¶ Introduction
During the 3D printing process, the printed model often experiences warping due to shrinkage of the material or insufficient adhesion between the object and the build plate, especially when printing materials that are prone to shrinkage such as ABS or ASA.
Usually, you can add Brim or increase the heat bed temperature in Bambu Studio to enhance the adhesion of the first layer of the model (you can refer to the wiki for details: Model Warping, Falling Off, or Collapsing | Bambu Lab Wiki). However, in some cases, removing Brim may be troublesome and may not completely improve the warping problem.
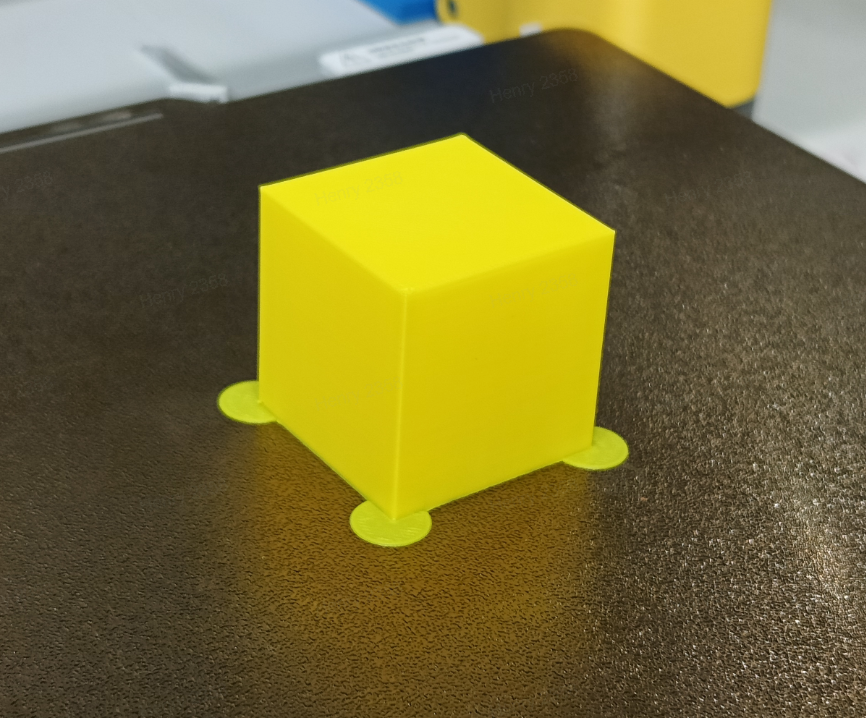
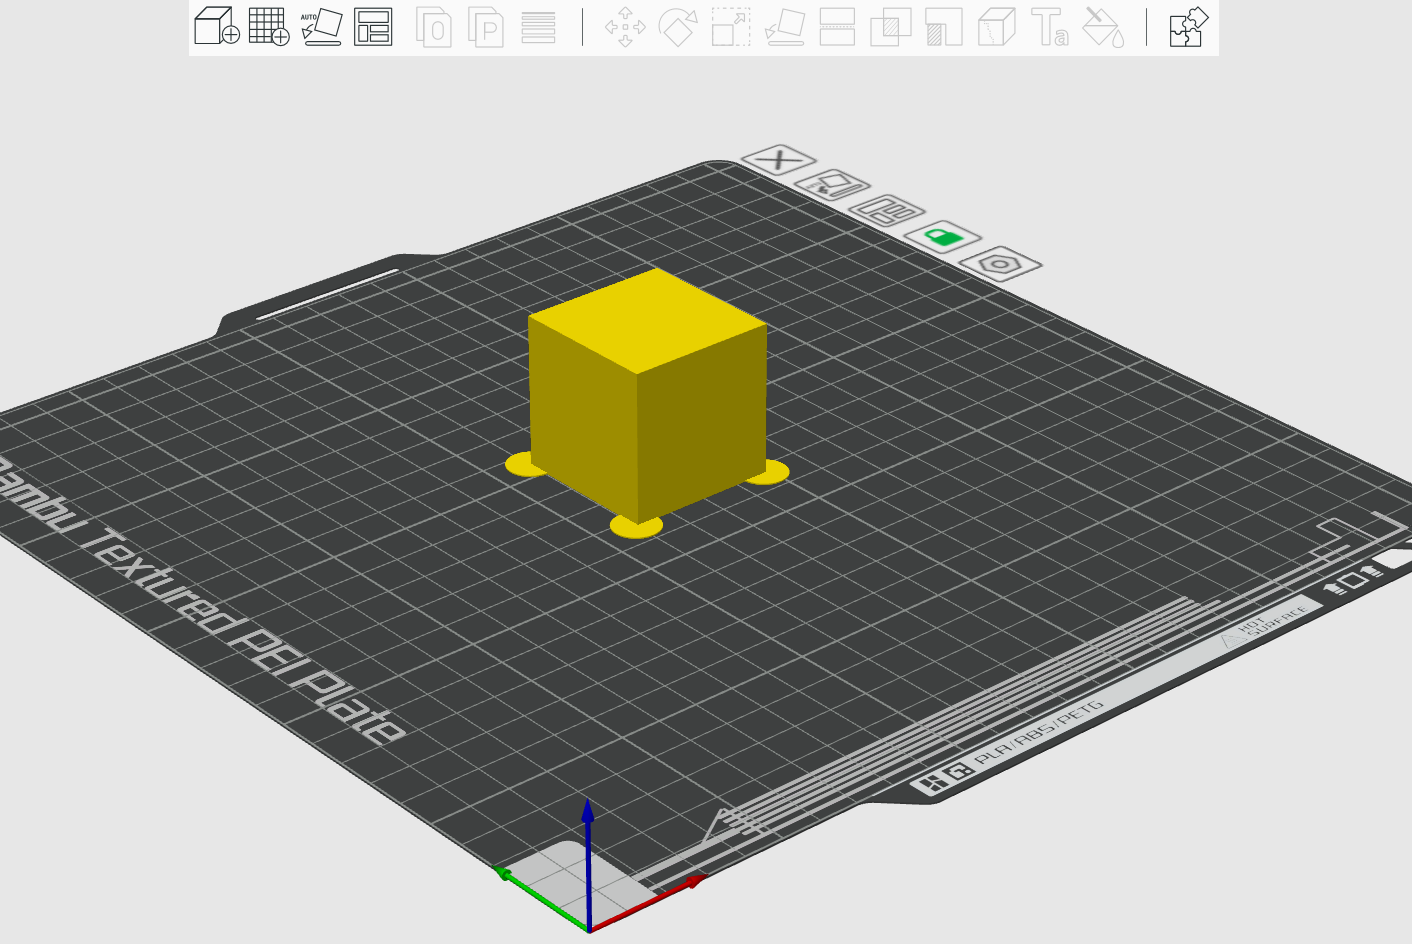
Therefore, we also recommend that you add some discs to the objects in Bambu Studio, which can help you improve the problem of warping during printing, and the post-processing of the model is also more convenient.
¶ Operation procedure
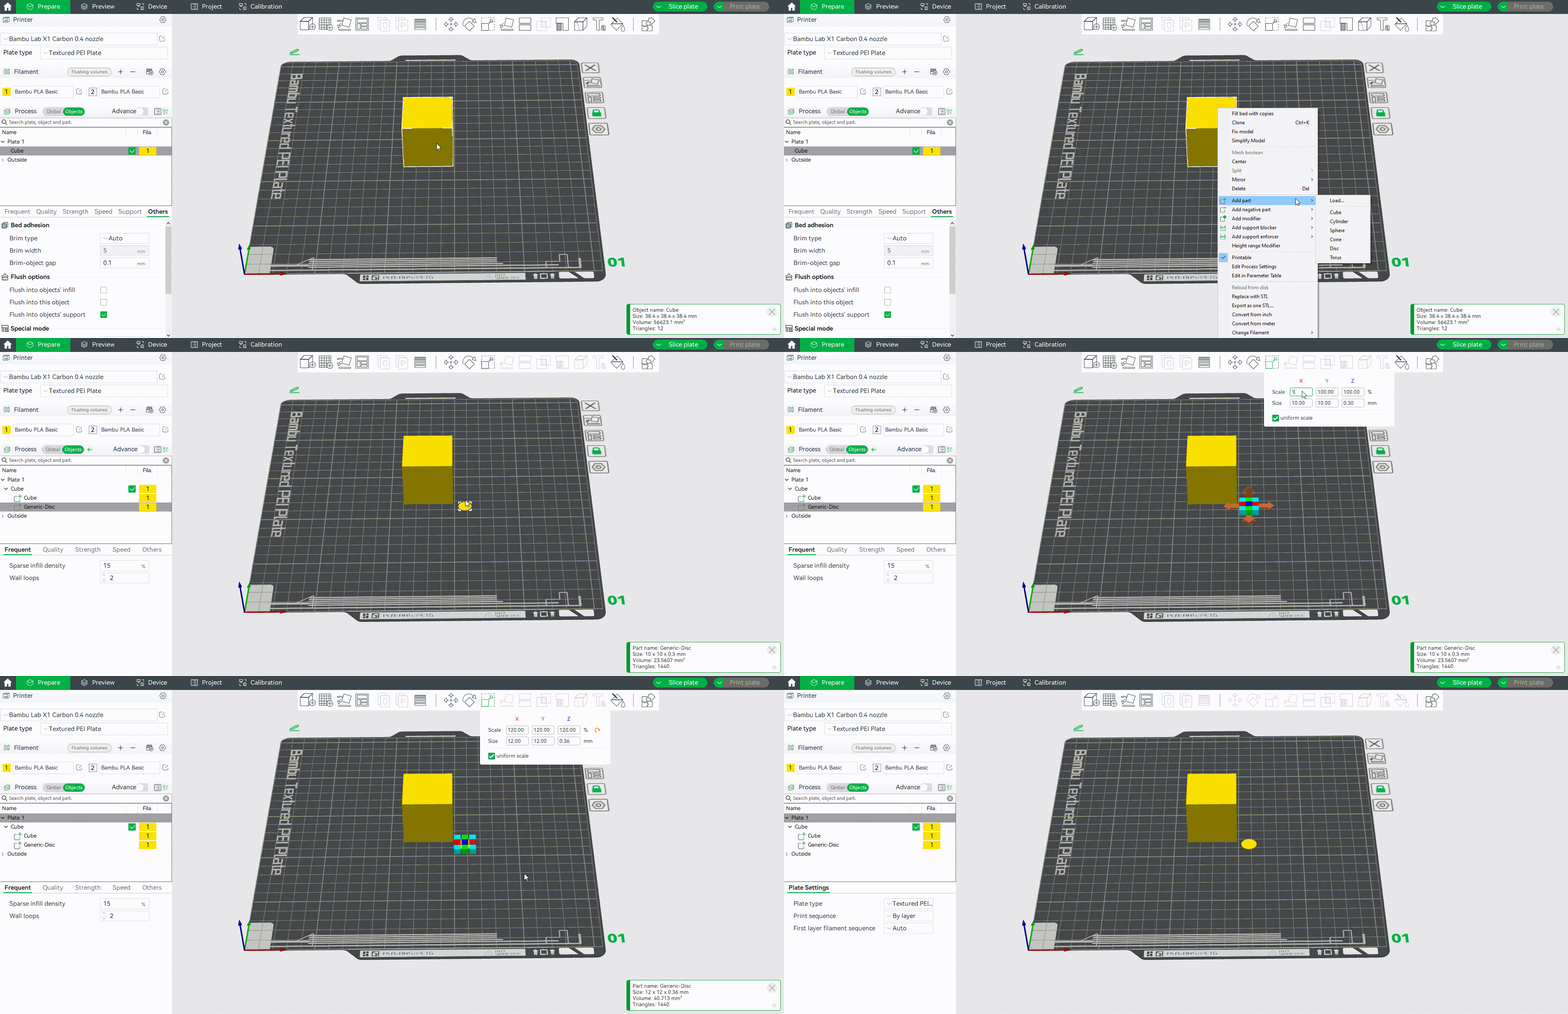
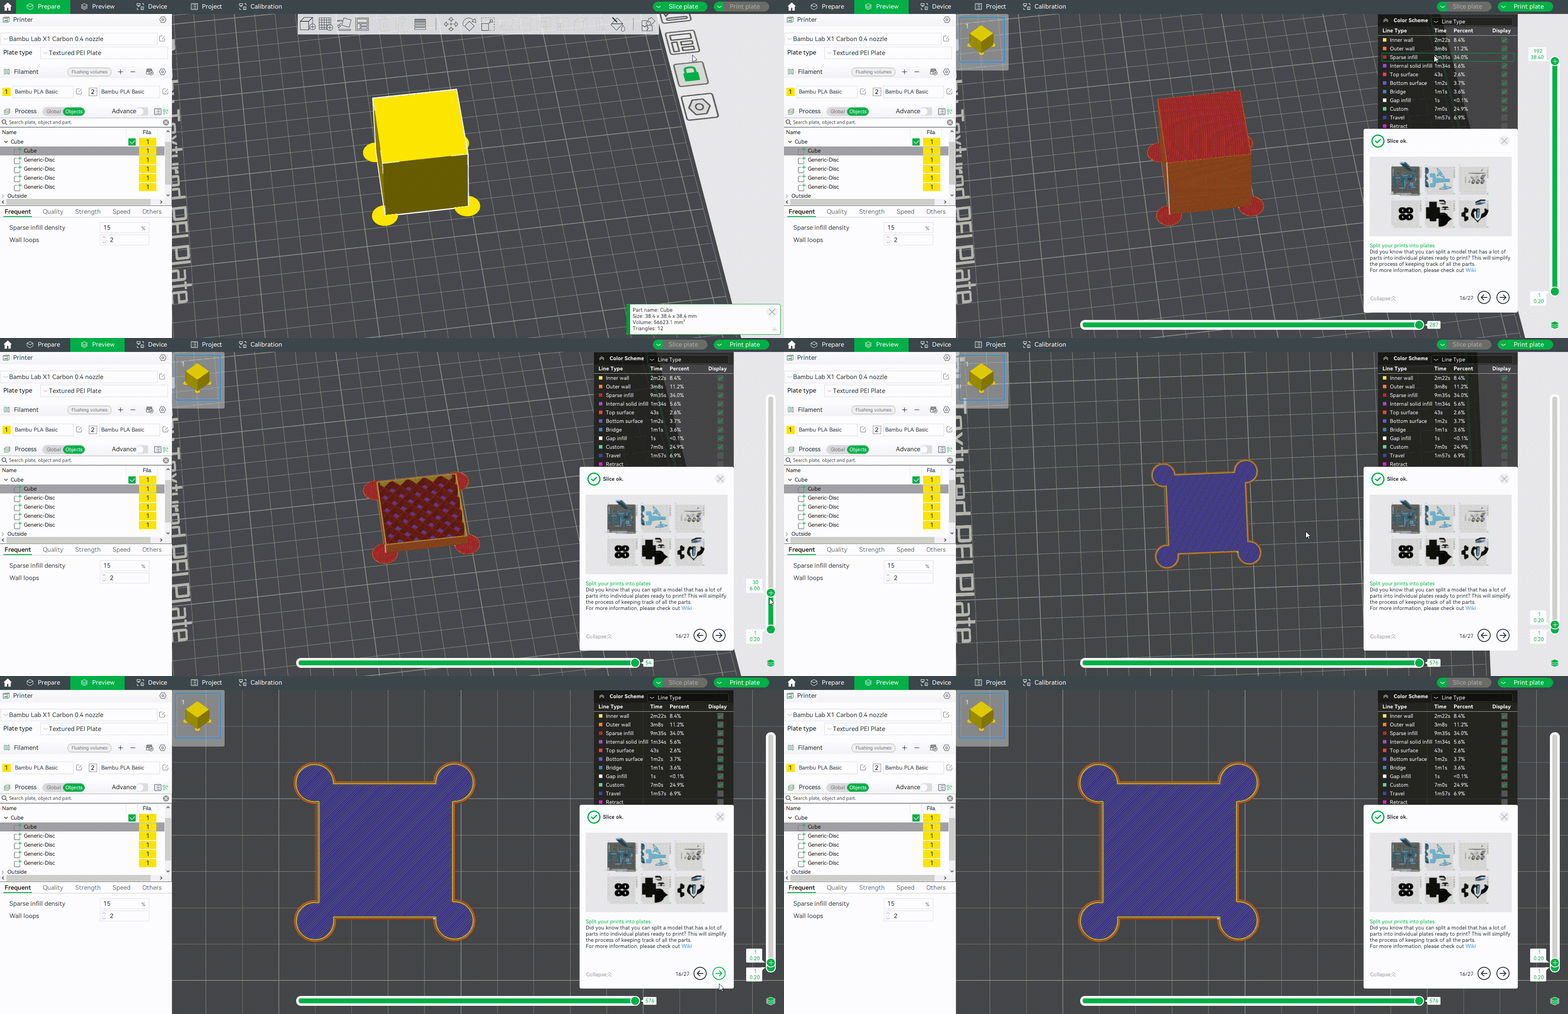
- Here we use the cube as an example. First, right-click the cube on the build plate, select “Add part” — "Disc", and adjust it to the appropriate size:
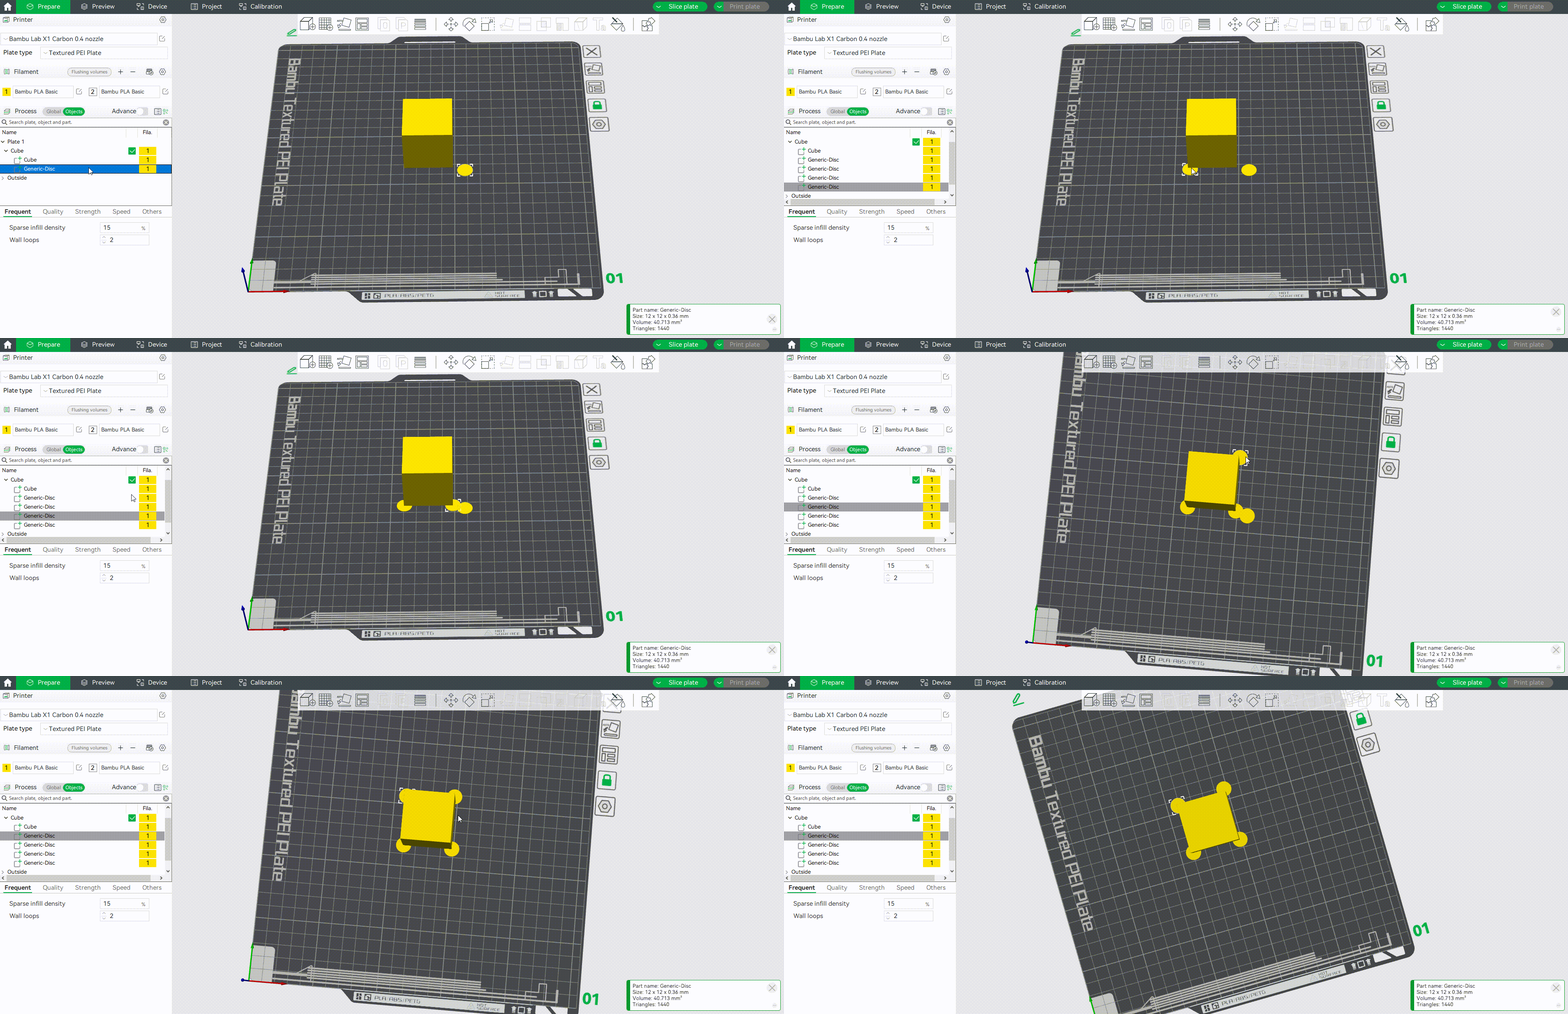
- Select the disc, use the shortcut keys Ctrl+C and Ctrl+V to copy it to the desired number, and move them to the corners of the easily warped edges of the model, as shown in the following figure:
- After clicking on the slice, you will find that the small discs and cube have completely merged, which has also changed the shape of the original model. We also need some settings to separate the discs and cube for disassembly. If the discs and cube are independent of each other, it is possible that the discs are not added as parts of the cube. Simply merge them together and slice them again.
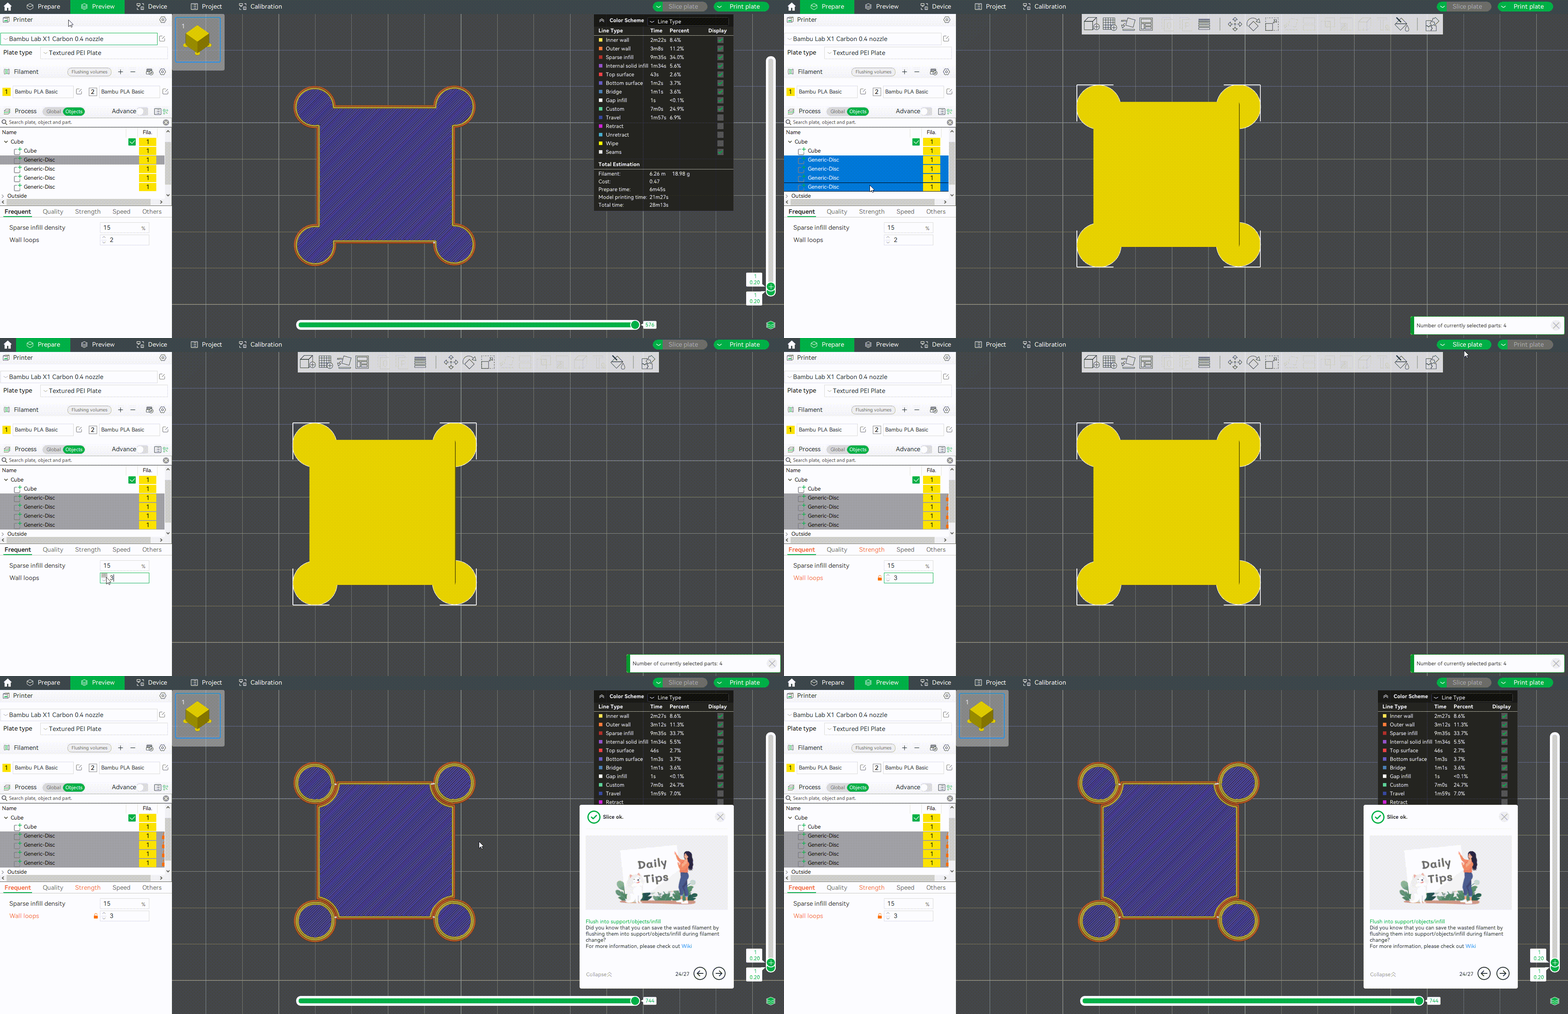
- We need to modify some parameters of the discs or cube in the object list to separate them. For example, set all discs as 3 loop walls while maintaining the default 2 loop walls for the cube. Because the discs and cube are parts that belong to the same object, if the parameters are the same, will be sliced into a whole. If the number of wall loops between parts is different, independent wall routes will be generated as a differentiation. The effect after slicing is as follows:
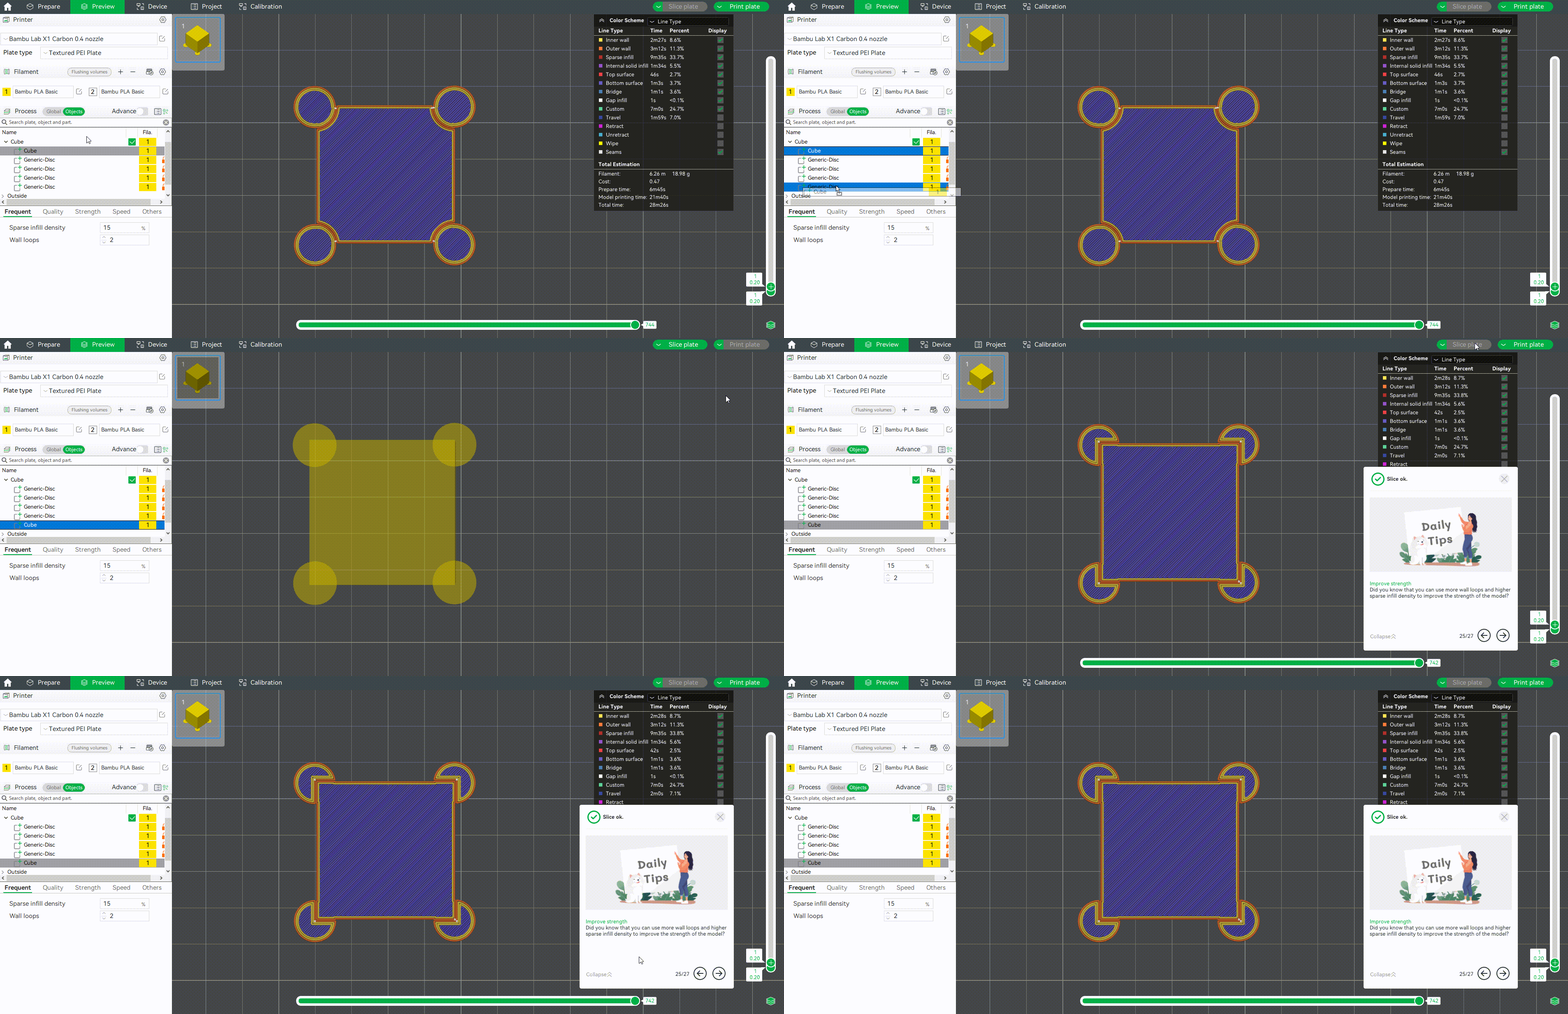
- At this point, the discs and cube have been separated, but the overlapping part after slicing retains the disc part instead of the cube part. You can drag the cube to the end of the object list so that after slicing, the overlap between the cube and the discs will retain the portion of the cube. Because in the object list, multiple parts of the same object are ranked lower on the parts list and have higher priority. If there are overlapping parts, the higher-priority parts will be retained:
- In some printer presets the default value for elephant foot compensation is not 0 (for example, the preset compensation value for X1C is 0.15). After slicing using the above method, due to the shrinkage caused by elephant foot compensation, the junction between the cube and the discs will protrude slightly compared to the side. You can set the elephant foot compensation to 0 and slice again, as shown in the following figure. For a detailed introduction to elephant foot compensation, please refer to the wiki: Elephant foot compensation | Bambu Lab Wiki
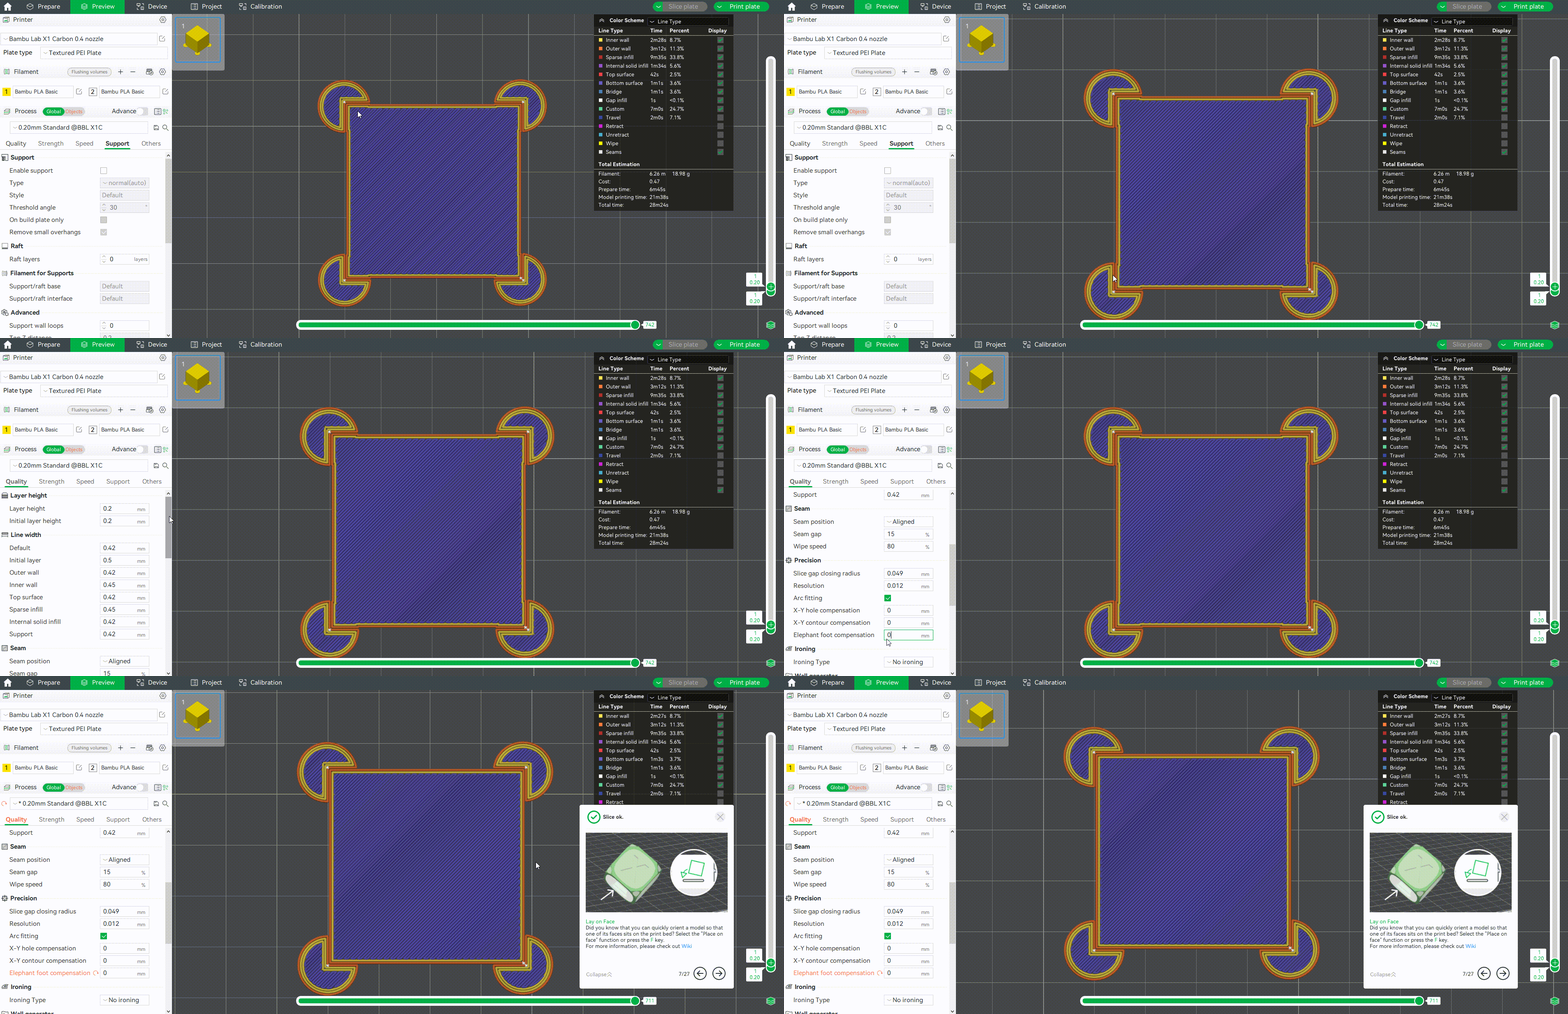
Following the above steps, you can add discs to the edge part of the model that is easy to warp for slicing and printing, which can effectively prevent warping.
