¶ Model warping, falling off, or collapsing
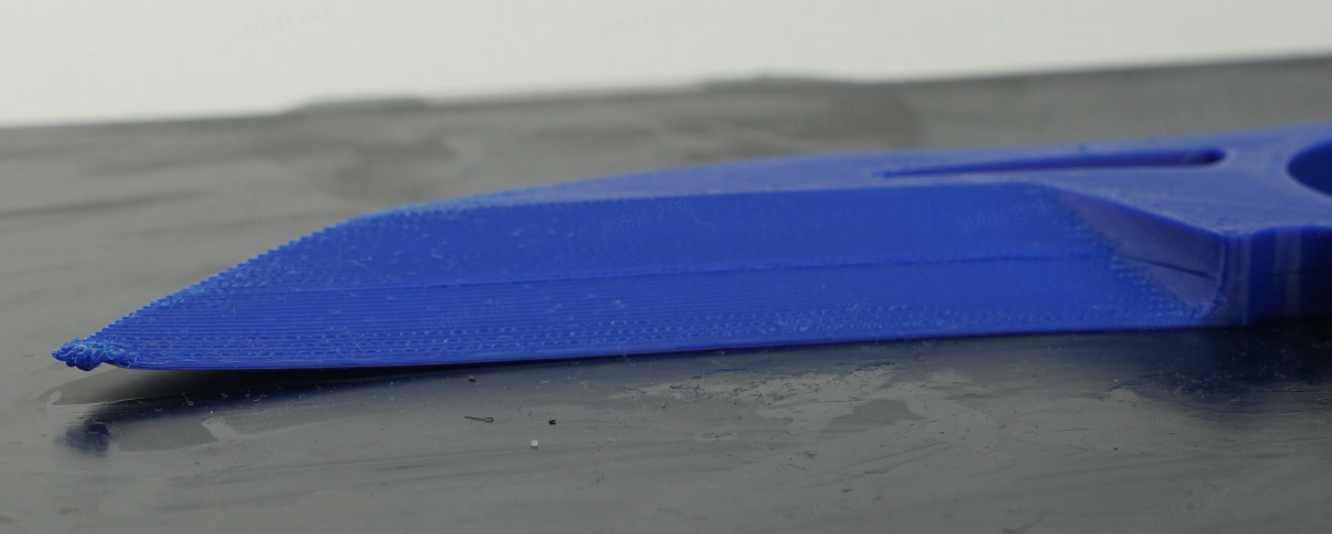
Printing warping, falling off, or collapsing is usually caused by shrinkage during printing and insufficient adhesion to the build plate. After warping, a horizontal line may appear on the printing surface due to the reduced distance between the warped part and the nozzle, resulting in the extrusion of the layer being flattened and overflowing. As shown below:

Related wiki links:
¶ Potential reasons and corresponding solutions
¶ 1. The model is too thin and tall, with a high center of gravity, and the printing process falls off and collapses due to shaking.
- Enable support.
- Decreasing printing speed and acceleration.
- Change the arrangement before slicing, try to arrange the model in a lie-down way or cut the model and print it.
¶ 2. Nozzle hit printing.
- If the nozzle temperature is insufficient, the filament melting is not sufficient during the high-speed printing, and the extruded melt has a higher stickiness and poorer flowability, which easily causes the nozzle to scratch the printing. In this case, it is recommended to increase the nozzle temperature appropriately. In addition, if the nozzle or the printing is partially stuck with the block, it may also lead to the nozzle hitting the print during the printing process. In this case, it is recommended to clean the nozzle appropriately and then print it again with the increased nozzle temperature and reduced printing speed.
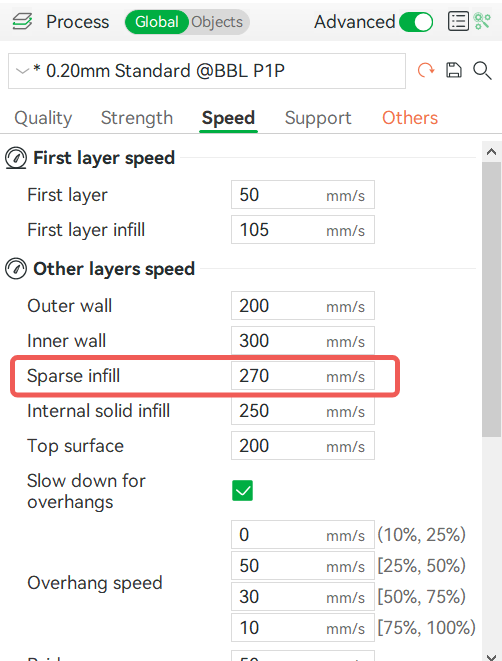
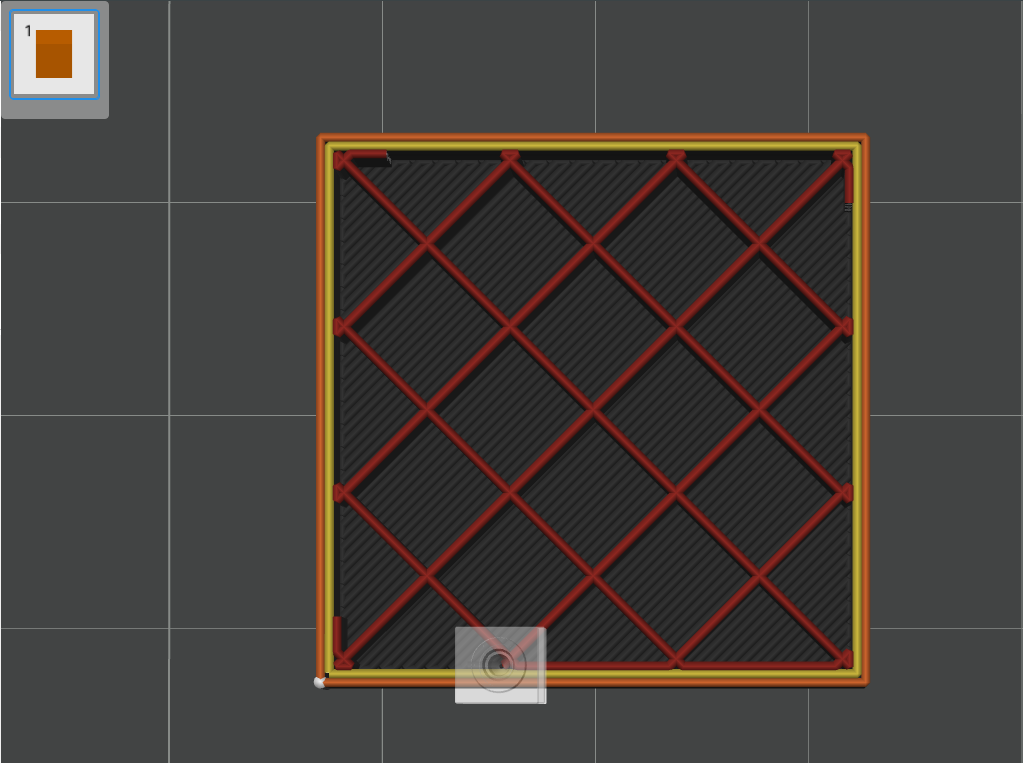
- Some infill patterns (such as Grid, Triangles, etc.) have crossings within a single layer, so the nozzle will scratch the infill at the crossing point, which usually does not have much impact on the print. And if this does happen and affects the adhesion of some printing, you can try to slow down the infill printing speed or change the infill pattern without crossing points, such as Line, Rectilinear, Gyroid, or Concentric.


|

|
¶ 3. Filament selection and print settings
Prints warping is usually caused by insufficient adhesion between the model and the buid plate, too fast cooling of the model, or excessive partial shrinkage of the model. The larger the size of the prints, the easier it is to shrink, and the higher the infill density, the easier it is to shrink; ABS, ASA, PC, POM, PP, PA, and PA-CF are more likely to shrink. Therefore, it is advisable to avoid them whenever possible for large-size prints. Instead, It is recommended to select filaments like PLA, PLA-CF, PETG, PETG-CF, PET-CF and others that are less prone to warping.
- The heatbed temperature is too low, resulting in insufficient adhesion of the printing to the heatbed - increase the heatbed temperature appropriately.
- The chamber temperature is too low and the fan speed is too high, resulting in the model cooling too fast - properly raise the heatbed temperature, close the front door of the printer, cover the top cover, and turn down the fan speed appropriately.
- Large model size and high infill density - If the prints size is large and the infill density is set high, e.g. 60% (default is 15%), and warping occurs, please adjust it appropriately. In addition, the infill pattern with more straight lines is more likely to shrink, you can change the infill pattern to Gyroid to reduce the risk of shrinkage. For some of the structural parts with high requirements for strength, you can set 5 layers of walls and about 25% fill density, and try to avoid using more than 50% fill density to reduce the tendency of shrinkage; for most of the non-structural parts with low requirements for strength, you can directly choose the default 2 layers of walls and 15% fill density.
¶ 4. Insufficient adhesion between the printing model and the build plate.
- The build plate used does not match the "plate type" selected in the slicer - one filament can often be printed on different build plates using different bed temperatures, and if the wrong plate type is selected, there is a risk of insufficient adhesion due to insufficient adhesion. Also, PEI textured plates have particles on the surface, so after leveling the heatbed, the printer will lower the nozzle by 0.04mm to ensure good adhesion of the first layer. If you print on a PEI plate and select other plate in "bed type" when slicing, the nozzle height will be too high, affecting the first layer adhesion.
- The heatbed is not leveled properly - clean the plate and nozzle first, then level the heatbed and print again. Please refer to: Bambu Lab Textrued PEI Plate Cleaning Guide.
- Dirty or damaged build plate - clean the build plate (with water and detergent) or replace a new print sheet or plate. Please refer to: Bambu Lab Textrued PEI Plate Cleaning Guide.
- Insufficient Brim - Enable the Brim and increase its width. Note: Reducing the gap between the birm and the model can also improve the quality, but it will be more difficult to trim the birm after printing.
- Not properly glued - apply glue evenly on the surface of the build plate before printing. Please refer to: How to use Bambu Lab glue.
- Heatbed temperature is too low - Increase the heatbed temperature appropriately.
¶ End Notes
We hope the detailed guide provided has been helpful and informative.
If this guide does not solve your problem, please submit a technical ticket, we will answer your questions and provide assistance.
If you have any suggestions or feedback on this Wiki, please leave a message in the comment area. Thank you for your support and attention!