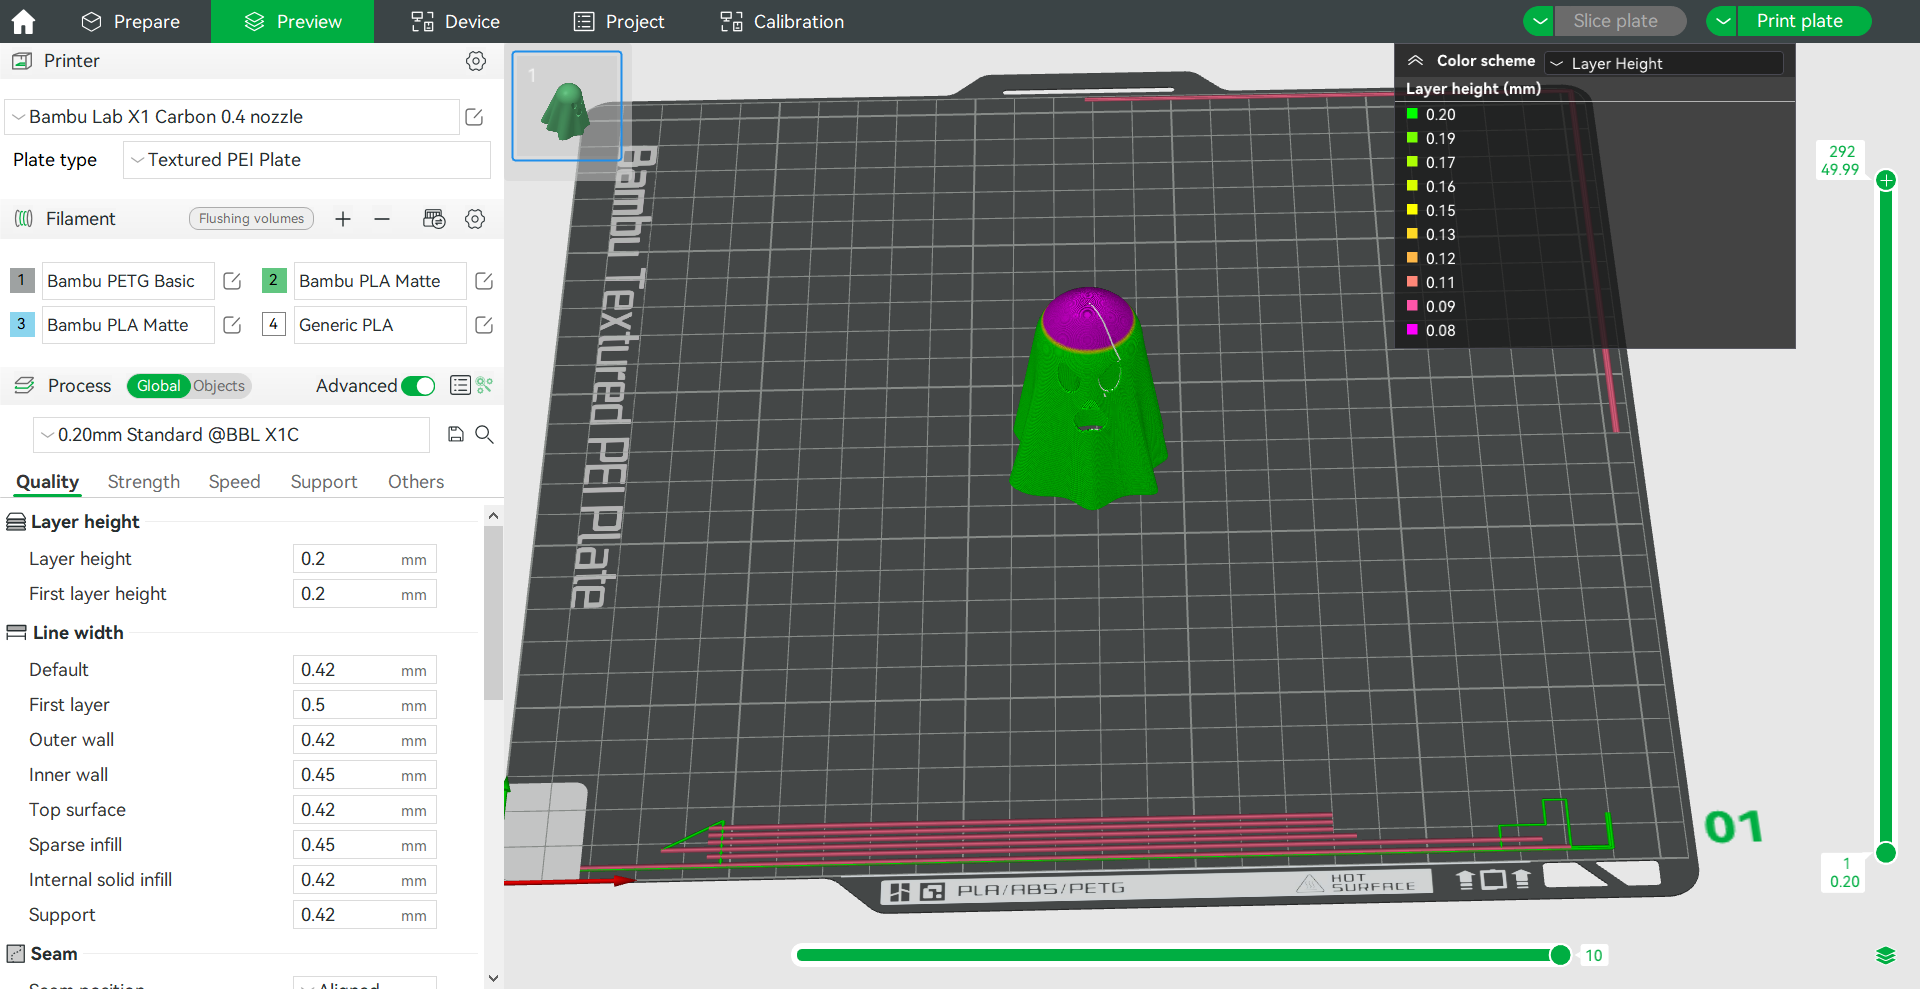
¶ Definition of layer height
Layer height refers to the height of each layer in the 3D printing model, during FDM 3D printing the model is built layer by layer, we also regard the layer height as the vertical resolution of the model, that is, the lower the layer height, the higher the fineness of the model.
In Bambu Studio, you can set the layer height parameters in the Process - Quality - Layer height.
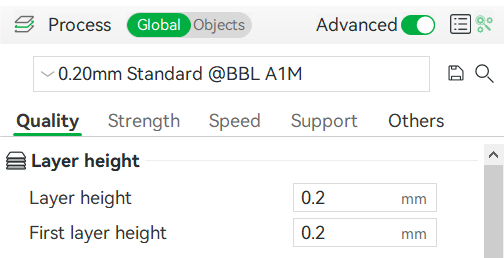
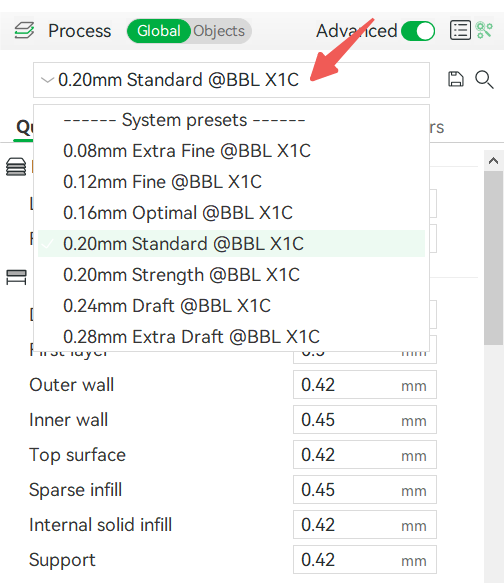
You can also select different layer height presets directly in the Process, Bambu Studio has several layer height presets for different diameter nozzles of Bambu series printers:
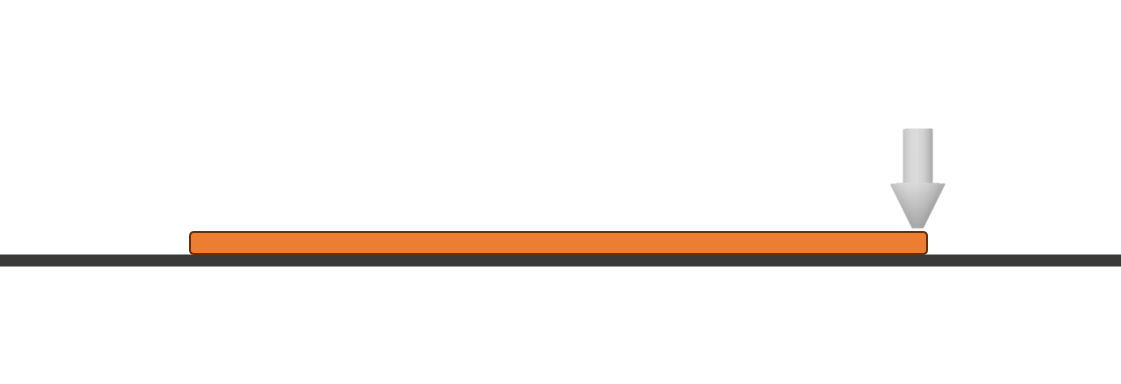
The first layer height means the height of the first layer printed, which is the height between the nozzle and the build plate. The appropriate first layer height can ensure the adhesion of the printed first layer, resulting in better quality of the first layer and thus improving the printing success rate. In the Bambu Studio System Presets, fixed first layer heights are preset for various layer height profiles of different diameters nozzles, that is, the first layer height=nozzle diameter * 50%. For example, for the 0.4mm nozzle printer, the default first layer height is 0.2mm.
¶ Effect of layer height
The layer height affects the fineness of the model surface and the printing time. The lower the layer height, the less obvious the interlayer patterns on the model surface, but the printing time will be relatively longer. Because the model height is fixed, the lower the height of a single layer, the more layers are required and the longer the printing time. The following is an example of printing the Glowing Ghosts model (from James ThePrinter):
| 0.08mm layer height, printing time 1h 19m | 0.2mm layer height, printing time 36m 14s | 0.28mm layer height, printing time 28m 27s |
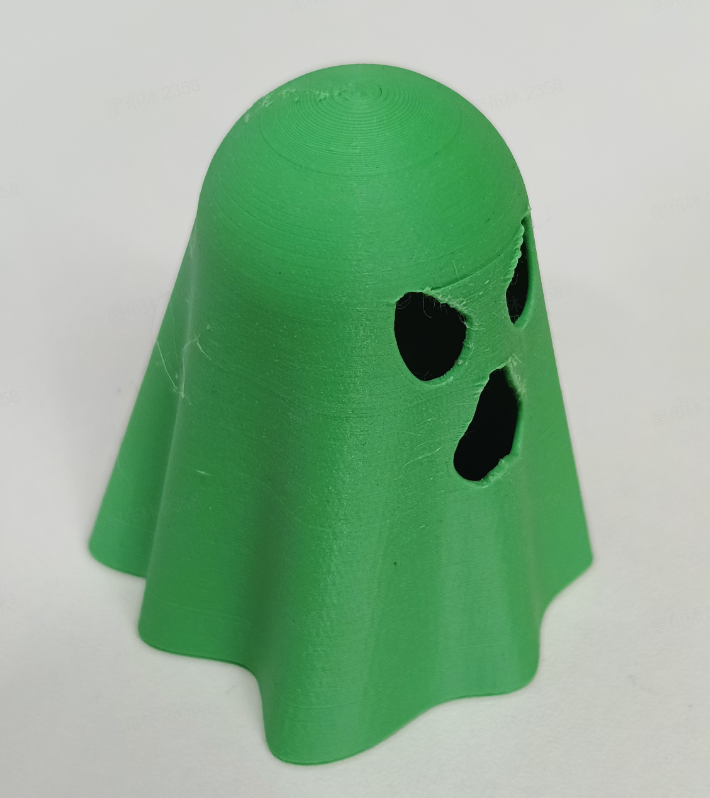 |
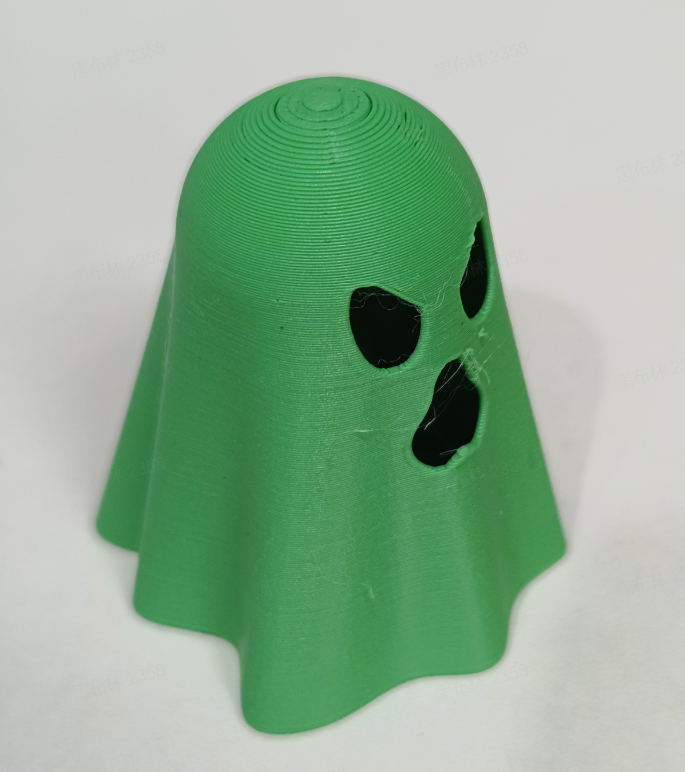 |
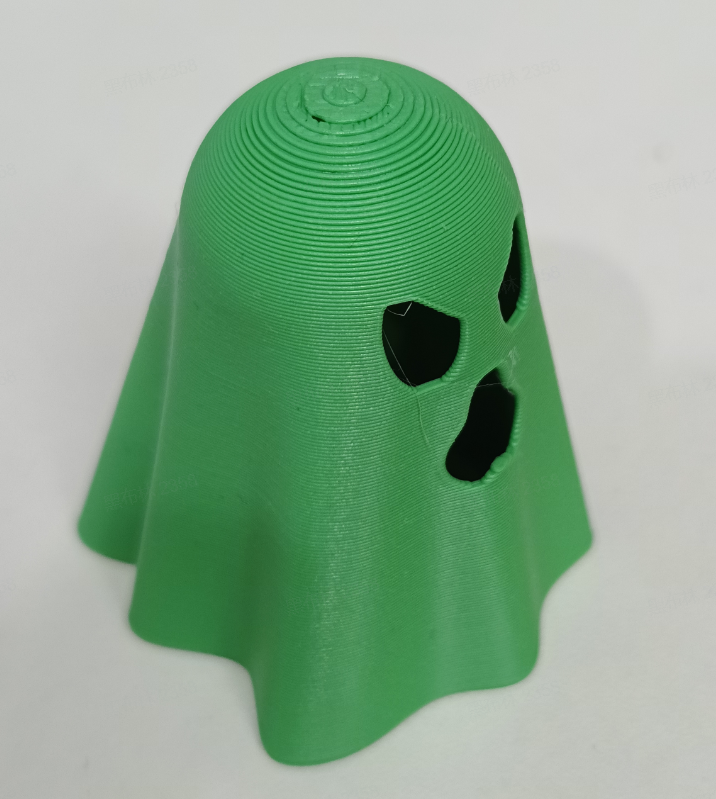 |
¶ Adjustable range of layer height
In 3D printing, only by setting the layer height value within a reasonable height range can you achieve better printing quality. If the layer height is too high or too low, it may lead to printing quality problems. In general, the reasonable range of layer height should be 20% ~70% of the nozzle diameter. For example, for the 0.4mm diameter nozzle, the appropriate printing layer height is between 0.08mm and 0.28mm. In the printer settings - extruder, you can also see the limit of layer height range for the current nozzle used:
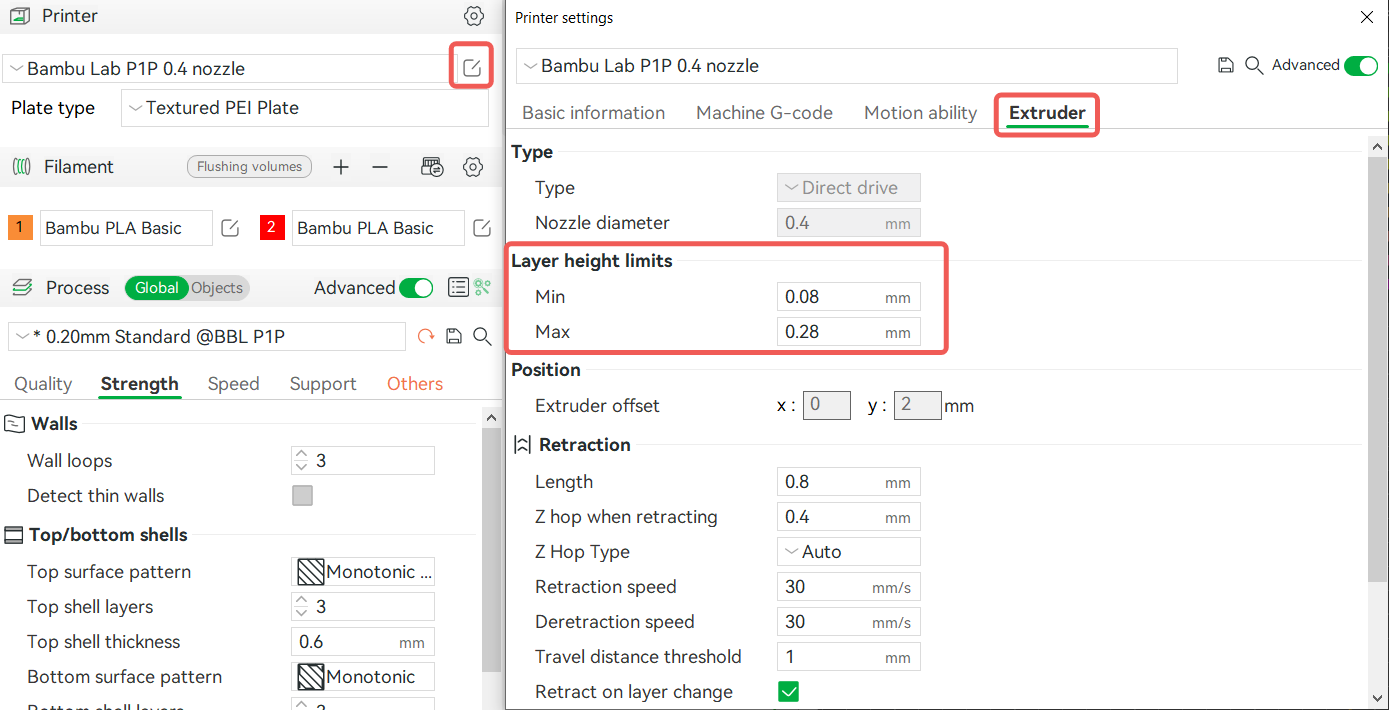
When the layer height is set relatively high, the extrusion flow rate is relatively large, and a slower printing speed is required to make the hot end fully melt the extruded filament. Different default print speeds are also configured in different height presets of Bambu Studio, as shown below:
|
0.08mm height preset |
0.20mm height preset |
0.28mm height preset |
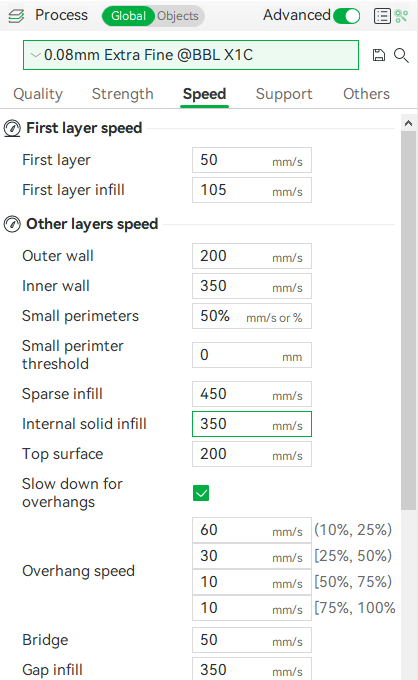
|
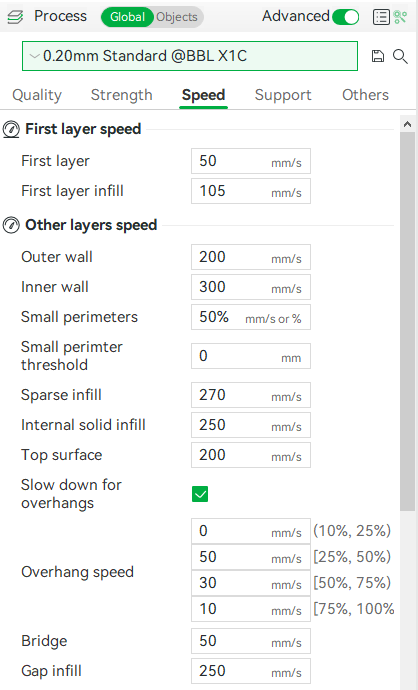
|
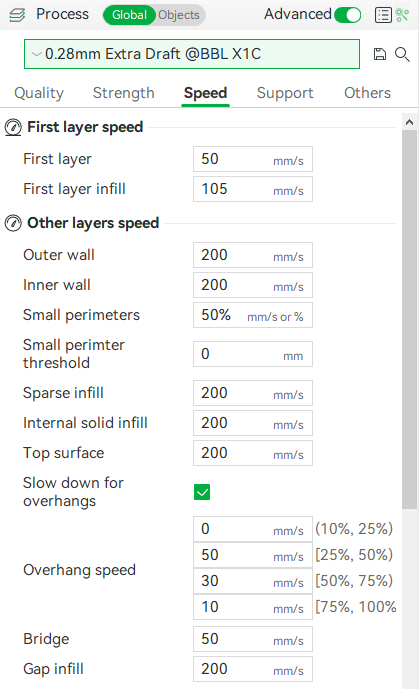
|
¶ The rounding logic of layers
When the height of the model cannot be evenly divided by the layer height, a rounding algorithm will be used during slicing to confirm the number of layers required for the printing model. The Bambu Studio slices the 3D model layer by layer. When slicing to the top layer, it determines whether to round up or down based on the center Z height of the topmost line compared to the actual height of the model. When the model height > the center Z height of the topmost line, then the top layer exists. If the model height ≤ the center height of the topmost line of the model, then that layer does not exist, and the previous layer is taken as the topmost layer of the model.
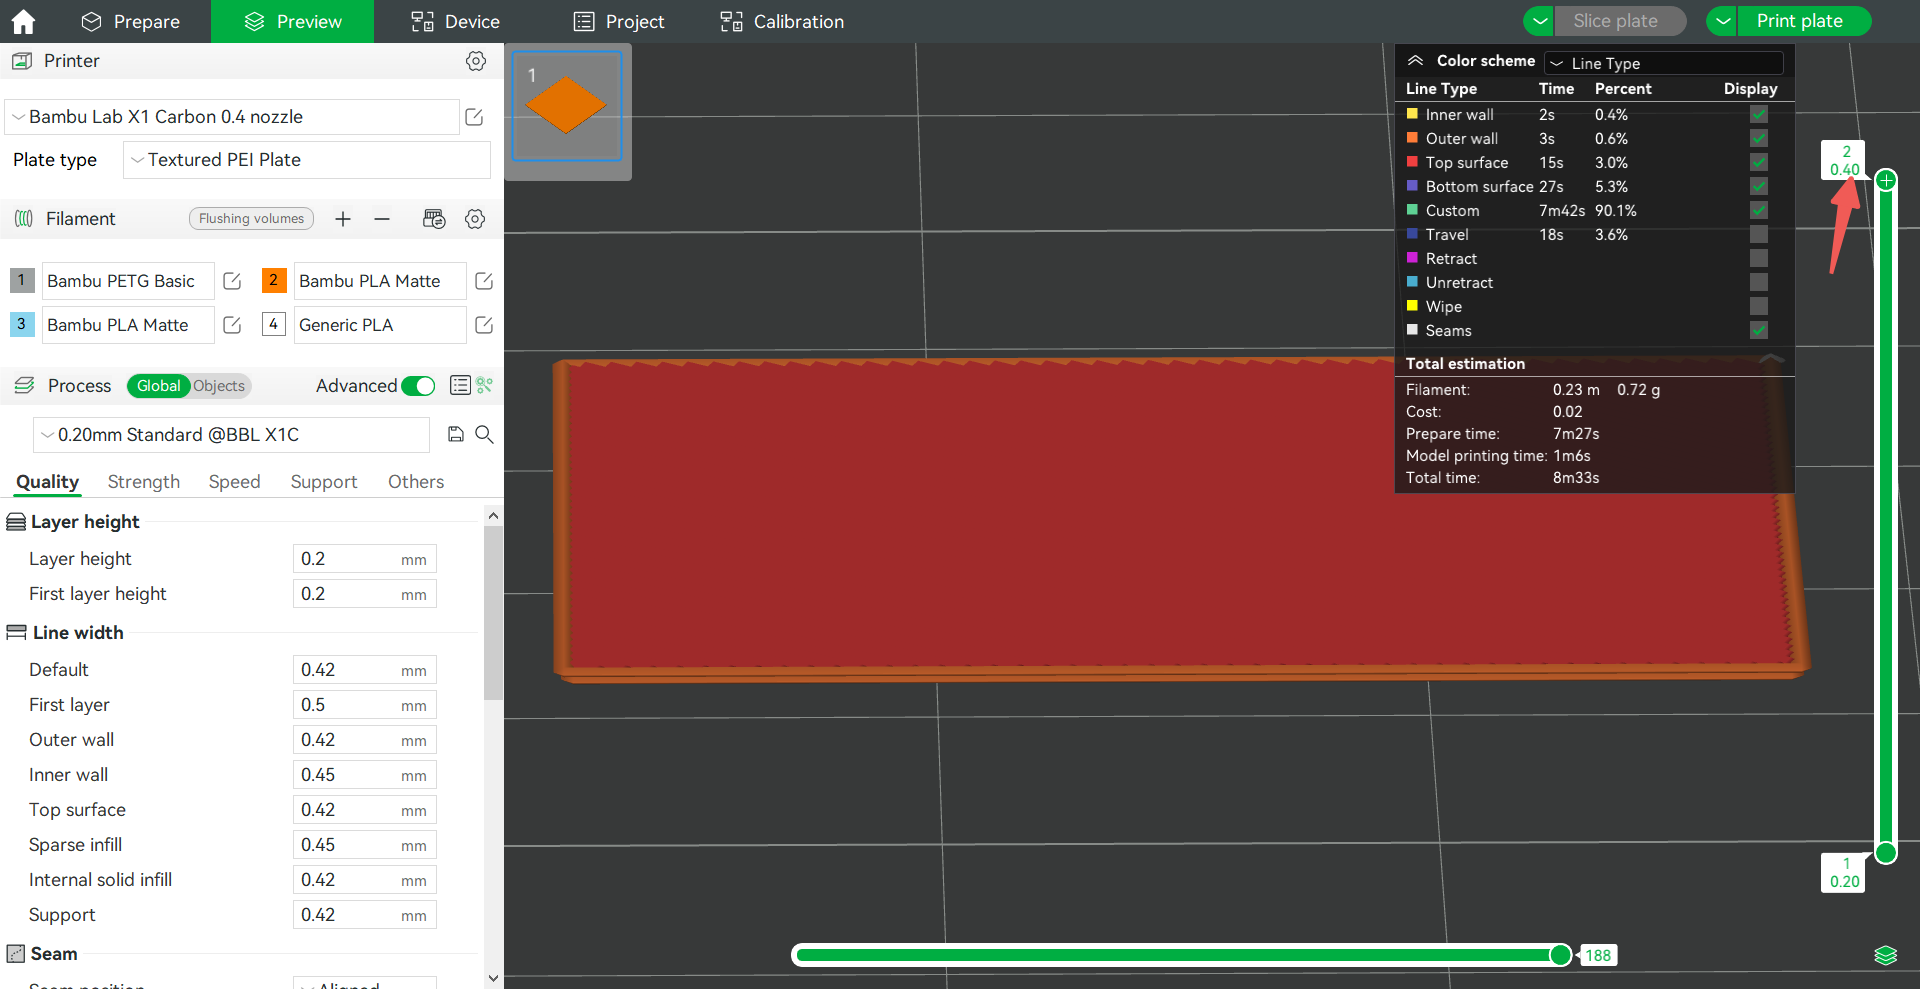
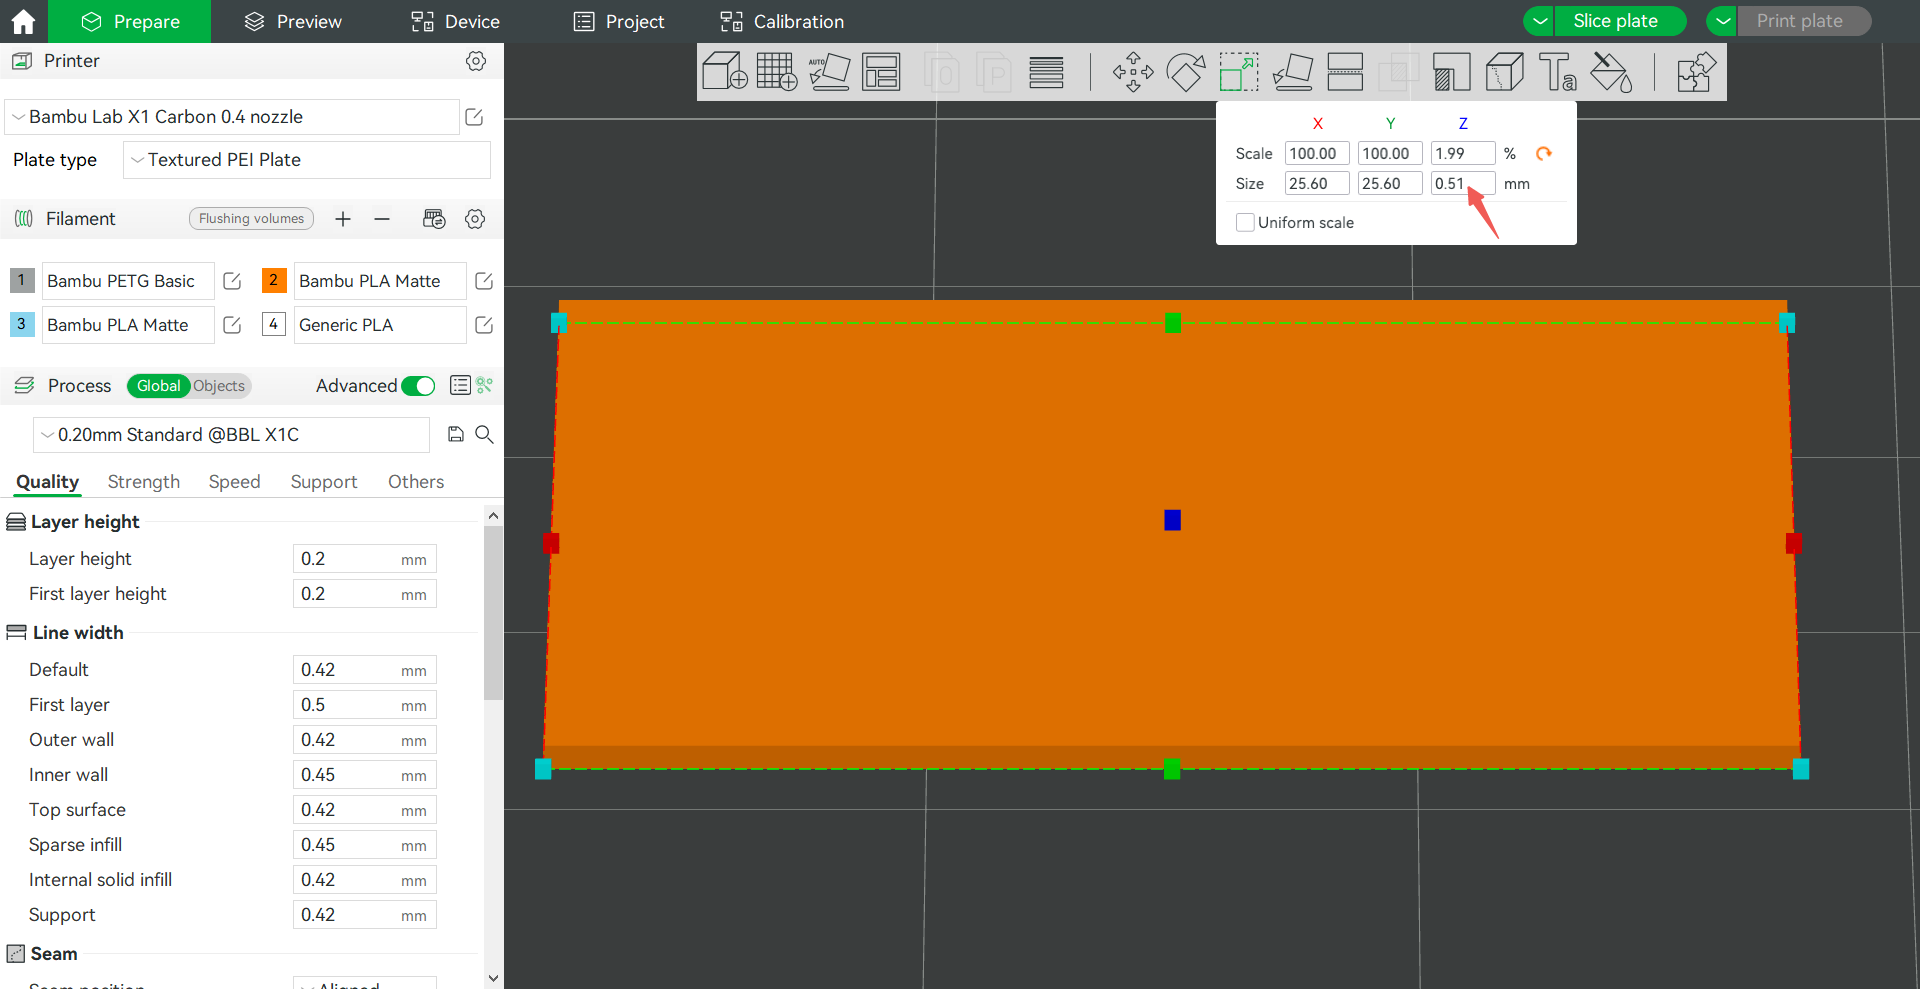
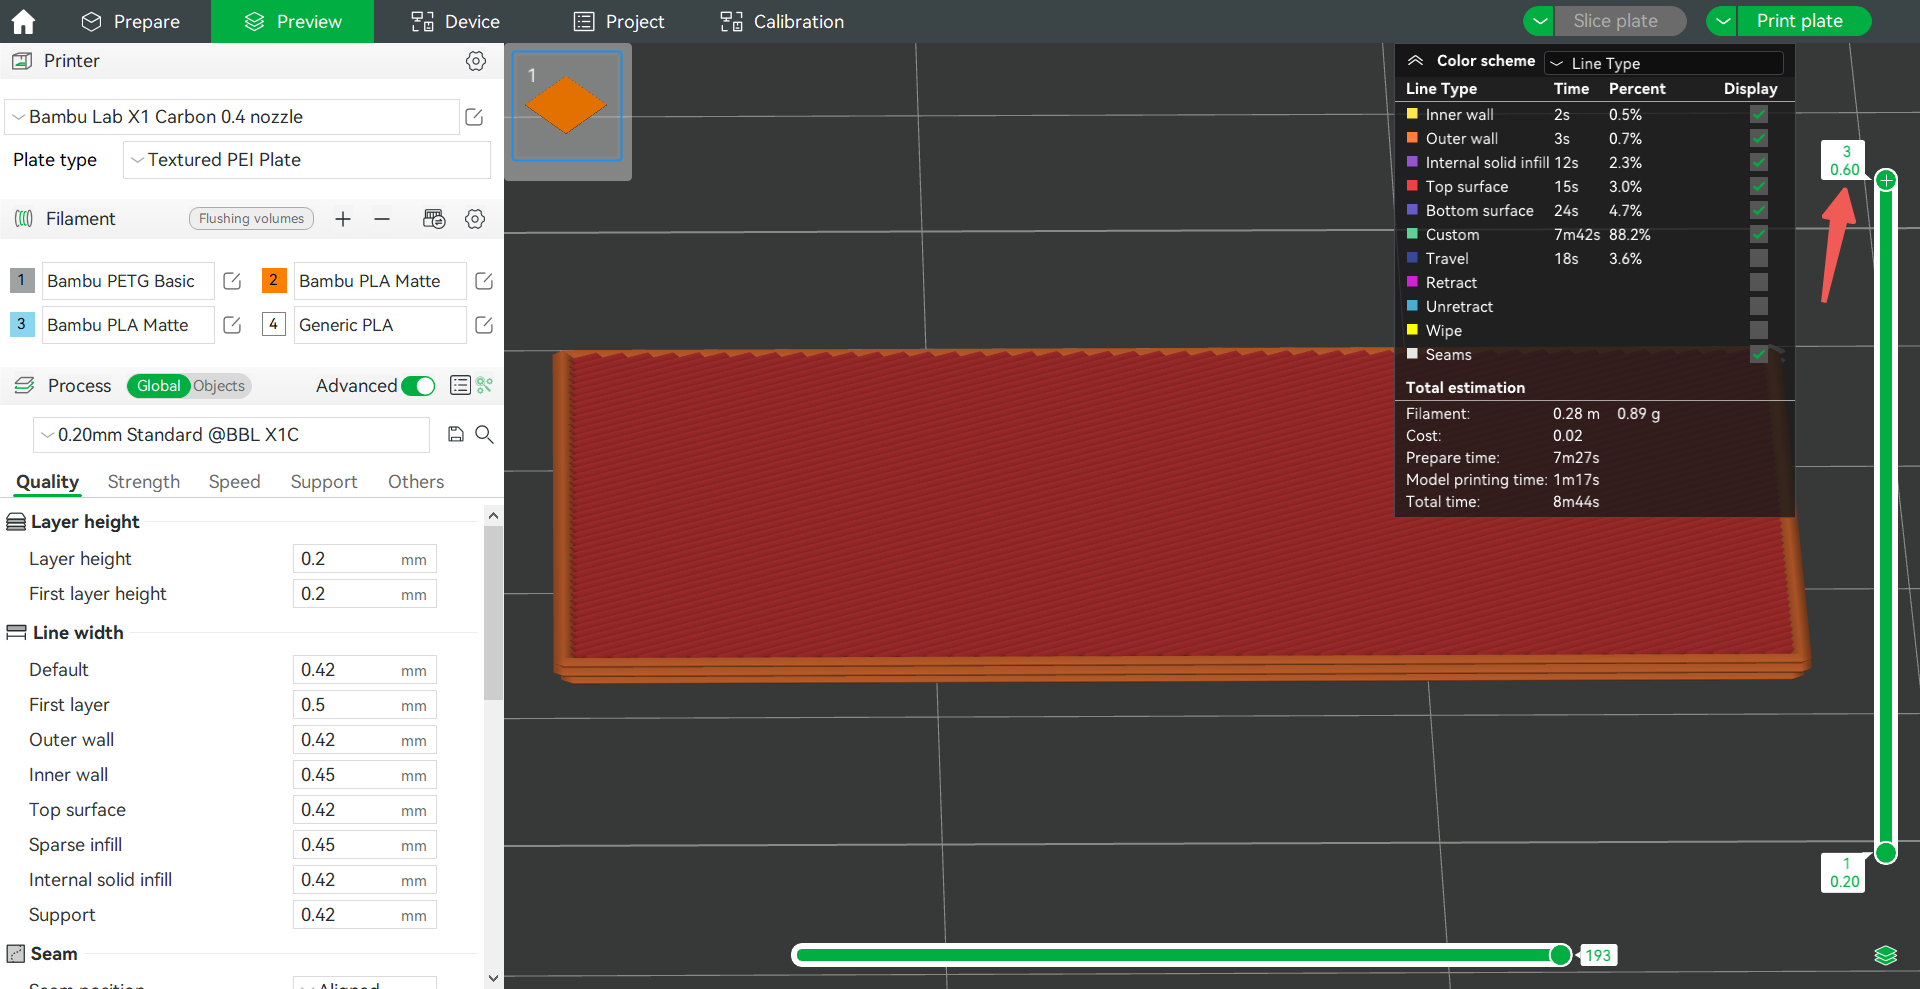
Here is an example. Slice results with a layer height of 0.2mm and model heights of 0.5mm and 0.51mm, respectively.
When the height of the model is 0.5mm, the height of the first two layers is 0.4mm, and the height of the center Z of the third layer is 0.5mm (0.2+0.2+0.1) = the model height 0.5mm, so the third layer does not exist, and there are only 2 layers after slicing.
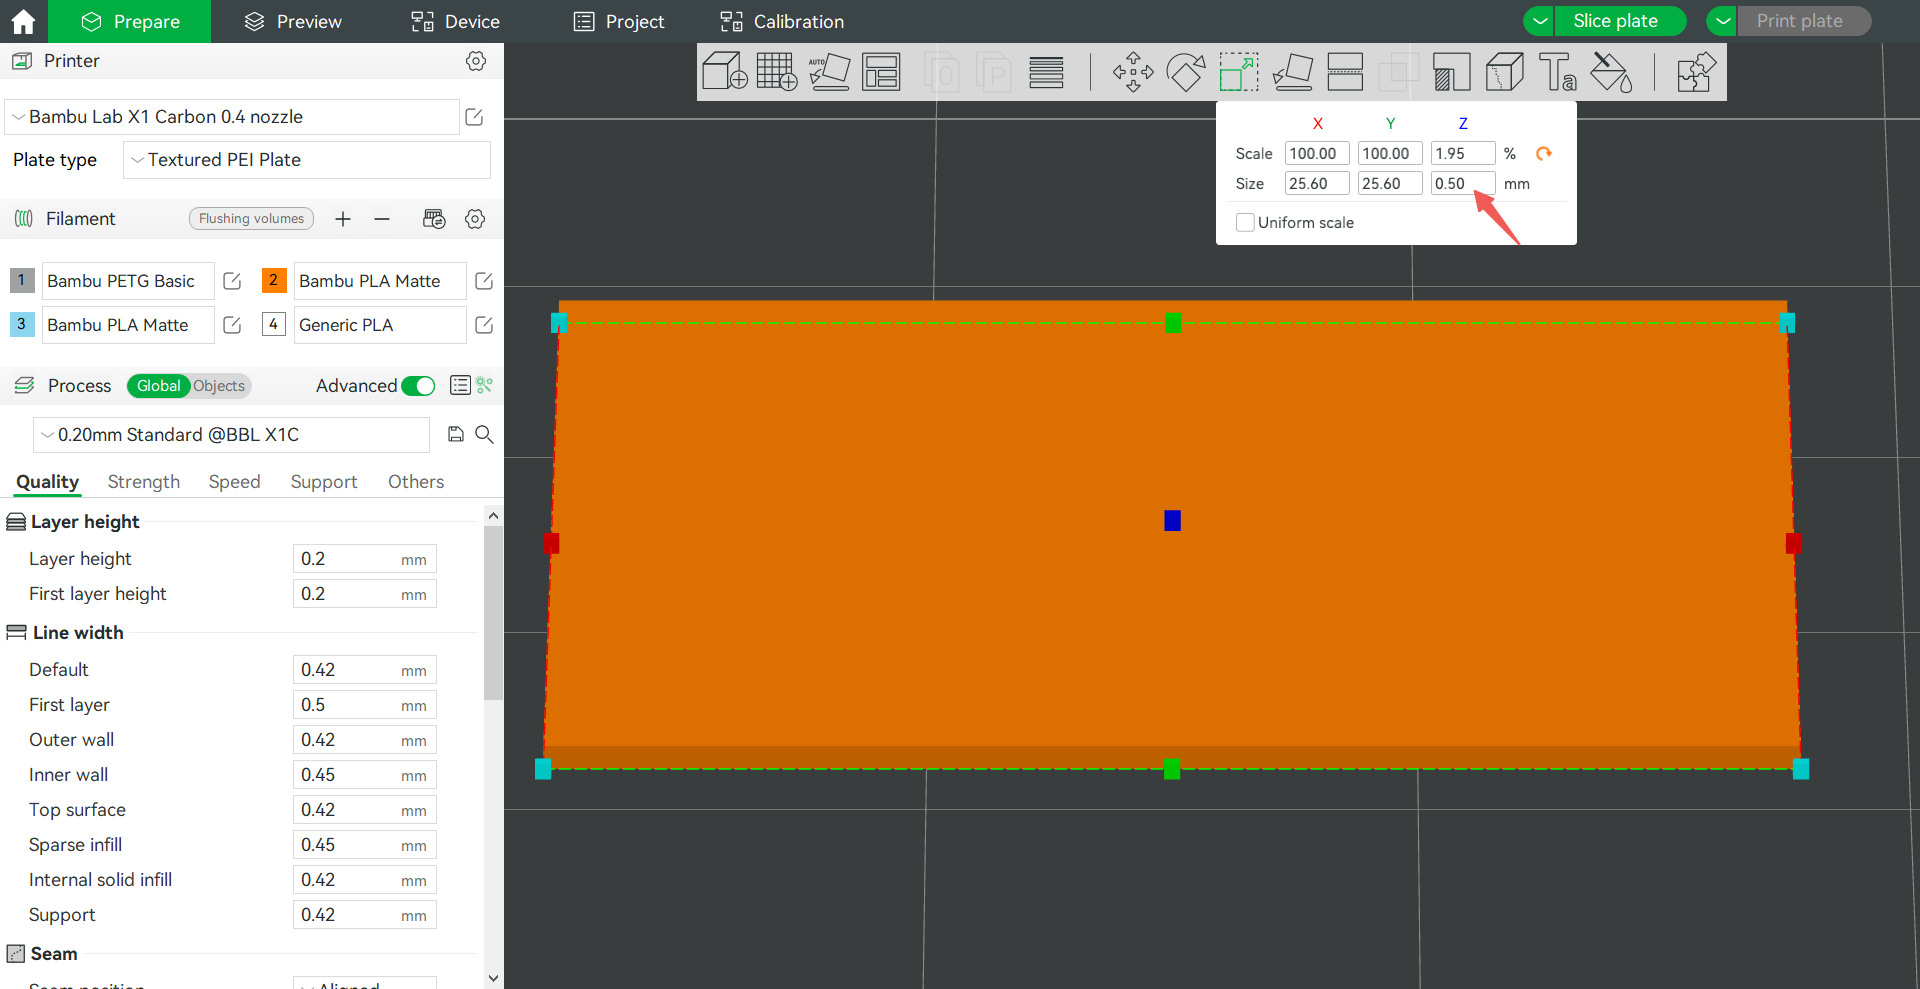
When the model height is 0.51mm, the center Z height of the third layer is 0.5mm < the model height 0.51mm, so the third layer exists and there will be three layers after slicing.
¶ Precise Z height
In the process of rounding layers, due to the fixed layer height, when the layer height cannot be evenly divided by the object height, the sliced object may have a height difference from the original height. In Bambu Studio version 1.9, the precise Z height feature was introduced, which can obtain precise object heights after slicing. The logic of this function is to fine-tune the height of the last 5 layers to ensure that the final layer height matches the actual value.
Here is an example. A cube with 2mm height, set the 0.24mm layer height preset and 0.2mm first layer height. If the precise Z height is not enabled, according to the above layer rounding algorithm, the layer height after slicing is 0.2+0.24*7=1.88mm, a total of 8 layers.
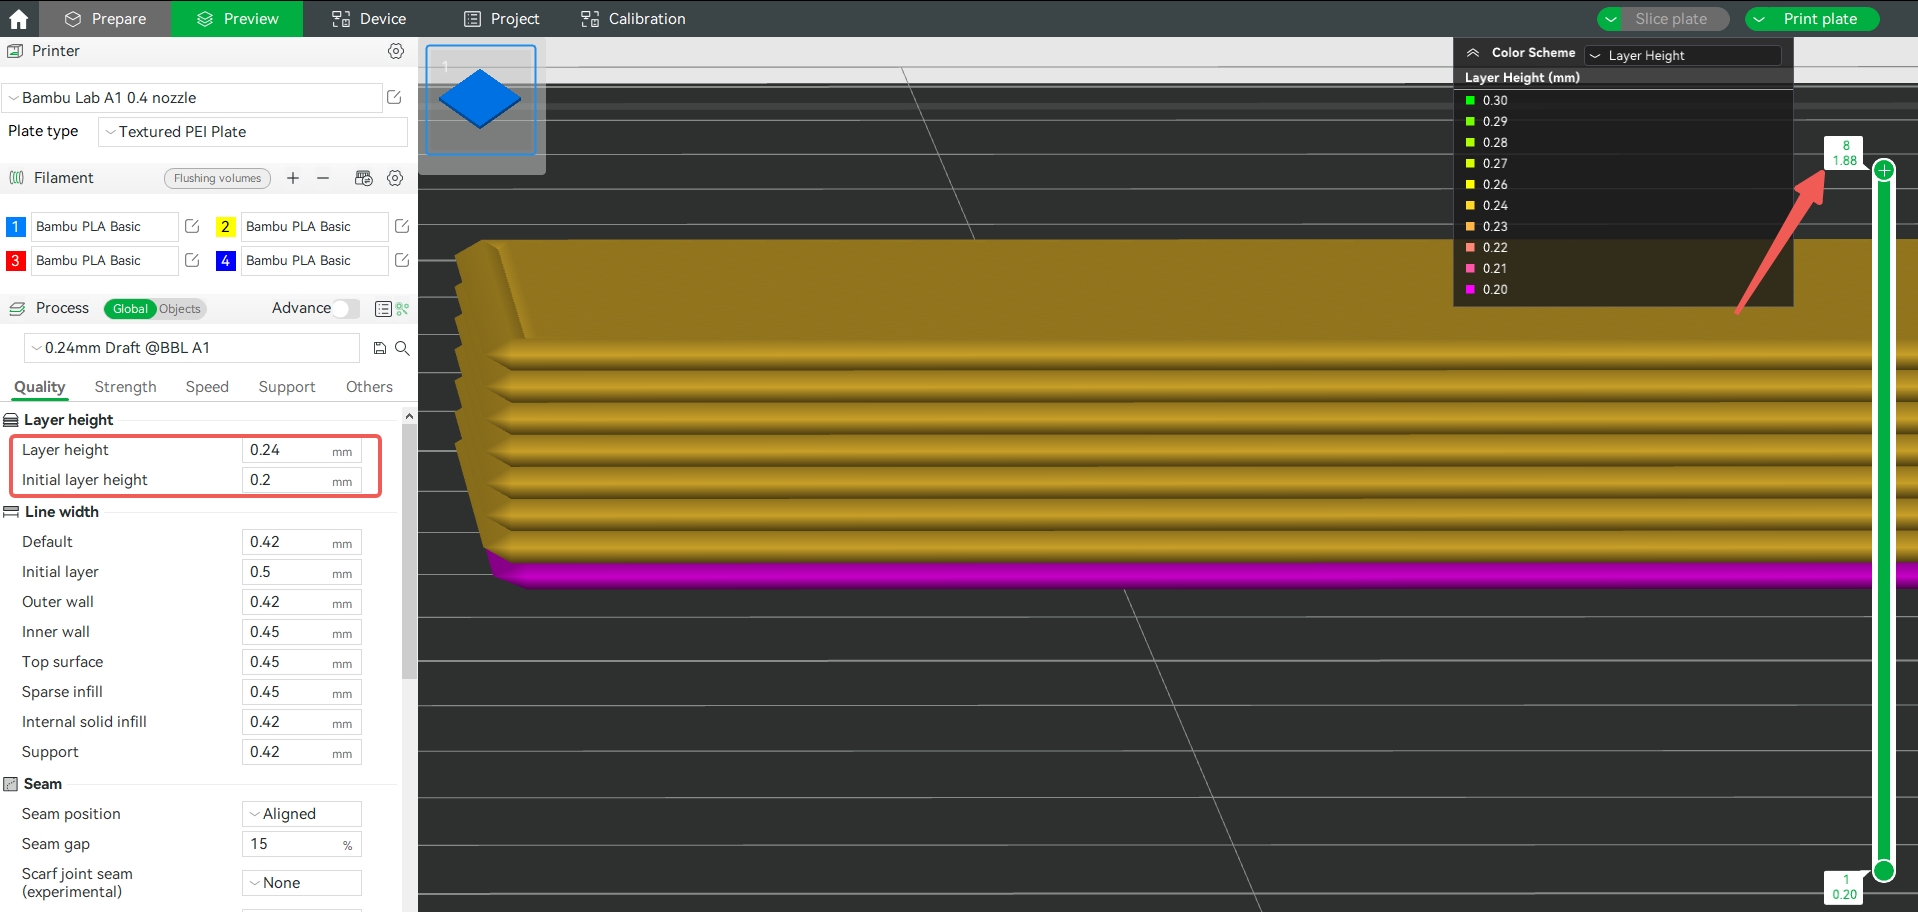
After the precision Z height is enabled, the average height of the last five layers is increased, so that the height of the final sliced object is consistent with the expected height, which is 2mm.
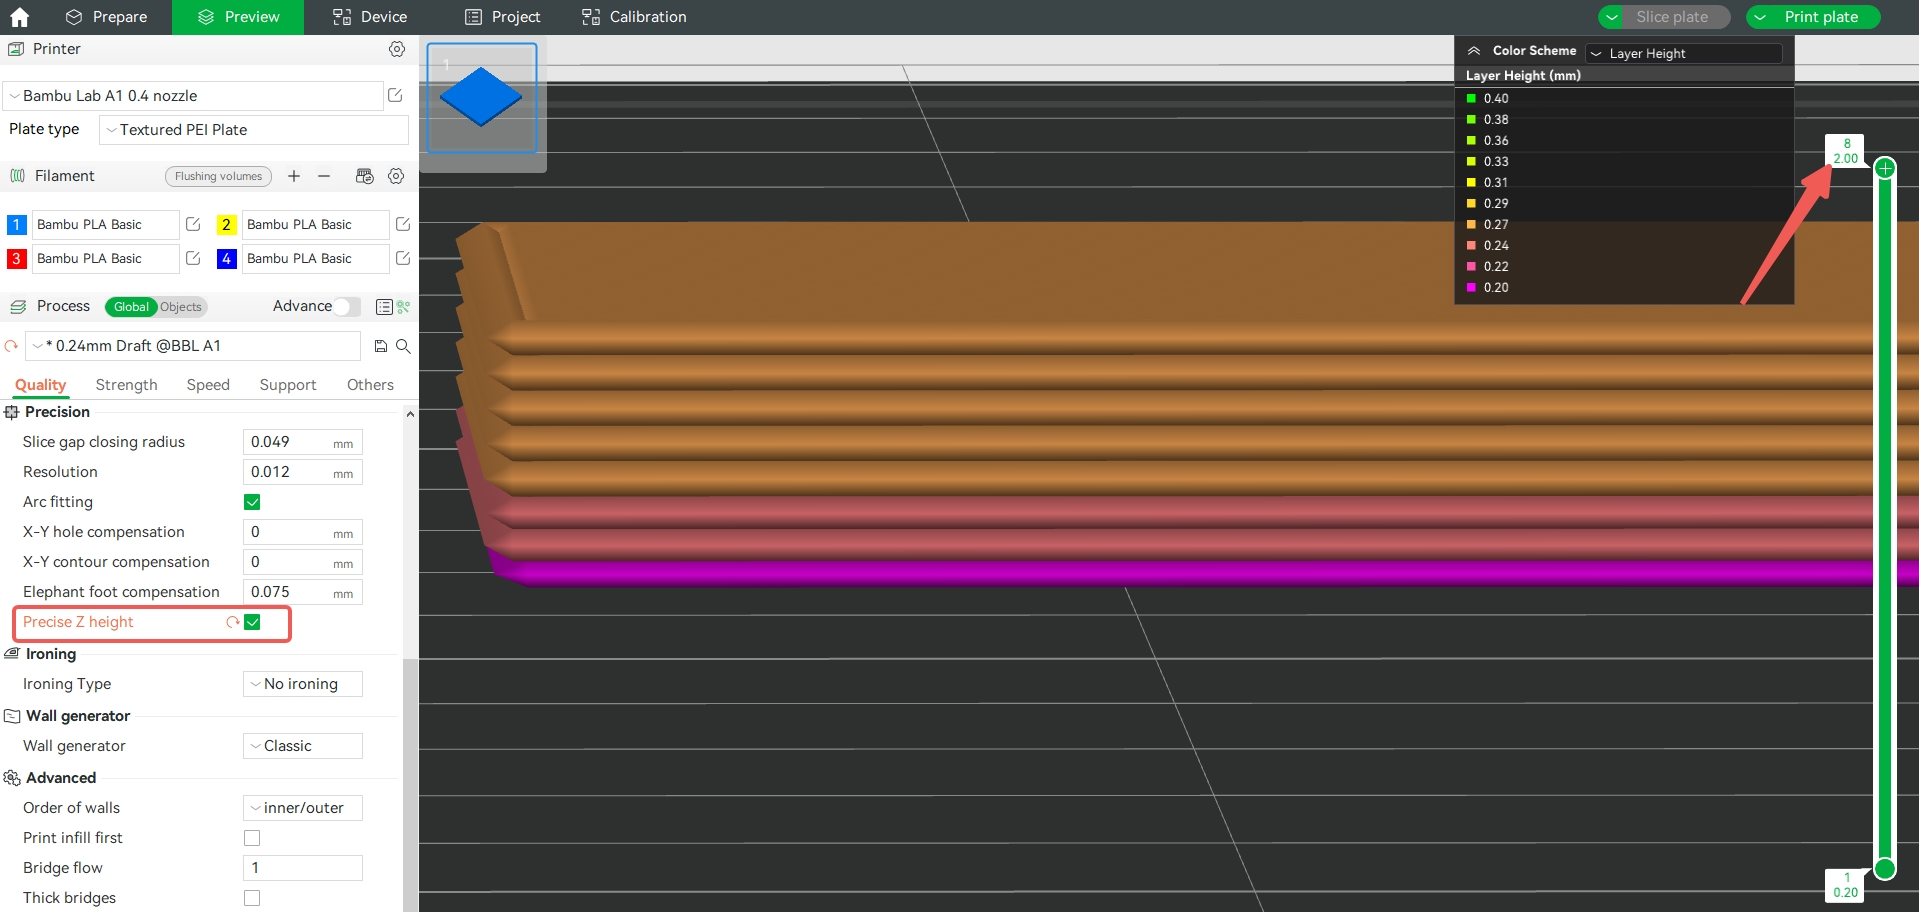
Note: This feature will not take effect when the number of layers of the model object is less than 6. And if during the fine-tuning of the last 5 layers, it needs to exceed the layer height limit to achieve the expected object height, then this feature will not take effect.
¶ Variable Layer Height
As mentioned above, the surface of the model printed with the lower height is finer, but the printing time is longer. For some models, we only want to set a lower height for some areas. At this point, you can use the variable layer height feature to set different heights for different parts of the model. This can not only ensure the printing quality but also save printing time as much as possible. Please refer to the wiki for details: Variable Layer Height | Bambu Lab Wiki
