¶ Introduction
Usually, after we set the print height in the process preset, we will get a uniform height model after slicing. But sometimes for some special models, such as models with a spherical top or slope, the printed surface may not be smooth enough, and the "ladder feeling" on the surface of the model is more obvious. The variable height feature will help improve this. Figure 1 and Figure 2 show the difference between uniform height and variable height.
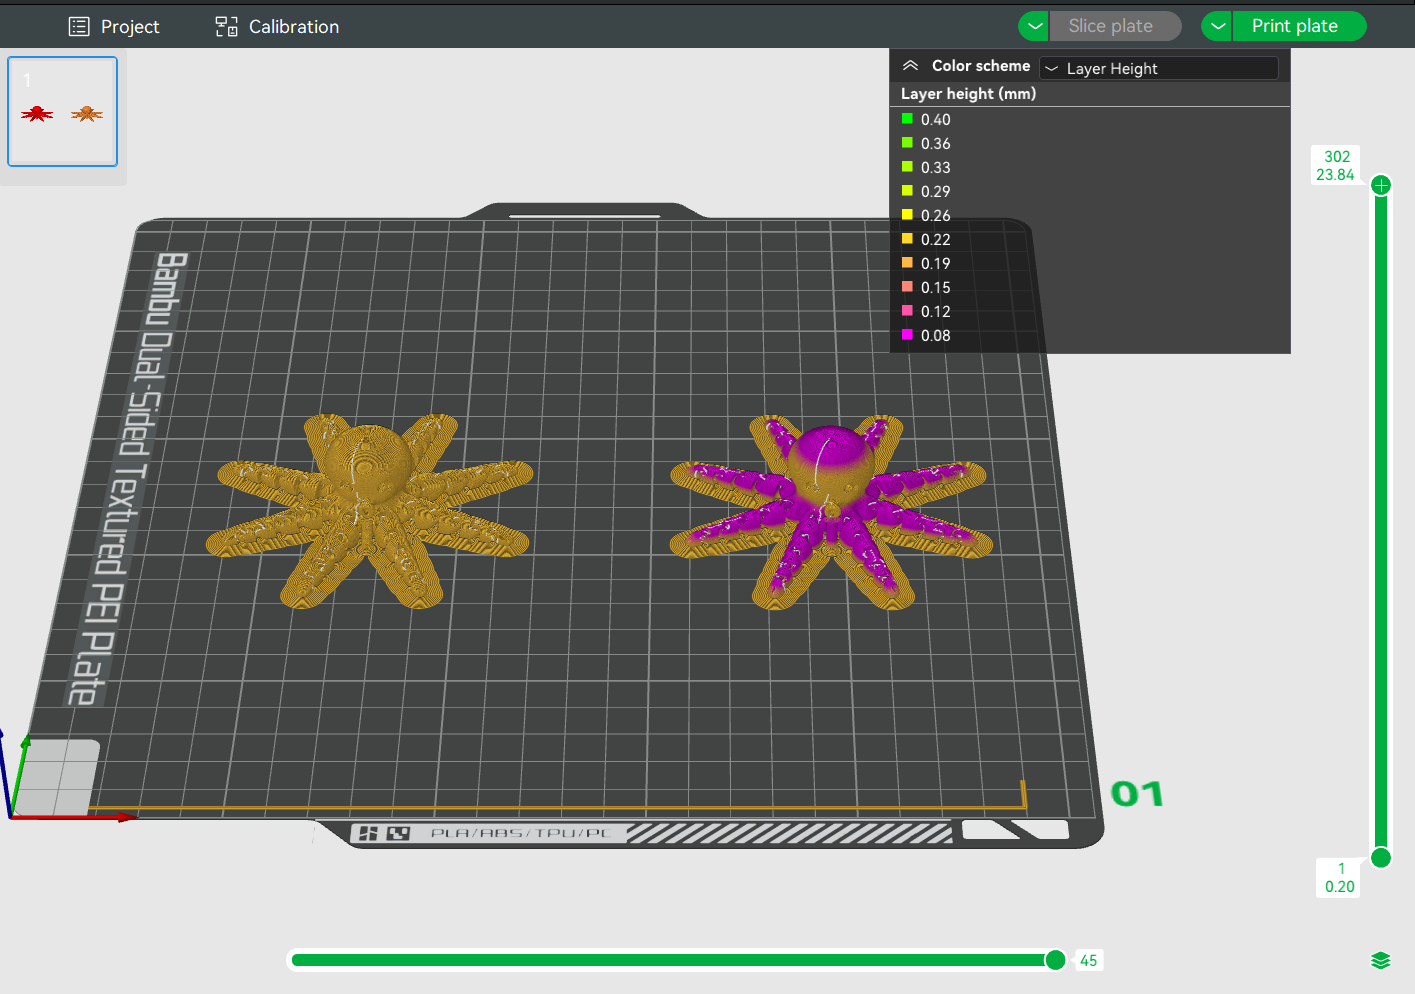
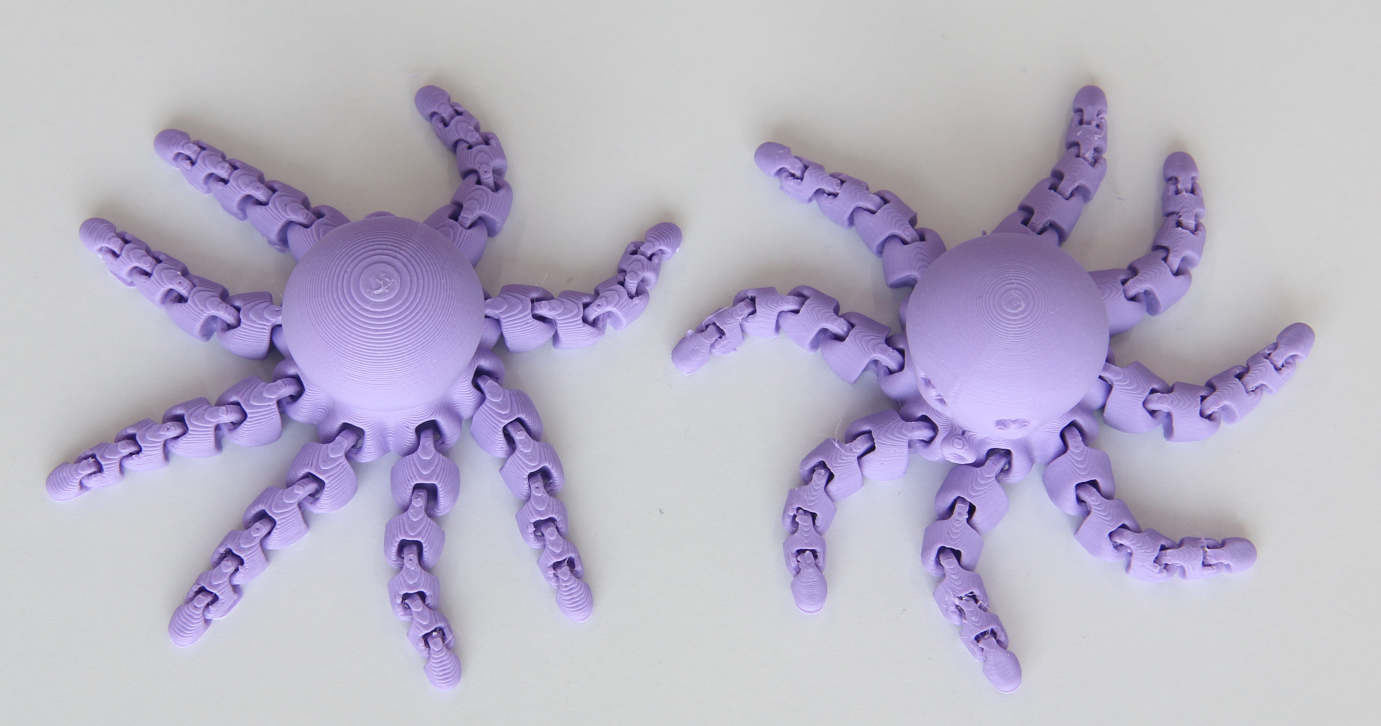
As shown in Fig.3, for the same layer height, the larger the slope, the smoother the surface of the model. If the top of the model has a small slope it may not be as smooth as the middle of the model. Obviously, if you lower the height of the top, the surface will look better.
As we all know, the lower height requires longer printing time, and for this case, we only need to reduce the local print height, the other parts maintain the original height. This can not only ensure the surface effect of printing but also save printing time as much as possible.


¶ Operation guide
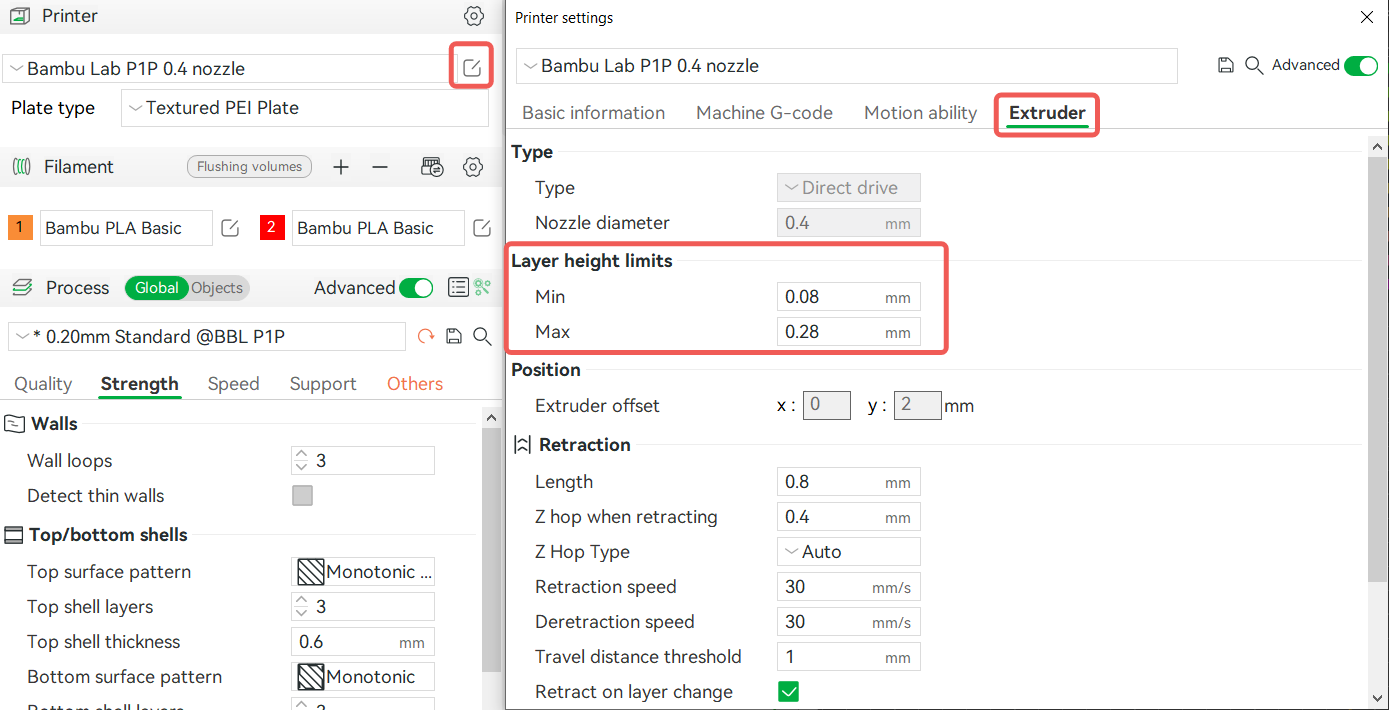
The height range of variable layer height is in the height limits of the printer settings, for example, the height range of 0.4 nozzle is 0.08-0.28 mm, which is a height range of our laboratory test that the nozzle can print out better print quality, you had better not modify it.
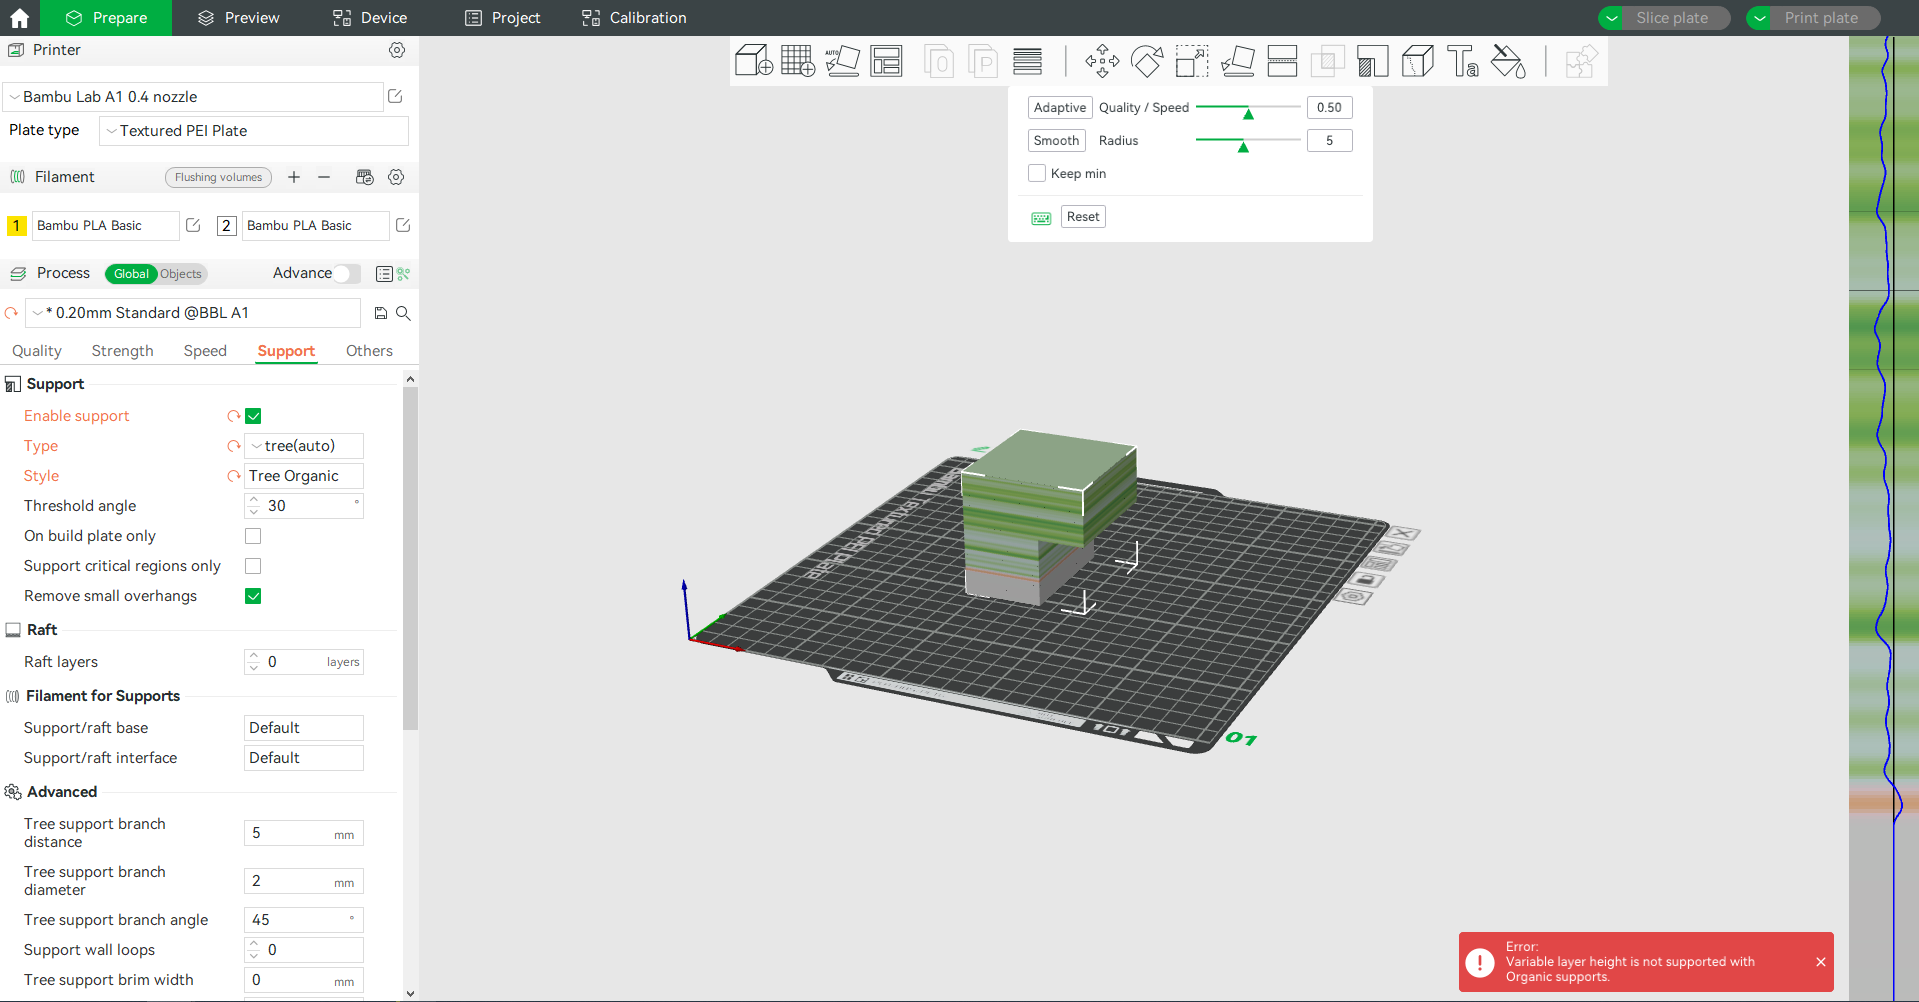
After selecting an object in the middle drive, you can enable this feature here:
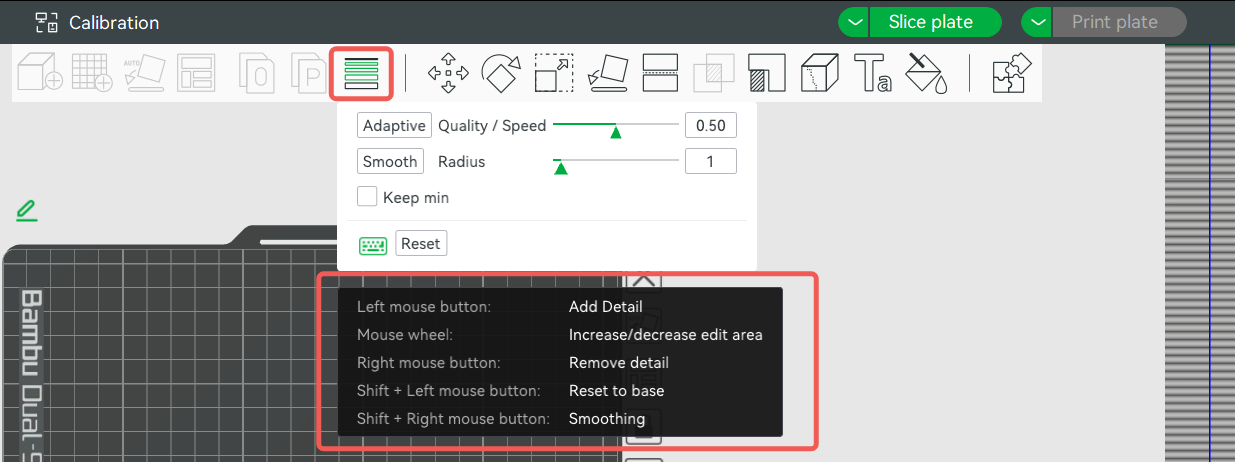
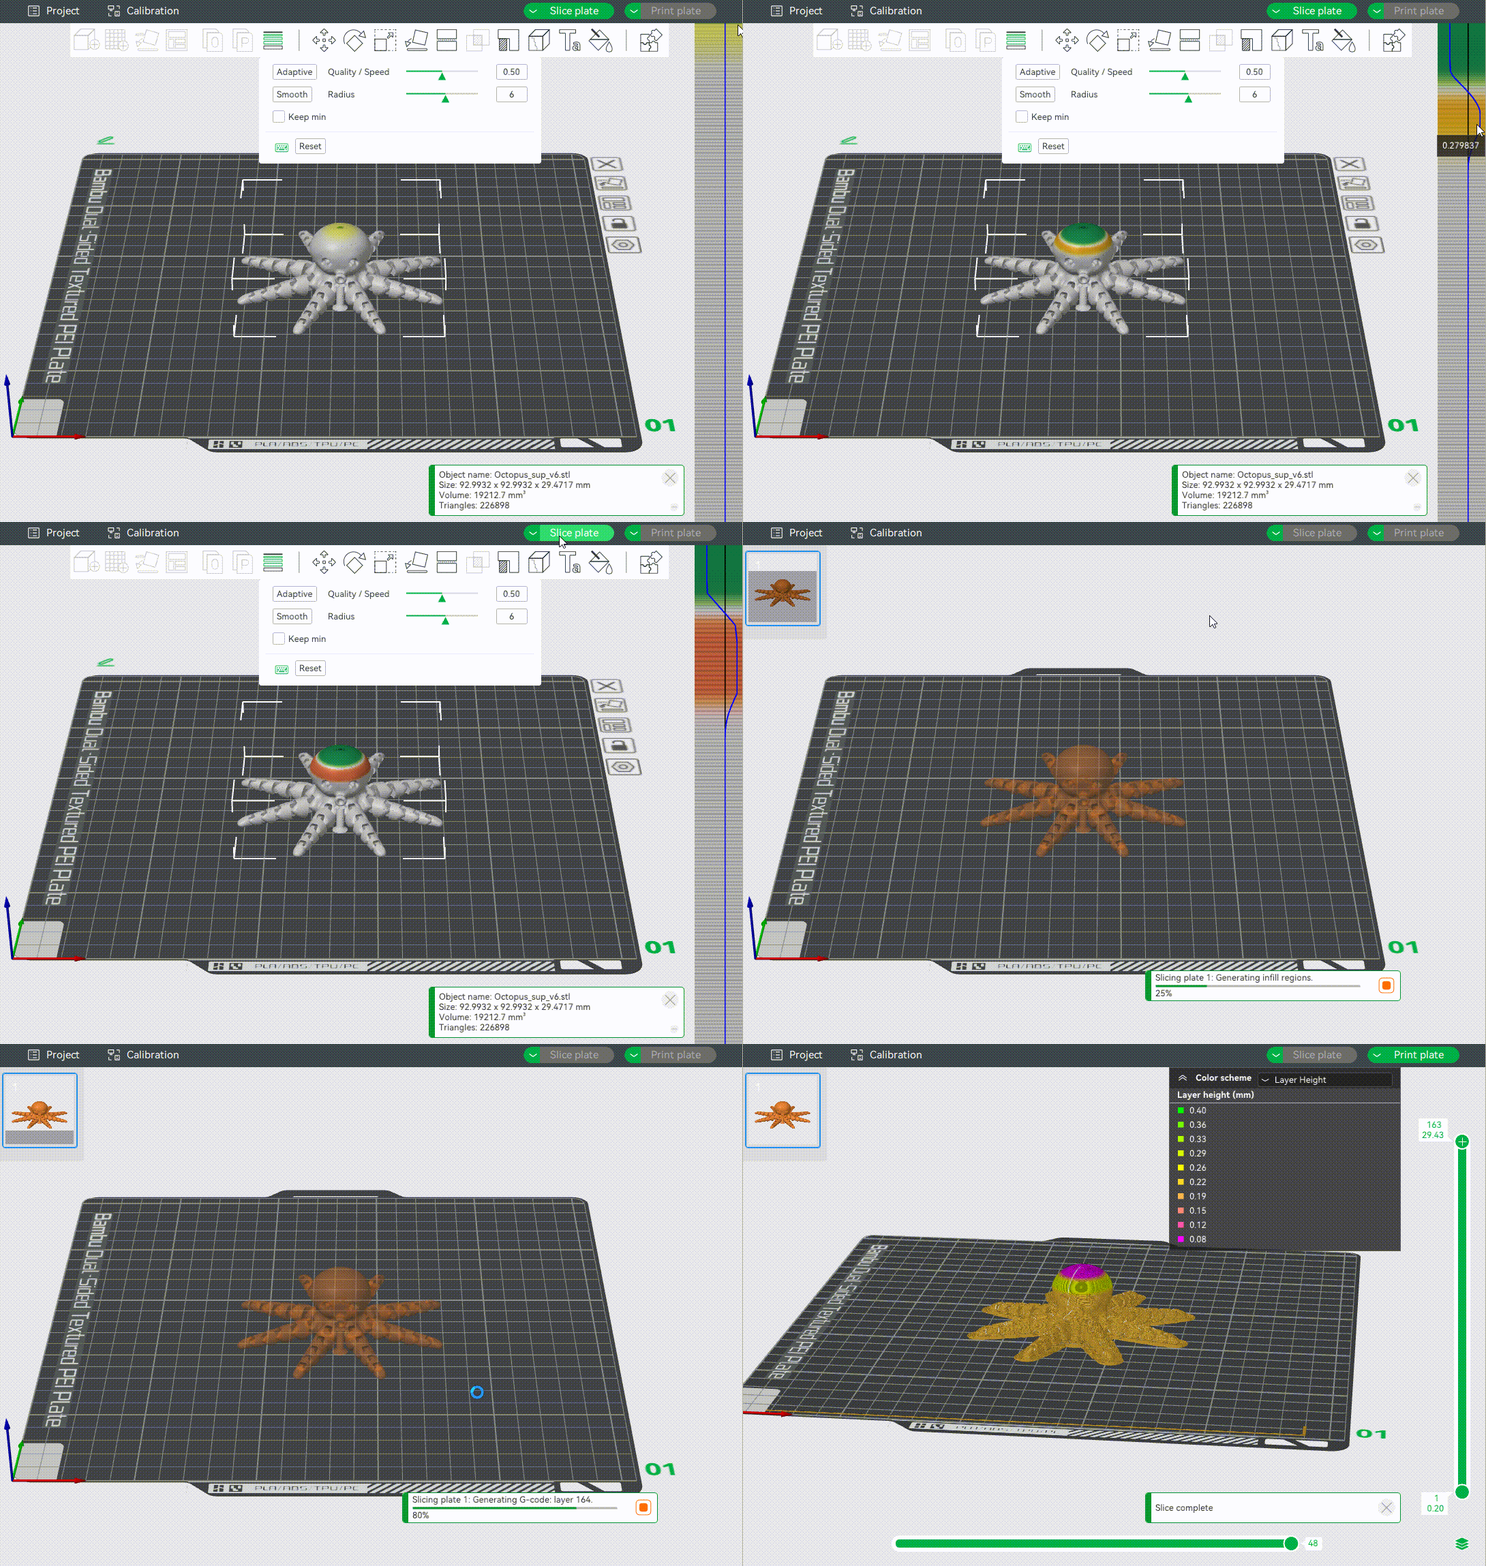
You can use the shortcut key (as shown in Figure 6) in the interface on the right of the slicer to drag the layer height in different height ranges, as shown in the following figure:
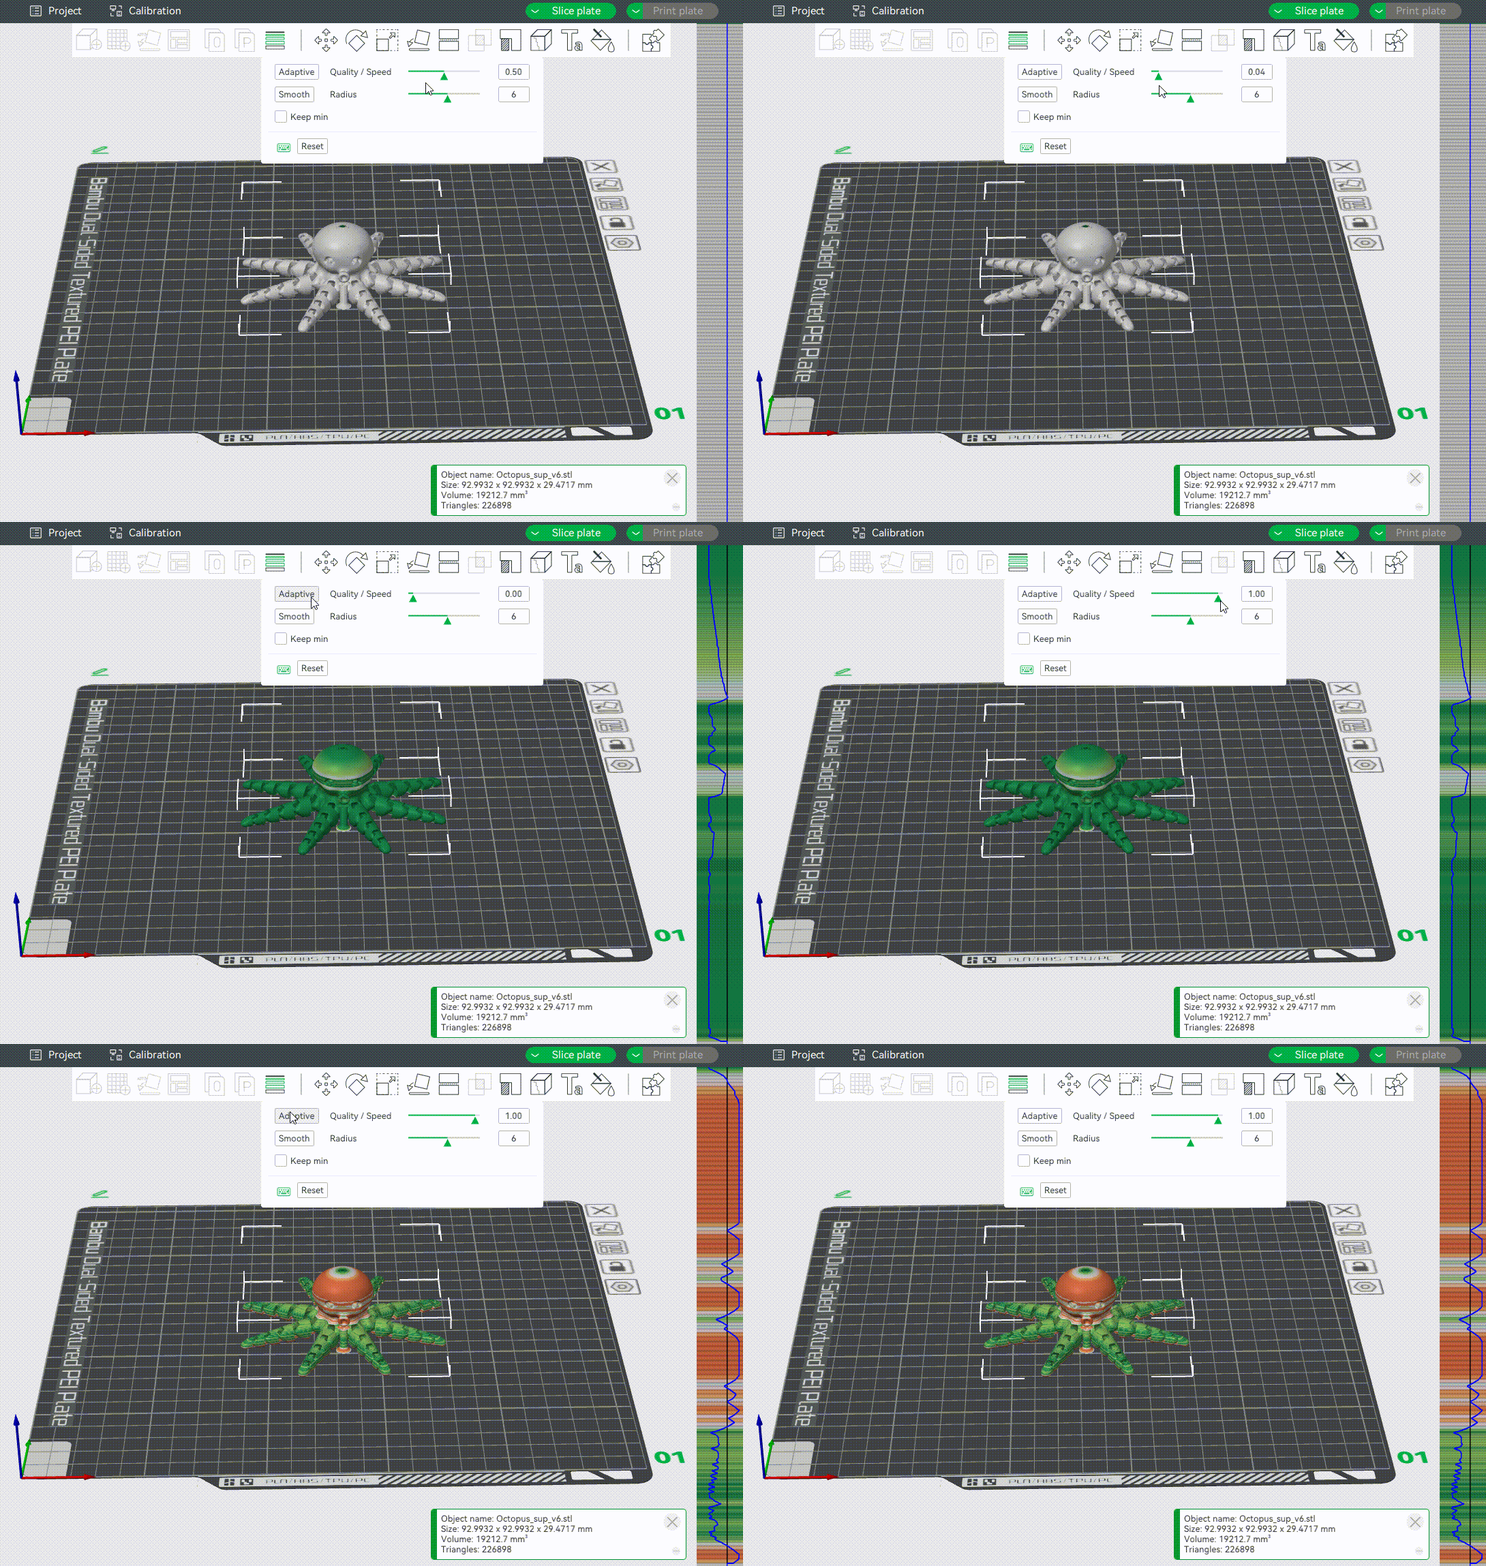
You can also adjust the detail/speed tendency and click Adaptive. It will automatically adjust the height of different ranges according to your needs for printing detail and speed. If you drag a small triangle closer to "detail", it indicates that the printed model has higher accuracy, and it will automatically set more parts of the model to lower layer heights. If you drag a small triangle closer to "speed", it will be more inclined to increase the printing speed, so it will automatically set more parts of the model to higher layer heights.
Smooth mode: Clicking will smooth the transition between different layers. The radius refers to the width of the Gaussian filter. The larger filter radius will make the curve smoother, and you can click multiple times to get a smooth curve effect, allowing better transitions between different layers.
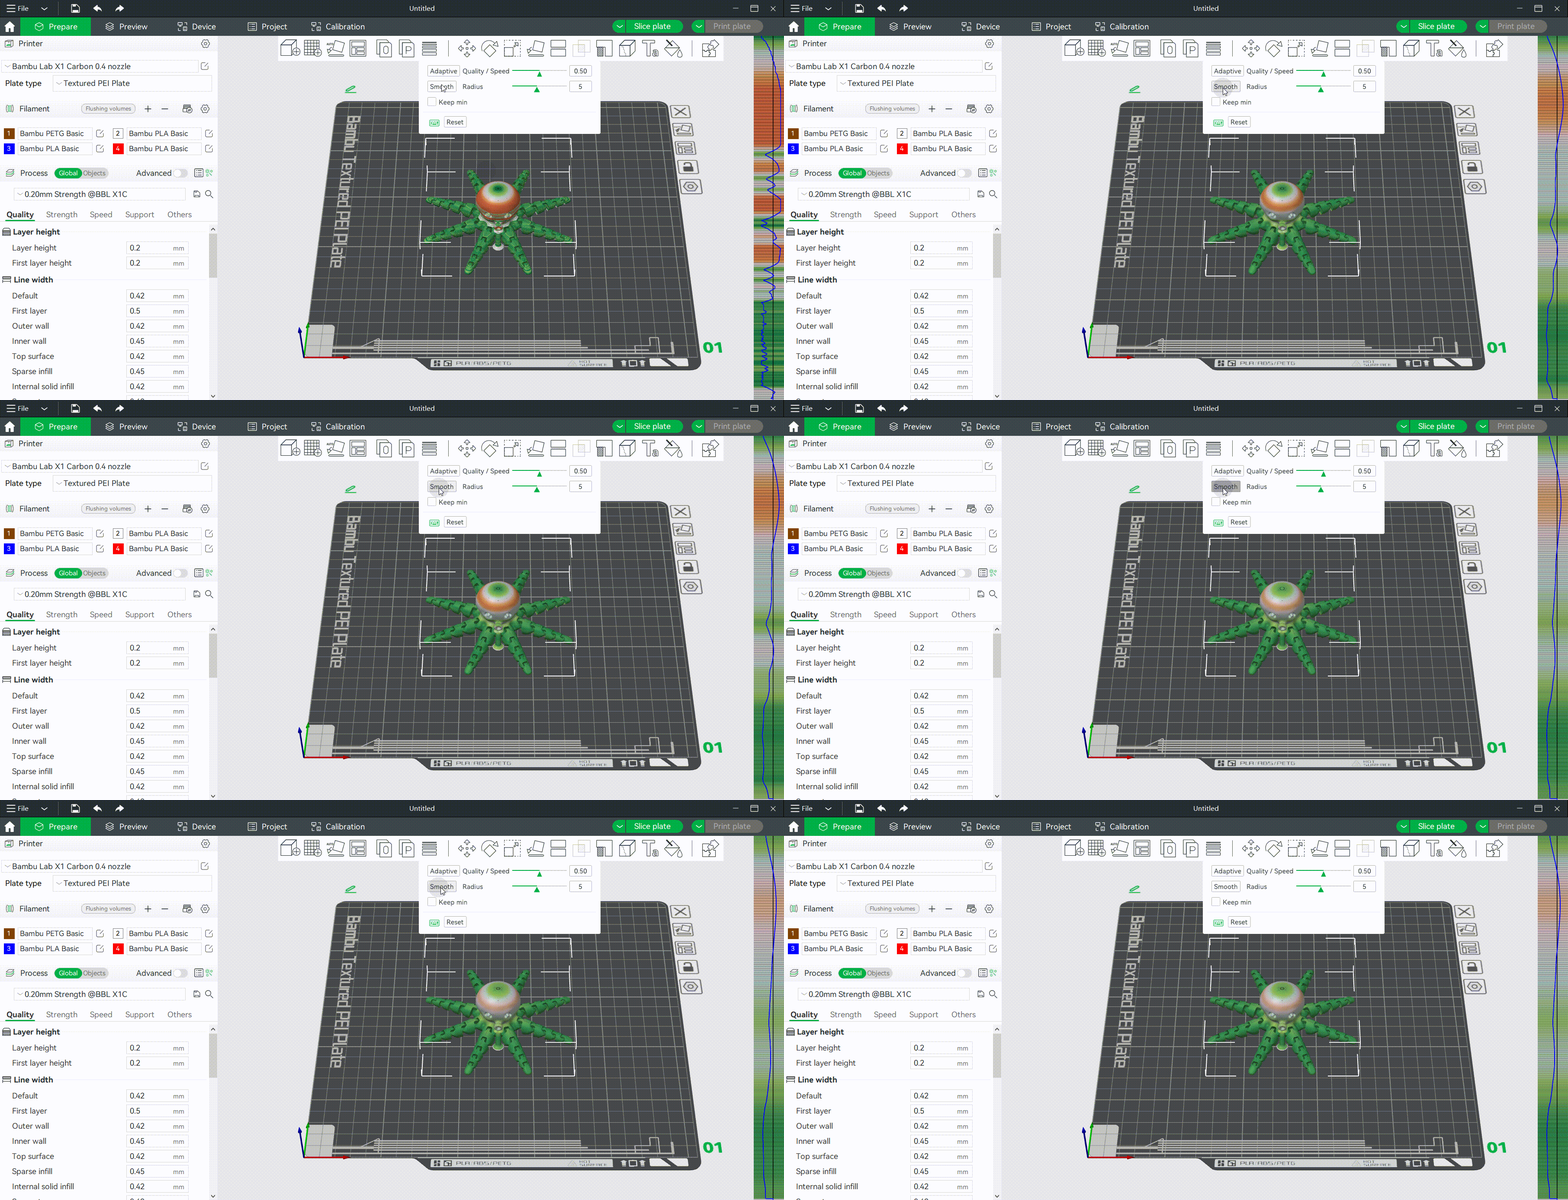
Keep min: When using smooth mode, the minimum height (the green part) will not be changed, that is, the minimum height will remain the original value when smoothing the curve.
¶ Note
1. When there are multiple model objects in a plate and more than one color is used, the prime tower can be enabled only if the variable layer height of all objects in the plate is the same. If the variable layer height of different objects is different, the prime tower cannot be enabled. As shown in the picture below:
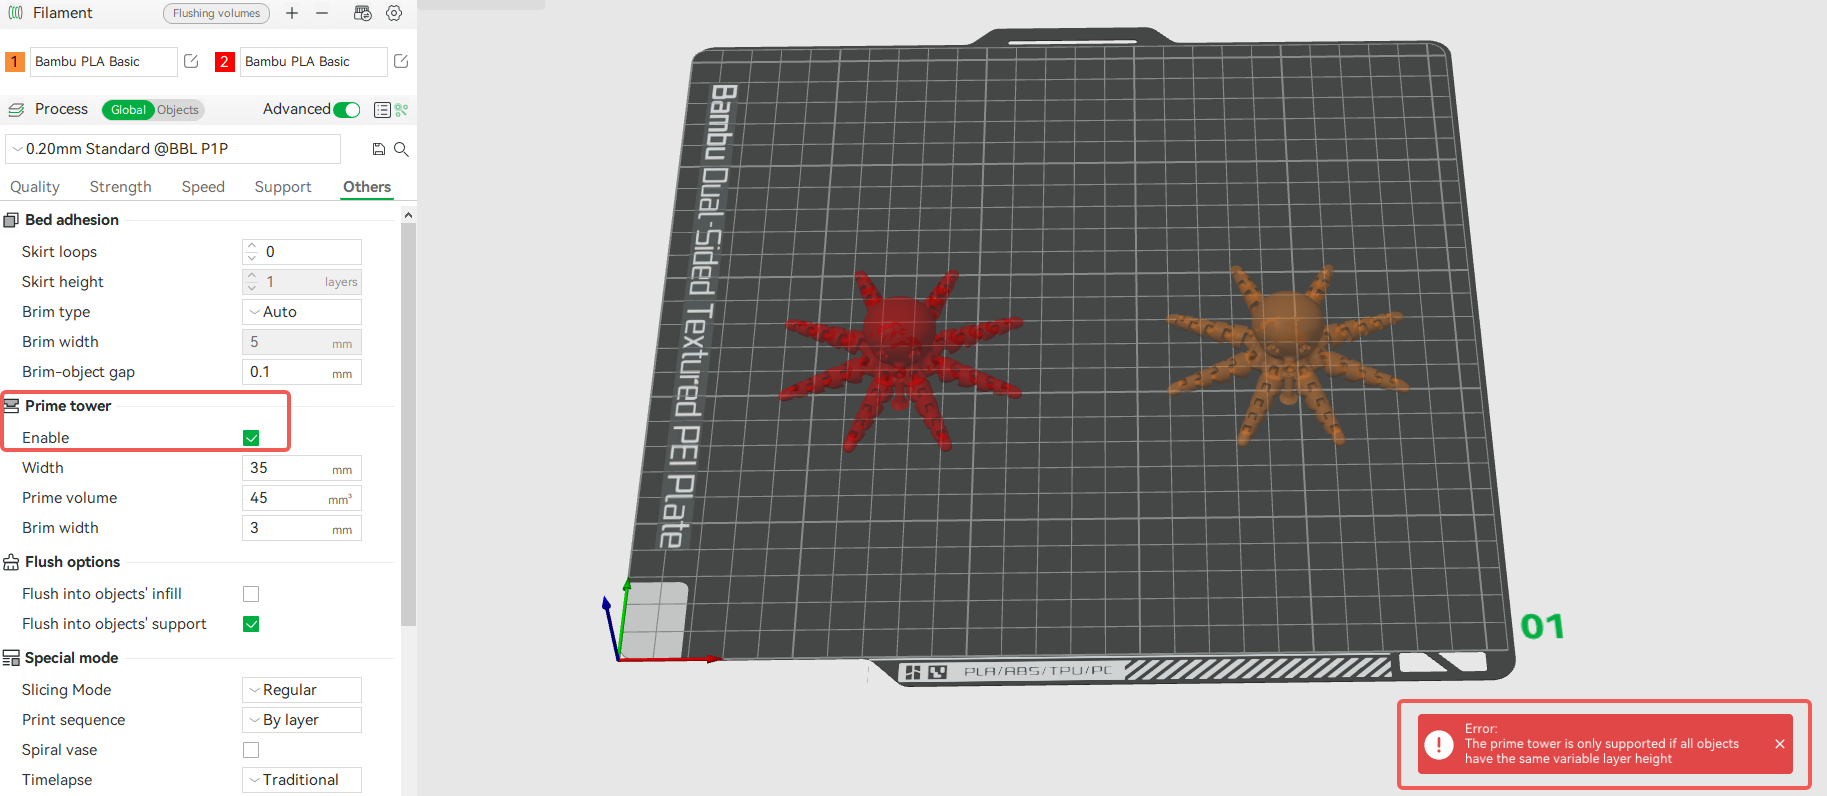
If the variable height Settings of the multi-color models are the same, the prime tower can be enabled, as shown in the figure below.
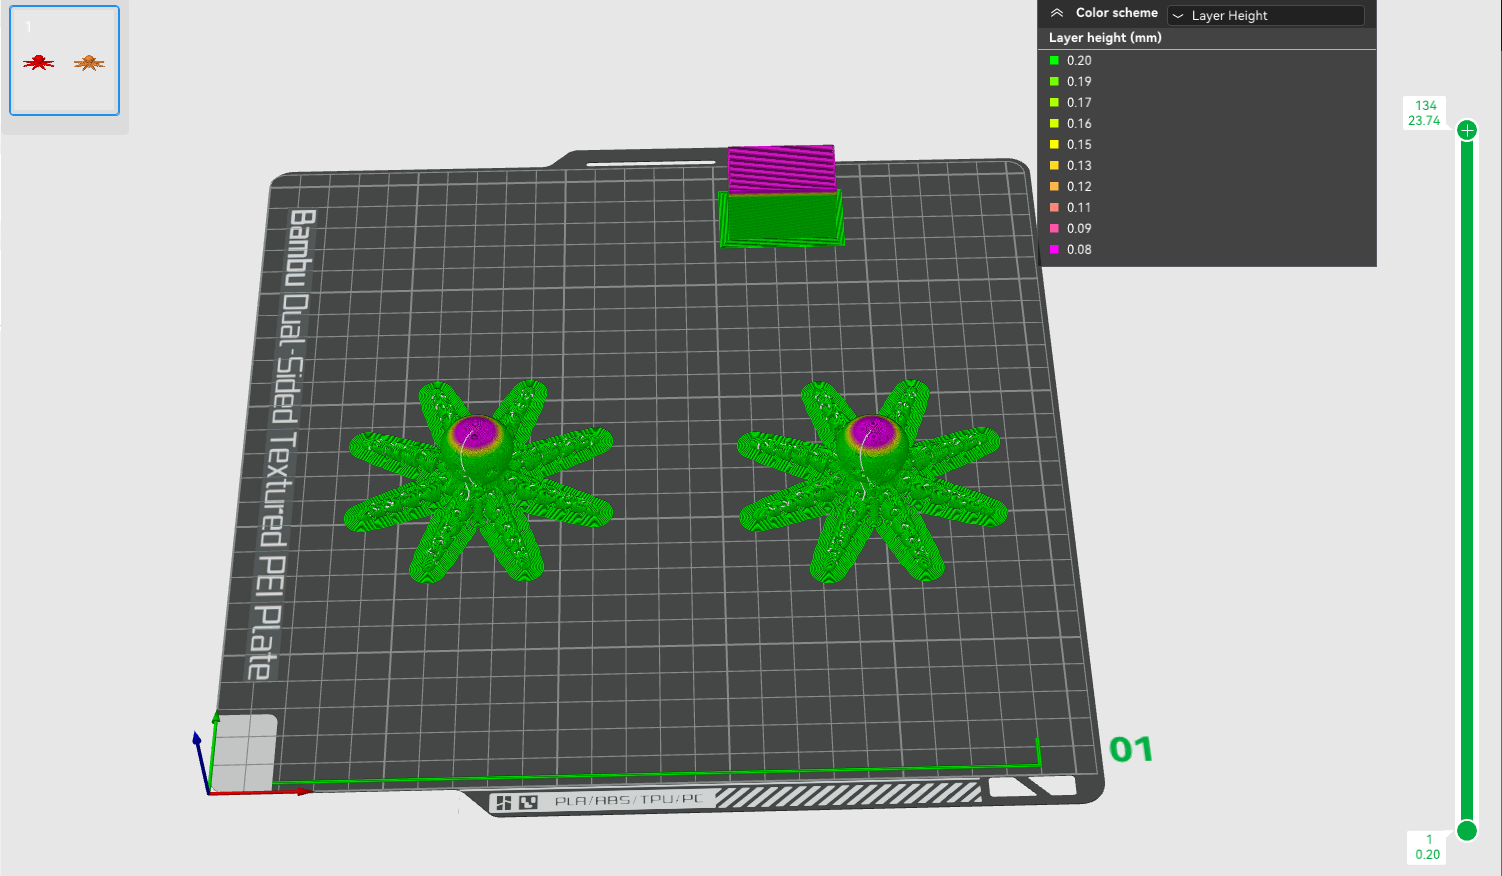
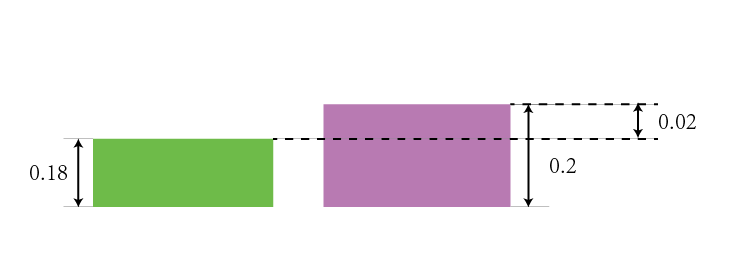
The reason is that the height of the prime tower must be the same as the height of the object, but if variable height is enabled, there will be a height difference between the different objects. For example, if the height of an object is set to 0.18mm, then the height of the prime tower must also be 0.18mm. However, the height of the other object is still 0.2mm, so the prime tower needs to increase by 0.02mm to reach the same height as the other object. However, the height of this 0.02mm is not available, so it is not possible to increase this height for the prime tower separately.
2. Variable layer height is also not supported with organic tree supports.
