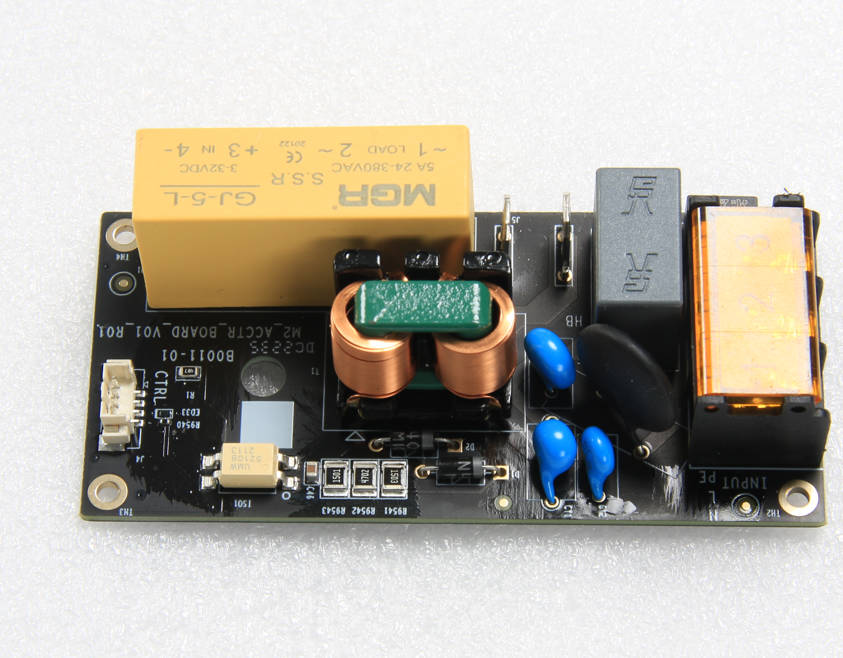
¶ What is this AC board?
This AC board is a circuit board that provides AC power for the X1 series V3 version heatbed or P1P heatbed.
¶ Tools
- H2.0/1.5 hex key
- Cross screwdriver
¶ Preparation
Disconnect the power cord cable
¶ Disassembly
¶ Step 1 - Remove the rear panel, excess chute, and the cable cover
Refer to the related contents of the Cable cover to remove the rear panel, excess chute, and cable cover.
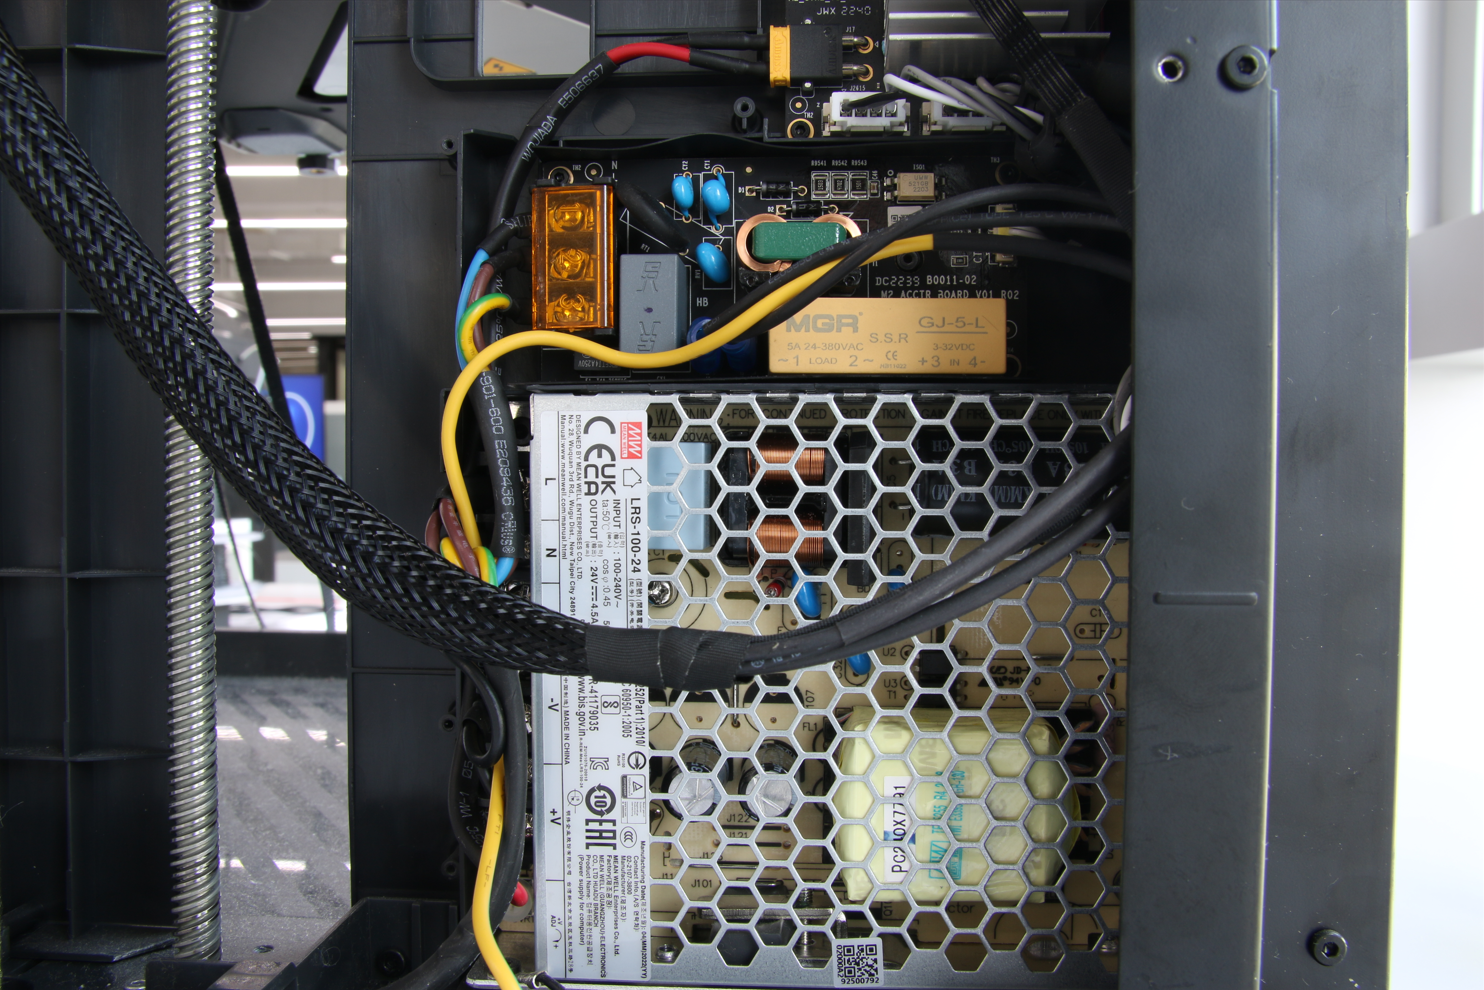
¶ Step 2 - Disconnect the heat bed power cable
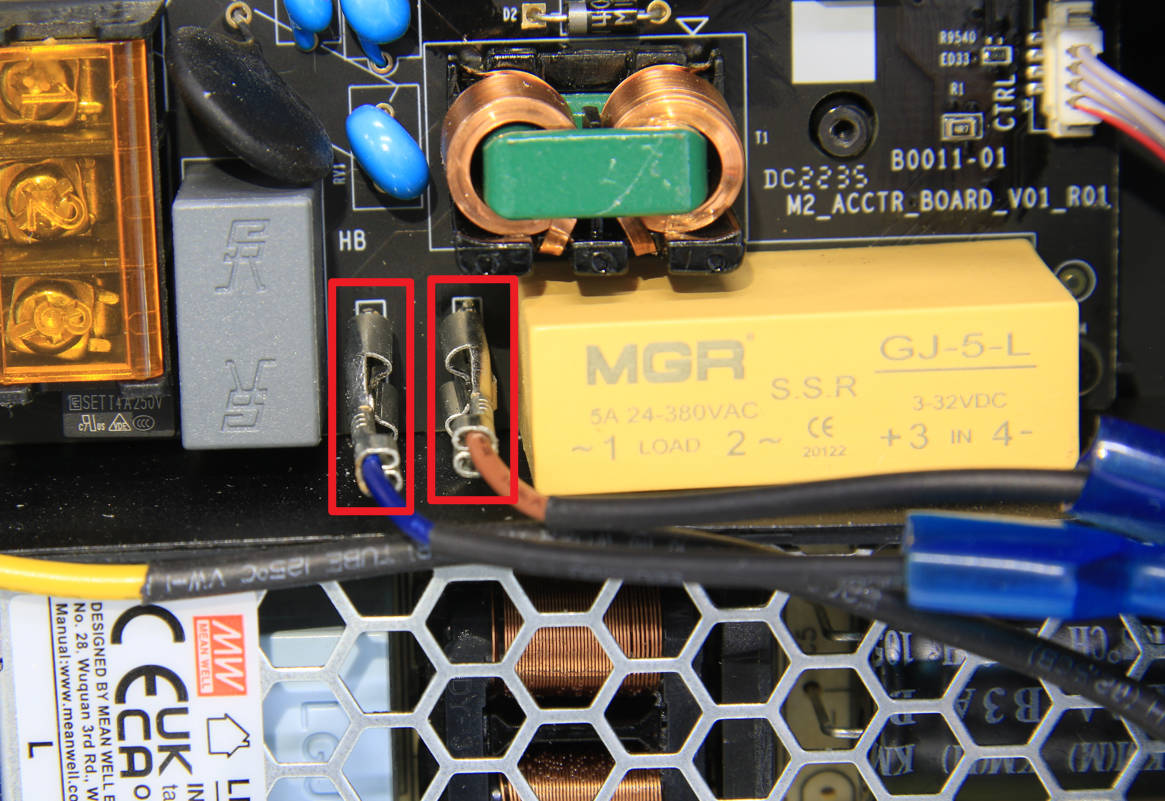
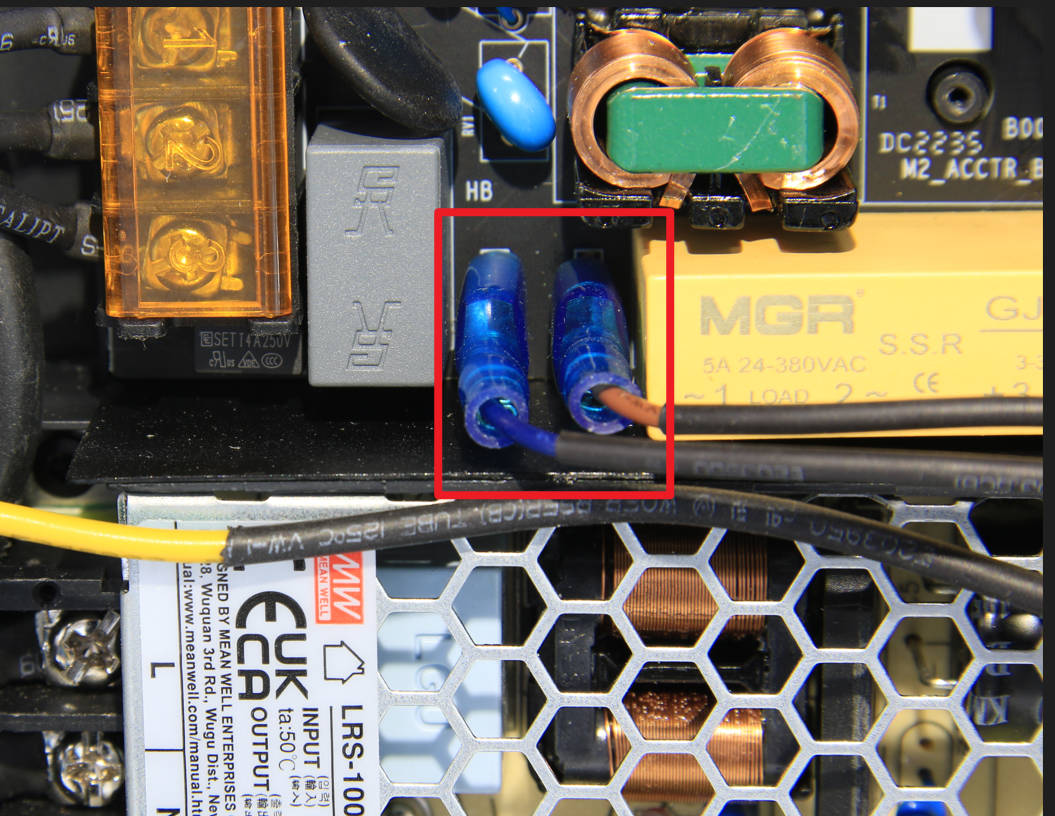
Remove the rubber sleeves, use tweezers to help unlock the locks, and pull out the 2 power cords of the heat bed.
¶ Step 3 - Disconnect the AC board power cord
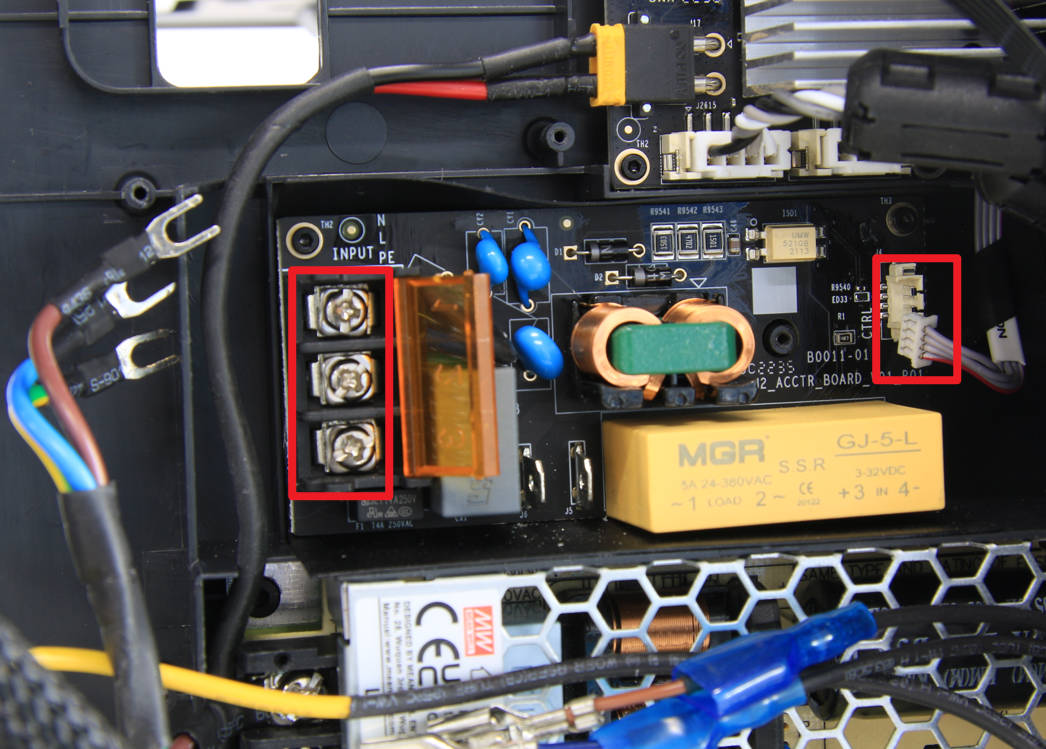
Open the protective cover, loosen 3 screws with a cross screwdriver, pull out the power cables, and then disconnect the AC-MC cable.
¶ Step 4 - Remove the AC board
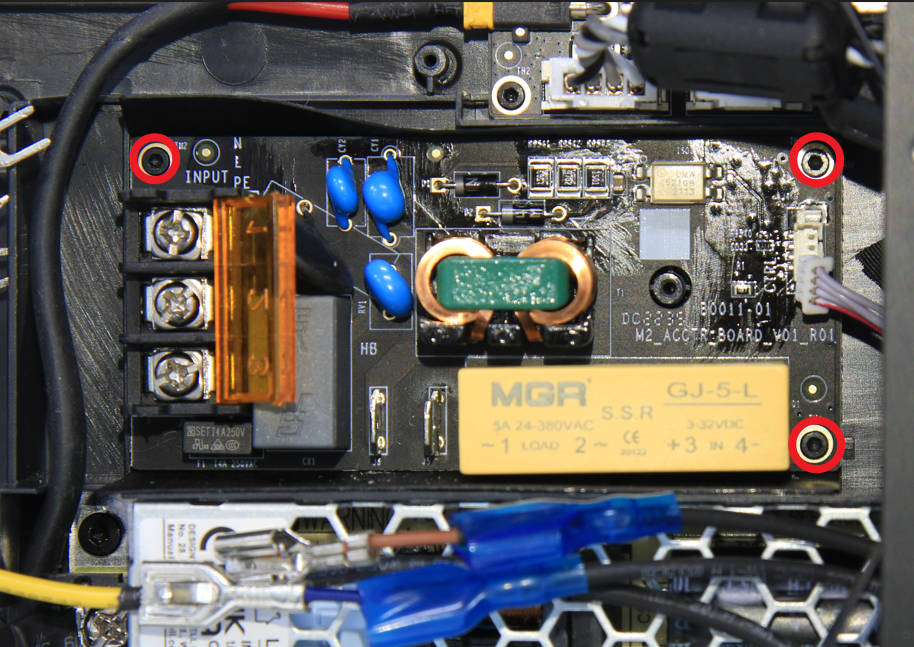
Remove 3 screws with an H1.5 hex key, and then take off the AC board.
¶ Assembly
¶ Step 1 - Install the AC board
Install the AC board on the inner sheld and lock in 3 screws.

¶ Step 2 - Connect the AC board power cable
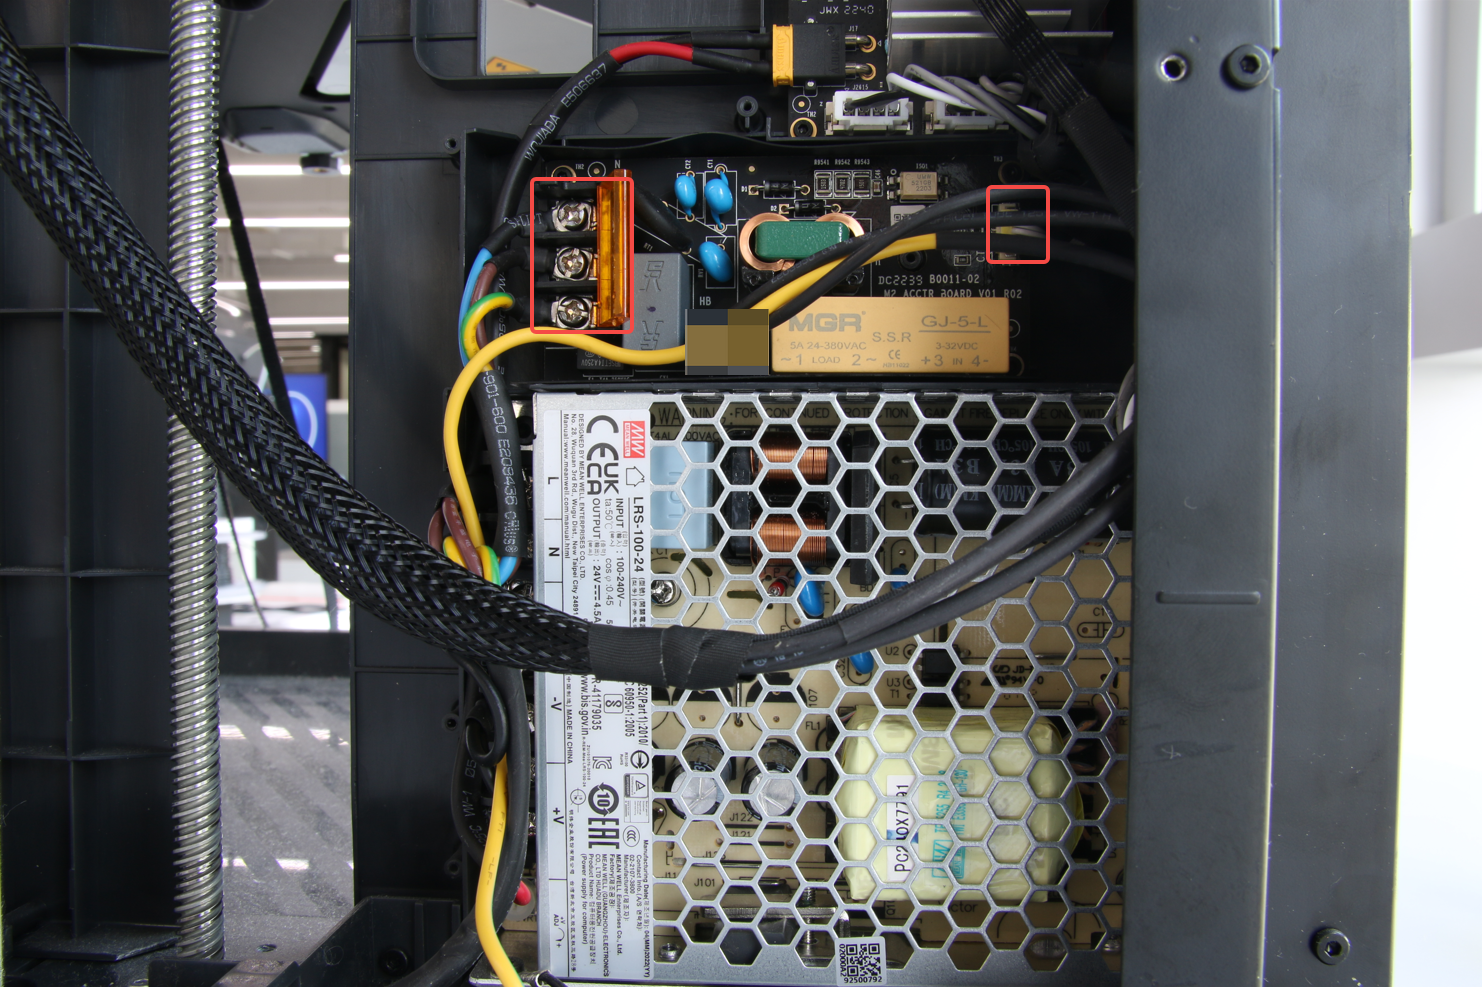
Connect the 3 cables to the input terminals, tighten the screws, close the protective cover, and then connect the AC-MC connection cable.
¶ Step 3 - Connect the power cables of the heat bed
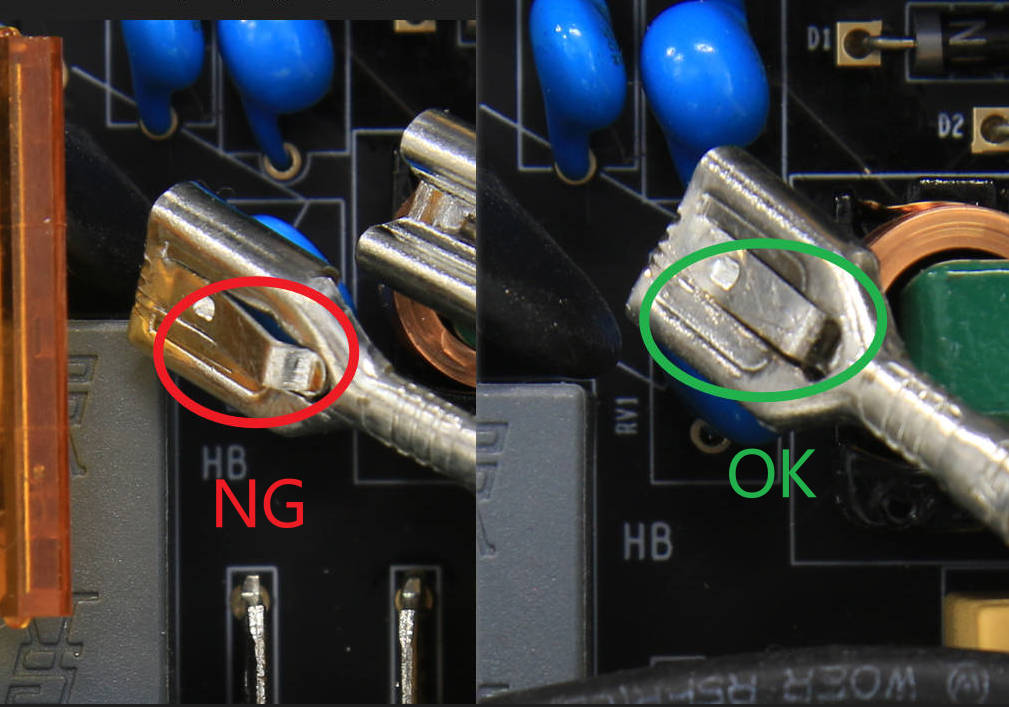
Check the heat bed power cable sockets, if there is any problem, it needs to be dealt with first. Then plug it into the corresponding interface of the AC board, and install the rubber sleeve.
 |
 |
¶ Step 4 - Assemble the printer
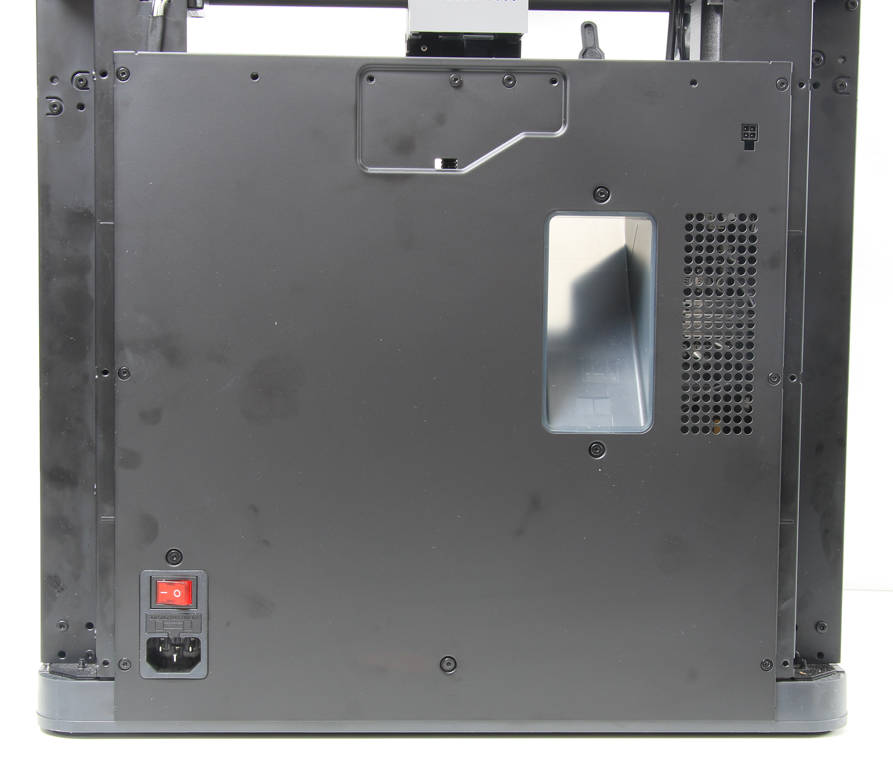
After arranging the cables, refer to the related content of the Cable cover to install the cable cover, the excess chute, and the rear plate in sequence.
¶ How to verify
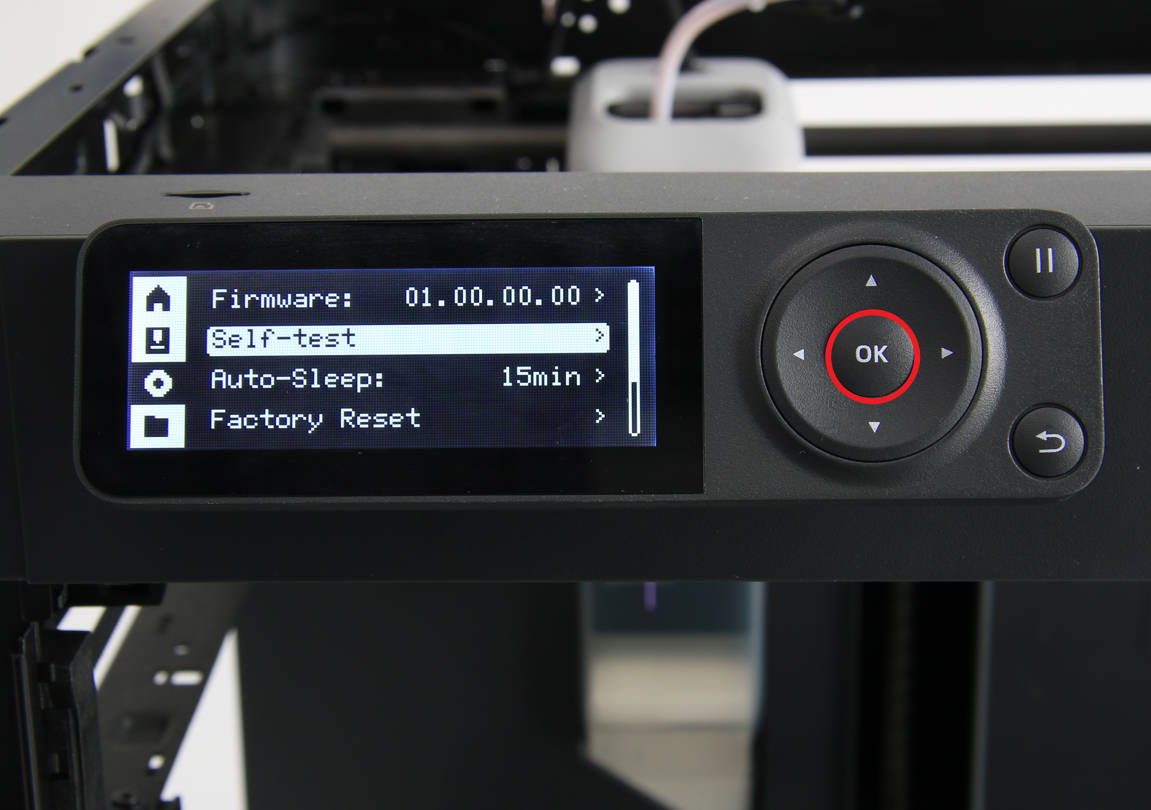
Connect the power cord cable of the printer, turn on the printer, and run the device self-test process. If the self-test passes, the operation is successful.
