¶ What is the AMS main frame
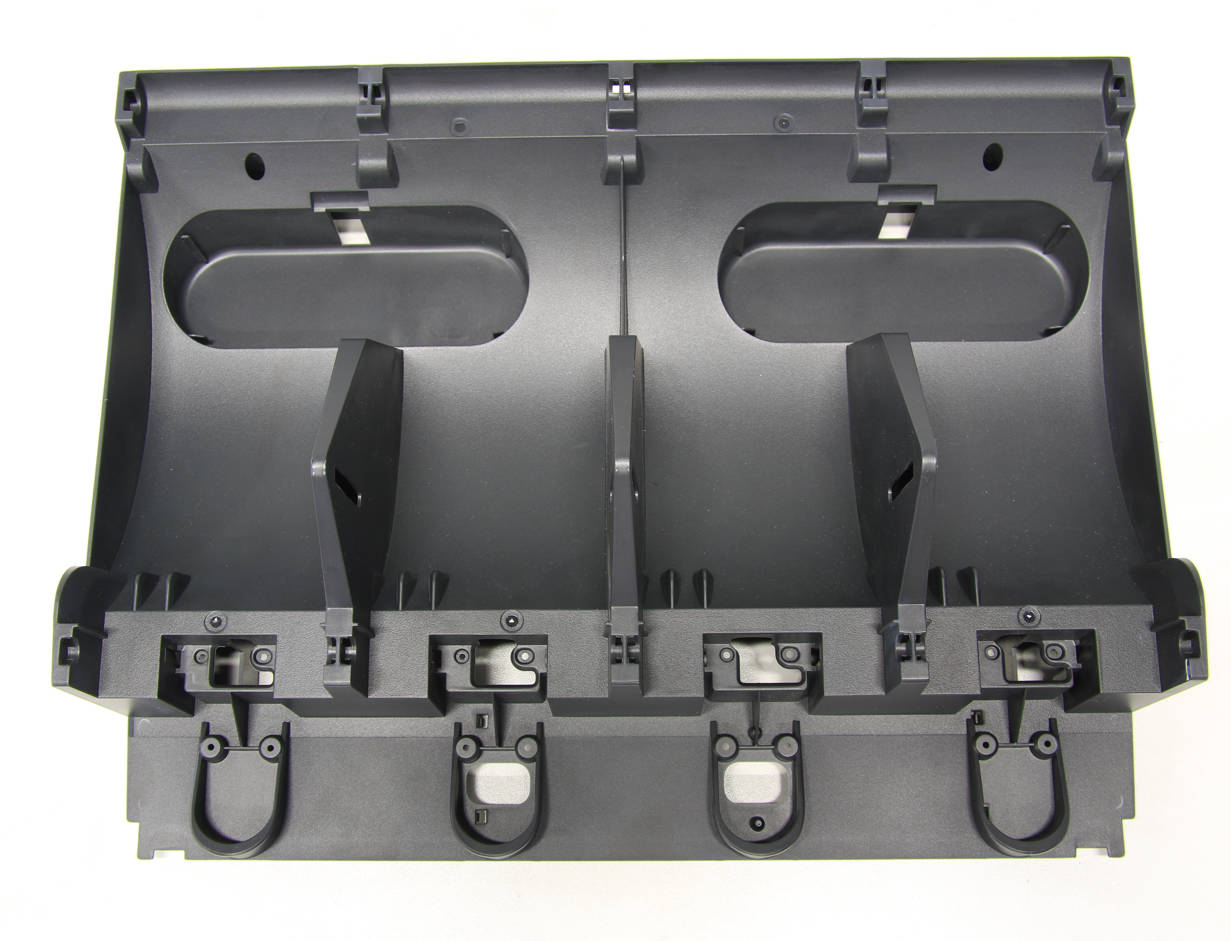
The AMS main frame is a casted holder for assembled parts of the AMS.
¶ When to use
Physical damage.
¶ Tools and materials needed
New AMS main frame, H2.0 & H1.5 allen key, tweezers.
¶ Safety warning and Machine state before starting operation
Disconnect the connection of the AMS with the printer.
¶ Operation guide
¶ Step 1 - (Disassembly) Remove the PTFE tube
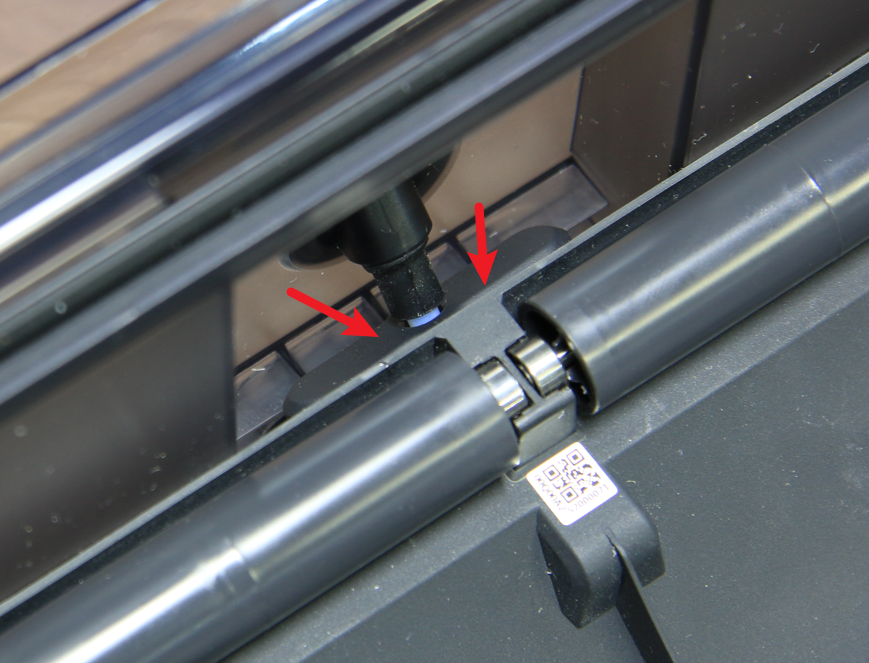
Open the AMS cover, press the button on the filaments hub and pull out the PTFE tube.
 |
.png) |
¶ Step 2 - Remove the desiccant
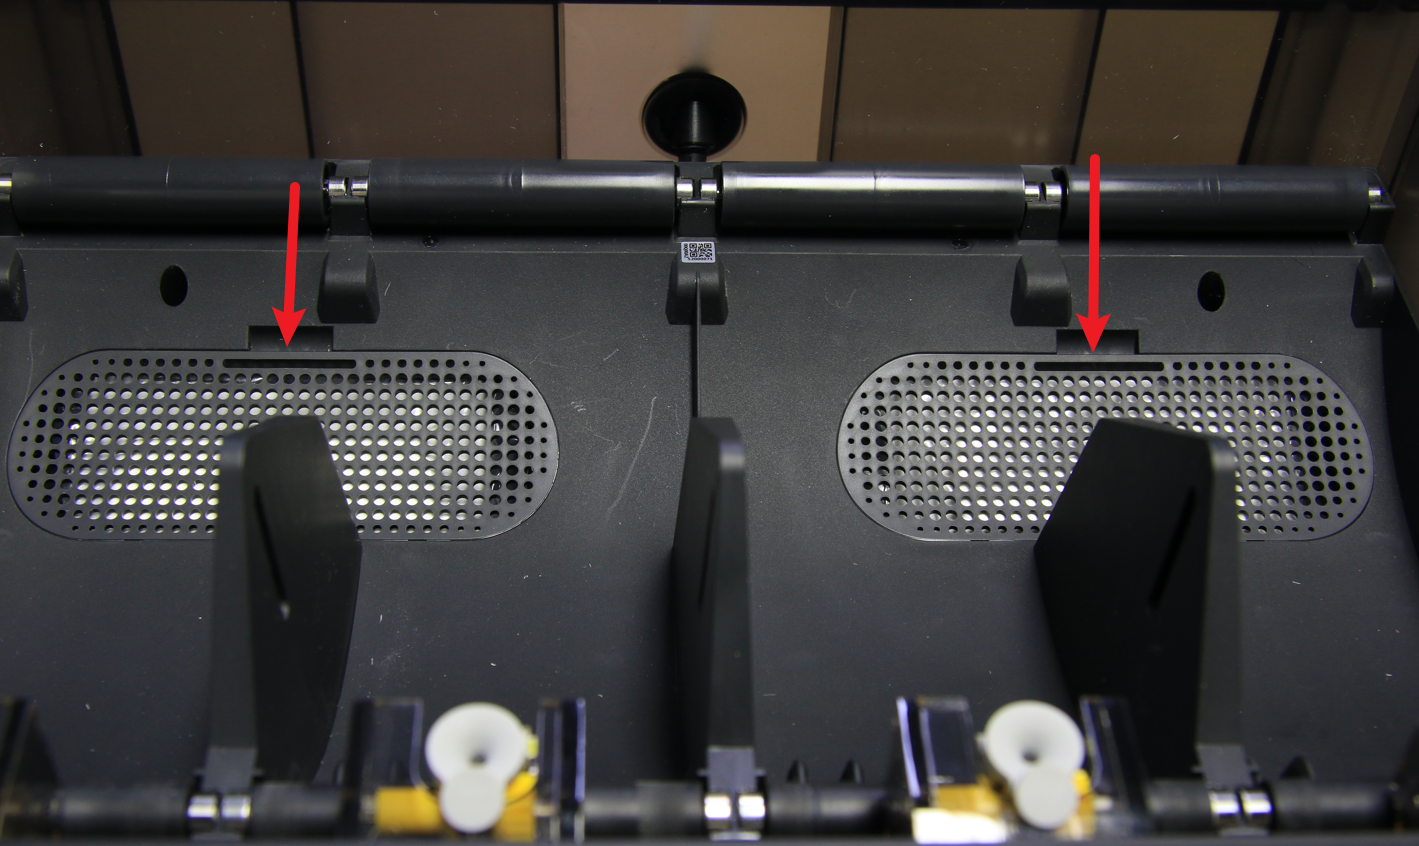
Remove the 2 covers and remove the desiccant.
¶ Step 3 - Remove 2 scews
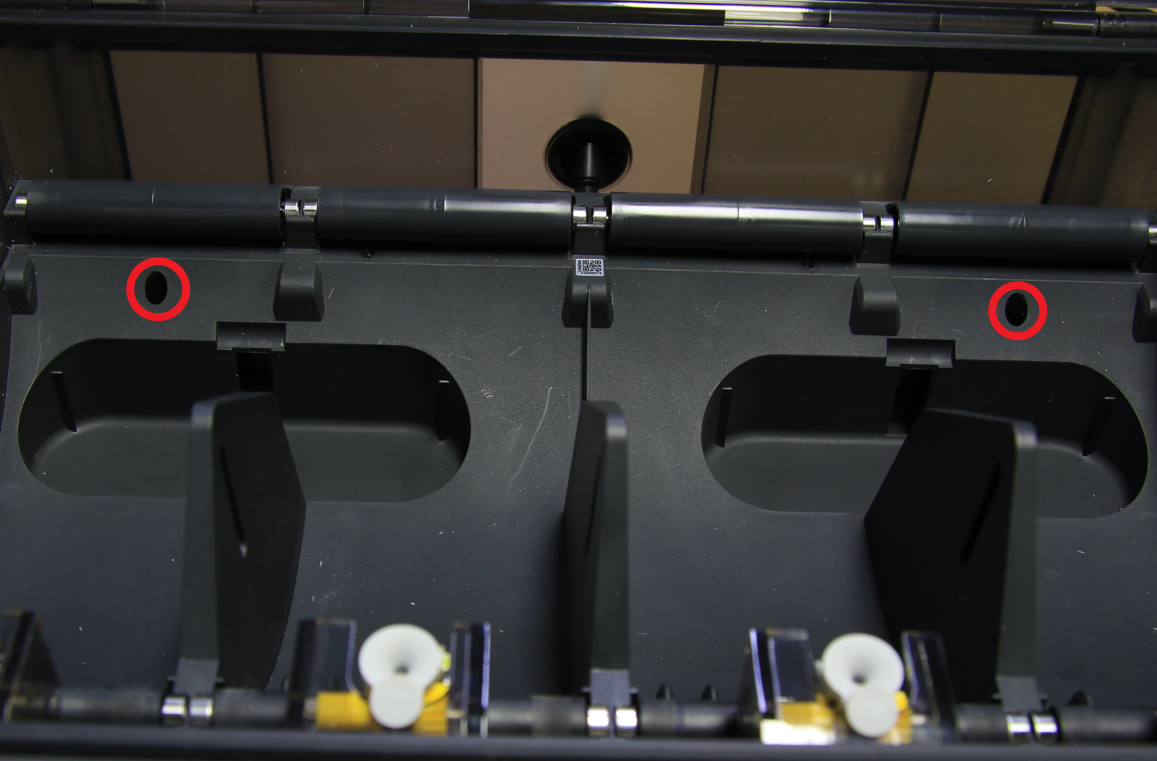
Remove 2 screws that lock the middle frame.
¶ Step 4 - Remove the middle frame module
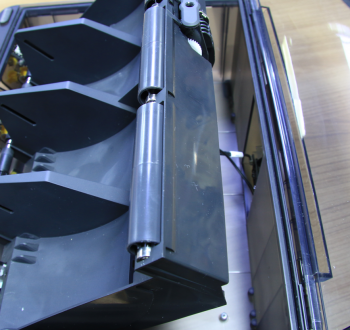
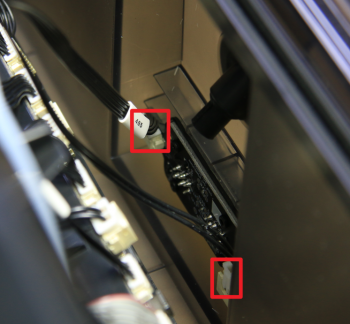
Flip the middle frame upward, disconnect the bambu bus cable and the power cable, and remove the middle frame module.
 |
 |
¶ Step 5 - Disconnect 11 cables
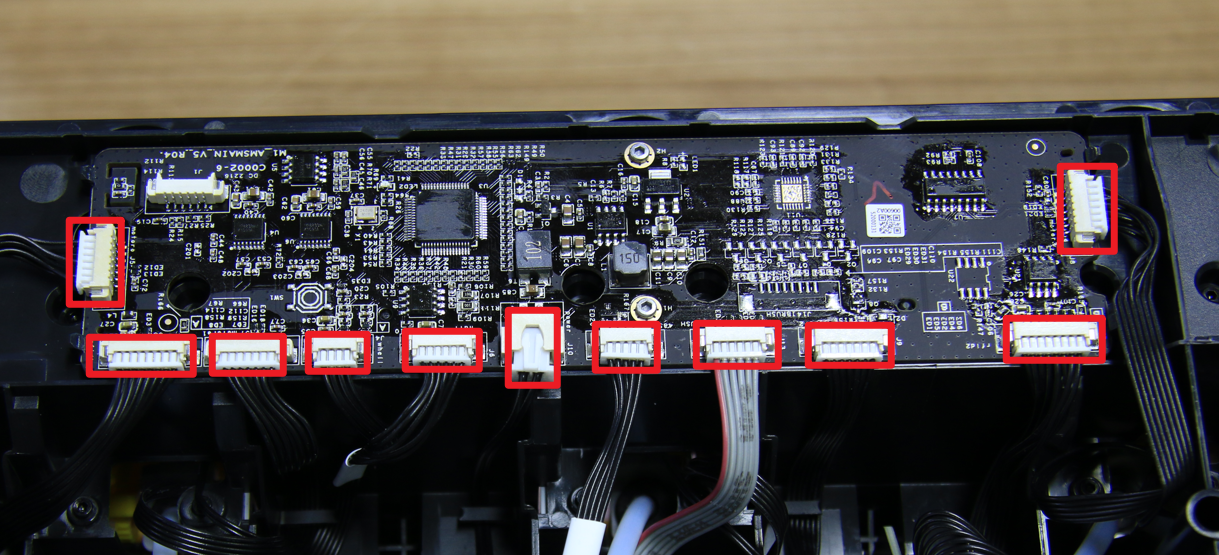
Disconnect all the cables from the connectors on the main board. Make some marks if needed or take pictures of the connections.
¶ Step 6 - Remove the main board
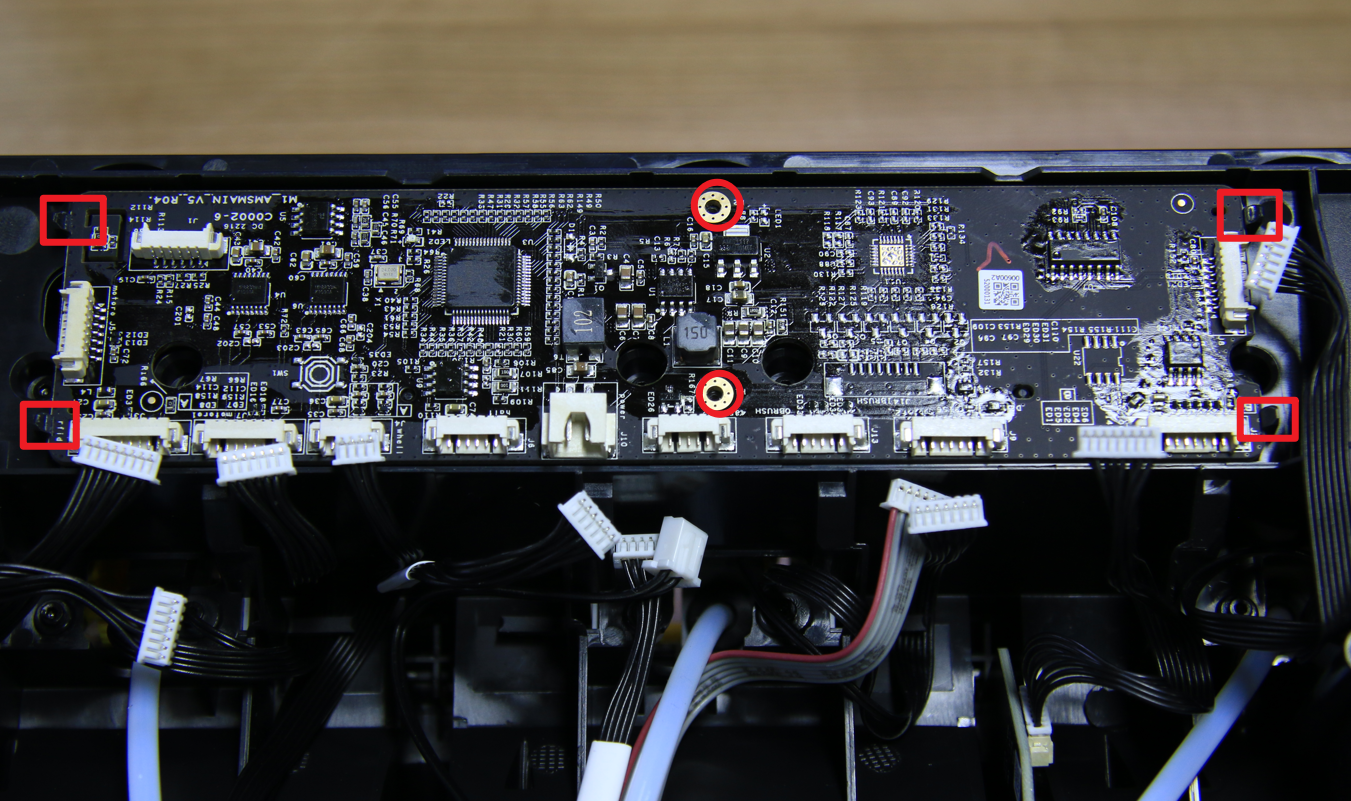
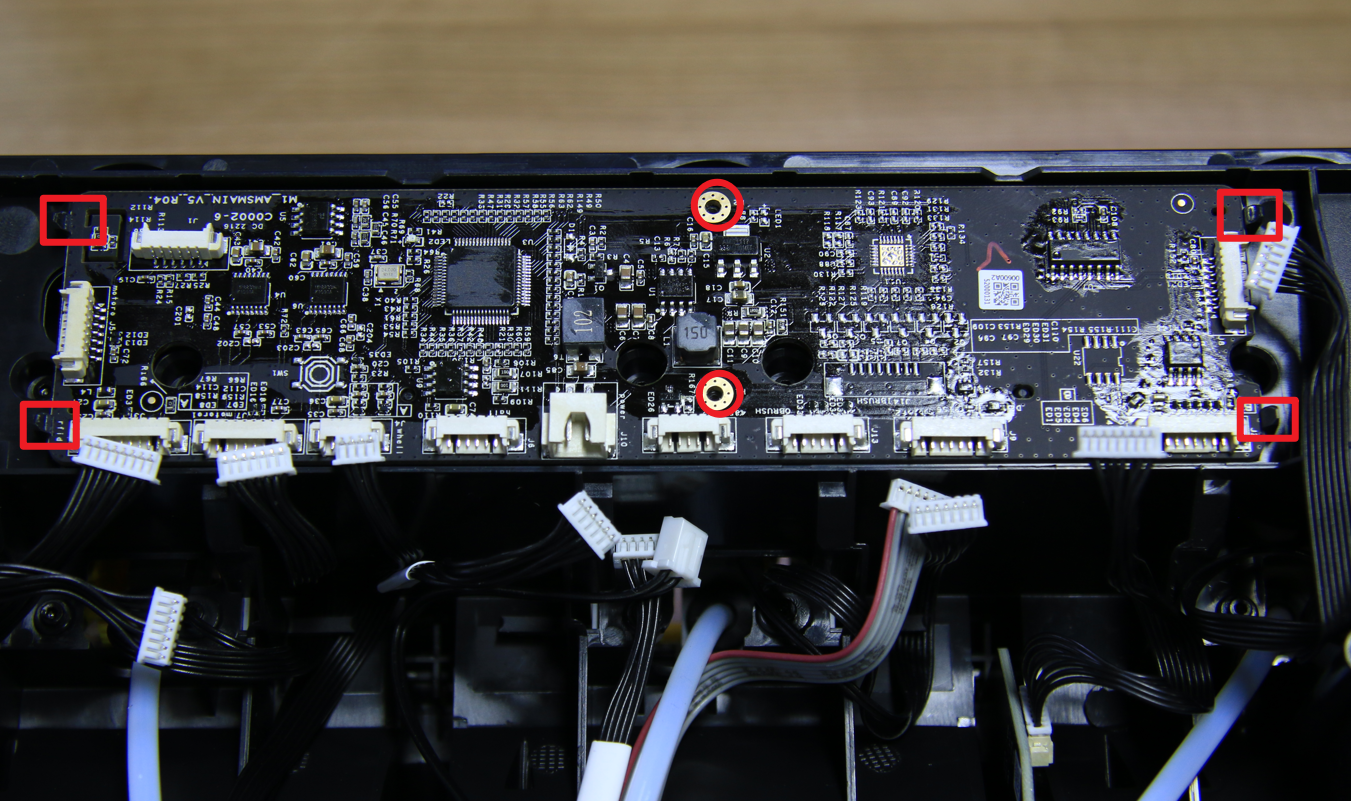
Remove 2 screws, unlock the main board from 4 buckles and then remove the main board.
¶ Step 7 - Remove the filaments hub
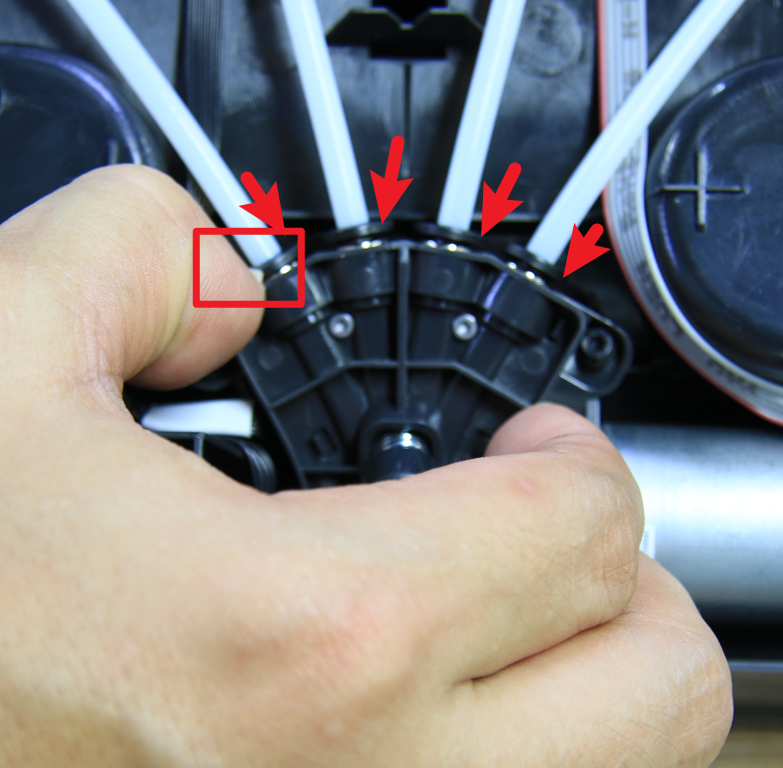
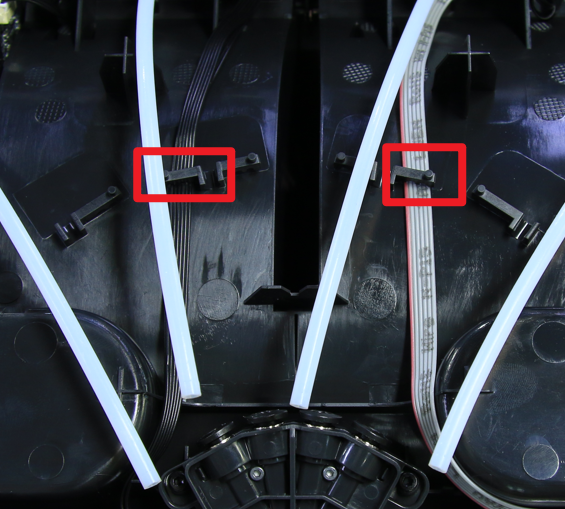
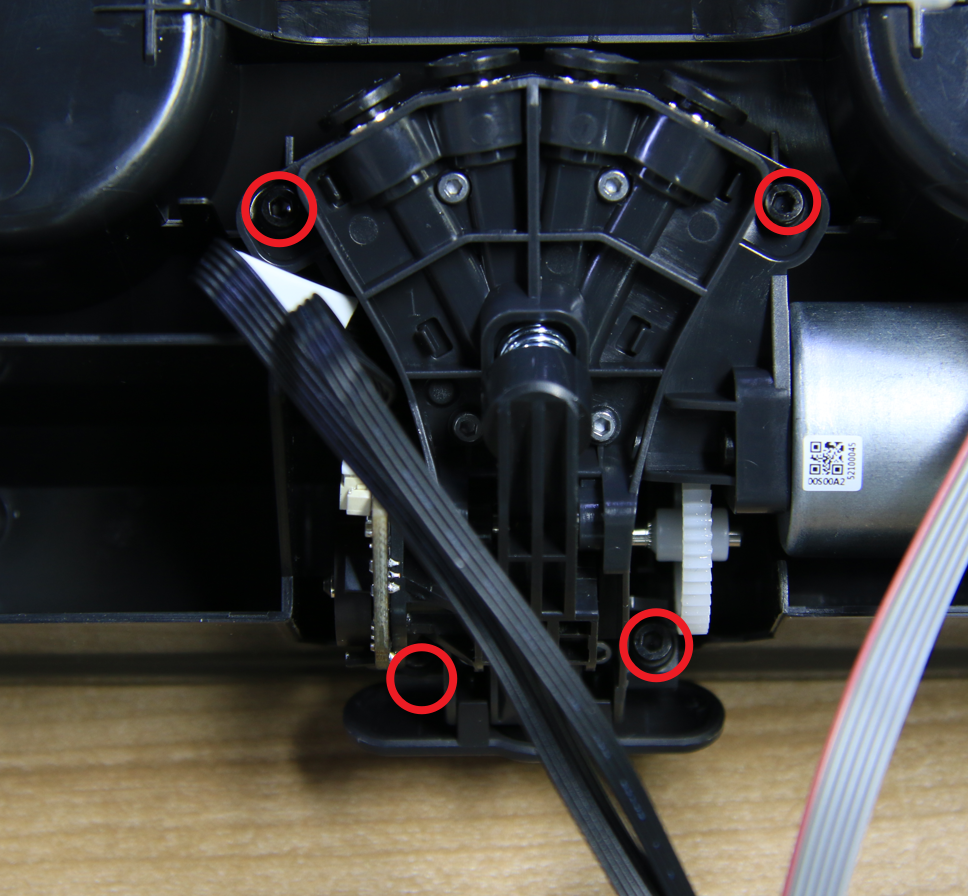
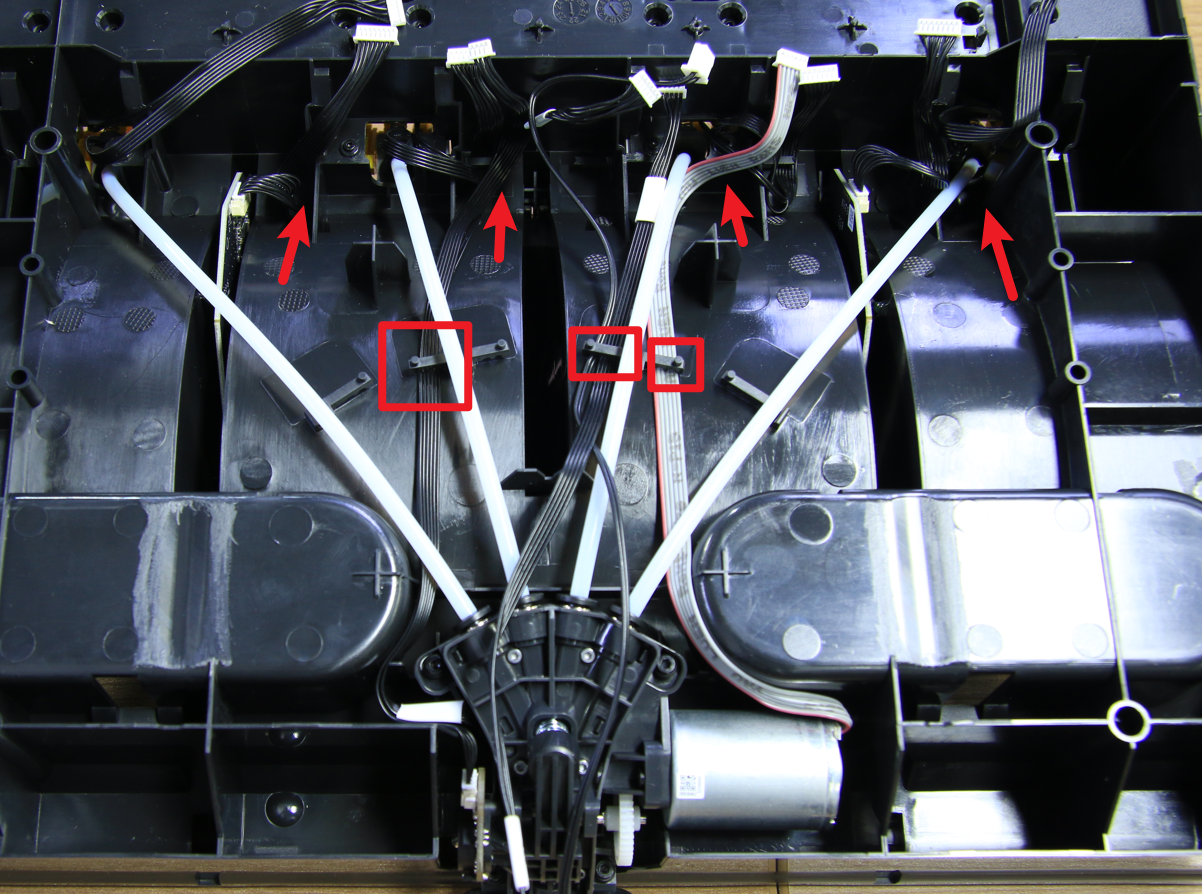
Press the buttons to disconnect the 4 PTFE tube, release the 3 cables from the buckles remove 4 screws, , and then remove the filaments hub.
 |
 |
 |
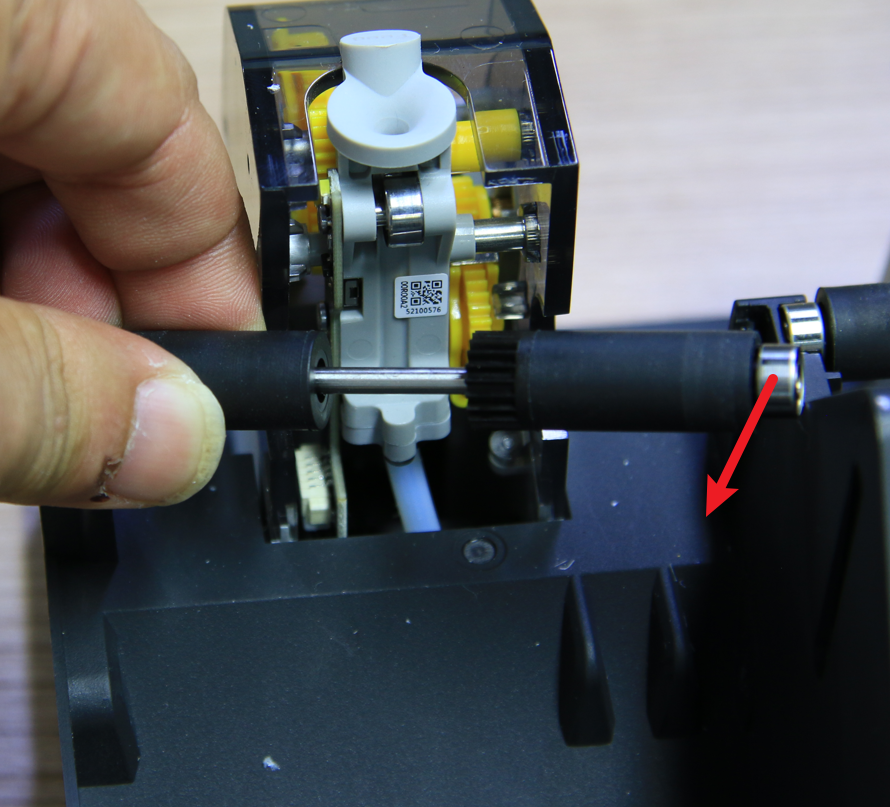
¶ Step 8 - Remove the driving/driven sleeve units
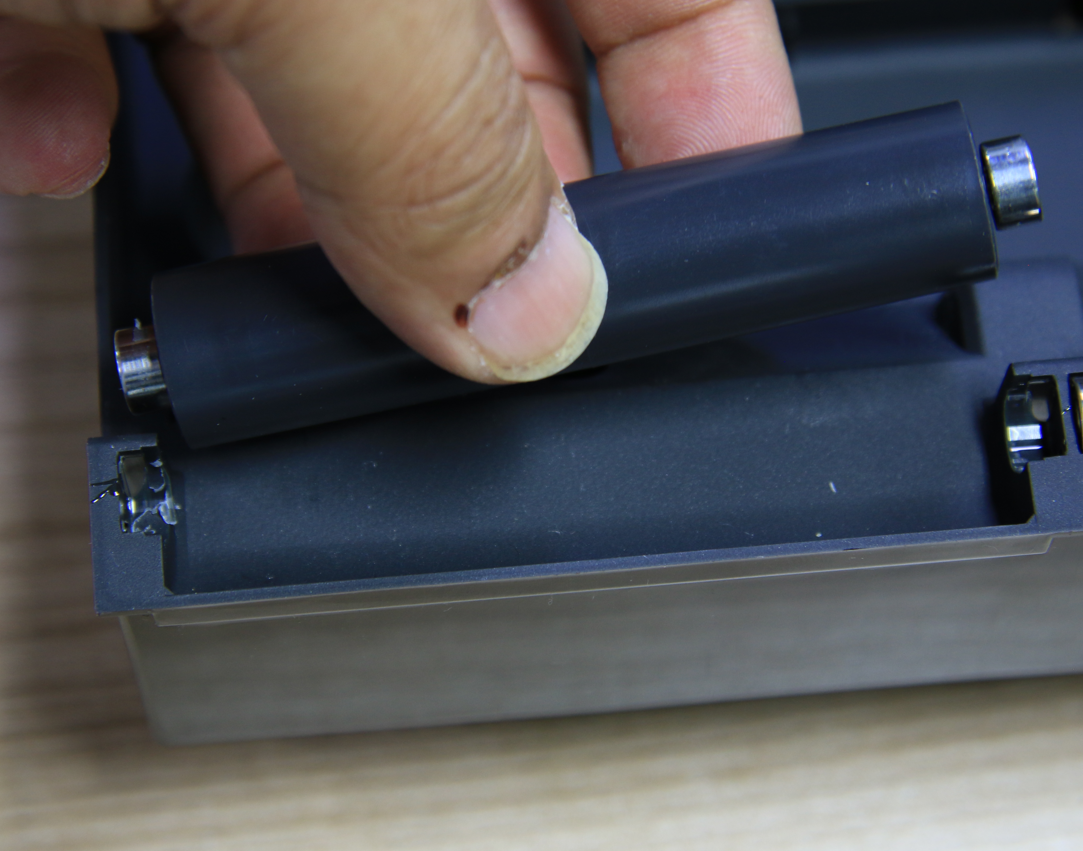
Remove the 4 driven sleeve units and 4 driving sleeve unit.
 |
 |
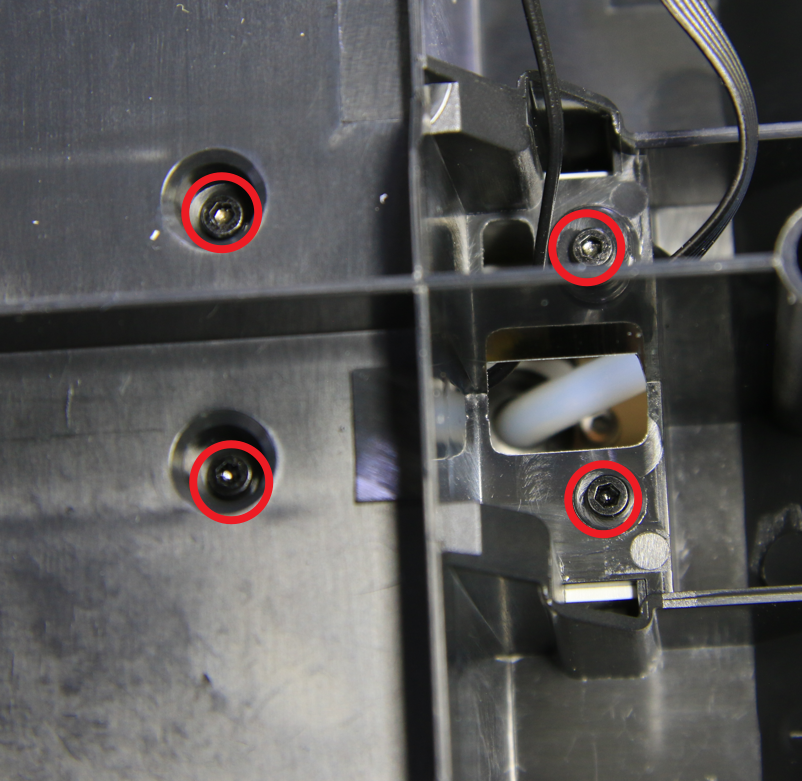
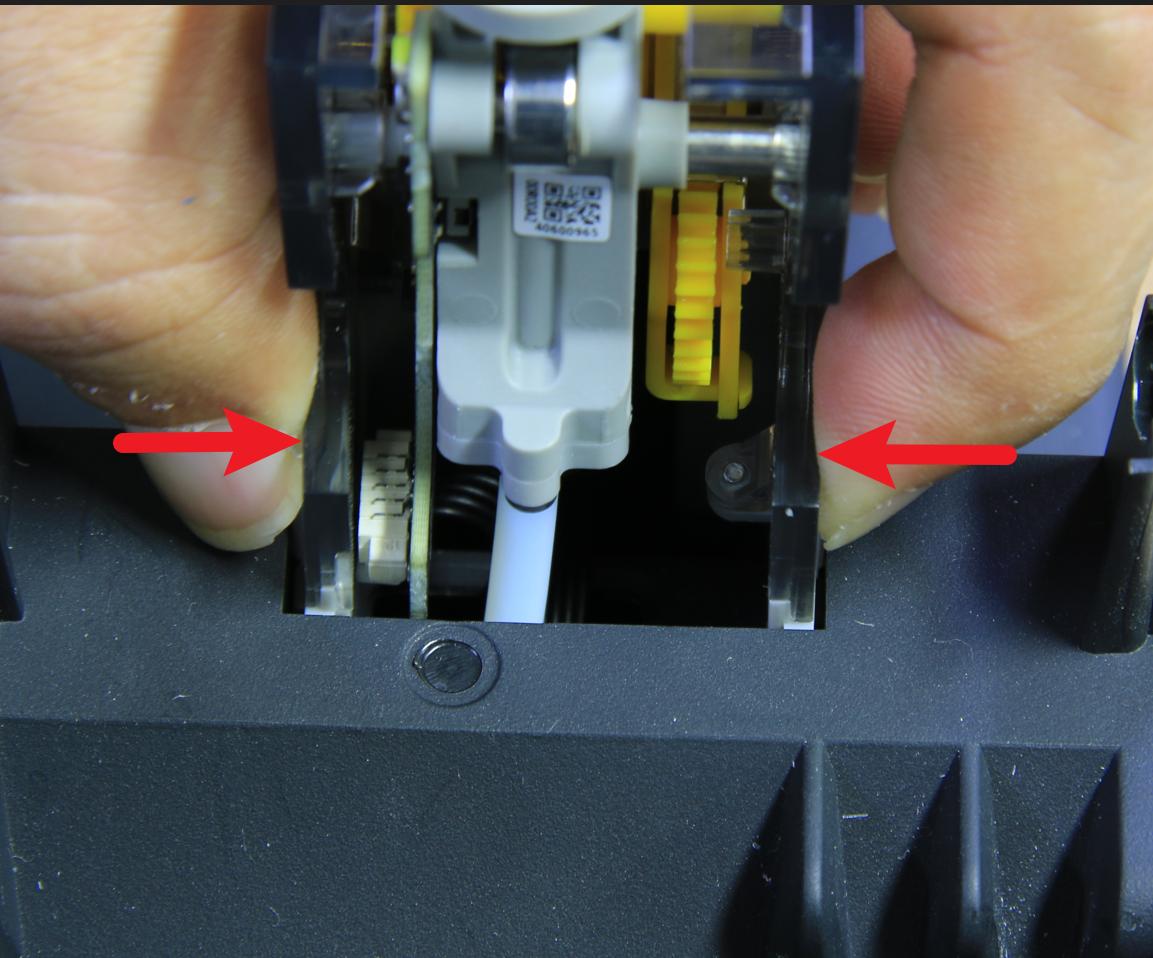
¶ Step 9 - Remove 4 first stage feeders
Remove 4 screws and then press both side of the first stage feeder, remove the first stage feeder. The same operation to remove another 3 first stage feeders.
 |
 |
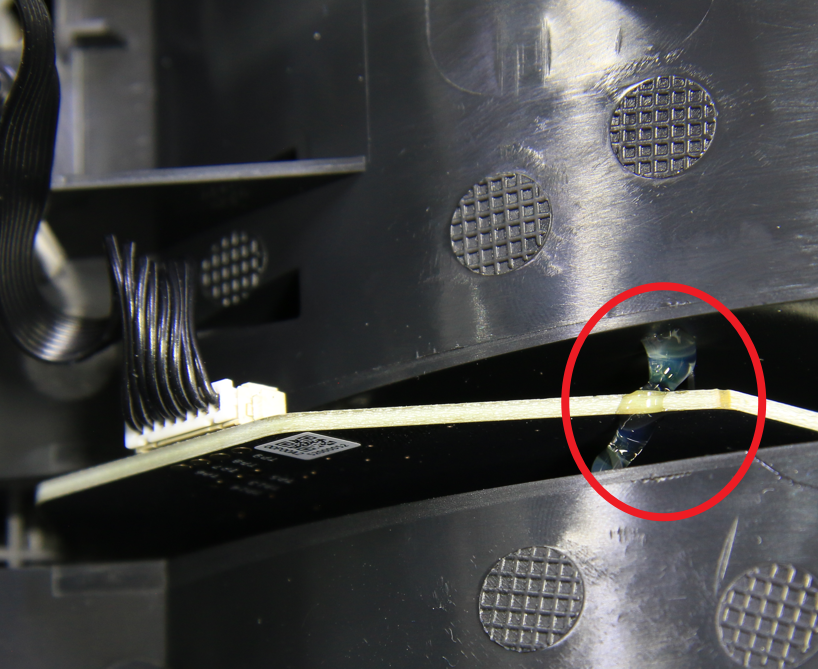
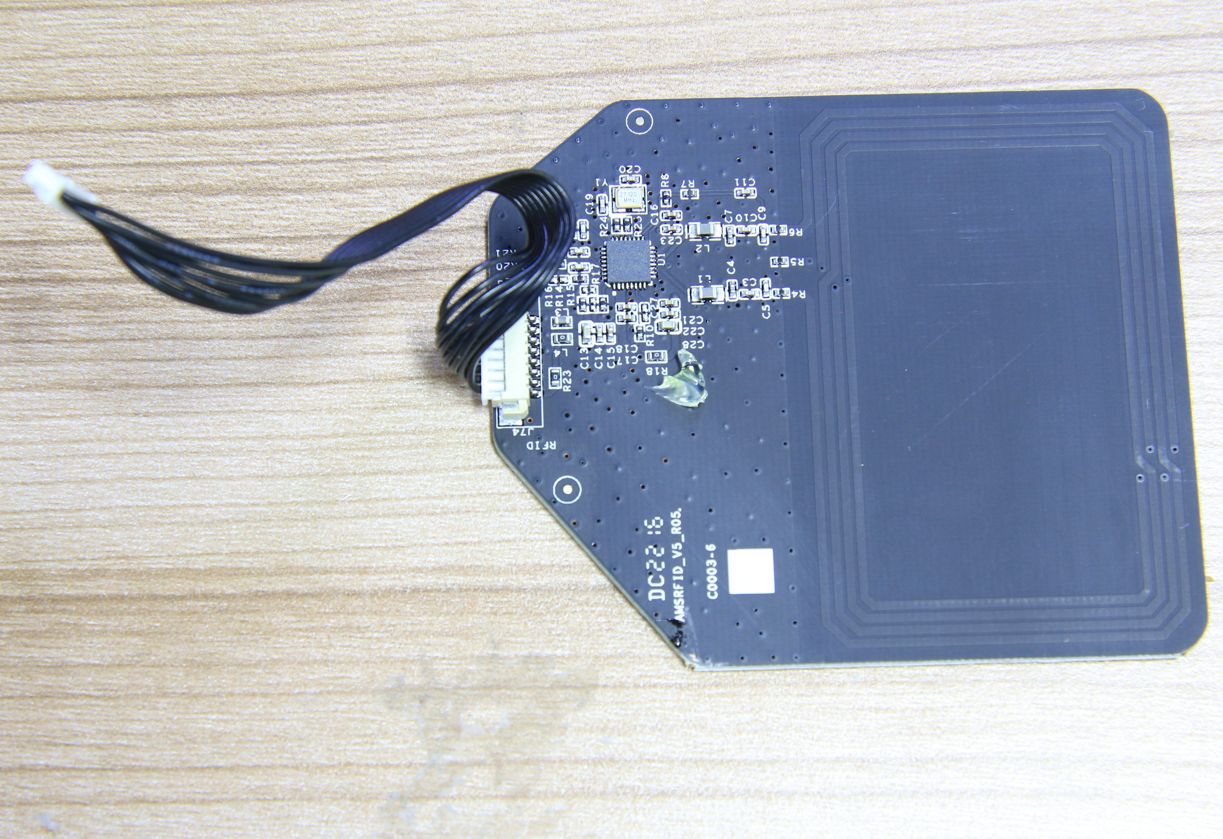
¶ Step 10 - Remove the RFID boards
Use a tweezers to clean up the UV glue on the 2 RFID boards, and the remove the 2 RFID board.
 |
 |
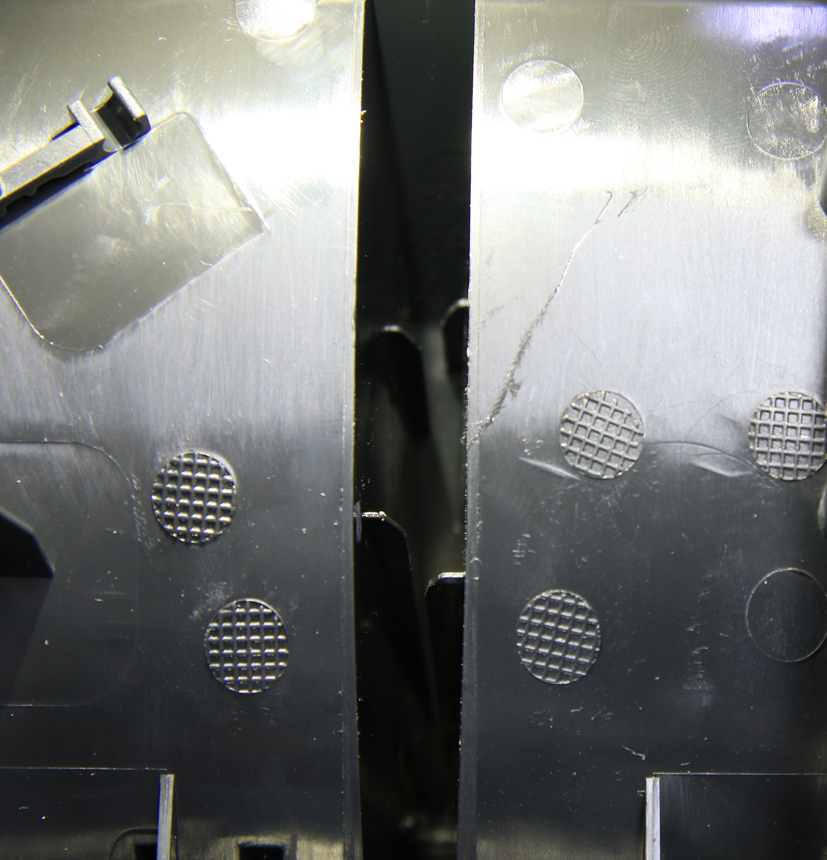
¶ Step 11 - (Assembly) Install RFID board
Install the RFID boards to the 2 slots on the main frame, and apply some glue(UV glue/hot melt glue, etc.) to fix the boards.
 |
 |
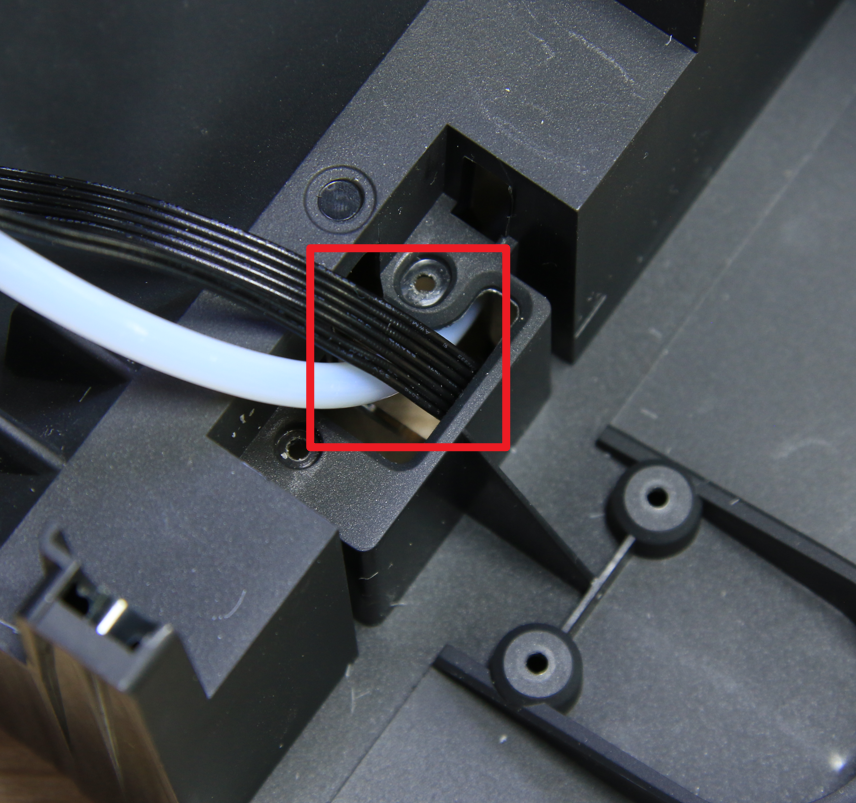
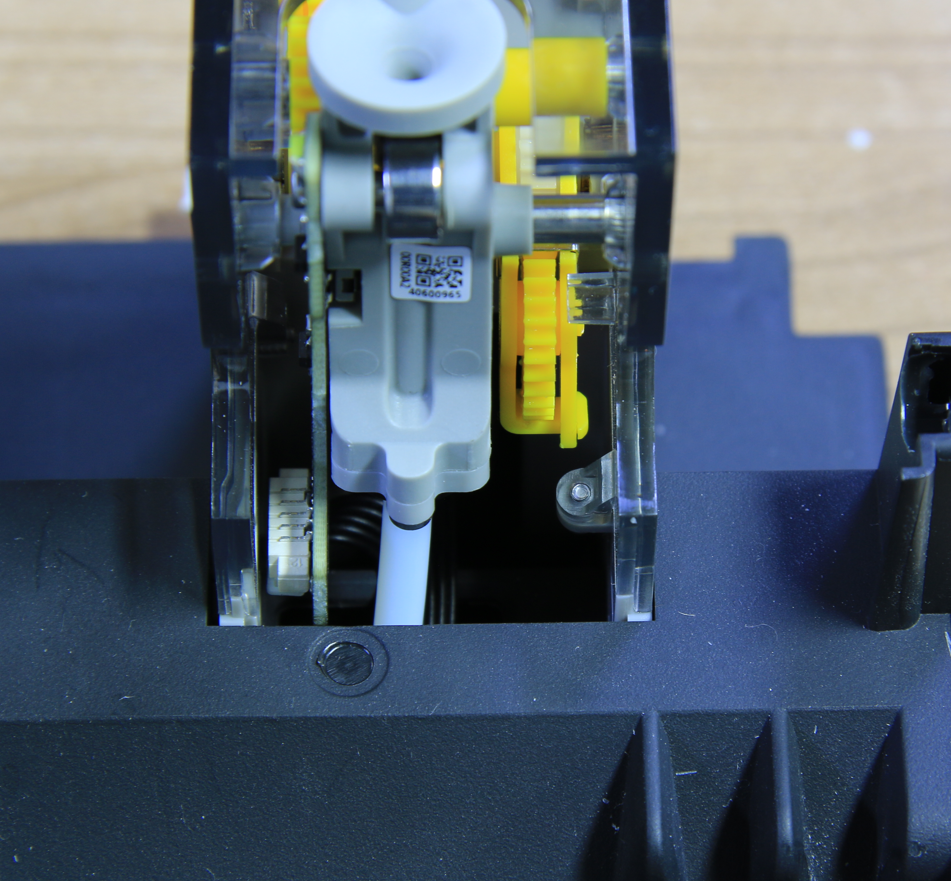
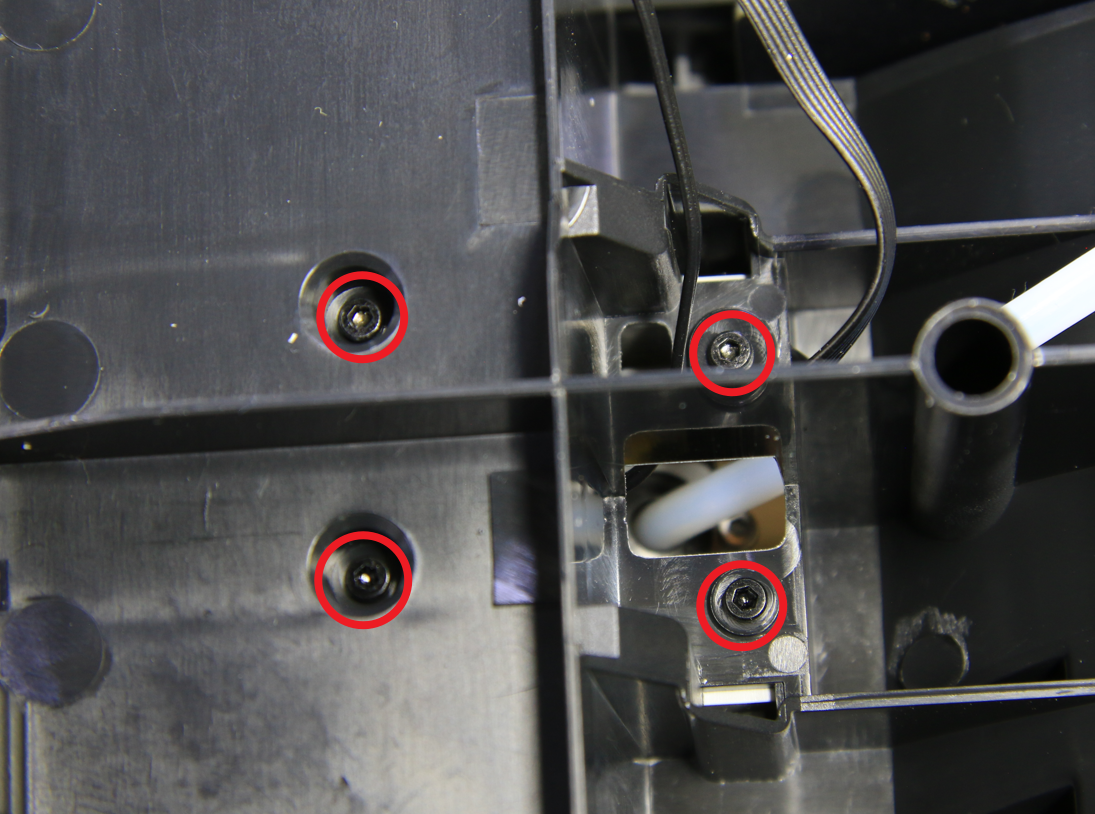
¶ Step 12 - Install the 4 first stage feeders
Pass throuth the PTFE tube and cable, install the first stage feeder to the main frame, lock the feeder with 4 screws. Install the other 3 first stage feeders, but note that the two feeders with longer PTFE tubes are outside.
 |
 |
 |
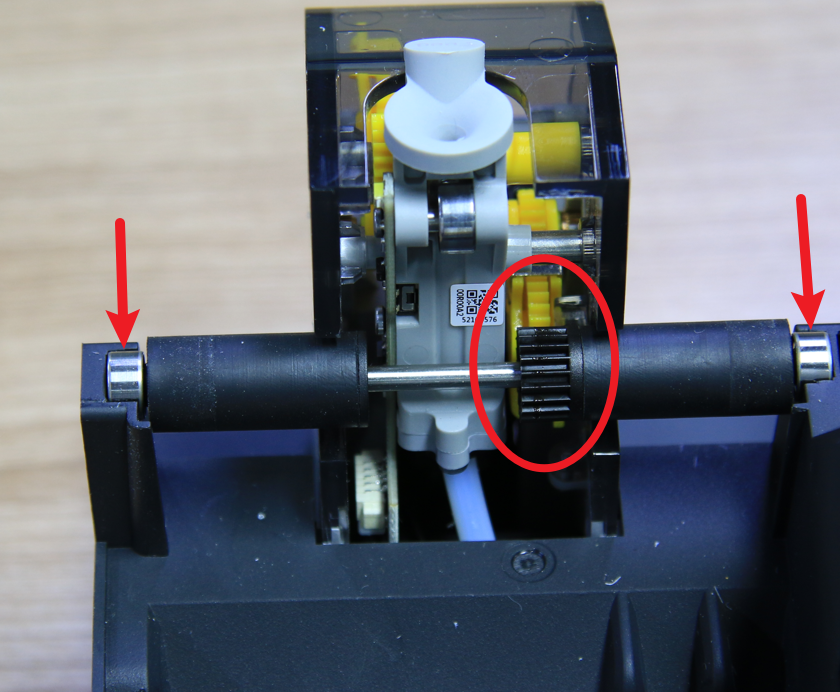
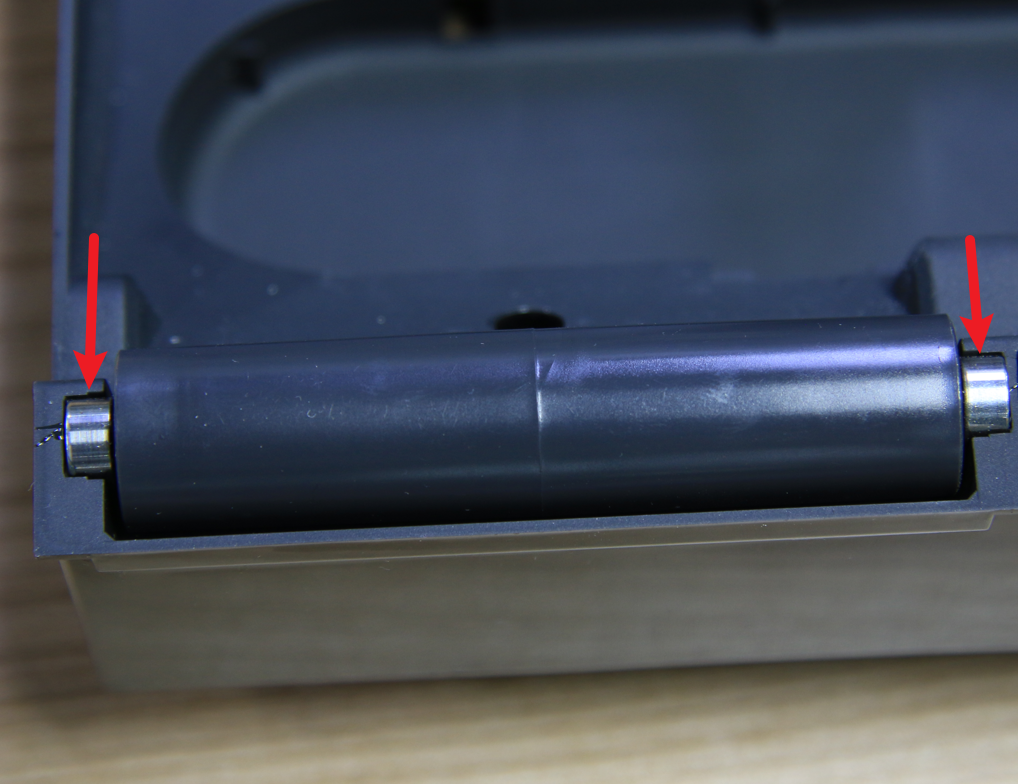
¶ Step 13 - Install the the driving/driven sleeve units
Install the 4 driving driving sleeve units, pay attention to the position of the gears, and then install the 4 driven sleeve units.
 |
 |
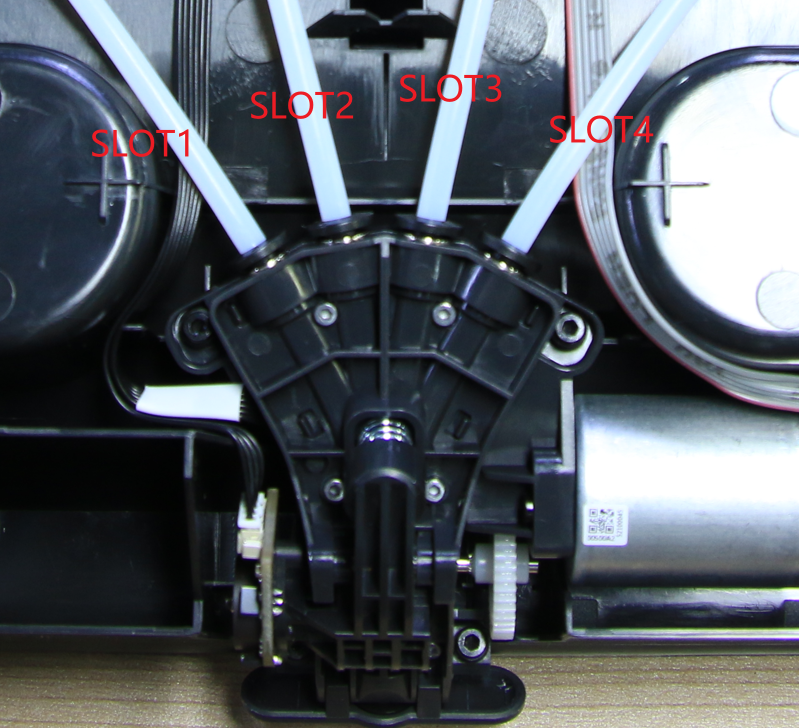
¶ Step 14 - Install the filaments hub
Install the filaments hub to the main frame, lock it with 4 screws, and then connect the 4 PTFE tubes.
 |
 |
¶ Step 15 - Arrange cables
Arrange the cables to the buckles on the main frame.
¶ Step 16 - Install the main board
Install the main board to the middle frame, prefix with the 4 buckles, and then lock in 2 screws.
¶ Step 17 - Connect 11 cables
Connect 11 cables, according to the marks or pictures taken before disconnected.
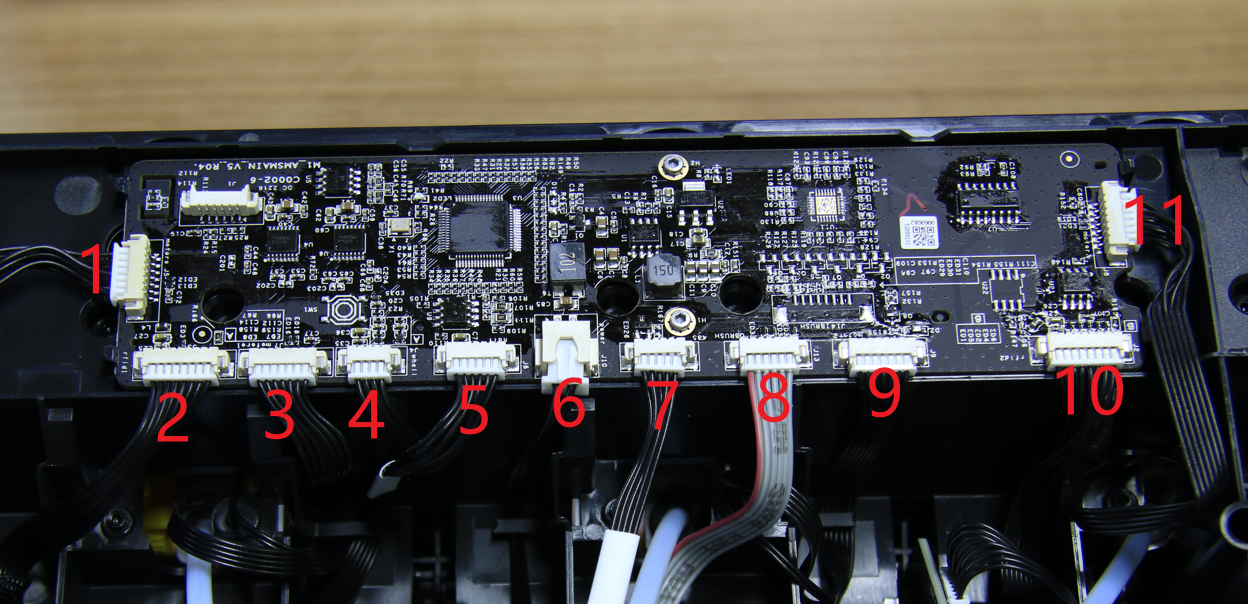
| NO. | Connect Object | N0. | Connect Object | NO. | Connect Object |
|
1 |
The first stage feeder 1 |
5 |
Haul cable to filaments hub |
9 |
The first stage feeder 3 |
|
2 |
RFID board 1 |
6 |
Power cable to power board |
10 |
RFID board 2 |
|
3 |
The first stage feeder 2 |
7 |
Bambu bus cable to power board |
11 |
The first stage feeder 4 |
|
4 |
Speed measurement cable to filaments hub |
8 |
Motor cable to filaments hub |
|
¶ Step 18 - Install the middle frame module
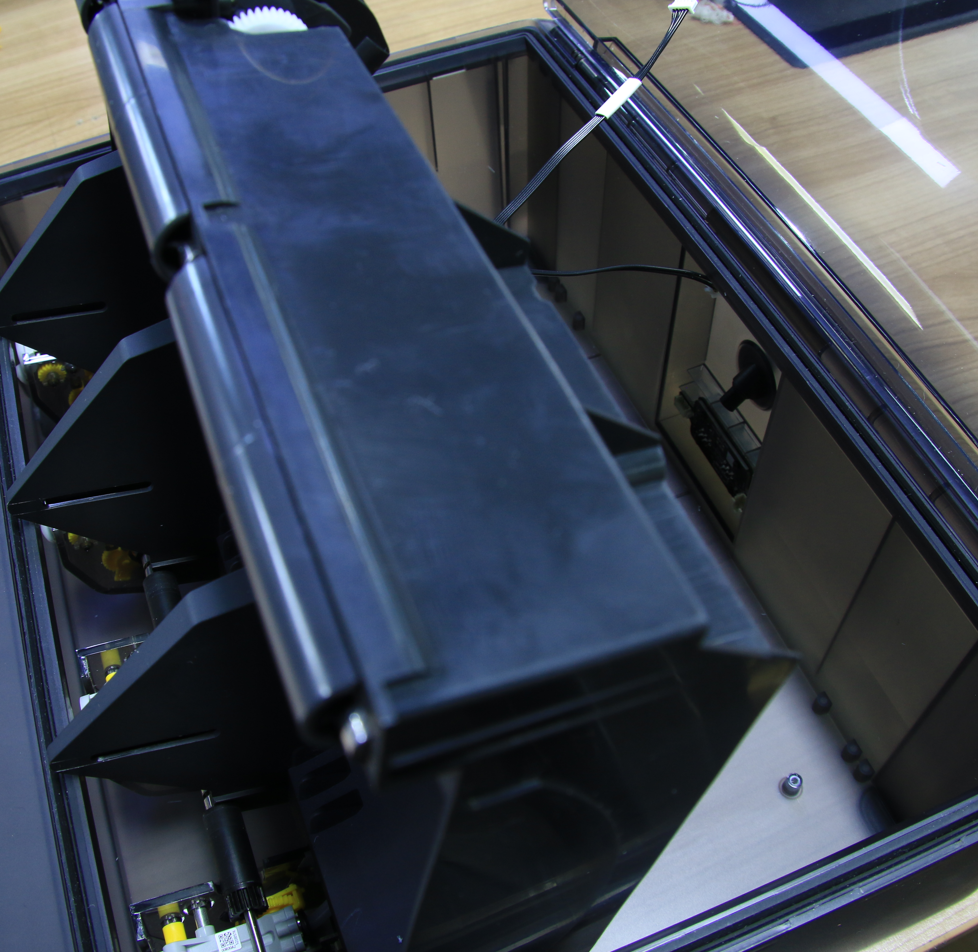
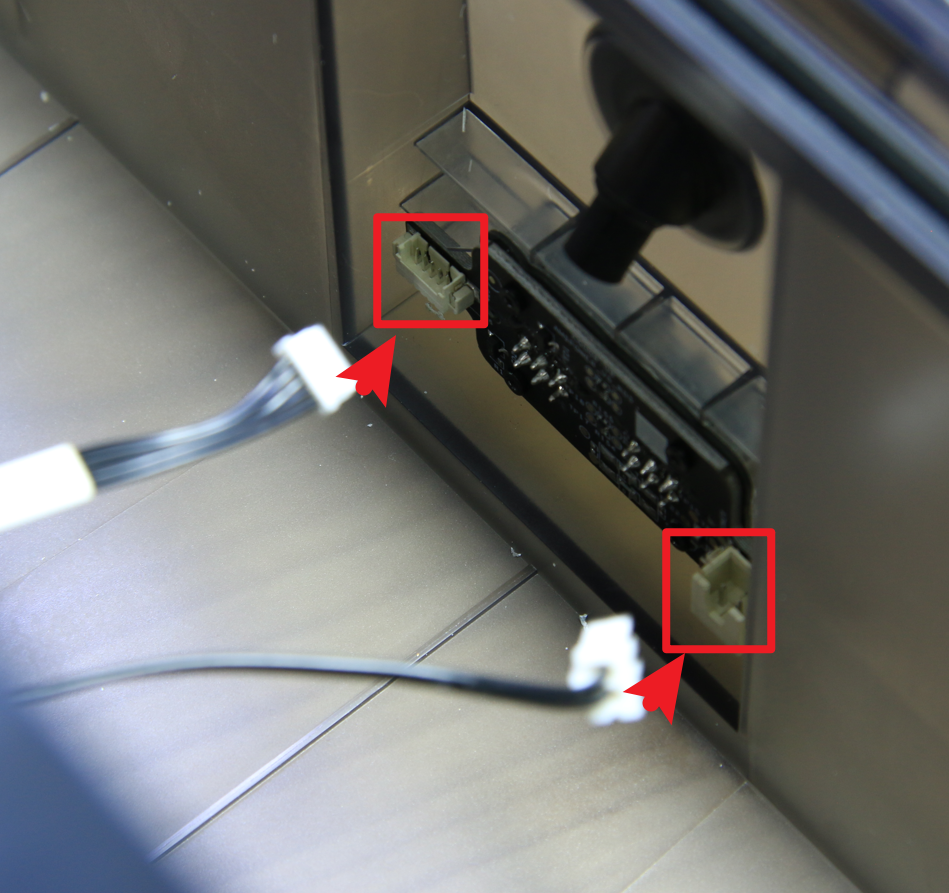
Pleace the middle frame into the AMS shell, connect the bambu bus cable and the power cable.
 |
 |
¶ Step 19 - Lock in 2 screws
Install the middle frame in place, lock in 2 screws.

¶ Step 20 - Install the desiccant
Place in the desiccant, and close the covers.

¶ Step 21 - Connect the PTFE tube
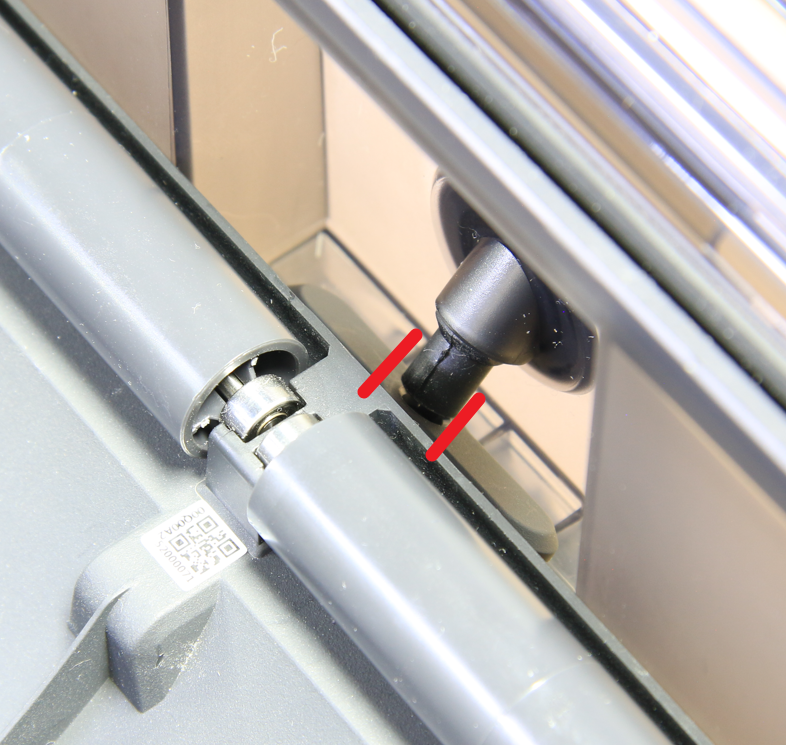
Check the tube bracket, and insert the PTFE tube. Try to pull it out to make sure that the tube is well connected.
 |
.png) |
¶ How to verify completion/success
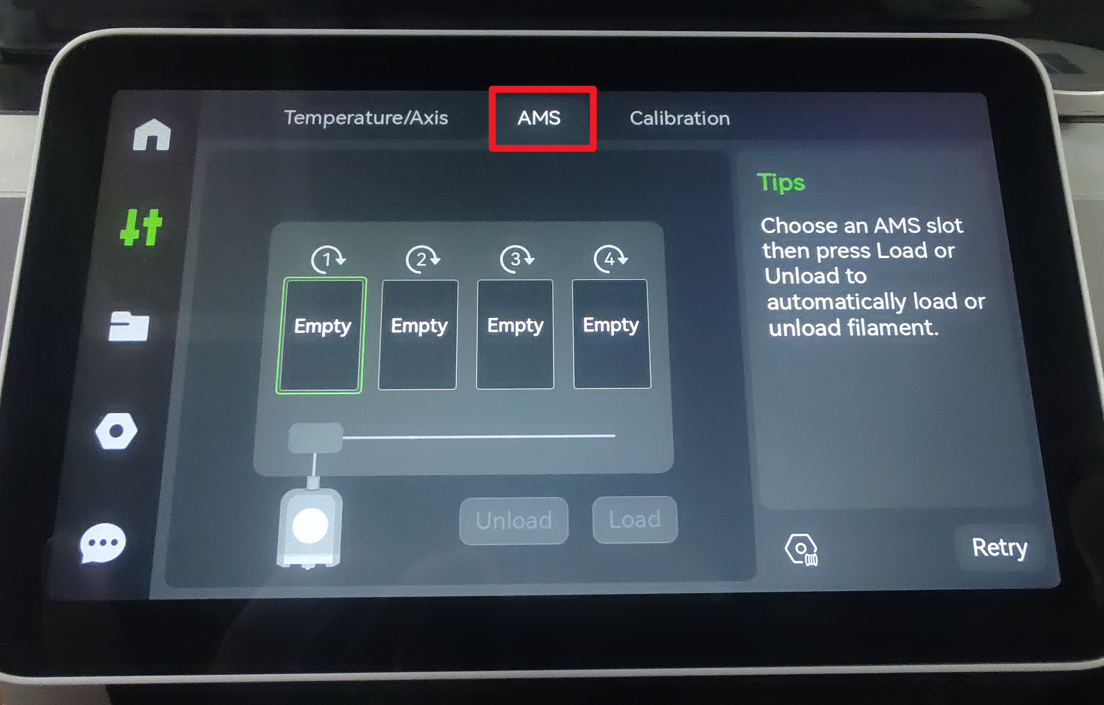
1. Connect the AMS to printer and power on, confirm that the AMS menu is on.
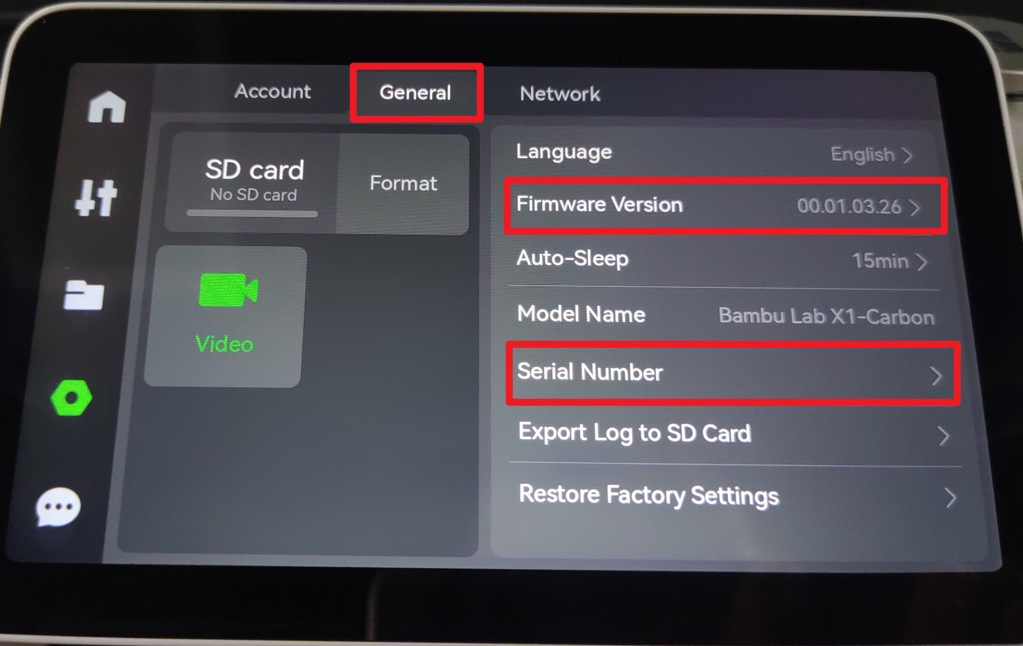
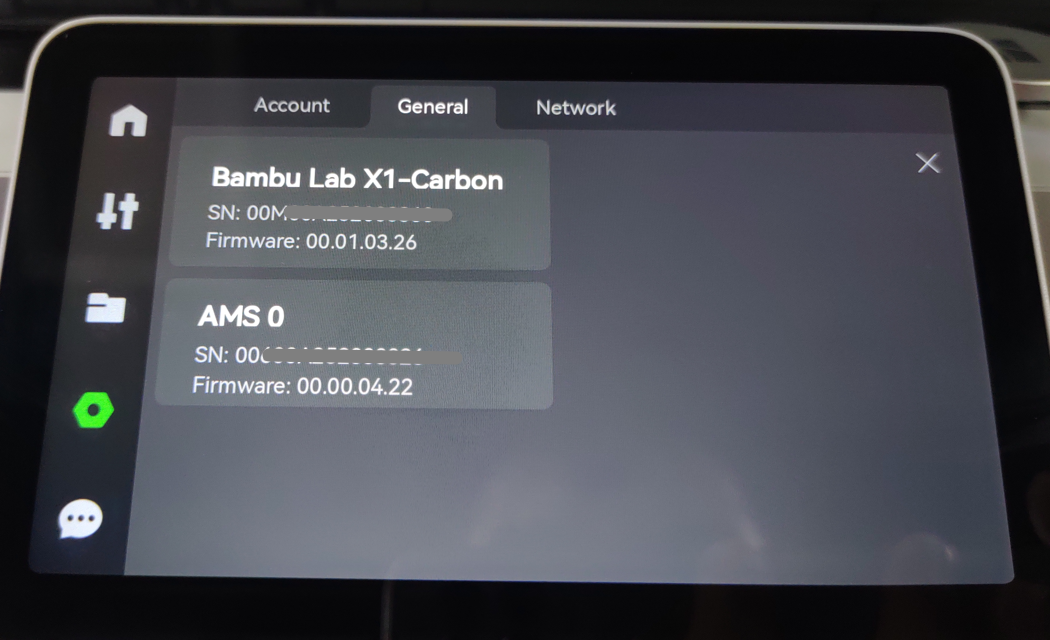
2. Check the SN and firmware, the FW and SN should be showed after entry, update the FW if new FW found.
 |
 |
3. Load filaments to the 4 slots, and confirm that every slot works fine. If you load Bambu Lab official filaments, the filaments' information will be recognized.
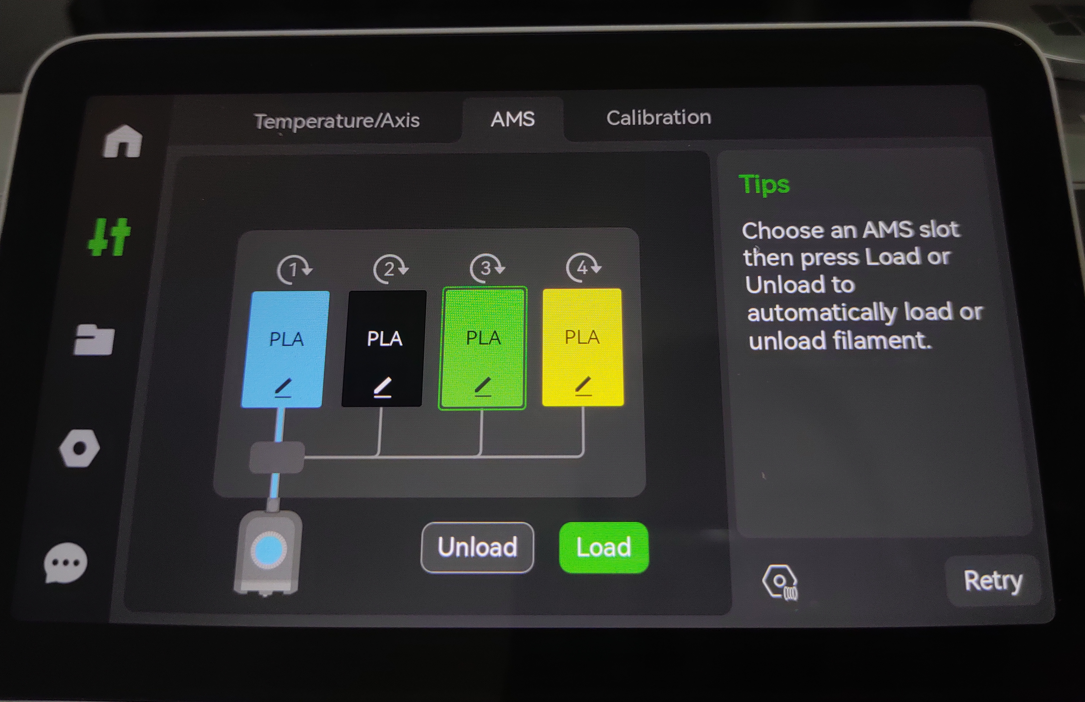
If your AMS is not like this, please check the connections. If it still malfunctions, contact the Bambu Lab service team for further assistance.