¶ Phenomenon:
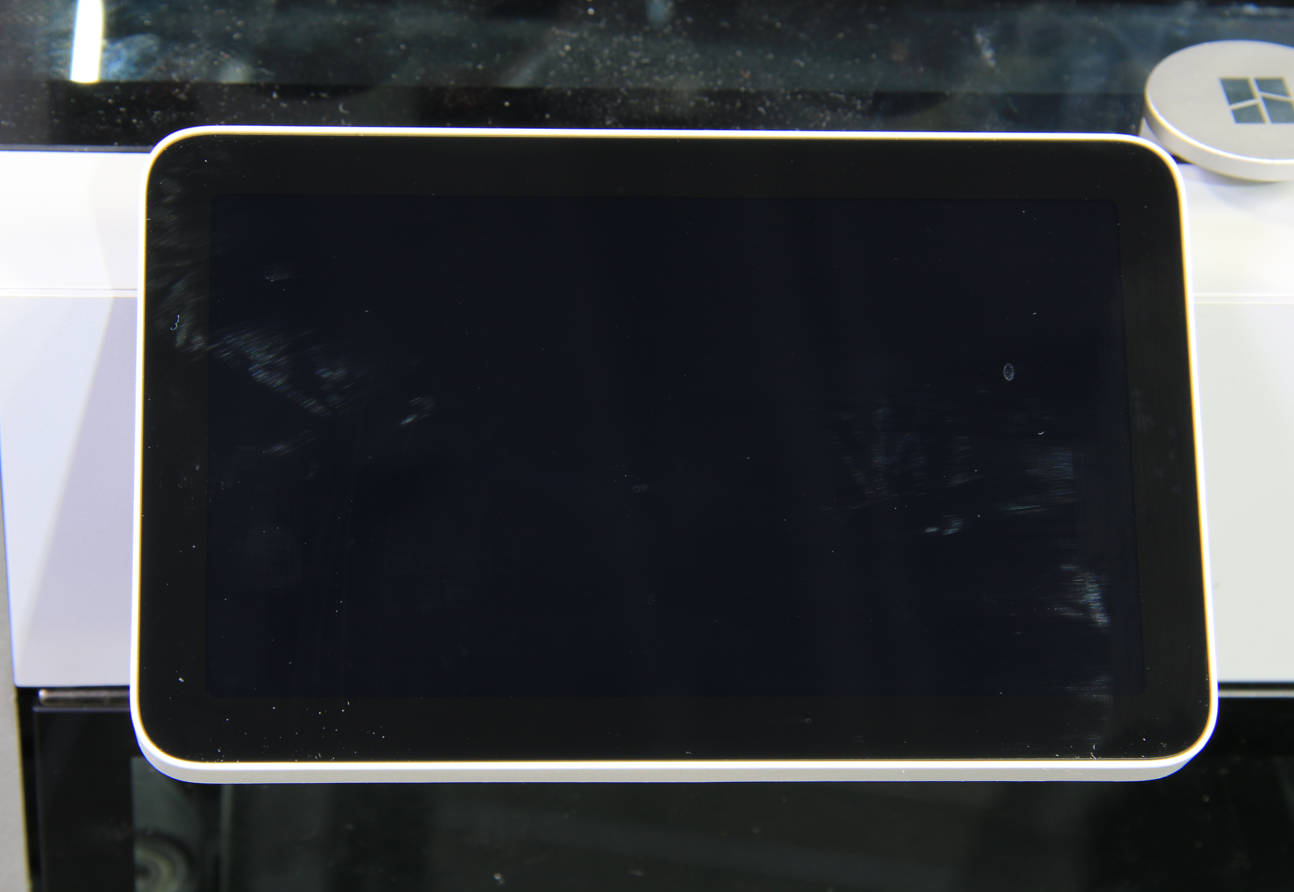
1. Turn on the printer, the LCD display is black, and the LCD backlight is not on.
Note: The image in this case is of the screen of the X1 series printer.
2、Turn on the printer, the LCD display is black, but the LCD backlight is on.
Note: The image in this case is of the screen of the P1 series printer.

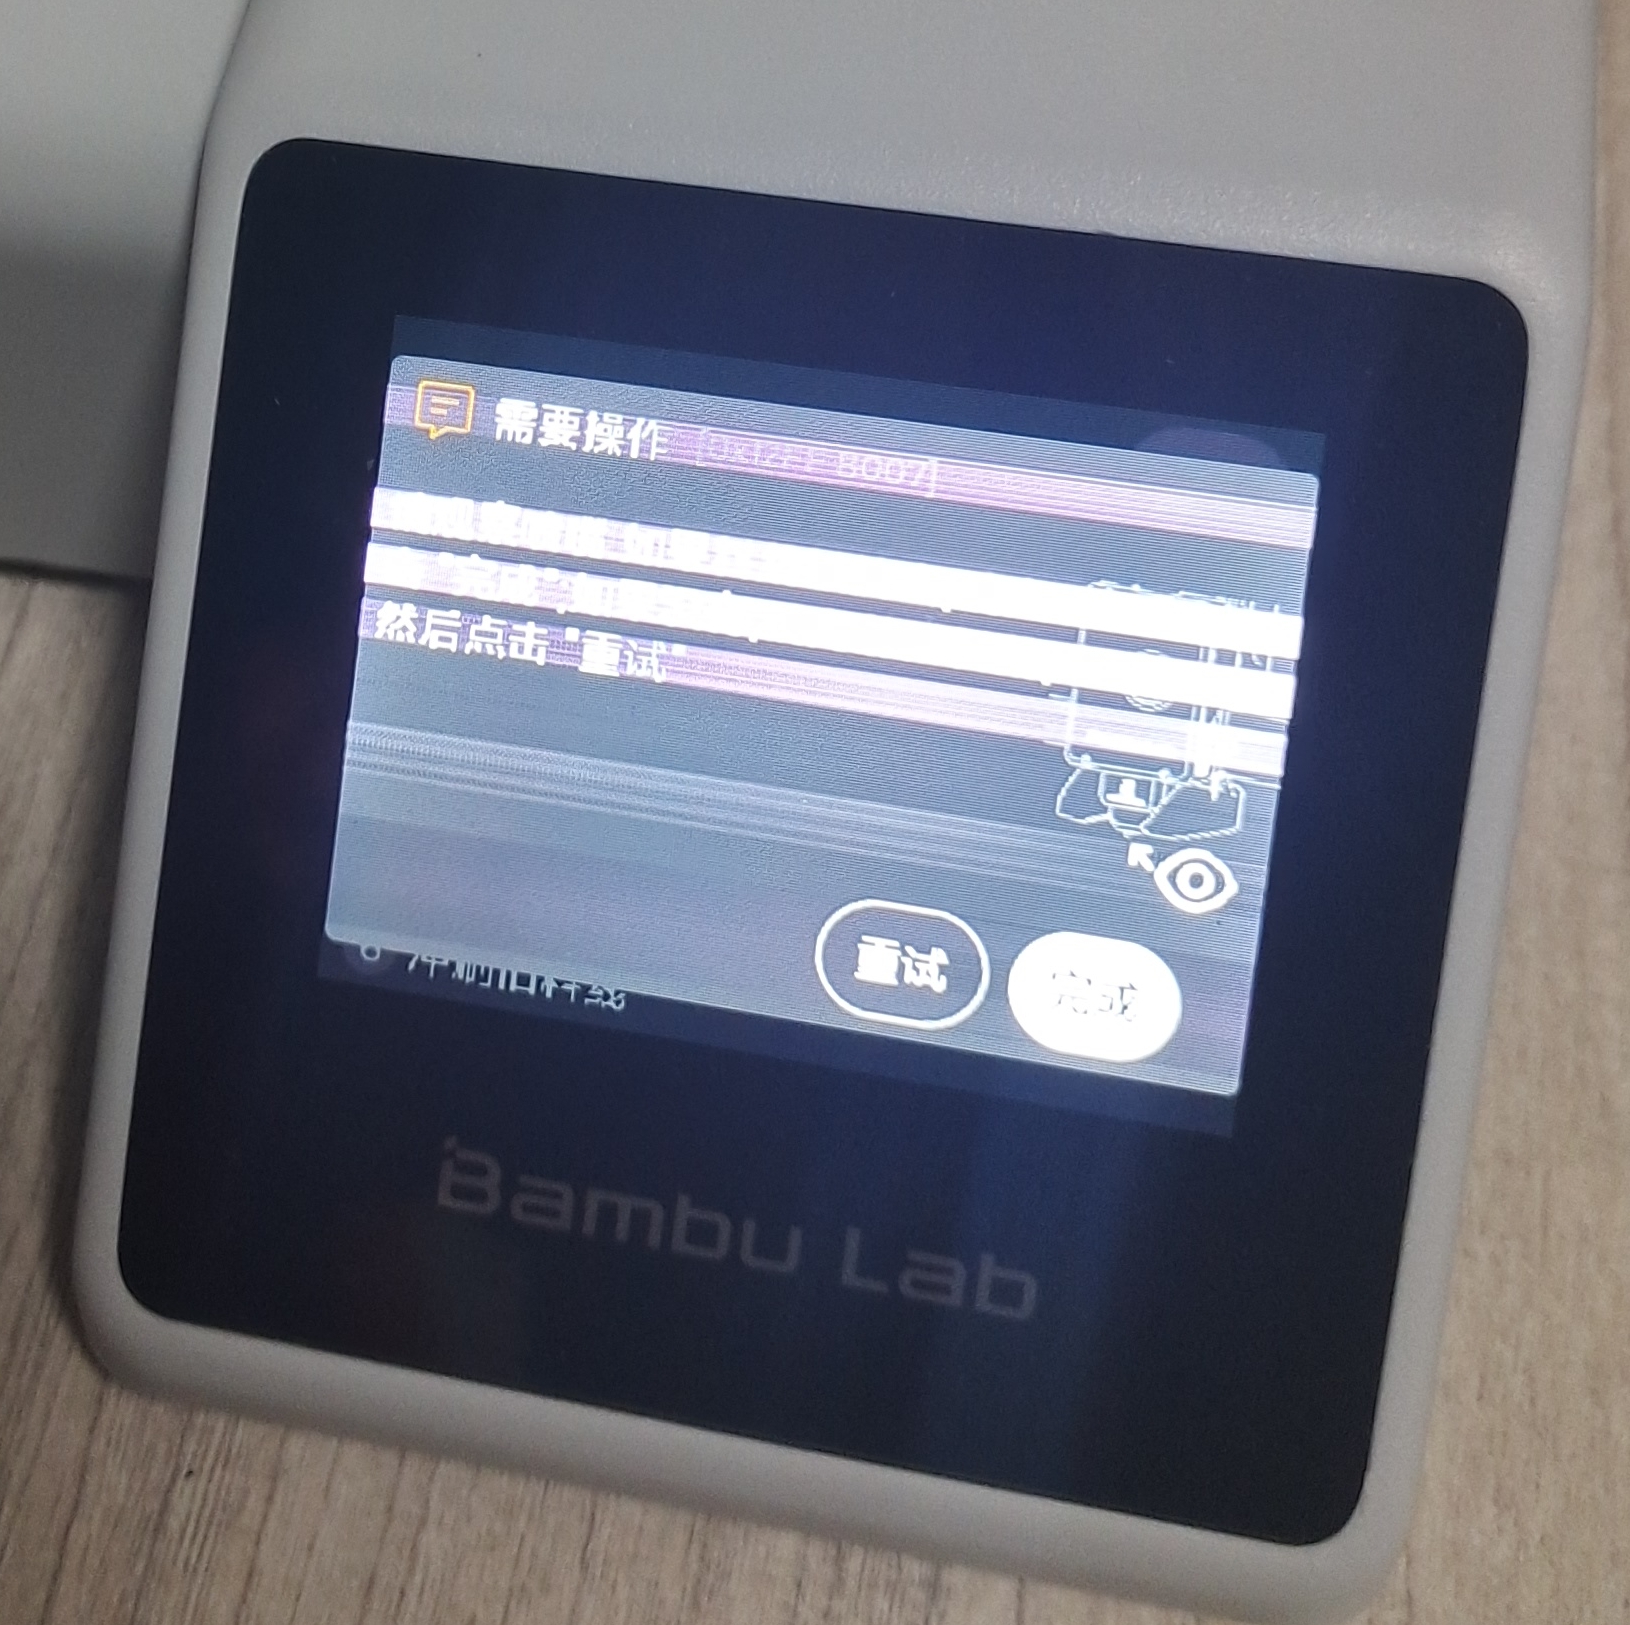
3、Turn on the printer and the display screen flickers or stripes appear.
Note: The image in this case is of the screen of the A1 mini printer.
¶ Causes & Solutions
¶ Black screen without backlight:
1. The power supply of the AP board is abnormal, and the power cable of the AP board needs to be checked.
2. The AP board is damaged, and the AP board needs to be replaced.
3. The chamber LED cable is short-circuited, causing the AP board to start up failed.
4. The LCD screen is not connected correctly, and you need to reconnect the LCD screen.
5. The FPC connector on the AP board is in poor contact and needs to be reconnected.
6. The FPC that connects the LCD screen and the AP board is damaged, and the FPC needs to be replaced.
7. The LCD display is damaged and needs to be replaced.
¶ Black screen with backlight on, flickers or stripes appear:
1. The LCD screen is not connected correctly, and you need to reconnect the LCD screen.
2. The FPC connector on the AP board is in poor contact and needs to be reconnected.
3. The FPC that connects the LCD screen and the AP board is damaged, and the FPC needs to be replaced.
4. The LCD display is damaged and needs to be replaced.
¶ Safety warning and Machine state before starting operation
When disassembling and assembling, it is necessary to confirm that the printer is powered OFF.
¶ Tools needed
- H2.0 Allen key
- Tweezers
- Hair dryer
¶ Troubleshooting
¶ 1. Troubleshoot the MicroSD card
Precautions: Before doing the following, be sure to turn off the printer's power
Before troubleshooting the MicroSD card, make sure that both the board and the power supply are properly powered.
- Switch off the printer and carefully remove the MicroSD card from the printer.
- Restart the printer and observe if the display lights up properly. If the display lights up normally after the MicroSD card is removed, reinsert the MicroSD card into the printer with the power off and power it on again to verify that the previous black screen problem was not caused by a faulty MicroSD card.

¶ 2. Check the status of the AP board, and select the solution according to the status
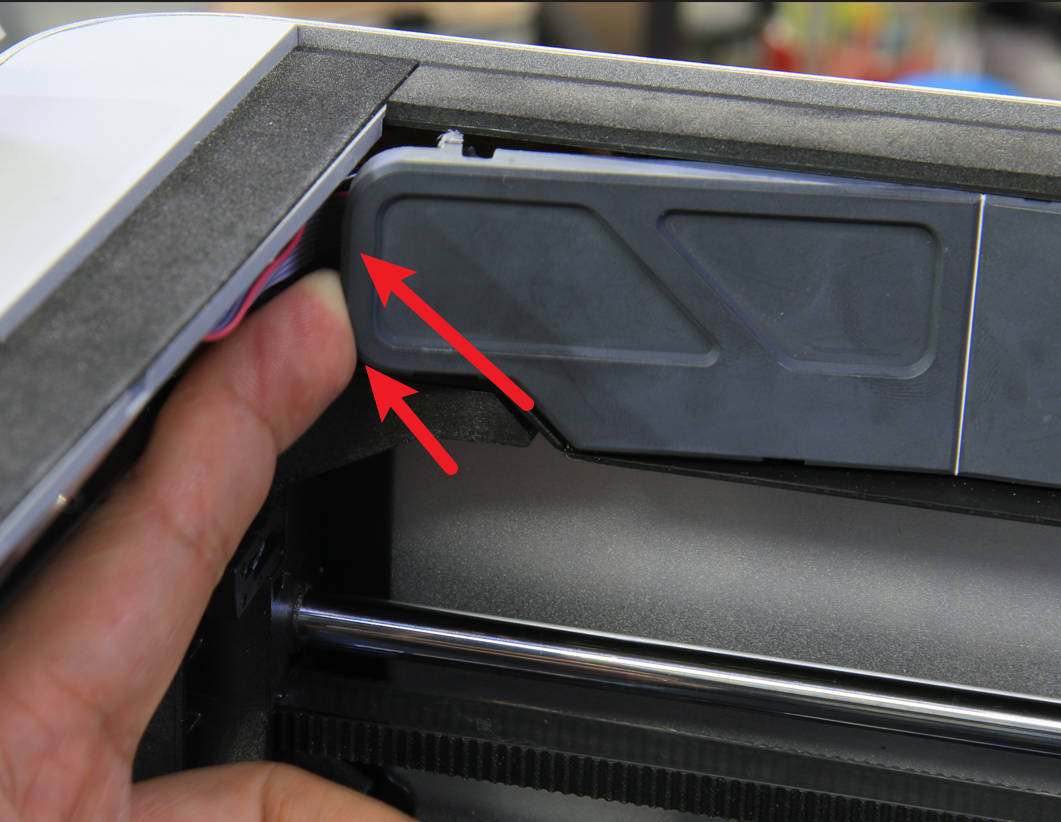
Keep the printer turned on, open the AP board cover, and confirm the status of the AP board according to the 2 prompt lights on the AP board.
¶ Scenario 1: AP board works normally
The power indicator (steady on) and the status indicator (blinking) on the AP board are in a normal state.
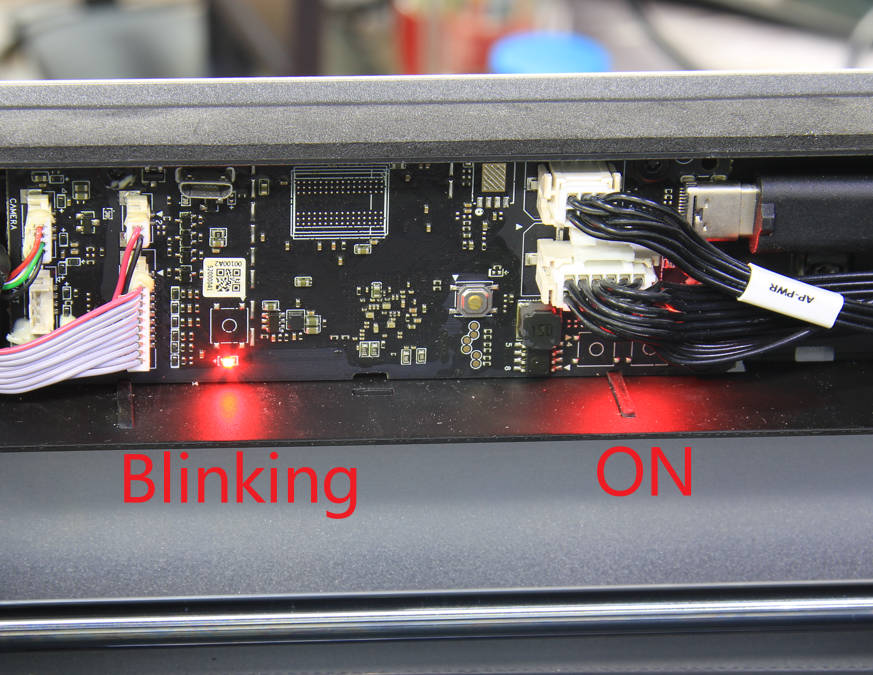
Solution: There is no abnormality in the AP board, and you need to continue to check the LCD screen and the FPC.
¶ Scenario 2: AP board is not powered normally
The power indicator and status indicator on the AP board are both off.
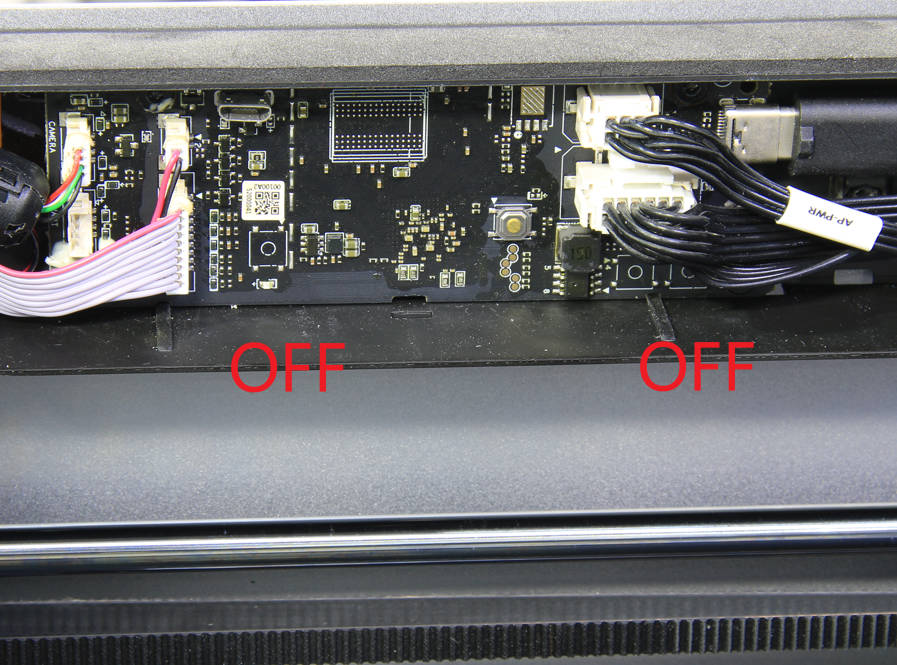
Solution: Check the AP board power cable
Steps:
1. Turn off the printer, unplug the AP board power cable, and reconnect it in place, then turn on the printer, and check the indicator LED lights status. If they do not return to normal, continue to check the connection of the power cable on the MC board ;
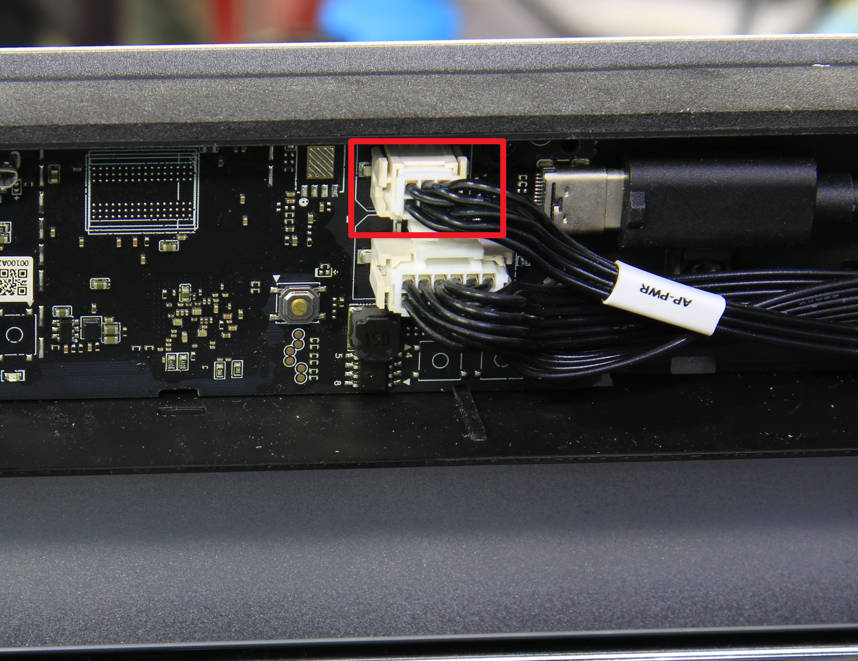
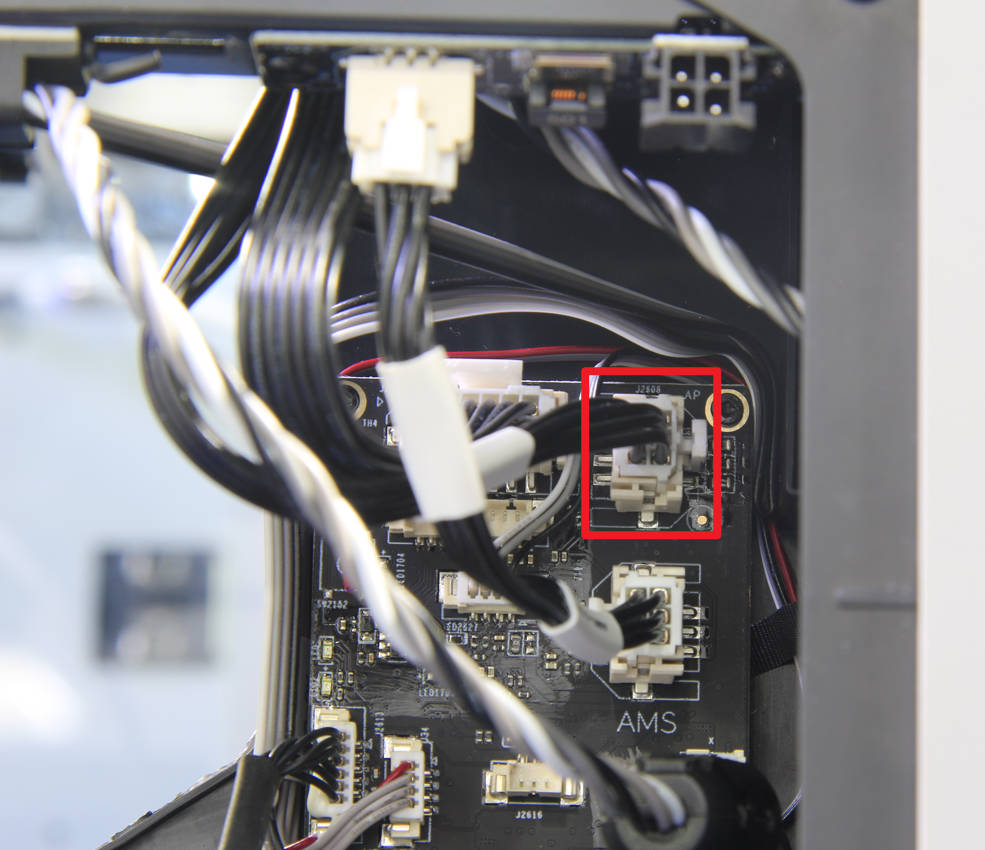
2. Disconnect the power of the printer, remove the rear cover, unplug the AP board power cable on the MC board, and reconnect it in place, then turn on the printer, and check the status of the AP board indicator LED lights again. If they do not return to normal, contact the service team for further instructions.
¶ Scenario 3: The AP board is powered normally, but the status is abnormal
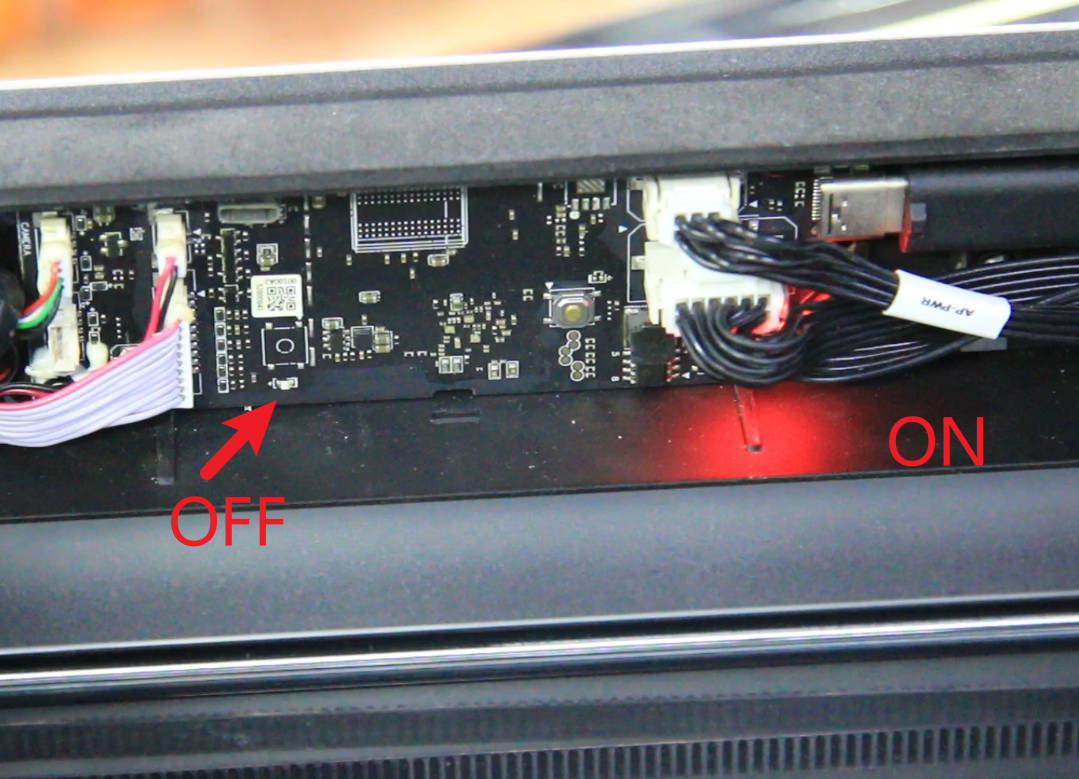
The power indicator (steady on) on the AP motherboard is normal, but the status indicator is off.
Solution:
1. The chamber LED cable is short-circuited, disconnect the LED cable, and restart the printer. If the AP board can start normally, it means that the LED light cable is short-circuited, and the chamber LED needs to be replaced.
2. The AP board is faulty. If restarting cannot solve the problem, the AP board needs to be replaced.
Steps:
1. Please click Replace the chamber LED to learn the specific procedure for replacing the chamber LED.
2. Please click Replacing the AP board to learn the specific procedure for replacing the AP board.
¶ 3. Reinstall the LCD display (Check the appearance of the FPC at the same time)
After it has been confirmed that the AP board is working normally, you can try to reconnect the LCD screen.
Please click Replacing the LCD high-resolution screen to understand the removal and installation of the LCD screen, and then power it on to confirm whether the problem has been solved. If not, go to the next step to check the status of the FPC connector on the AP board.
Precautions:
1. Turn off the printer before disconnecting/connecting the FPC cable;
2. Be sure to unlock the display screen correctly;
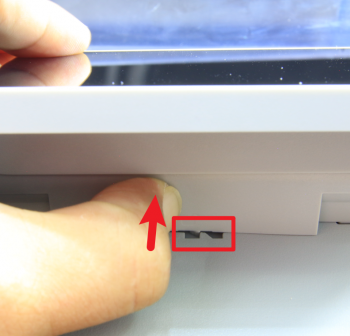
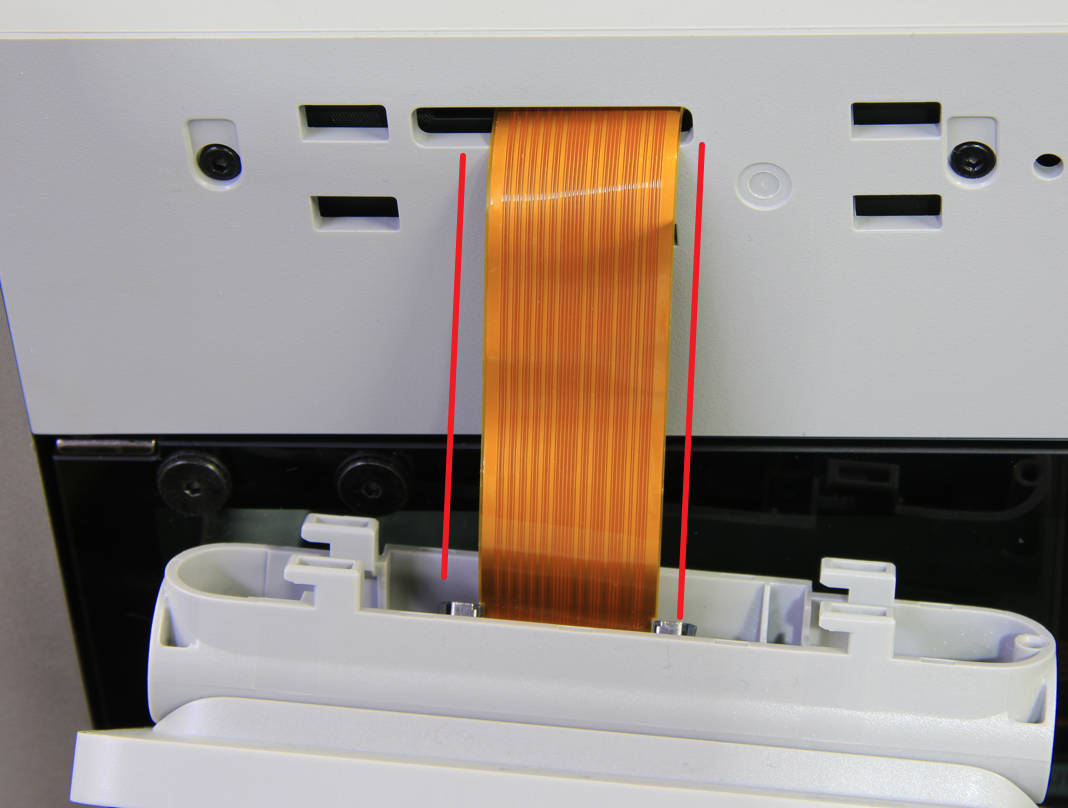
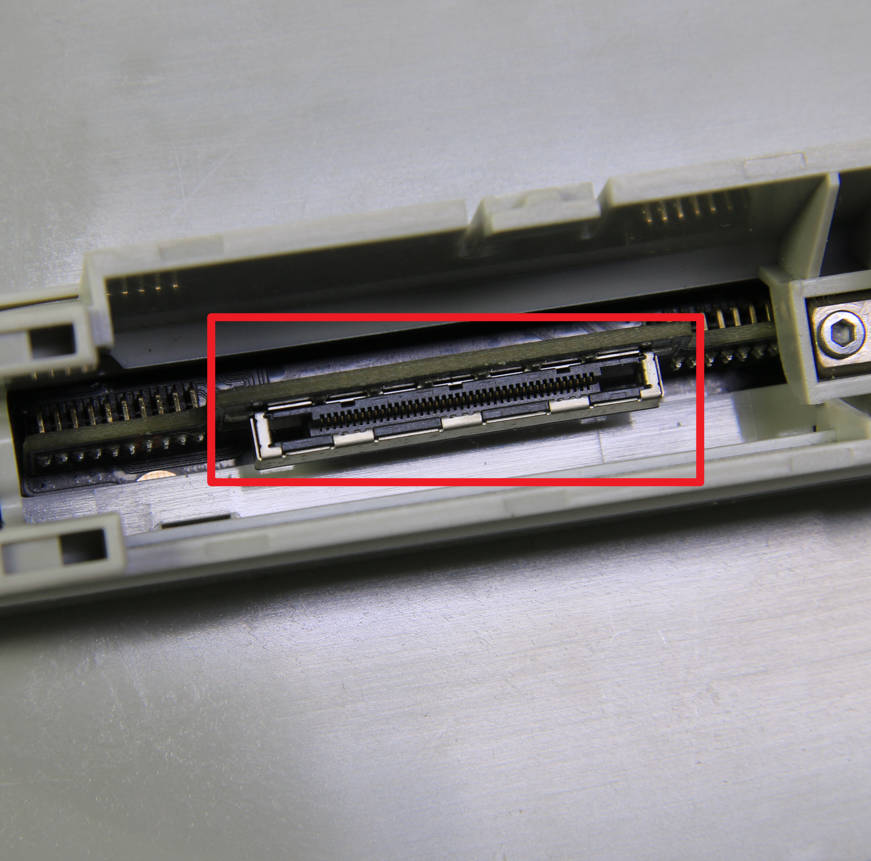
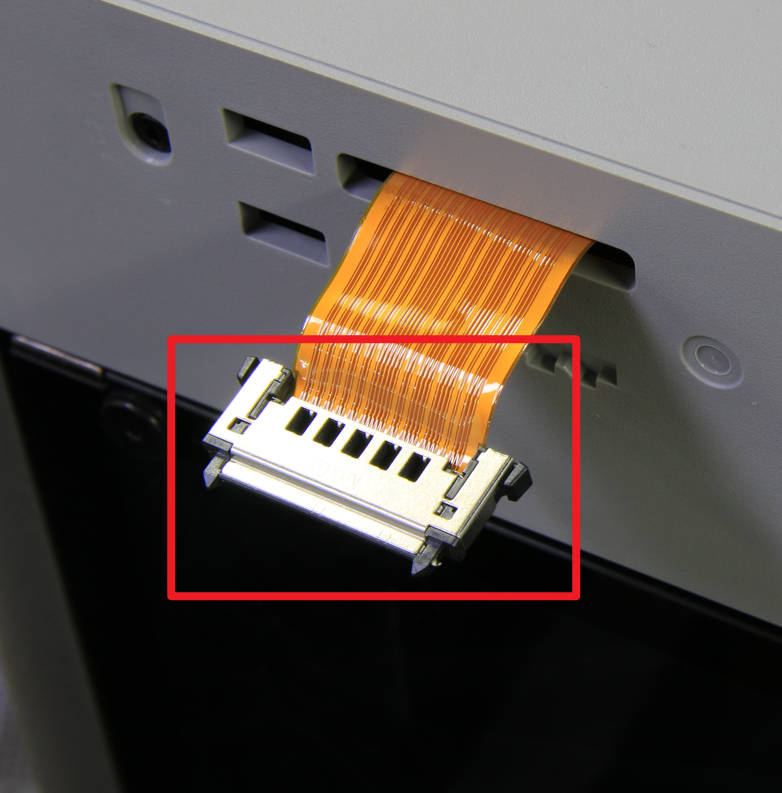
3. Before reinstalling, please check whether the interface and pins are abnormal and whether the FPC cable is damaged. If the cable is damaged, please click Replacing the FPC cable from AP to LCD display to get the replacement procedure of the FPC cable.
 |
 |
 |
¶ 4. Check the status of the FPC cable connector on the AP board
If reinstalling the LCD display does not solve the problem, and no abnormal damage to the FPC cable and interface is found, please turn off the power and refer to Replacing the AP board to check the connection status of the FPC on the AP board. If it is loose or tilted, please reconnect it.
Note: The FPC connection here is reinforced with UV glue. If you need to reconnect the FPC, be sure to use a hair dryer to heat the UV glue to help the removal.
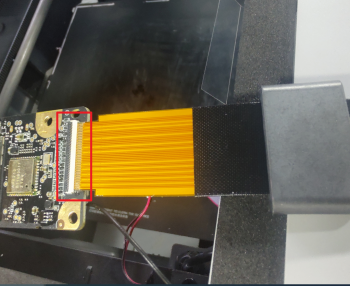
After reconnecting, you can turn the power ON of the printer without locking the screws of the AP board to check whether the problem has been solved. If it cannot be solved, please contact the service team for further instructions.
¶ Others Disassembly & assembly of the rear cover
¶ Step 1 - Remove the rear cover screws
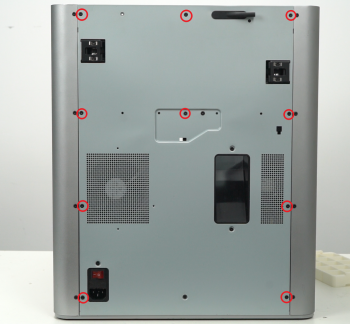
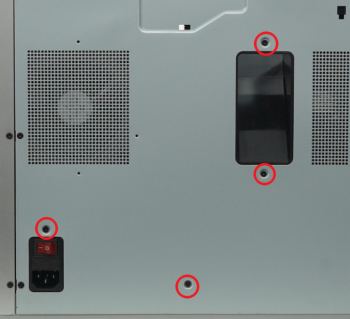
NOTE: There are a lot of screws involved in this procedure. Please label them and group them in separate sections to avoid issues.
Remove the 10 screws and 4 screws from the rear cover shown in the picture. There are 2 types of screws, so keep them separate and remember which ones go where.
 |
 |
¶ Step 2 - Remove the rear cover
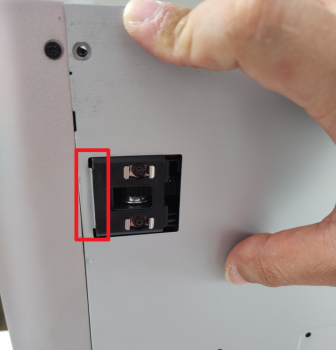
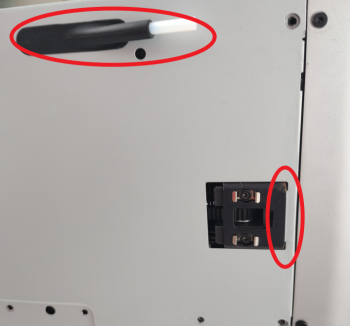
Remove the rear cover by unlocking the left side belt tension port first, and then the right side one to avoid getting stuck.
 |
 |
¶ Step 3 - Install the rear cover
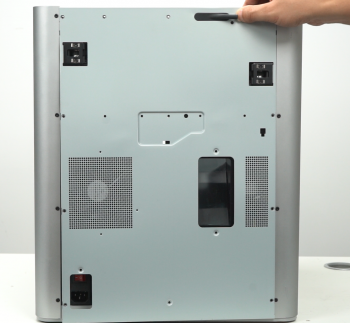
Pass the PTFE tube through the tube bracket, install first the right side belt tension port, and then the left side to install the rear cover.
 |
 |
¶ Step 4 - Install the 10+4 screws
Install the 10 + 4 screws (see picture).
 |
 |