¶ What is the Z motor
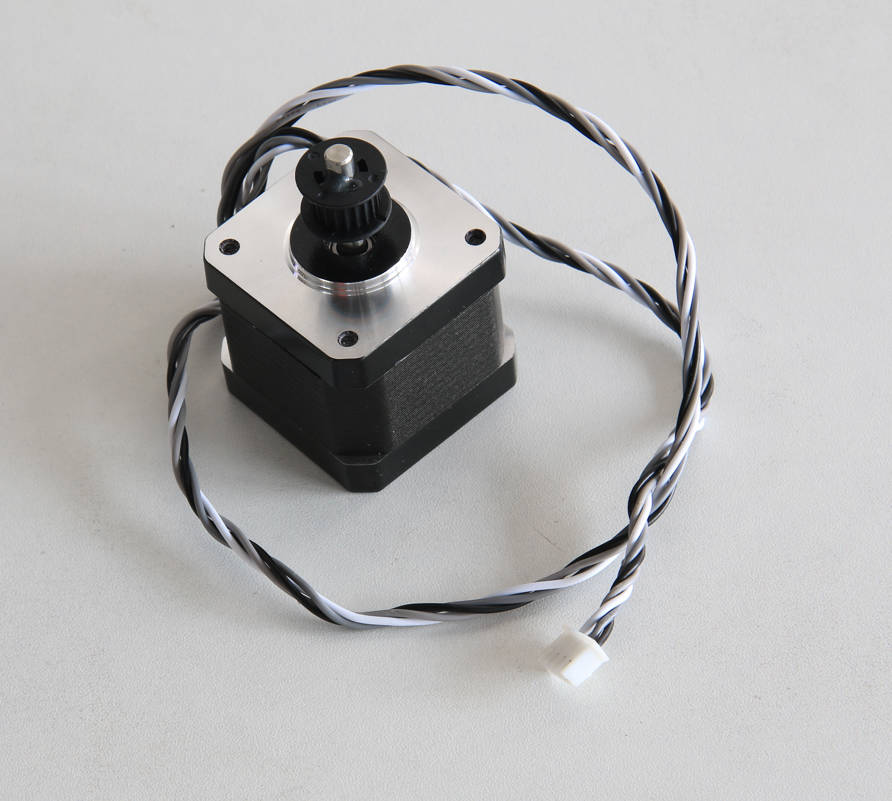
The Z motor is a stepper motor with a cable and a drive wheel attached that drives the movement of the heat bed in the Z-axis direction through the Z timing belt.
¶ When to use
- The Z motor was burnt out and could not work
- The service team confirmed the fault of the Z motor through log analysis.
¶ Tools and materials required
- New Z motor
- H2.0 hex key
¶ Safety warning and Machine state before starting operation
1. Turn off the power and remove the power cord;
2. It is necessary to clean foreign objects from the machine's base to ensure that the heat bed can descend to the bottom evenly;
3. The top glass cover plate and LCD display need to be removed before turning the printer upside down.
¶ Operational guide
¶ Step 1 - Clean the bottom base
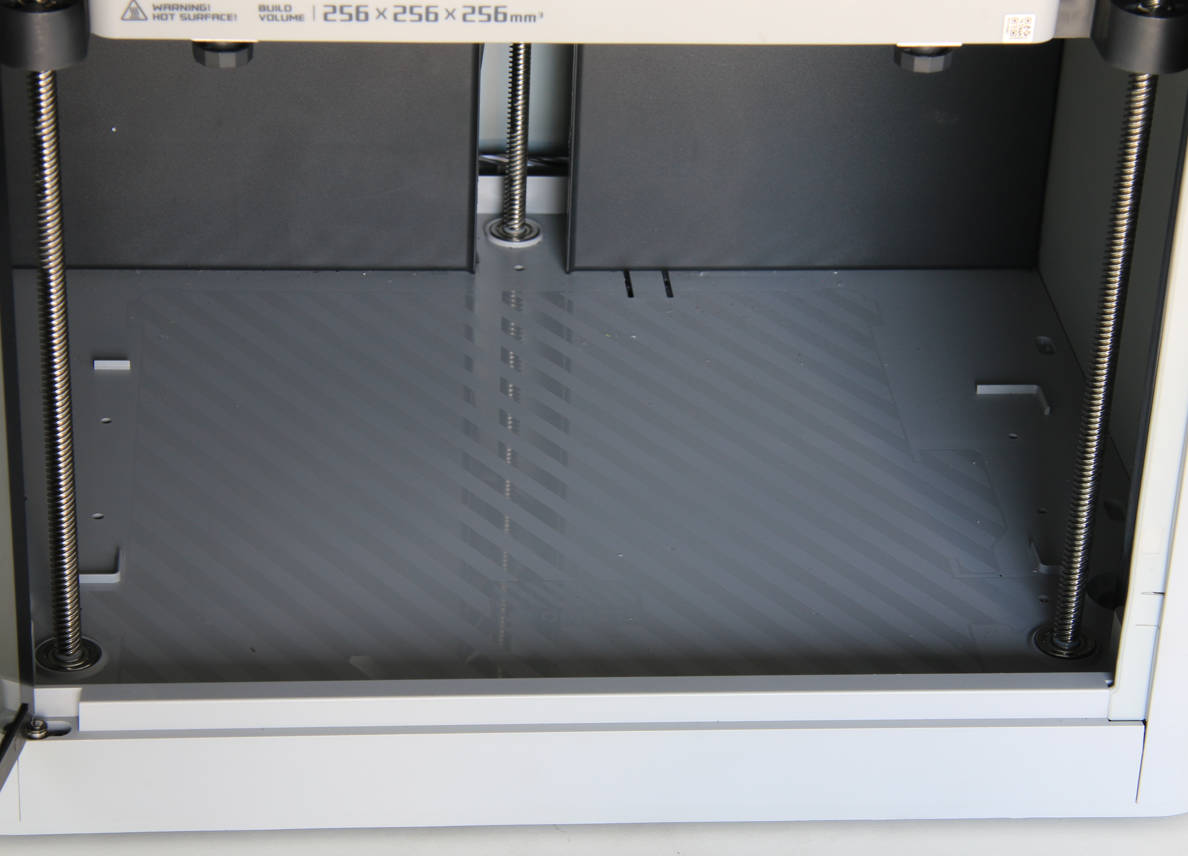
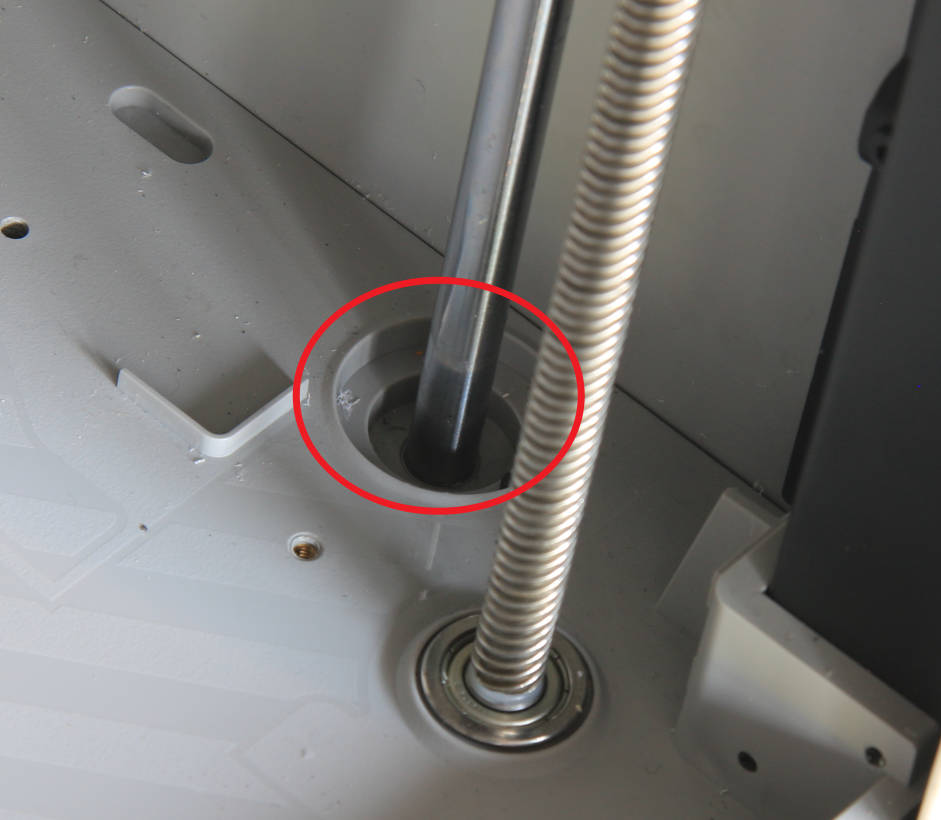
Clean the objects on the bottom base, especially the residue on the polished rods, and then remove the top glass cover plate.
|
 |
 |
¶ Step 2 - Lower the heat bed to the bottom and lock the sliders
There are two cases, and the method of operation is different.
Case 1: The motor still works
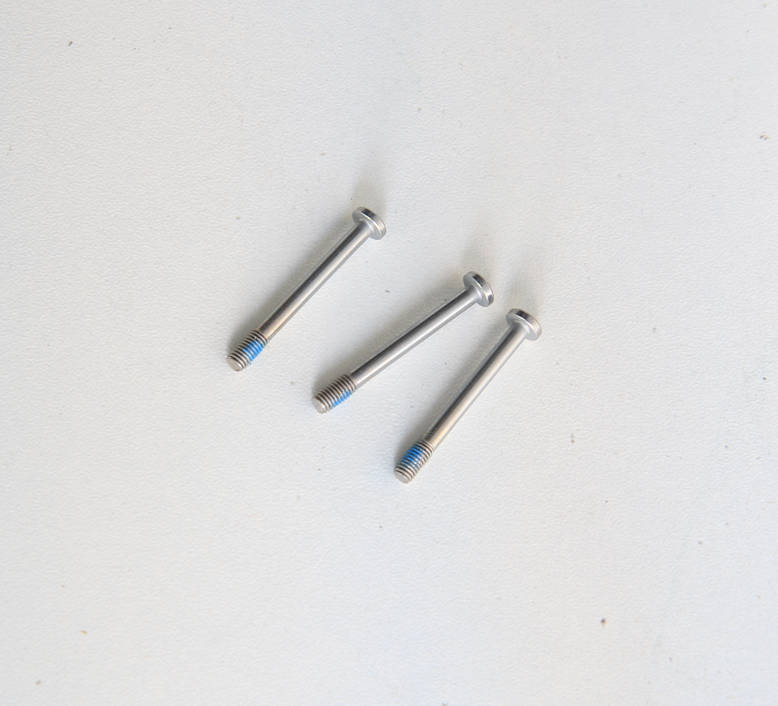
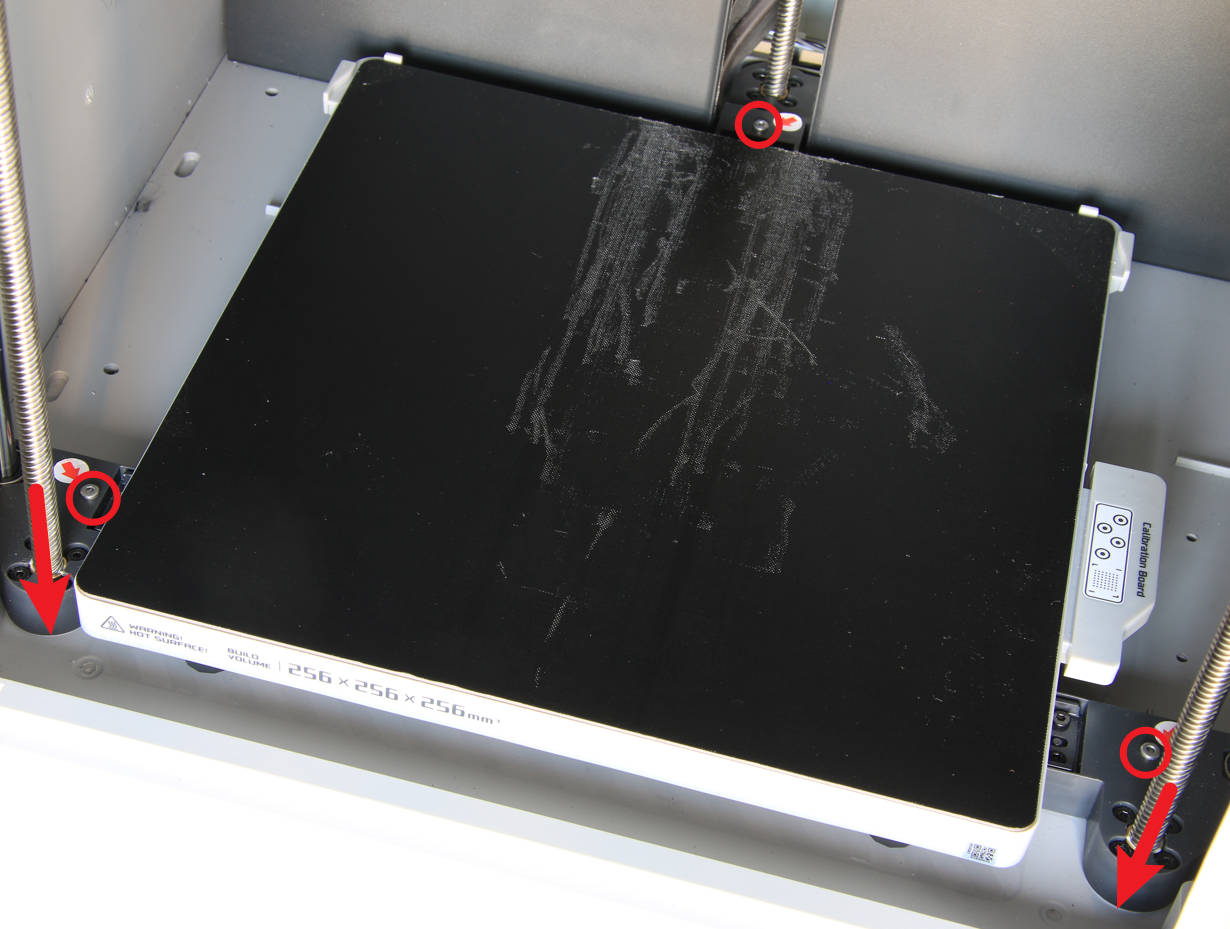
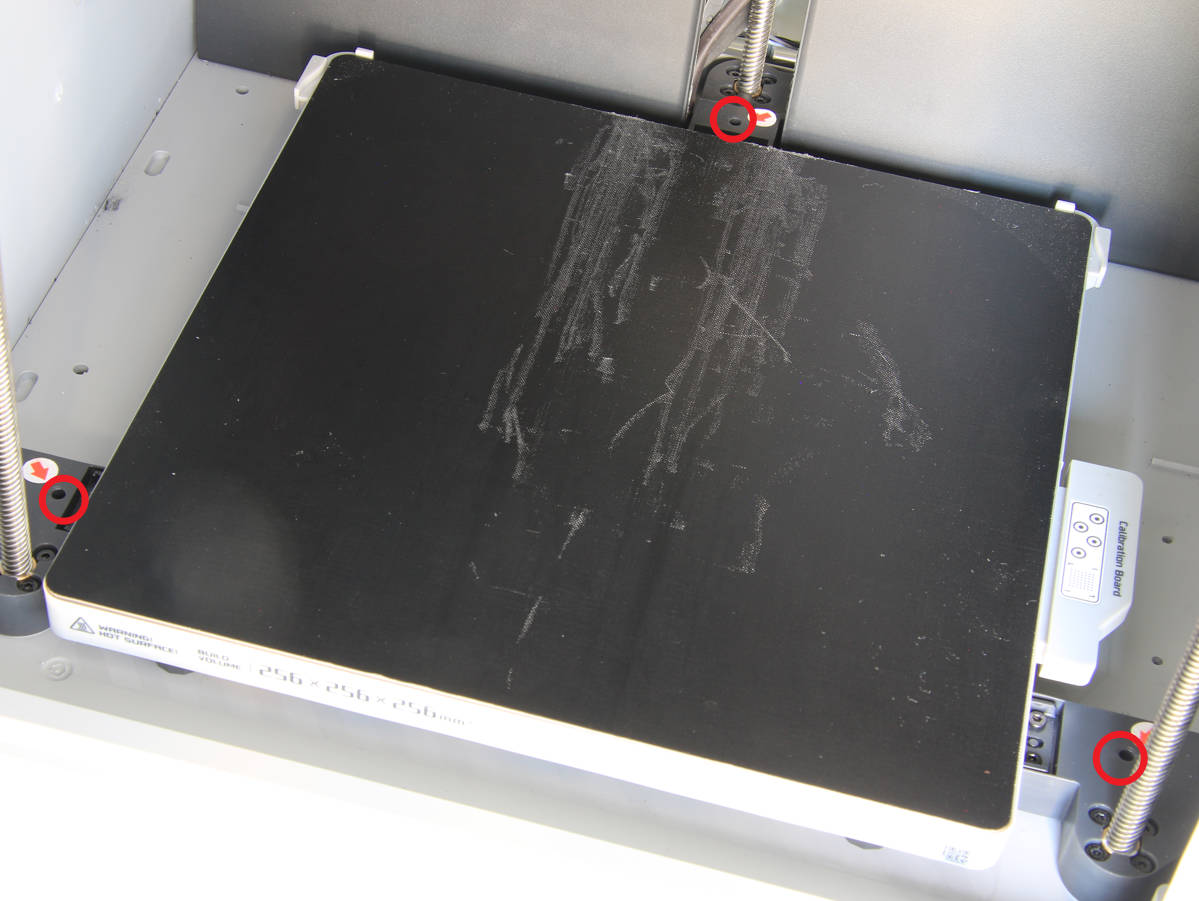
Operating on the screen, lower the heat bed to the bottom and lock the 3 sliders with 3 screws, just like when you first unlocked the heat bed on unboxing. Then turn off the printer and disconnect the power cord.
|
|
Case 2: The Z motor is completely dead
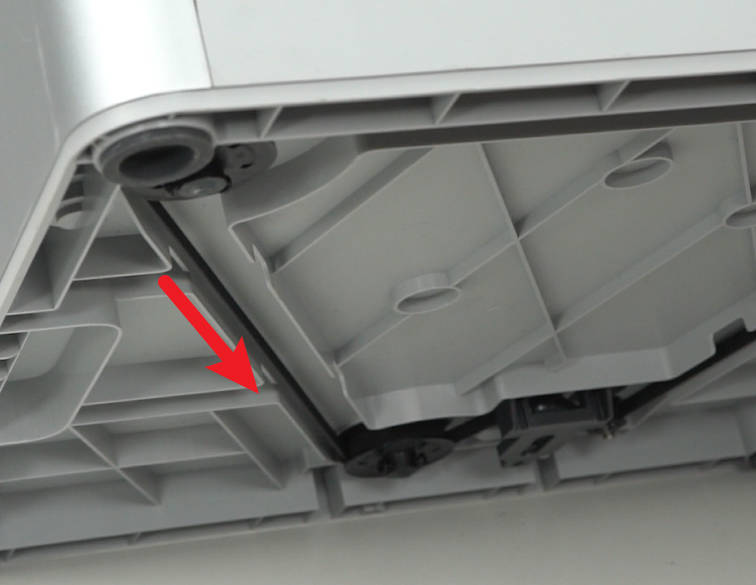
Power off the printer, disconnect the power cord, tilt the printer, manually move the Z timing belt to lower the heat bed to the bottom, and then lock the 3 sliders with 3 screws.
¶ Step 3 - Remove screws
NOTE: There are a lot of screws involved in this procedure. Please label them and group them in separate sections to avoid issues.
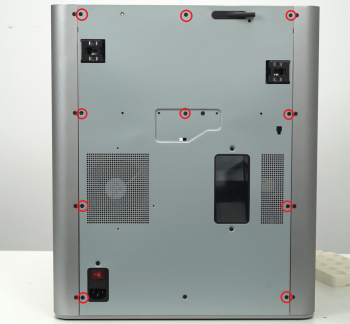
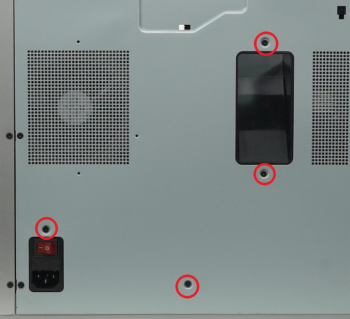
Remove the screws from the rear cover as pictured below (10 screws in the first picture, and 4 in the second). Be aware that there are 2 types of screw, and you will need to keep them separated to remember which screws to use for what areas when reassembling.
 |
 |
¶ Step 4 - Remove the rear cover
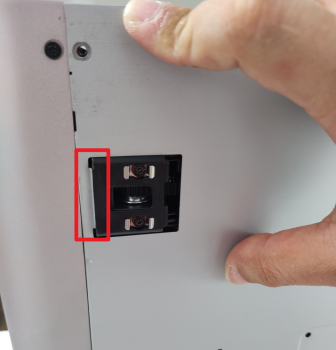
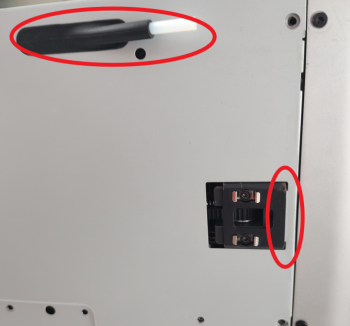
Remove the rear cover by unlocking the left side belt tension port first, and then the right side one to avoid getting stuck.
 |
 |
¶ Step 5 - Disconnect the motor cable
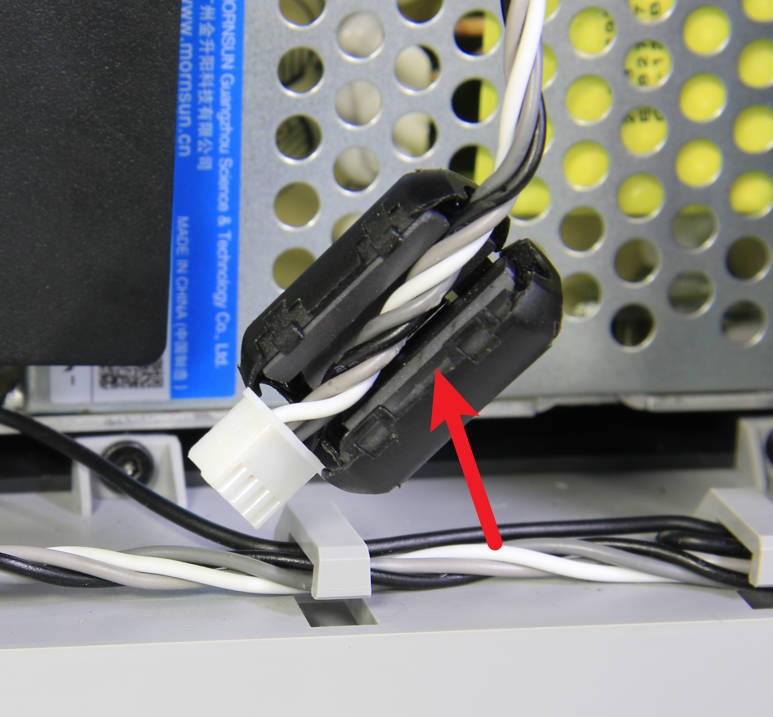
Find the MC board, disconnect the Z motor cable at the bottom of the MC board, and remove the cylindrical snap ferrite ring.
|
 |
 |
¶ Step 6 - Remove the square ferrite ring
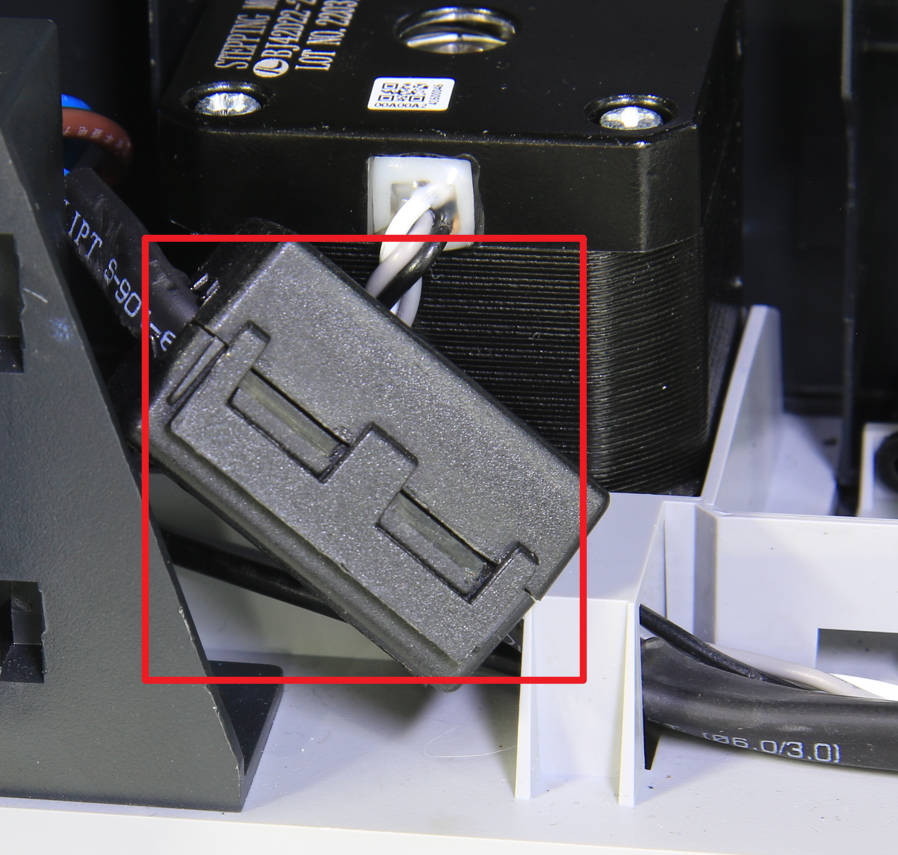
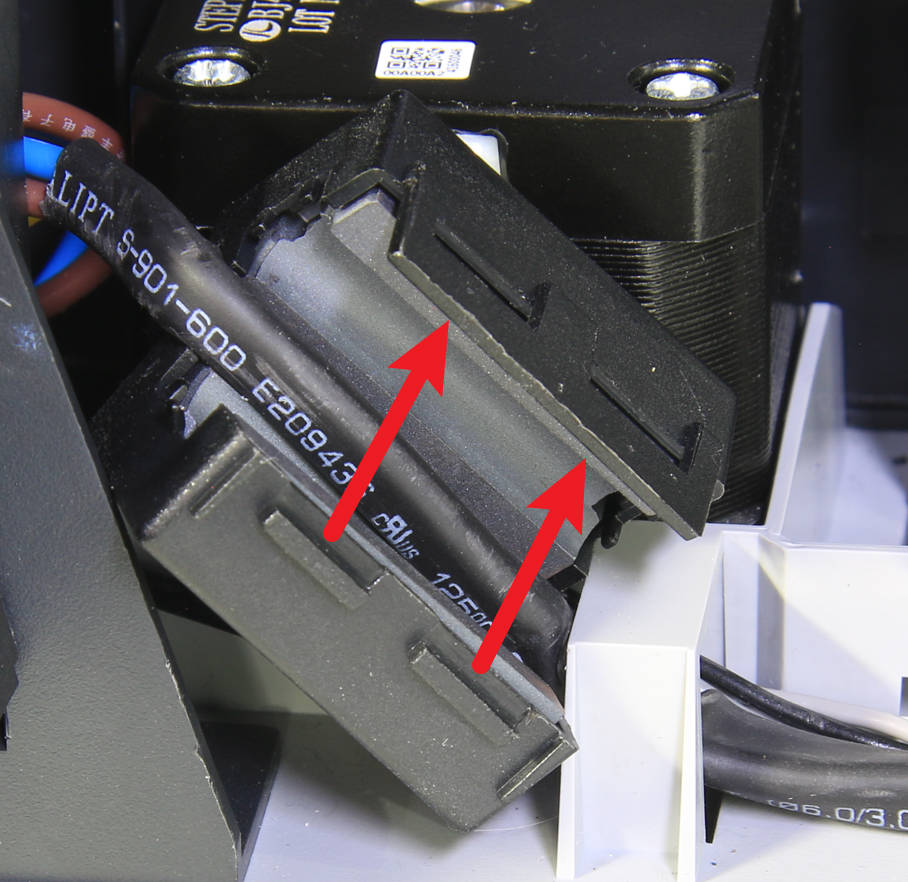
Turn the lock of the square ferrite ring out, unlock it, and then remove the square ferrite ring.
|
|
¶ Step 7 - Release the motor cables
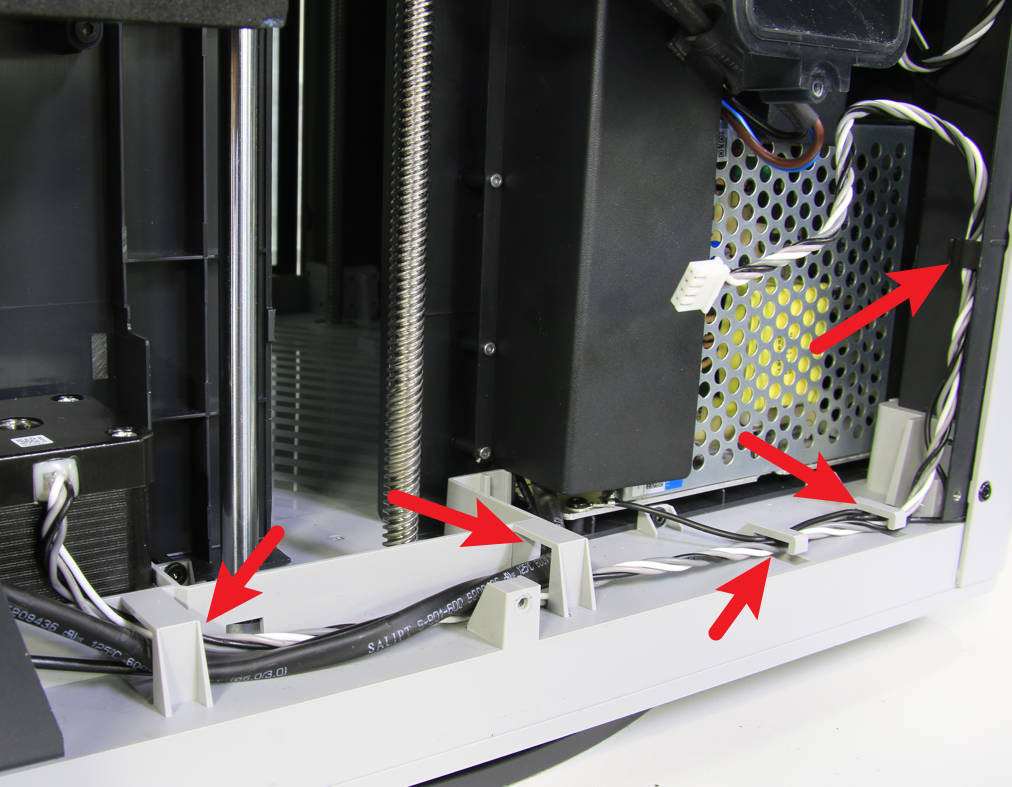
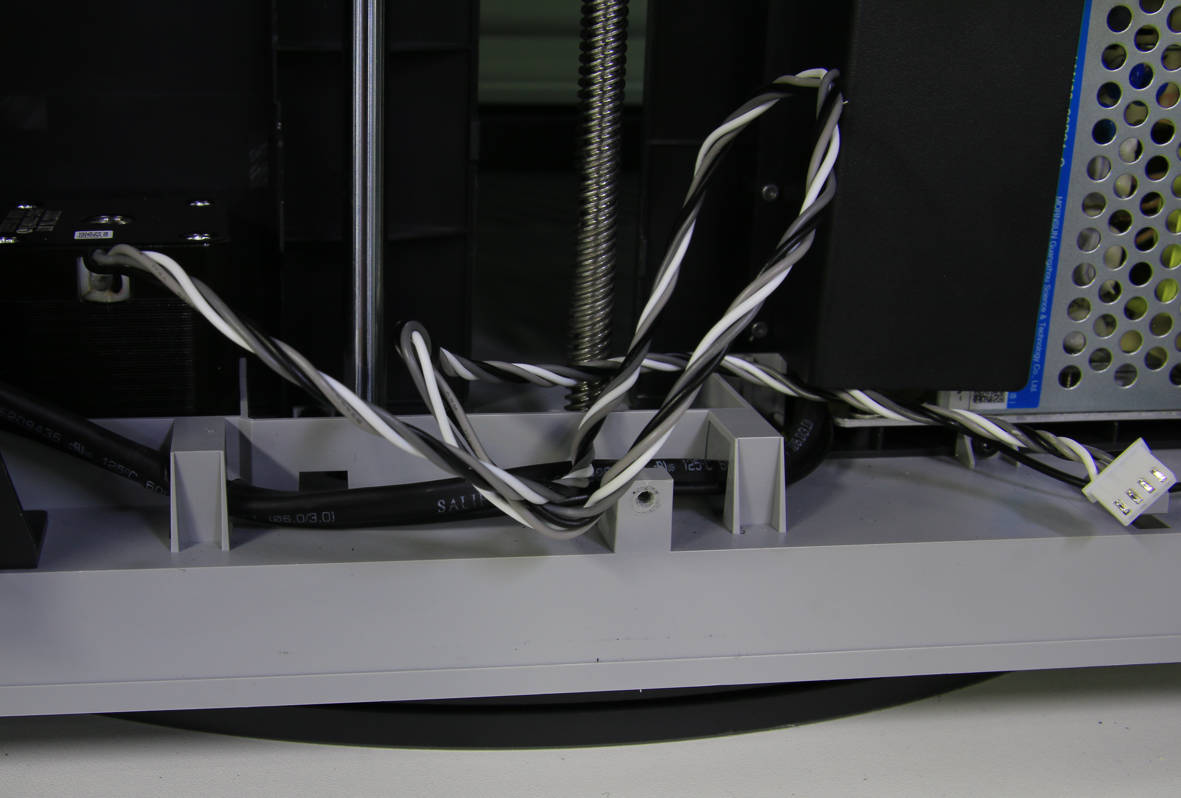
Unplug the motor cable from the buckles and routing holes.
|
 |
 |
¶ Step 8 - Remove the LCD screen
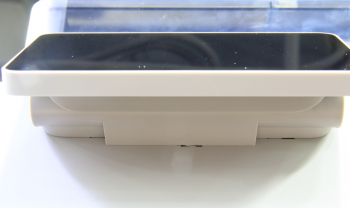
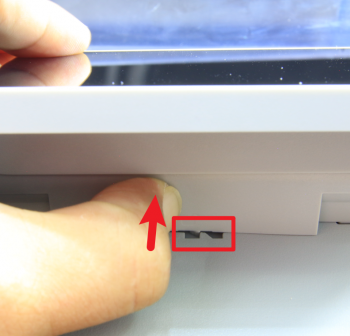
Tilt the screen up and press underneath with light force (see picture) to release the buckle and push rightward to unlock the LCD high resolution screen.
 |
 |
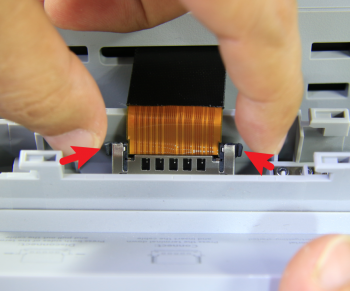
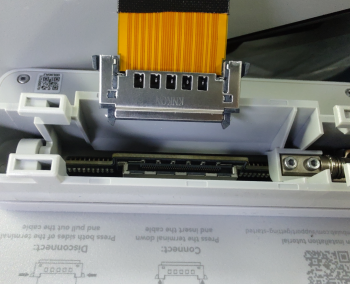
Press both sides of the FPC connector to unlock the connection and remove the LCD high resolution screen.
 |
 |
¶ Step 9 - Turn the printer upside down
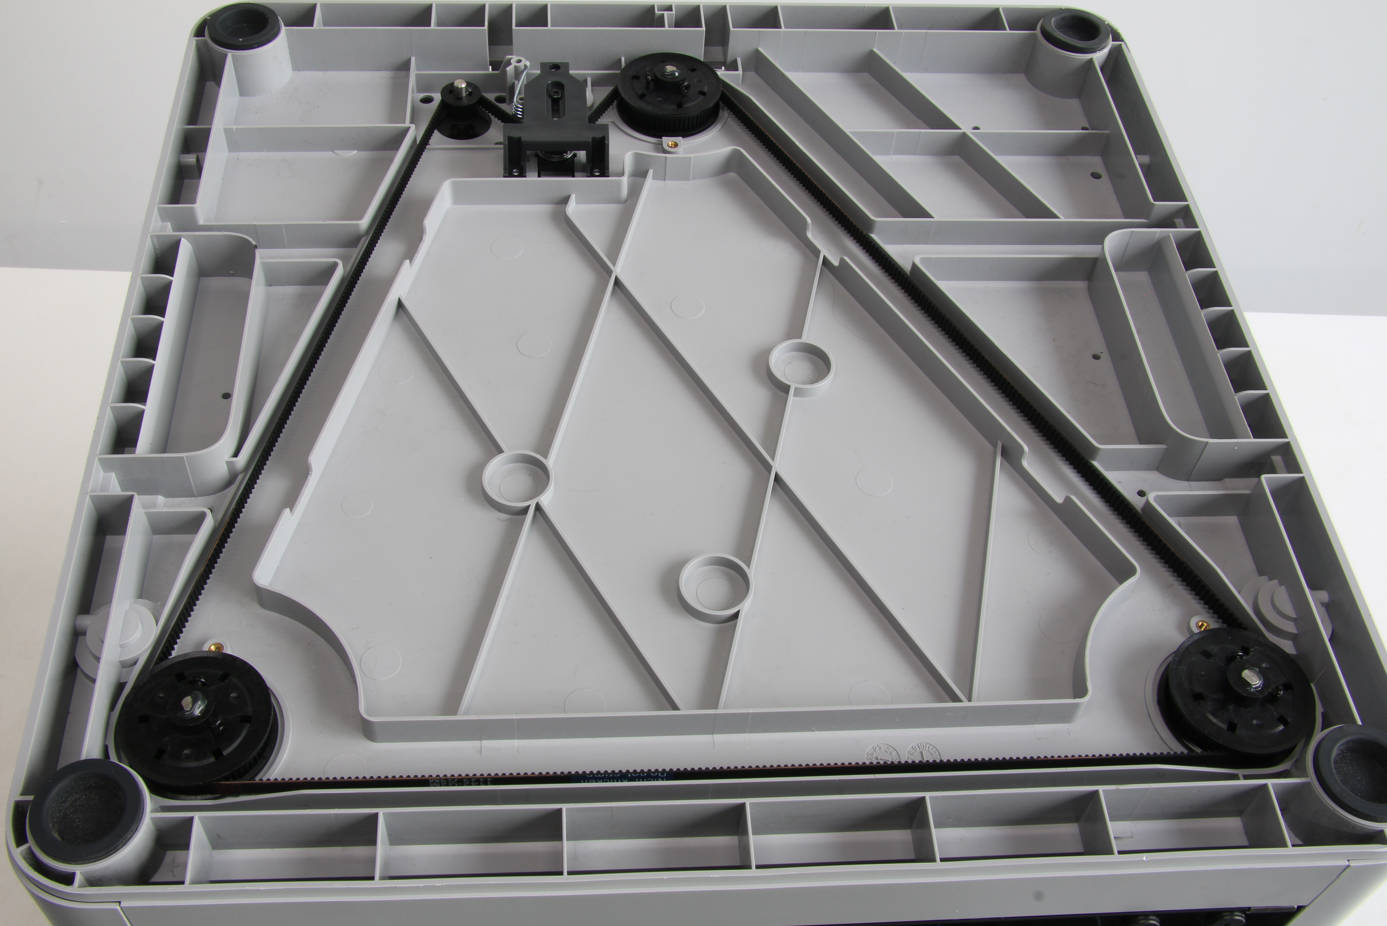
Turn the printer upside down with the bottom of the printer facing up.
¶ Step 10 - Release the tension pulley
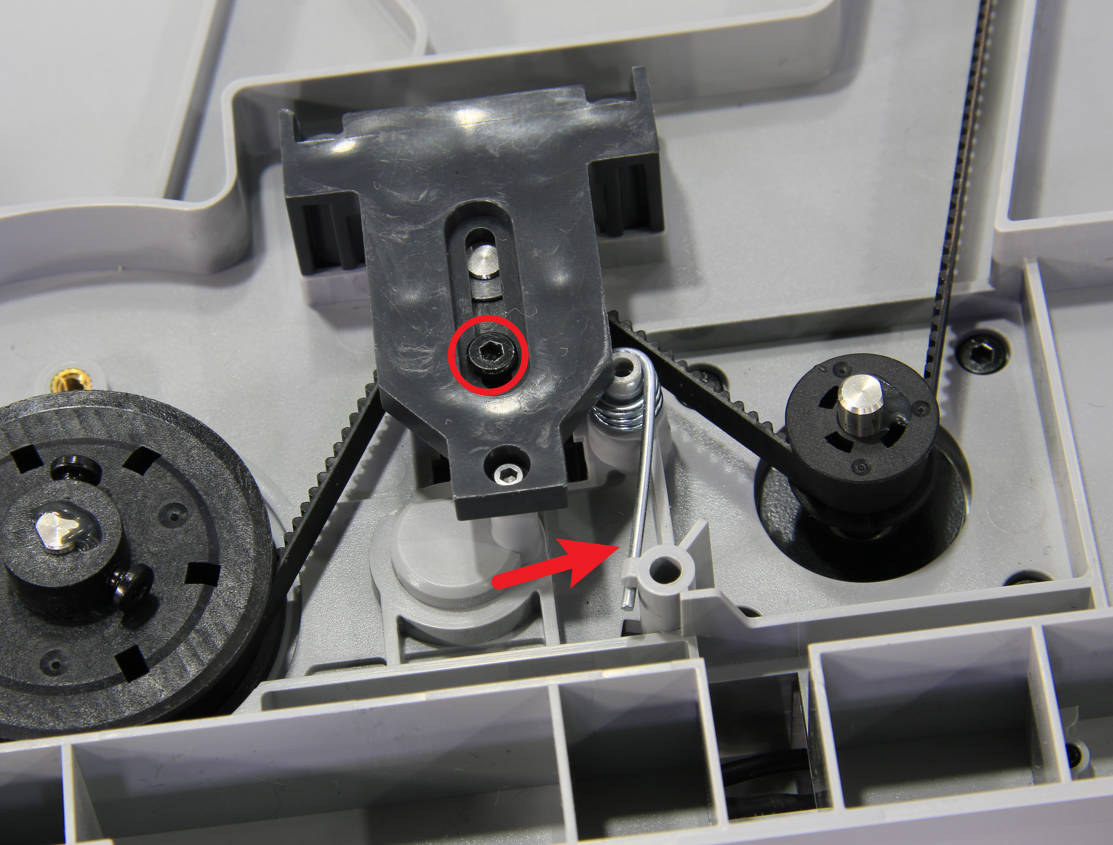
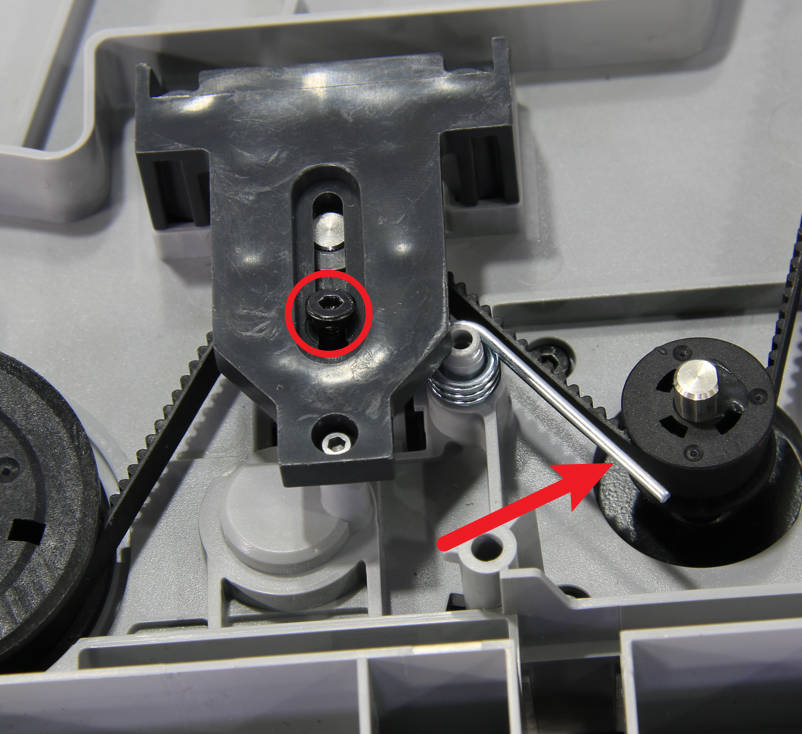
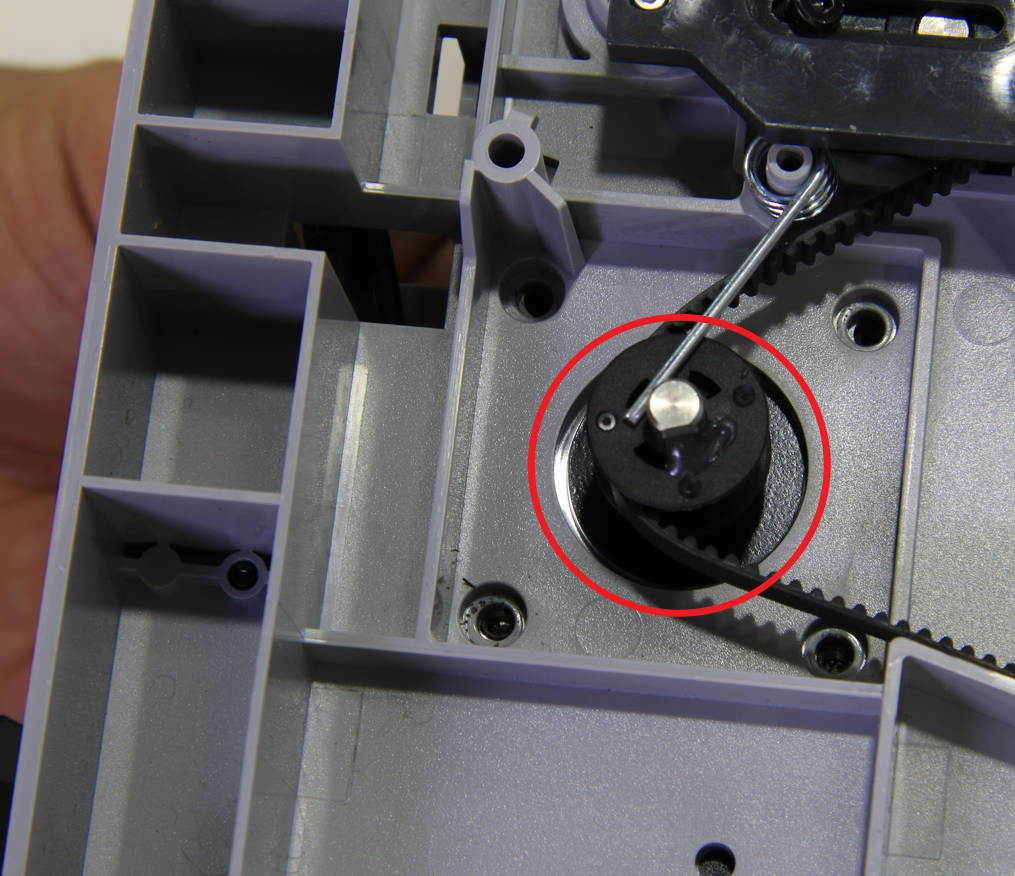
Release the torsion spring, and loosen the black adjustment screw with an H2.0 hex key to loosen the belt.
|
 |
 |
¶ Step 11 - Remove the Z motor
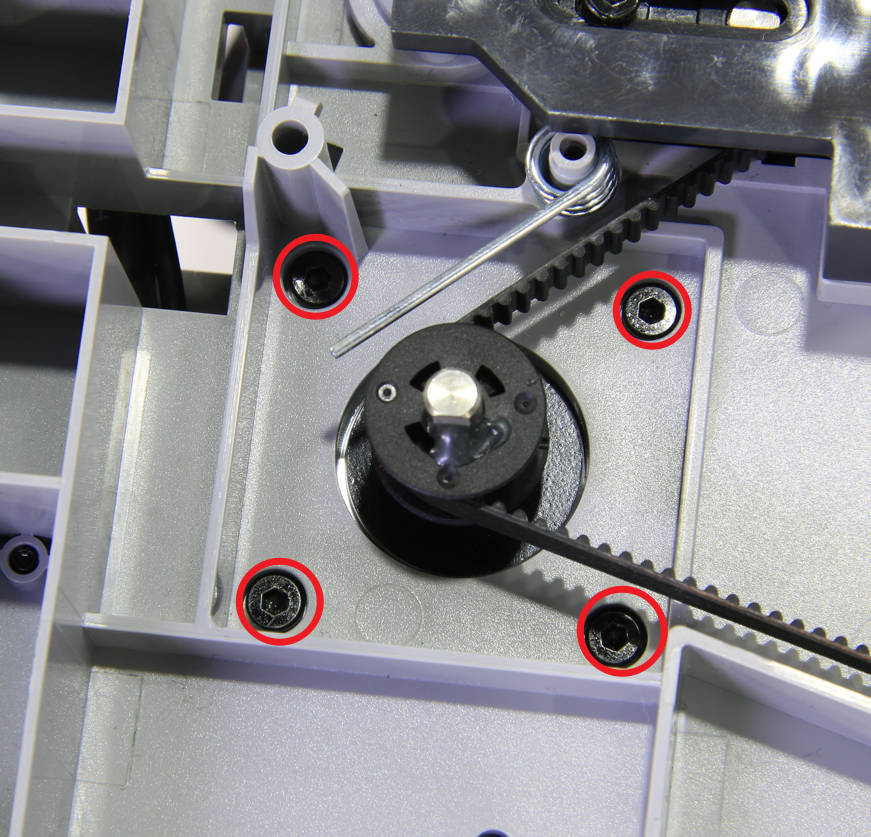
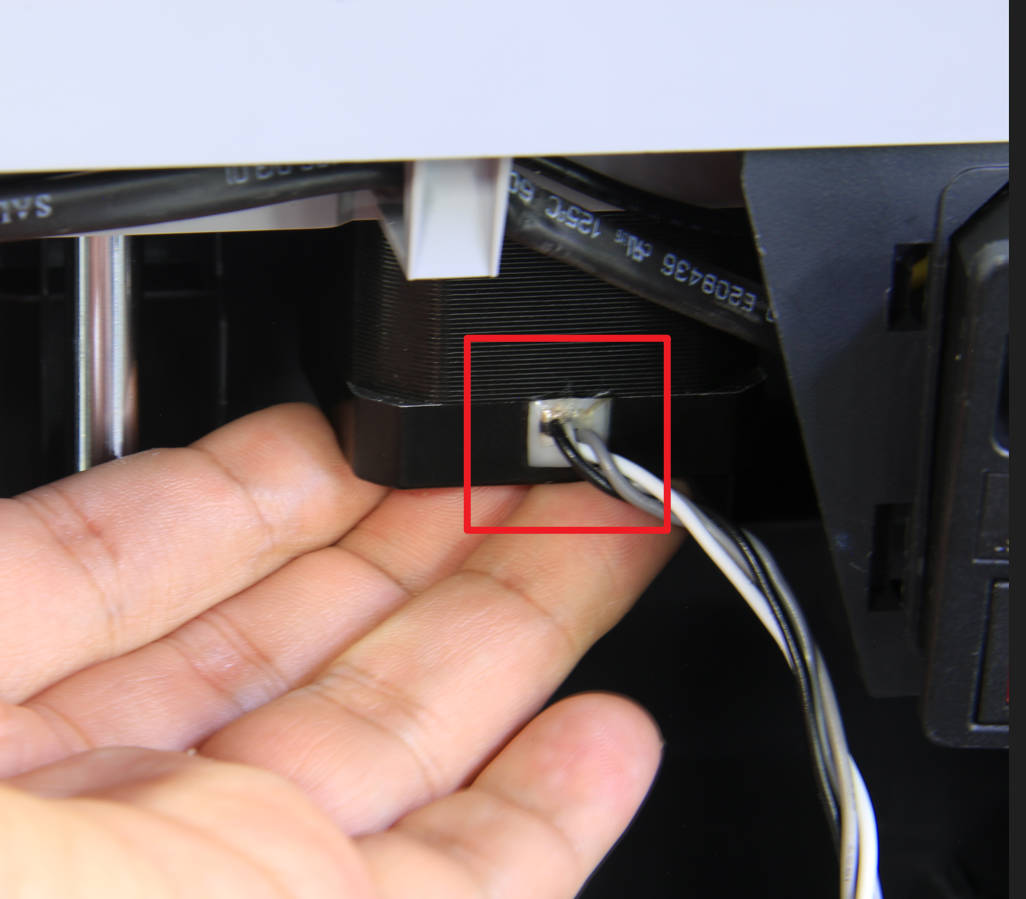
Remove the 4 screws. The locking torque of these 4 screws is large. It is recommended to use a reliable hex key to remove them, otherwise, it may cause a slip to the screw head. When removing the last screw, please catch the motor by hand to prevent it from falling.
|
 |
 |
¶ Step 12 - Install the Z motor
Install the new Z motor in place. You can check the installation direction according to the orientation of the motor cable in step 11. Tighten the 4 screws with the diagonal lock screws.
|
 |
 |
¶ Step 13 - Tension the spring and lock the tensioner
Bend the spring to place to make it tense and tighten the black screw with an H2.0 hex key.

¶ Step 14 - Remove slider set screws, action check
Flip the printer back over, place it upright, and remove the locking screws on the 3 sliders. Then, tilt the printer and move the Z timing belt back and forth to confirm that the heat bed can move up and down.
|
 |
 |
¶ Step 15 - Install the LCD screen
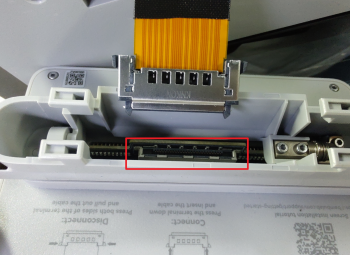
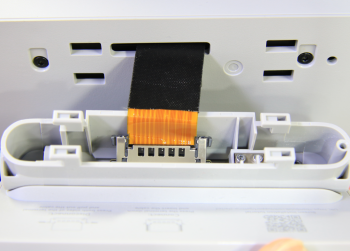
Pull the FPC out and insert the FPC connector into the port in the back of the LCD high resolution screen, by pressing both sides of the FPC connector.
 |
|
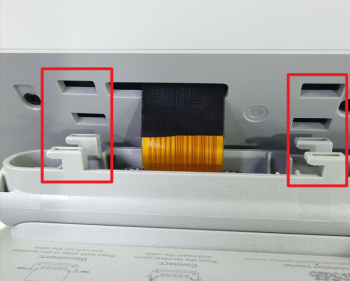
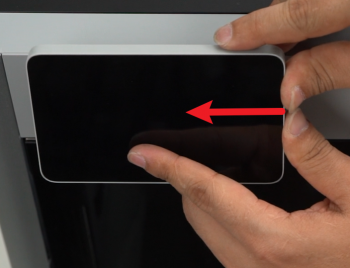
Insert the excess FPC cable into the printer and mount the LCD high resolution screen into the 4 slots of the printer and push gently to the left till you hear the buckle click.
 |
 |
¶ Step 16 - Thread motor cable
Route the motor cable through the two cable holes and the two buckles on the bottom base and fasten to the side buckle as before removal.

|

|
¶ Step 17 - Install cylindrical ferrite ring, connect the motor cable
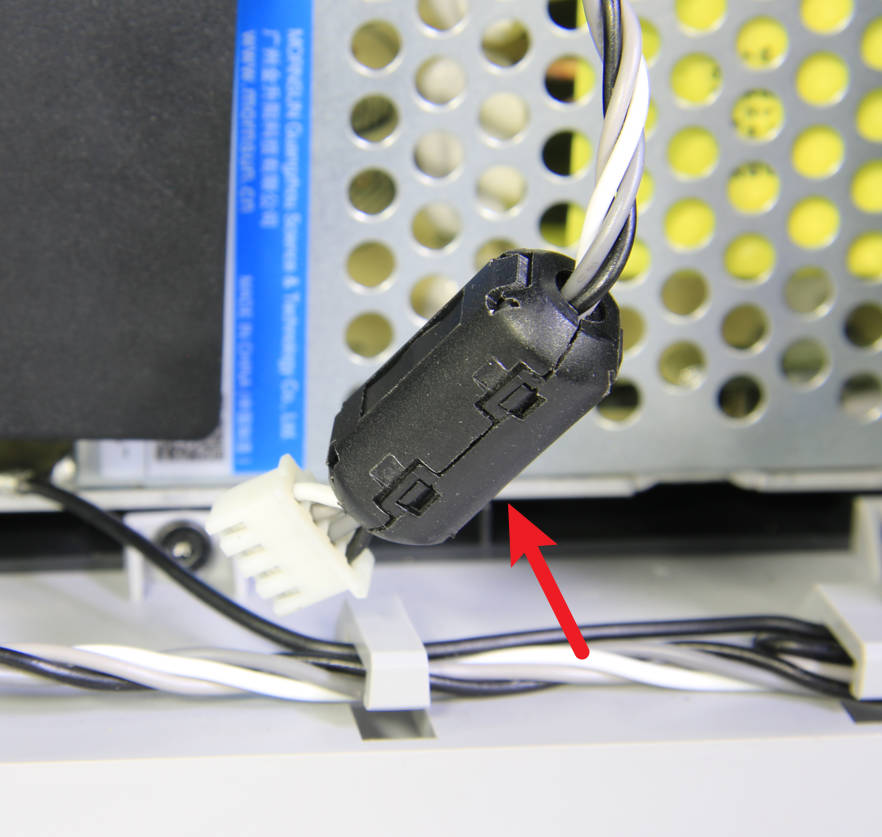
Install the cylindrical ferrite ring to the motor cable, and connect the cable to the connector of the MC board, double check the connection.
|
 |
 |
¶ Step 18 - Install the square ferrite ring
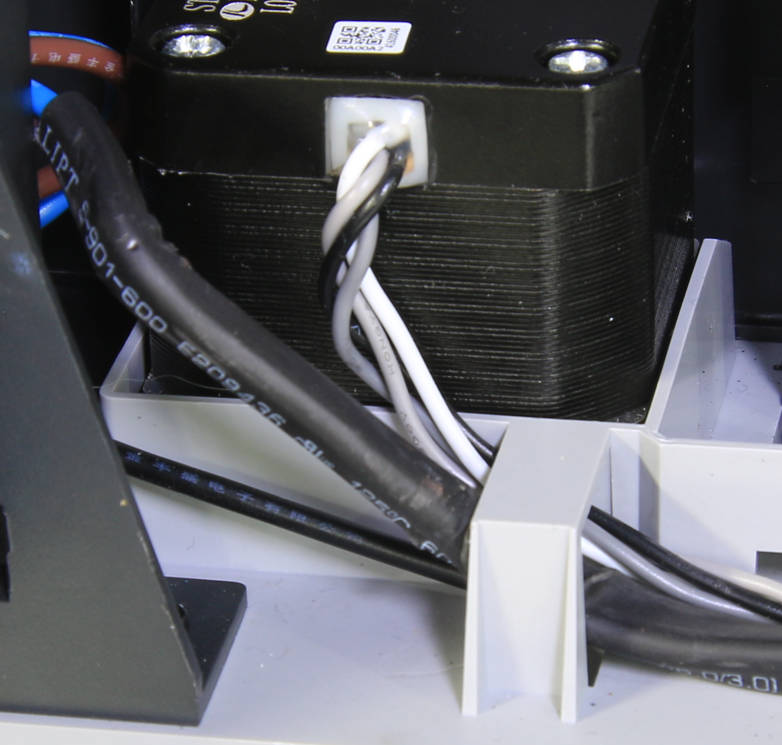
Install the square ferrite ring and sort out the cables.
|
 |
¶ Step 19 - Install the rear cover
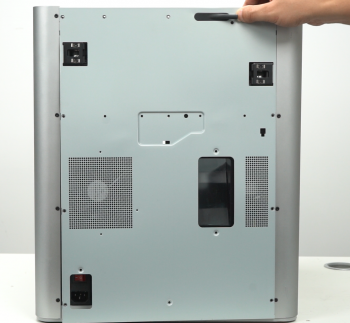
Pass the PTFE tube through the tube bracket, install first the right side belt tension port, and then the left side to install the rear cover.
.png) |
 |
¶ Step 20 - Install the 10+4 screws
Install the 10 + 4 screws (see picture), and replace the top glass cover plate.
 |
 |
¶ How to verify completion/success
Connect the power cord and turn on the power, then navigate the LCD screen to start a self-test. If no errors occur, the replacement is complete. Success!!
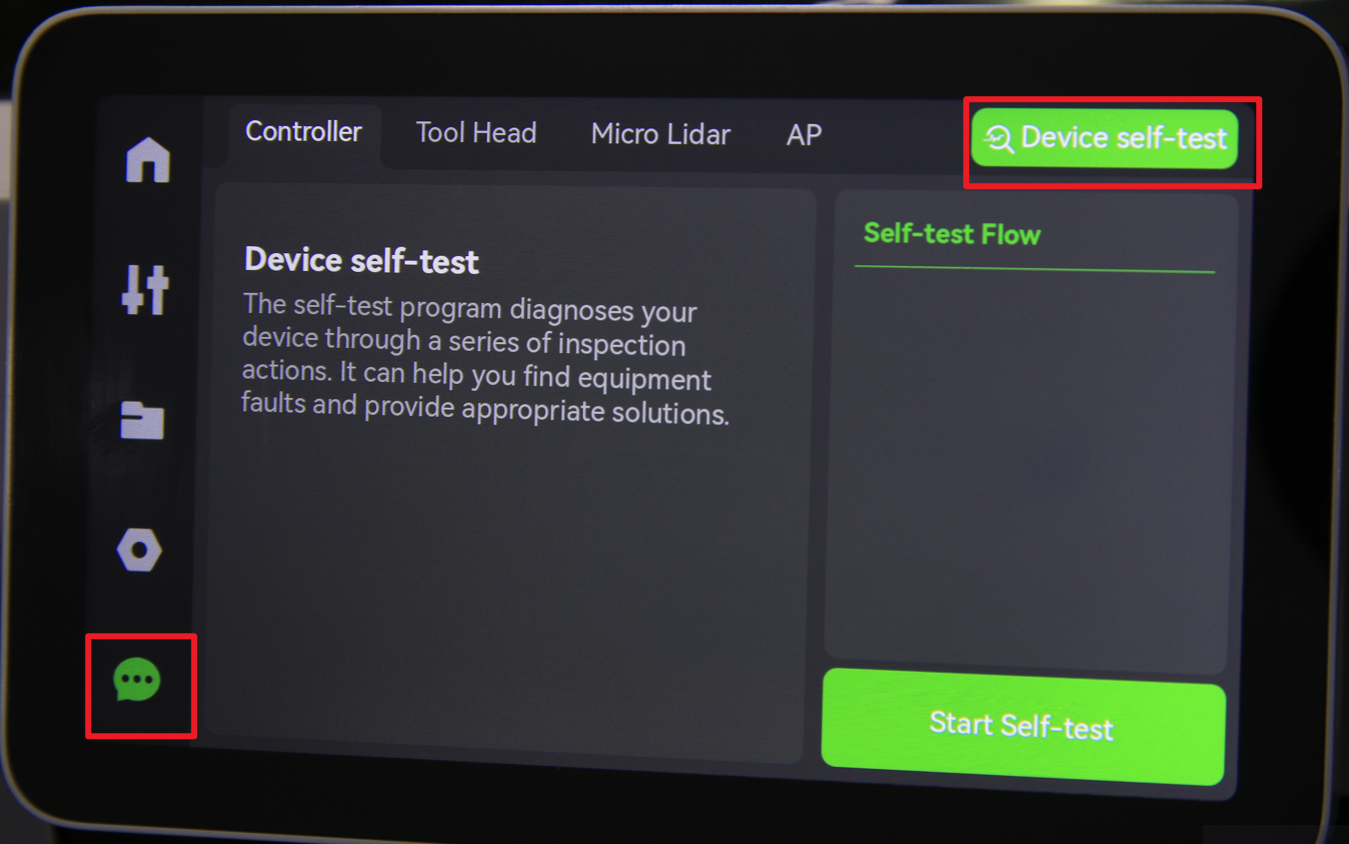
Otherwise, check the connections, and try it again. If still you have errors, contact the customer support team for solution advice.