¶ What is the Z timing belt
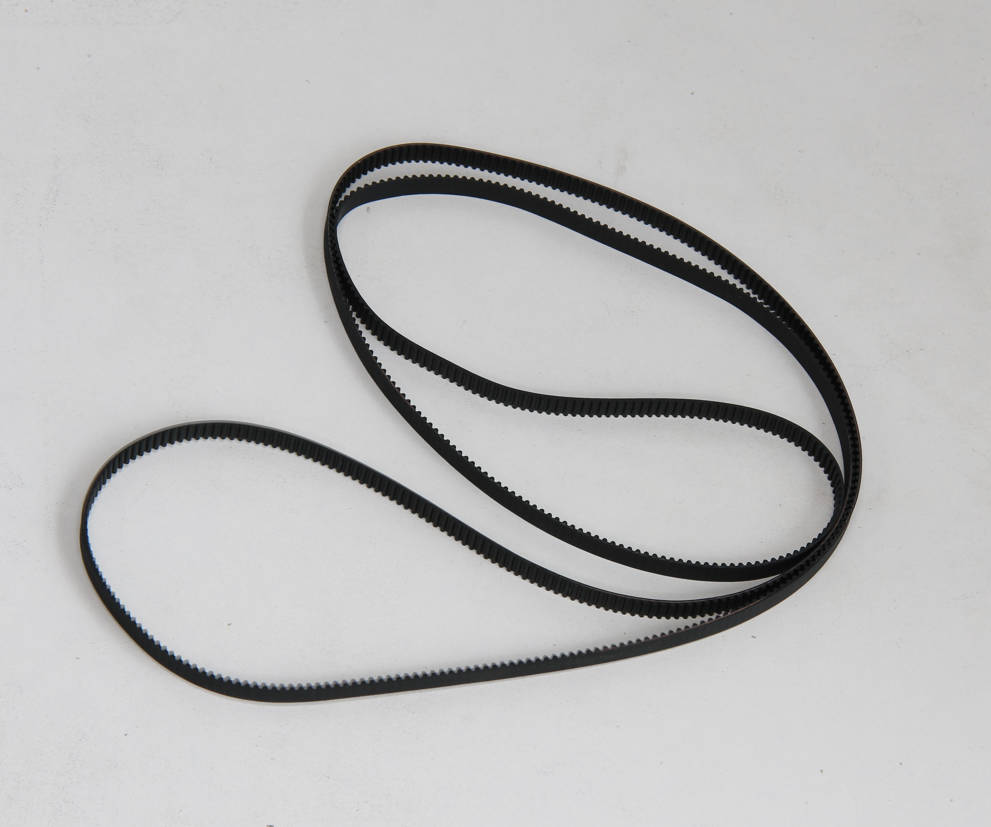
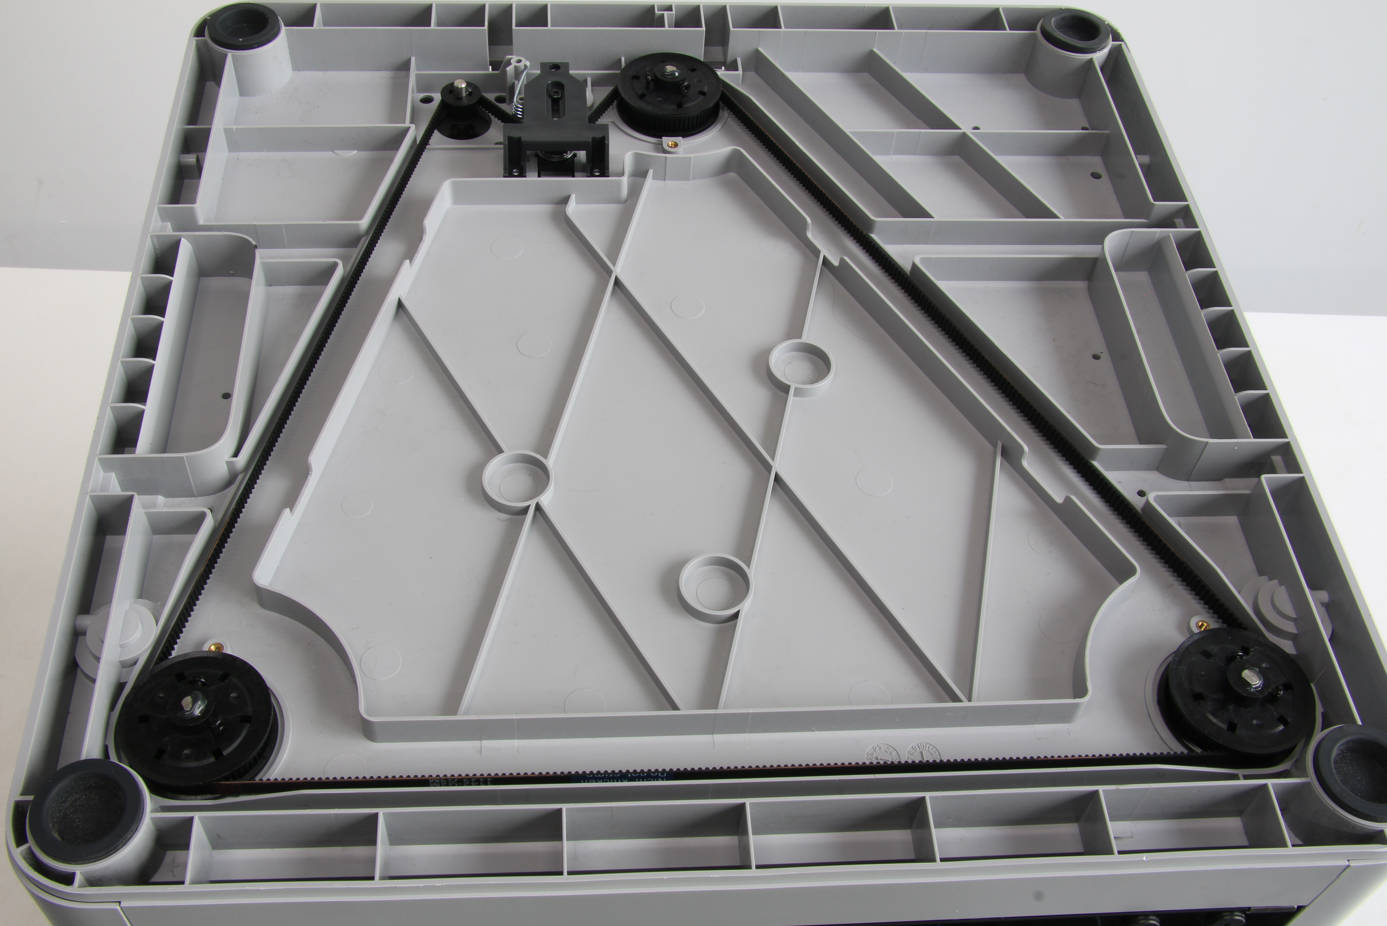
The Z timing belt is a close drive belt with a pitch length of 1142 mm, it is installed at the bottom of the Bambu Lab X1/X1C printer. It connects the Z motor and the Z rods and drives the heatbed to complete the movement in the Z direction.
¶ When to use
- Broken belt
- Belt aging & wear that has affected function
¶ Tools and materials needed
- H1.5 & H 2.0 Allen Key
- New Z belt
¶ Safety warning and Machine state before starting operation
1. Power OFF the printer before doing any maintenance work;
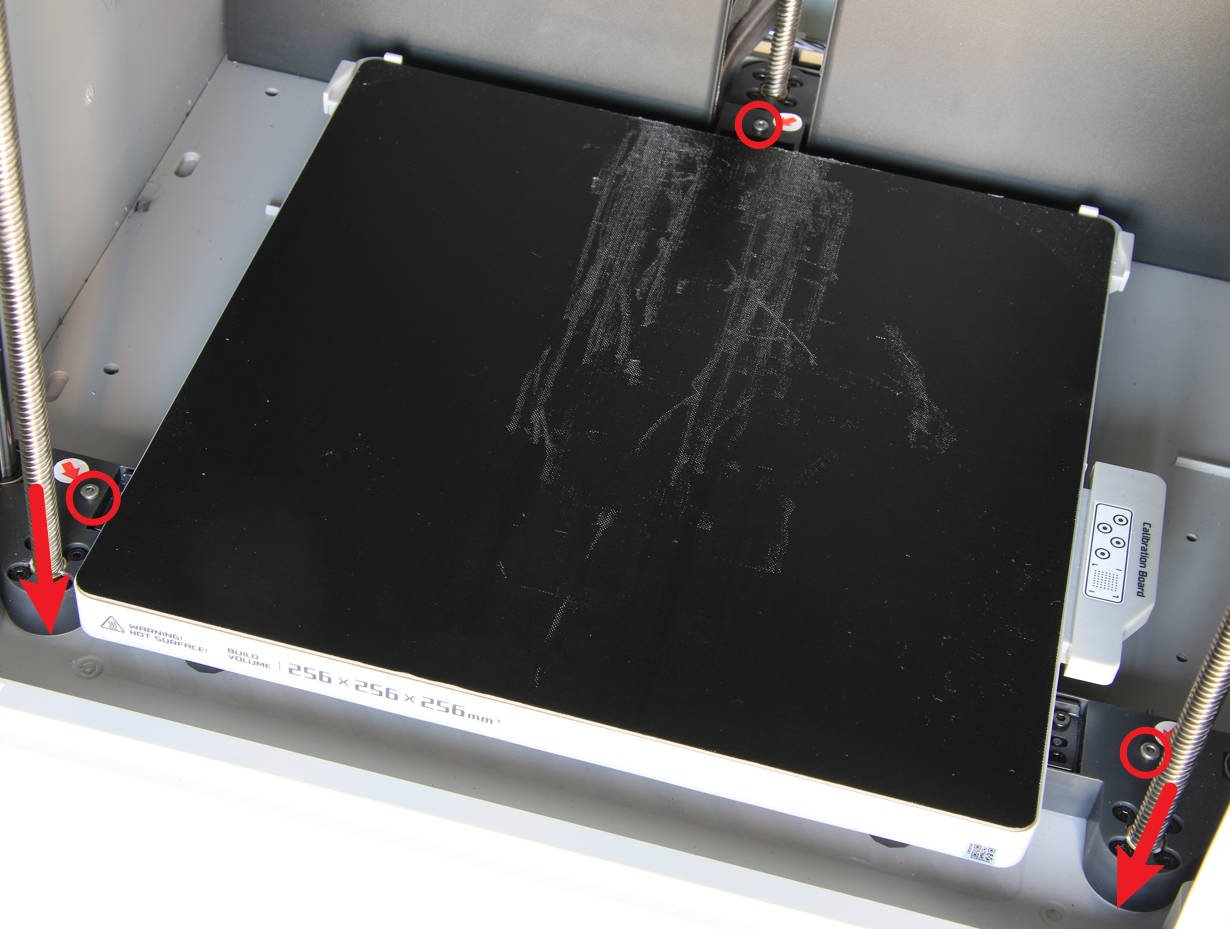
2. In the case where the belt is not broken, lower the heatbed to the bottom base and lock the Z sliders with screws;
3. Take care of the top glass cover plate and the LCD screen.
¶ Operation guide
¶ Step 1 - Clean the bottom base
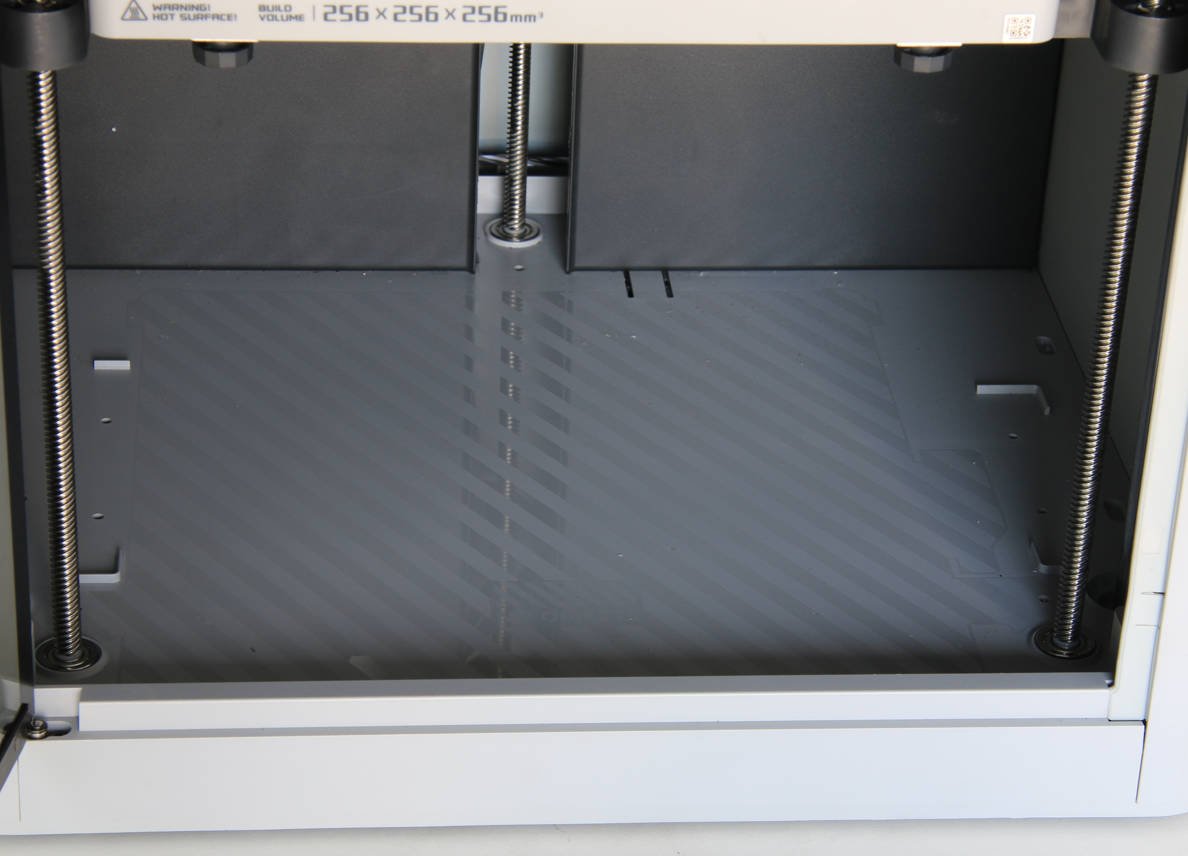
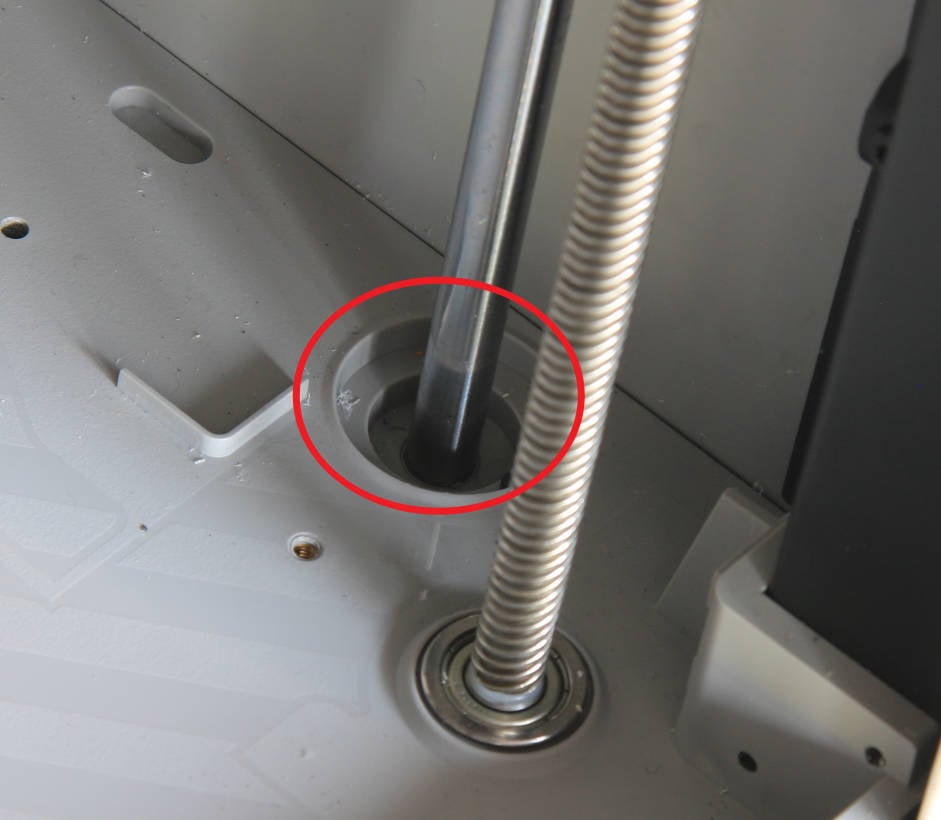
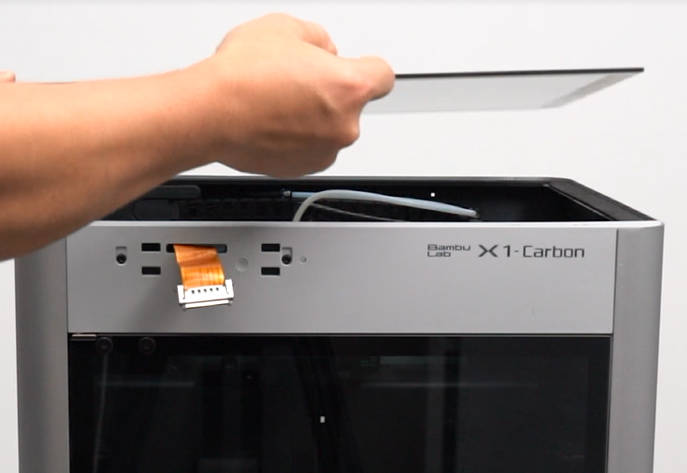
Clean the objects on the bottom base, especially the residue on the linear rods, and then remove the top glass cover plate.
|
 |
 |
¶ Step 2 - Lower the heat bed to the bottom and lock the sliders
There are two cases, and the method of operation is different.
Case 1: The Z timing belt still works
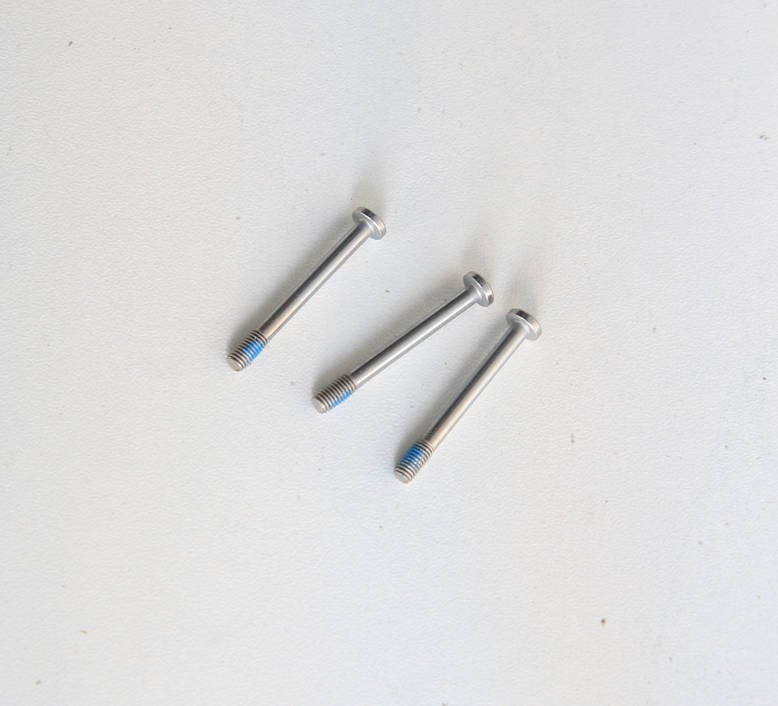
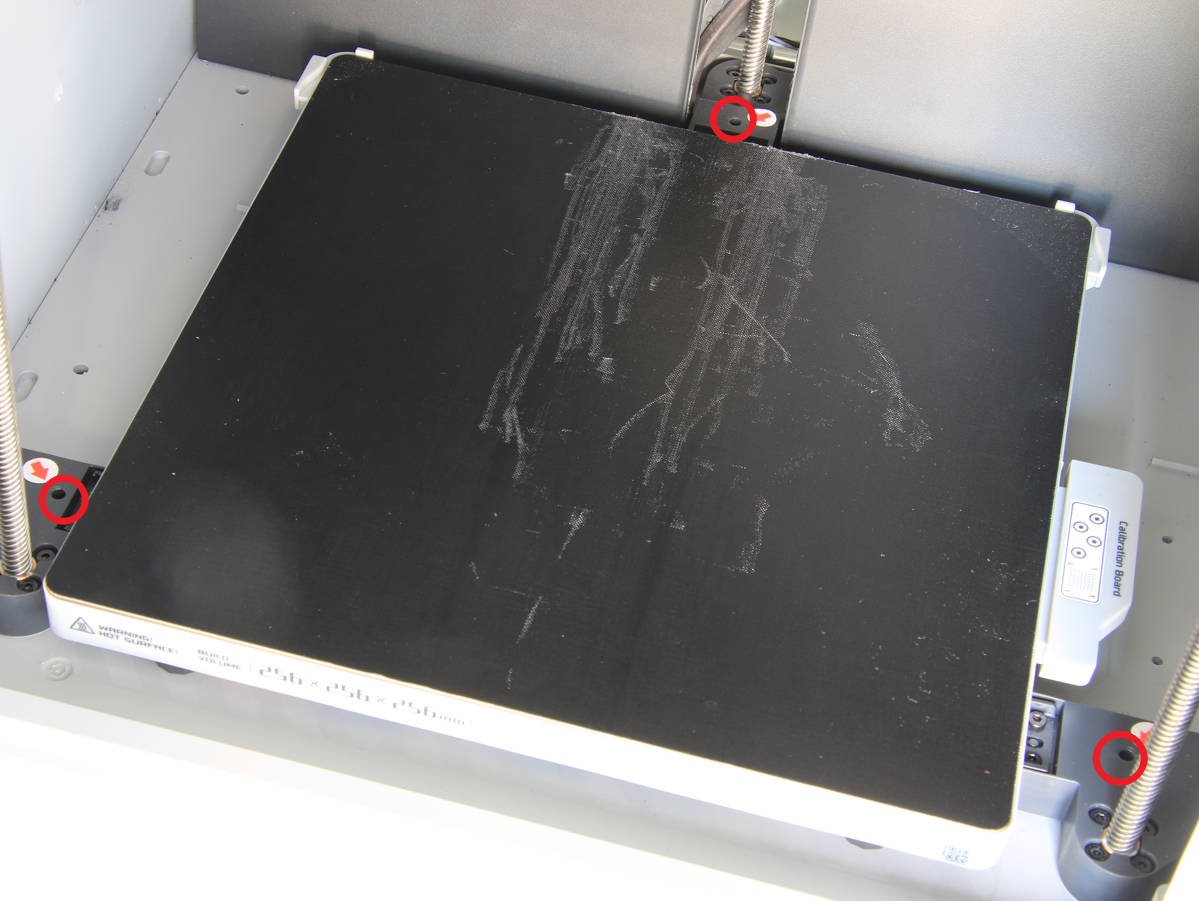
Operating on the screen, lower the heat bed to the bottom and lock the 3 sliders with 3 screws, just like when you first unlocked the heat bed on unboxing. Then turn off the printer and disconnect the power cord.
|
|
Case 2: The Z timing belt is completely broken
Power off the printer, disconnect the power cord, unscrew 6 screws to take off the heat bed from the sliders, tilt the printer, manually move the Z timing wheels to lower the Z sliders to the bottom, and then lock the 3 sliders with 3 screws.
¶ Step 3 - Removing the glass cover plate and left side down the printer
Remove the top glass cover plate, flip the printer over, and place the printer left side down so that you can see the Z timing belt.
 |
 |
¶ Step 4 - Unlocking the screws
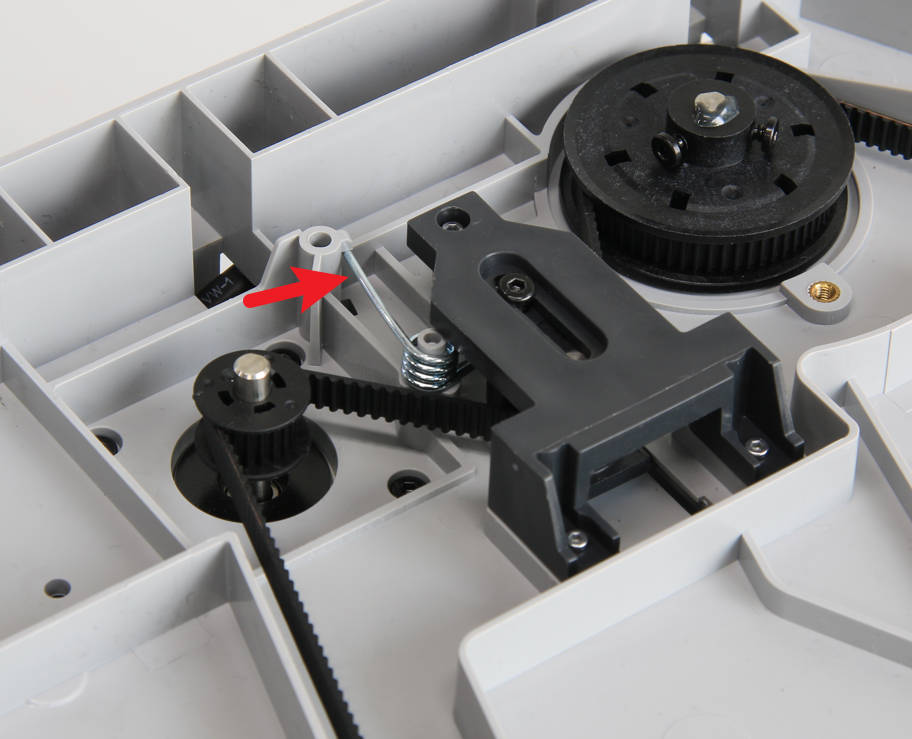
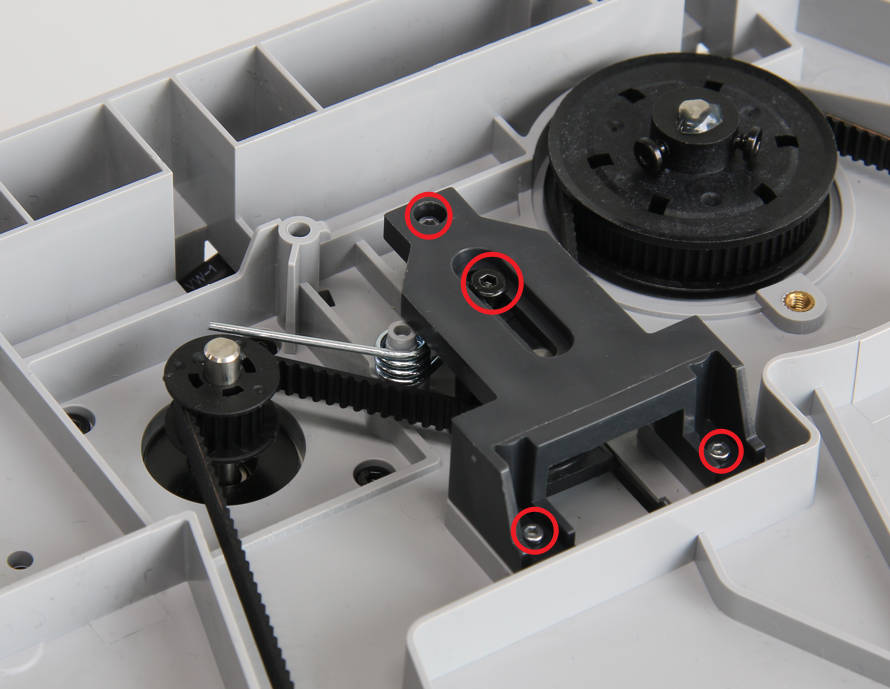
Release the torsion spring, and remove the black adjustment screw with an H2.0 hex key and the 3 silver screws with an H1.5 hex key.
|
 |
 |
¶ Step 5 - Removing the tension pulley cover and torsion spring
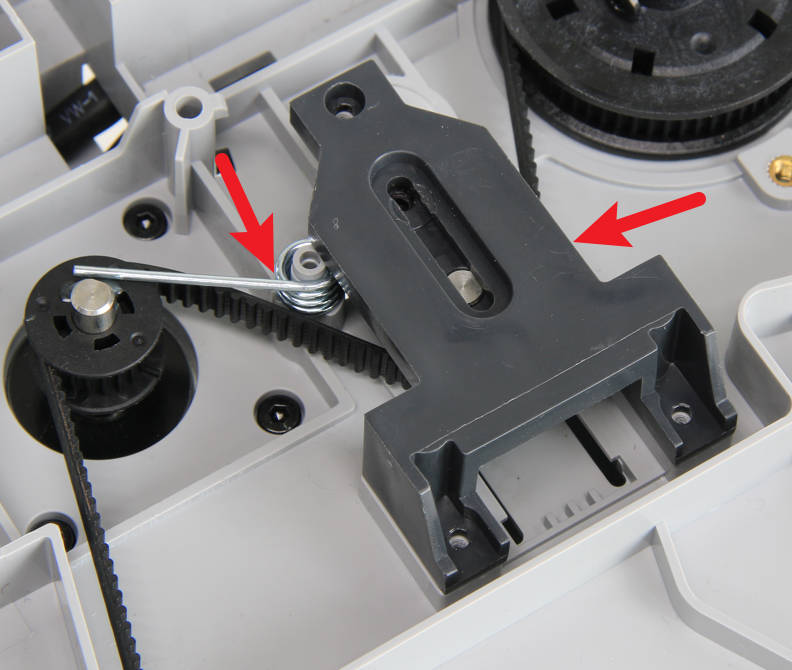
Take off the tension pulley cover, and remove the torsion spring.
¶ Step 6 - Removing the Z tension pulley assembly
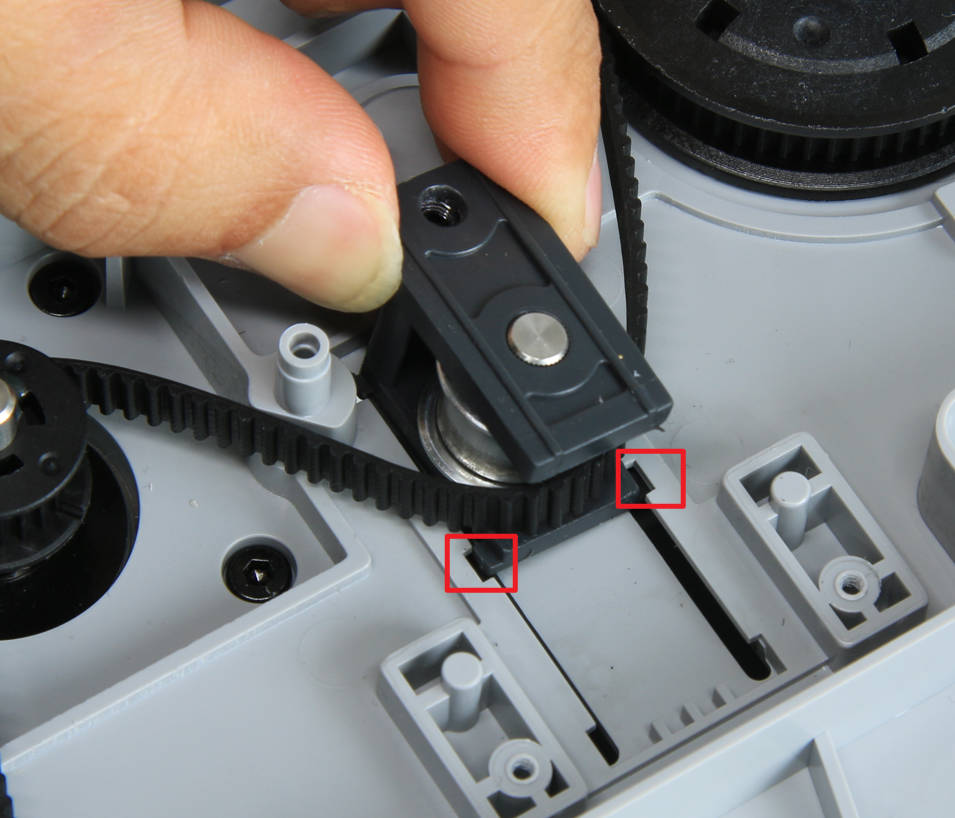
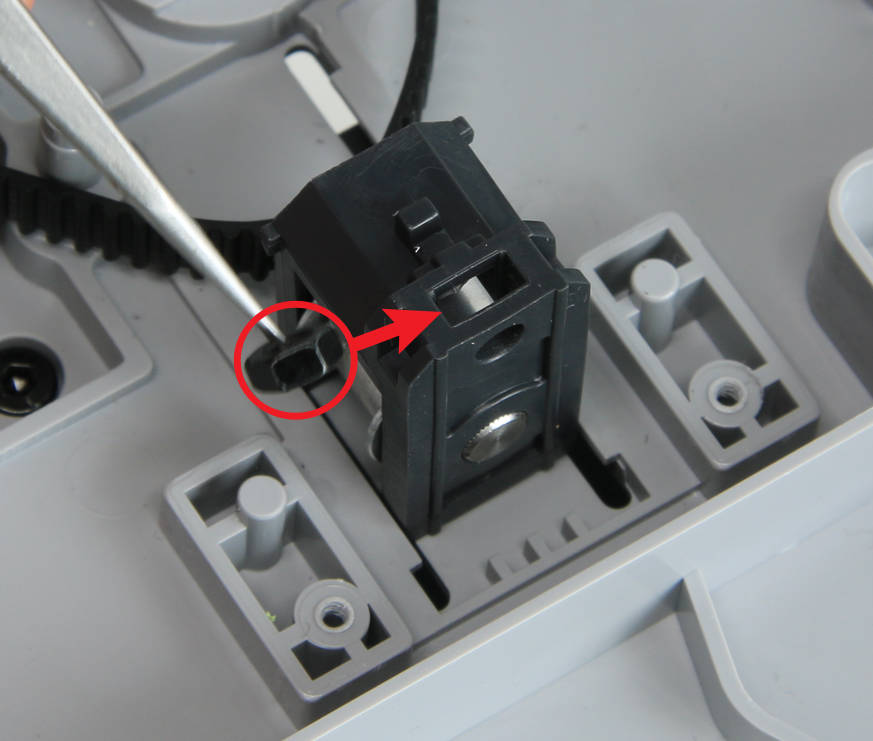
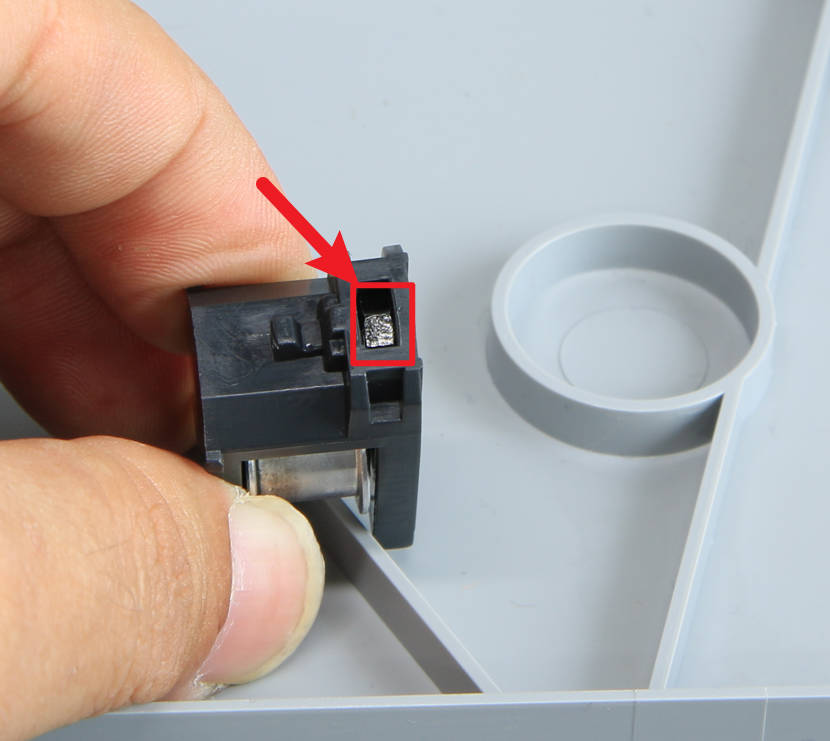
Remove the tension pulley assembly. Be careful with the nut inside the assembly, and do not lose it.
 |
 |
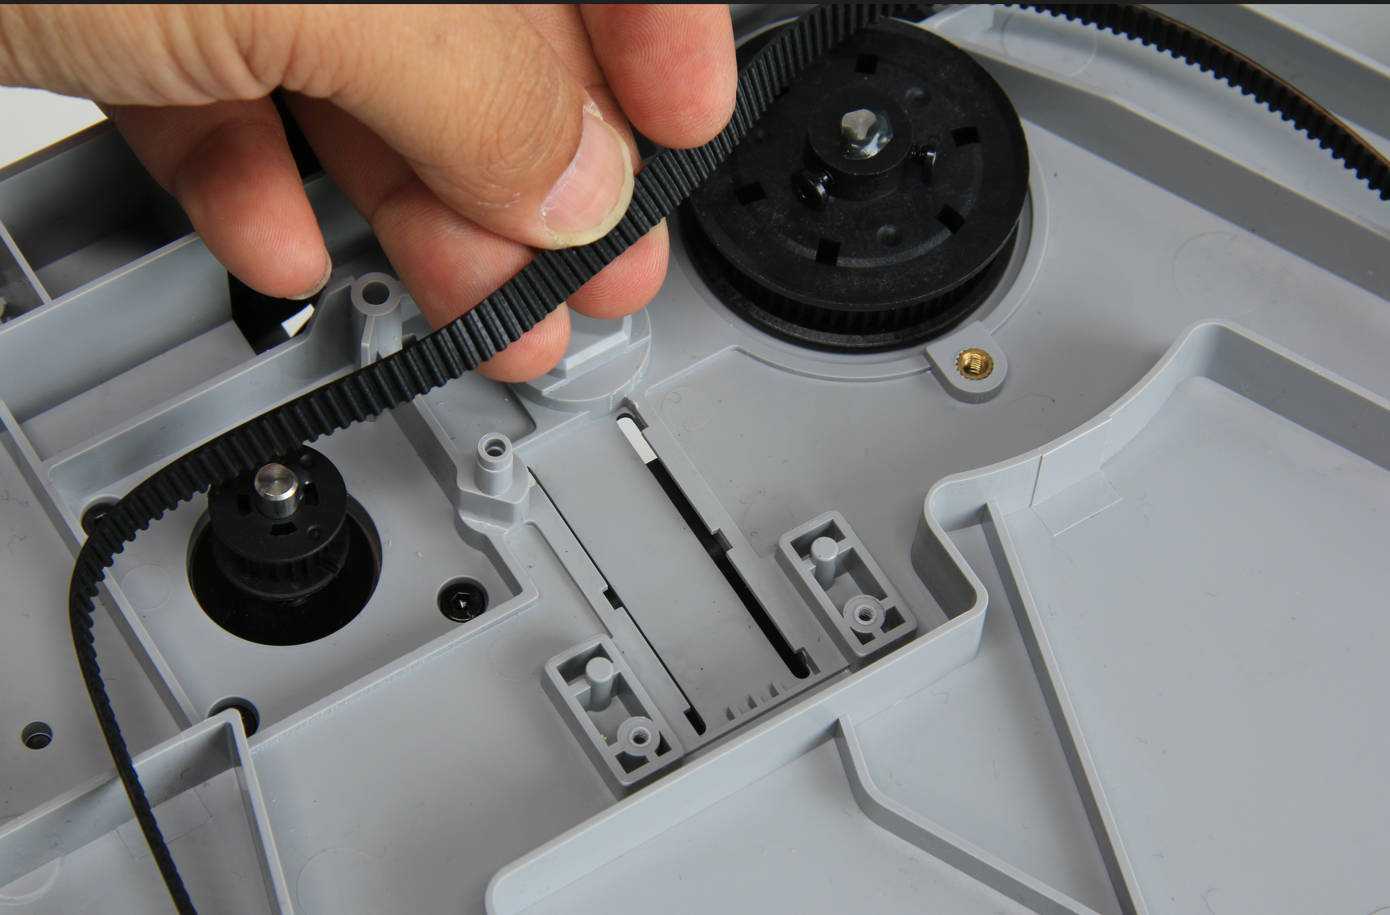
¶ Step 7 - Removing the old Z belt
Now you can take out and remove the Z belt easily.
Warning: Do not rotate the Z belt wheels alone; it will cause the heatbed to tilt.
¶ Step 8 - Installing the new Z belt
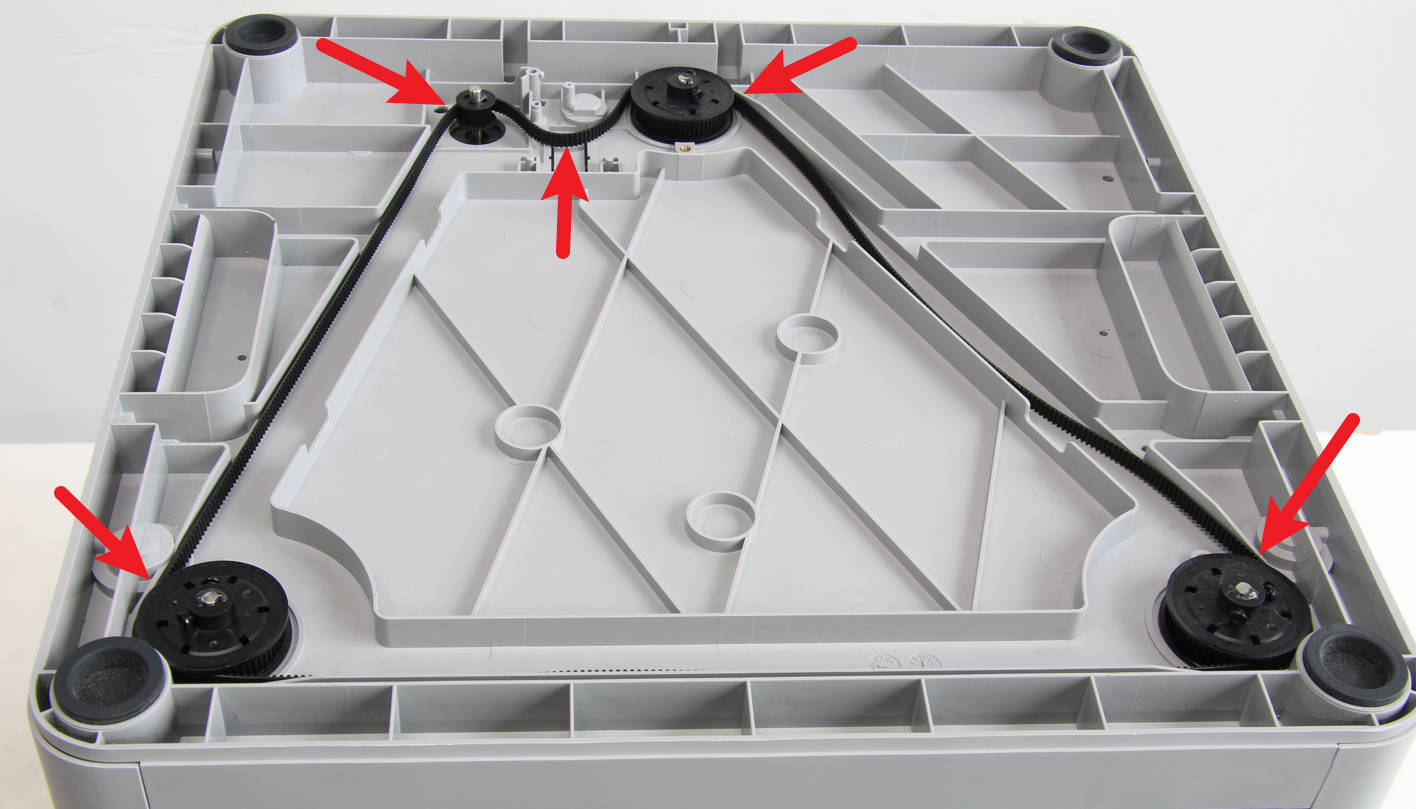
Install the new belt to the printer, and place it as shown in the picture below. Make sure that the teeth' side is facing inward.
Warning: Do not rotate the Z belt wheels alone; it will cause the heatbed to tilt.
¶ Step 9 - Installing the Z tension pulley assembly
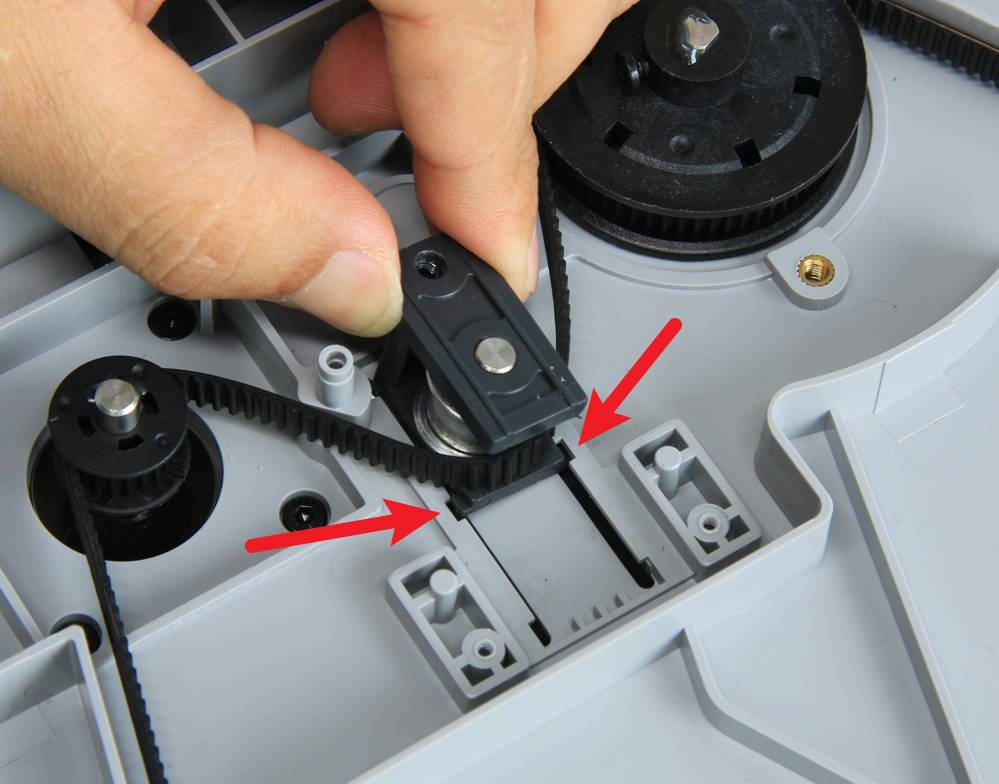
Confirm that the nut is inside the assembly, and then install the tension pulley assembly into place.
 |
|
¶ Step 10 - Installing the torsion spring and the pulley cover
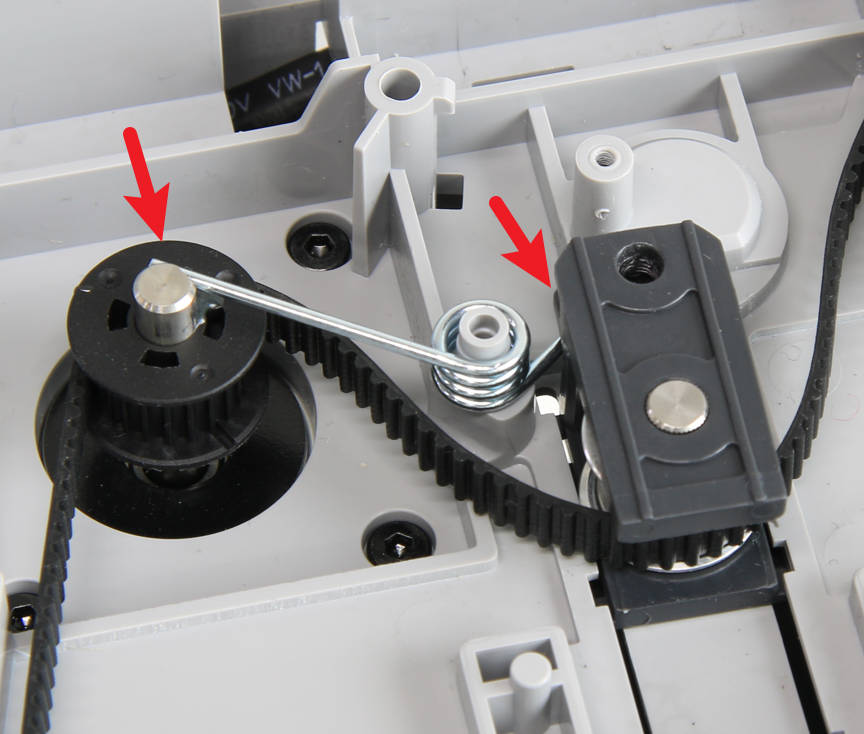
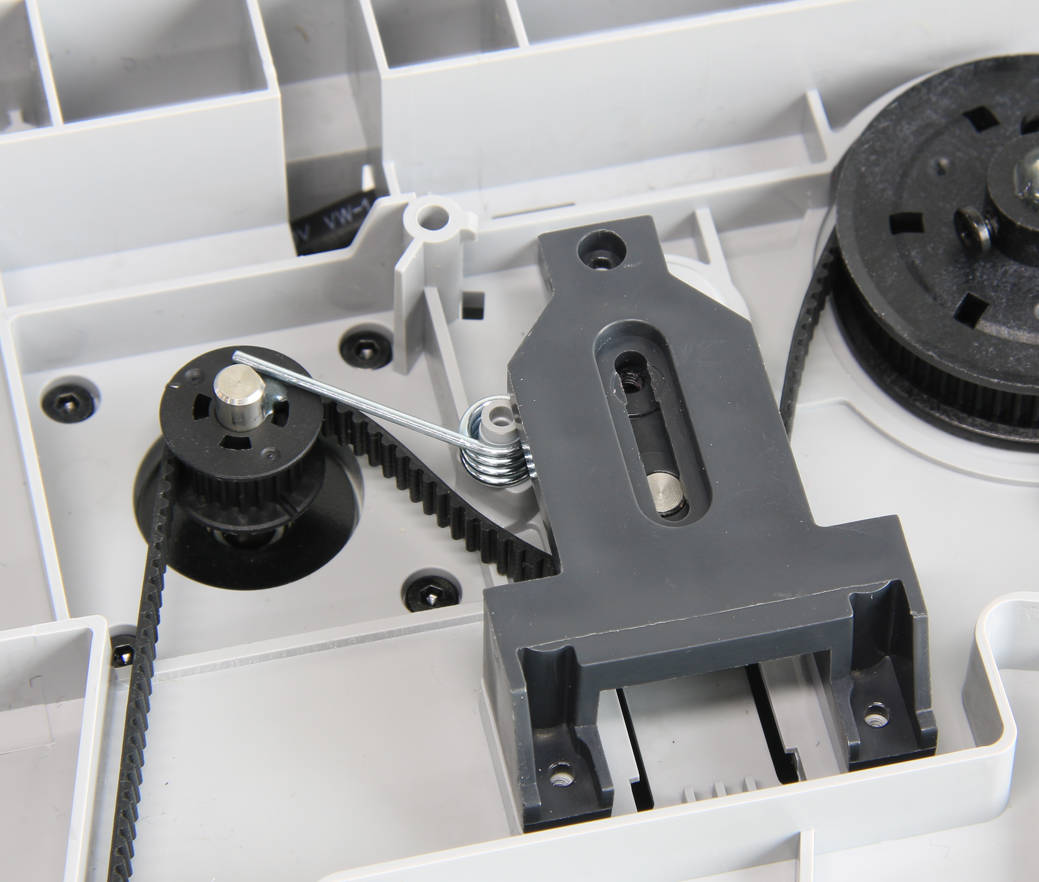
Install the torsion spring, noting that the shorter end is on the right side, and then place back the pulley cover.
 |
 |
¶ Step 11 - Locking screws and tension the spring
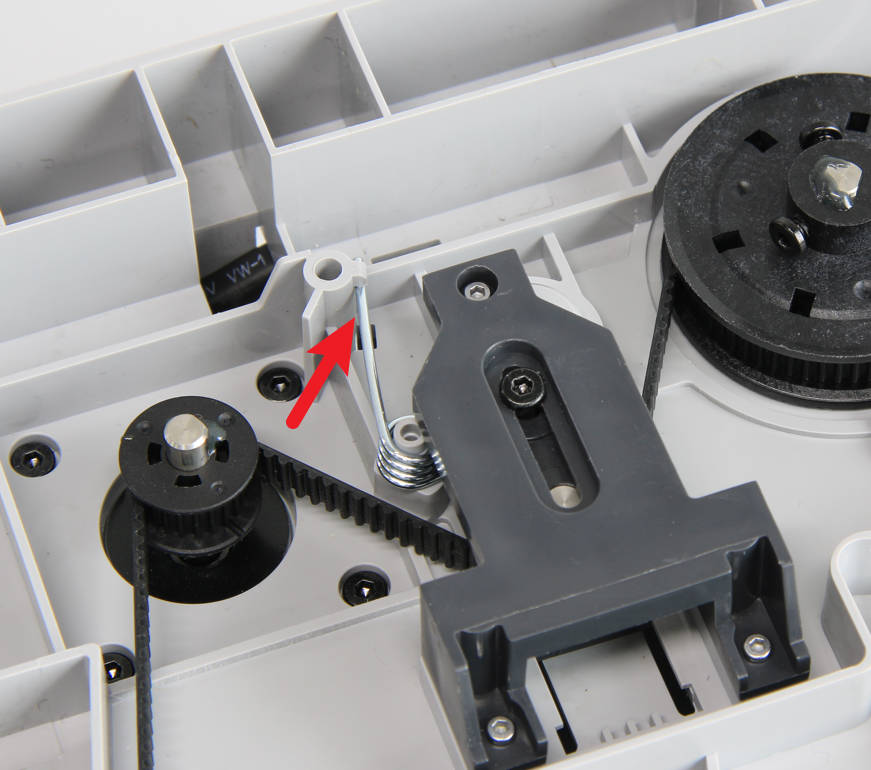
Lock the 3 silver screws with an H1.5 hex key to fix the cover, and prefix the black screw with an H2.0 hex key, do not tighten it. Bend the spring to place to make it tense.
 |
 |
¶ Step 12 - Remove slider set screws
Flip the printer back over, place it upright, and remove the locking screws on the 3 sliders.
¶ Step 13 - Tension the Z belt and tighten the screw
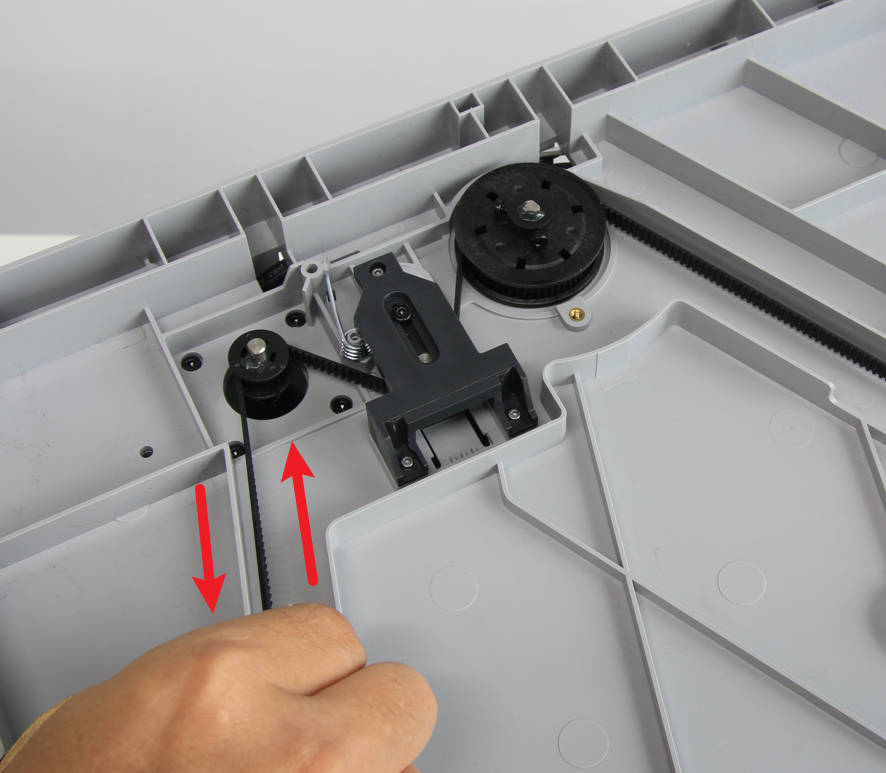
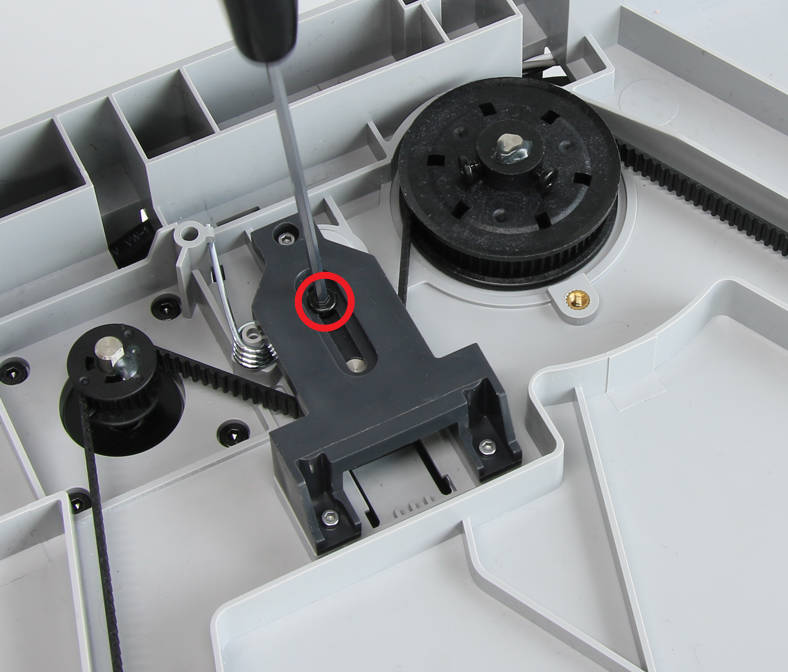
Tilt the printer again, move the Z belt back and forth several times to make sure the movement is smooth, and then tighten the black screw.
 |
 |
¶ Step 14 - Turn the printer upright and replace the glass cover plate
Turn the printer upright again and place back the glass cover plate.
¶ How to verify completion/success
- Connect the power cord and turn on the printer
- Run a Device self-test operation as shown below, and if no errors occur, the replacement was successful.
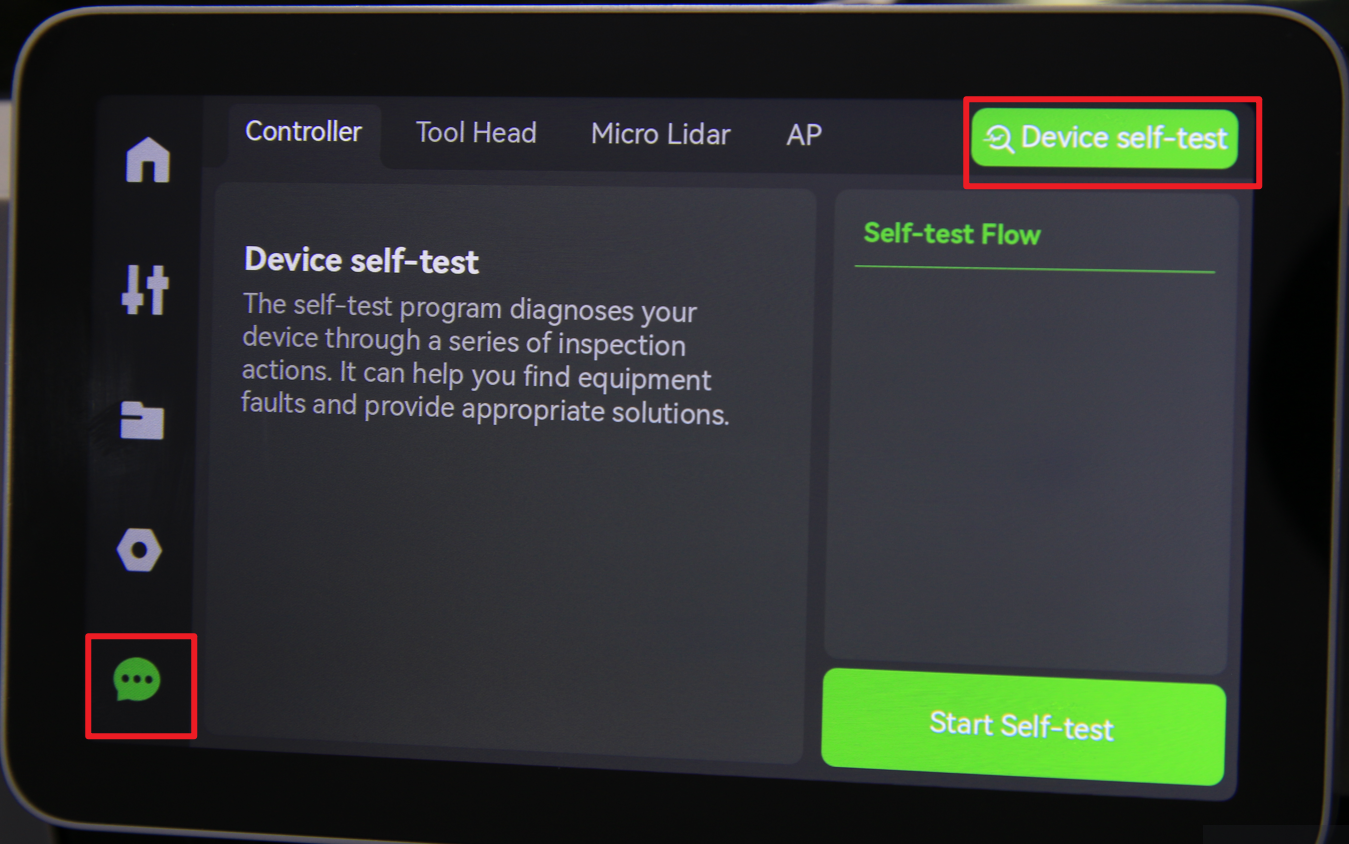
Should you come across any issues, first retrace your steps and check the installations, especially the direction of the belt and the connection of the LCD screen, and try again. If problems persist, contact the customer support team for further assistance.