¶ What is the AMS feeder funnel unit
The AMS feeder funnel unit is mainly composed of a structure with a funnel-shaped feeding inlet and a circuit board.
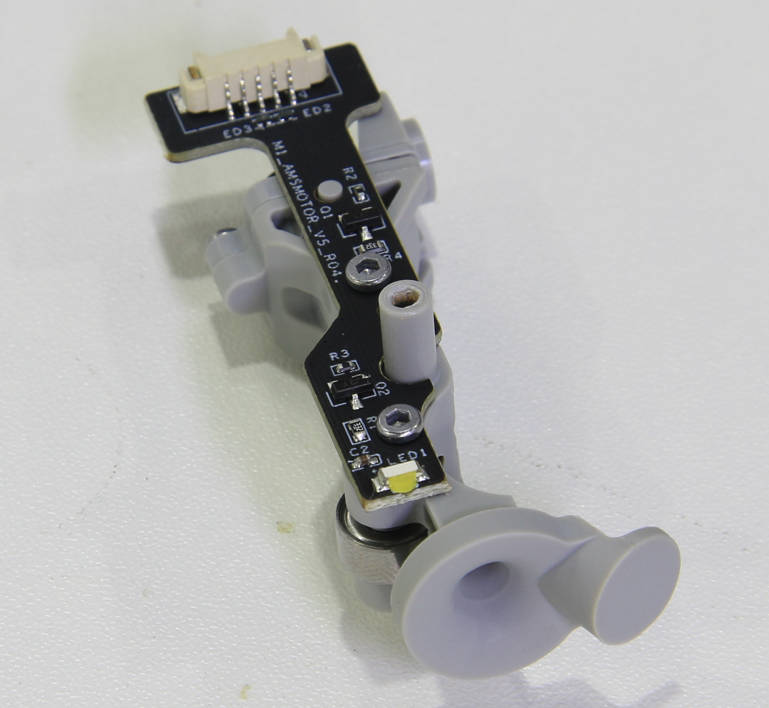
¶ When to use
The funnel-shaped feeding inlet is seriously worn, which has affected the loading and unloading filaments, or it has been confirmed by the after-sales team that the circuit board on it is faulty.
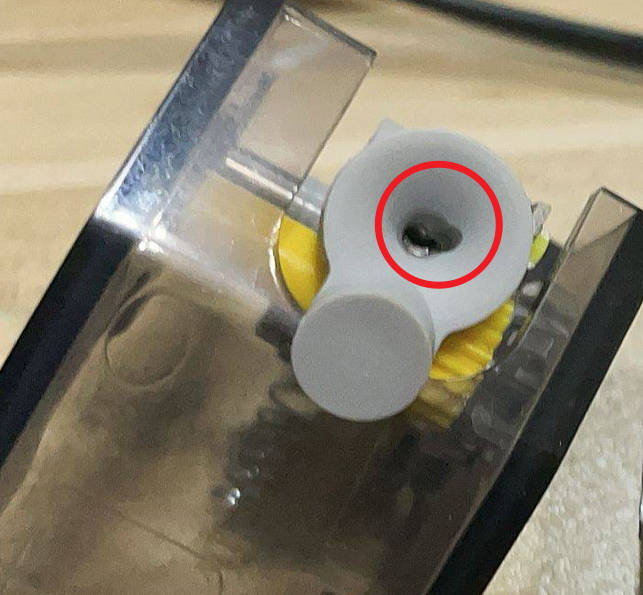
¶ Tools and materials needed
1. A new AMS feeder funnel unit
2. H2.0/H1.5 hex key
3. Tweezers
4. Pliers
¶ Safety warning and Machine state before starting operation
Turn the power OFF to the printer and disconnect the AMS connection with the printer.
¶ Operation
¶ Step 1 - Remove the first stage feeder from the AMS
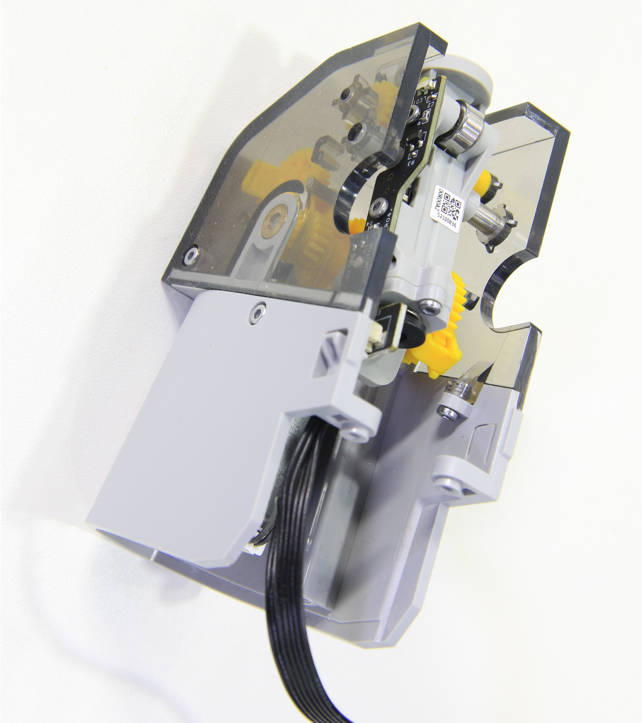
Please refer to steps 1~7 of Replacing the AMS first stage feeder to remove the AMS first stage feeder, and then disconnect the PFTE tube.
¶ Step 2 - Remove screws
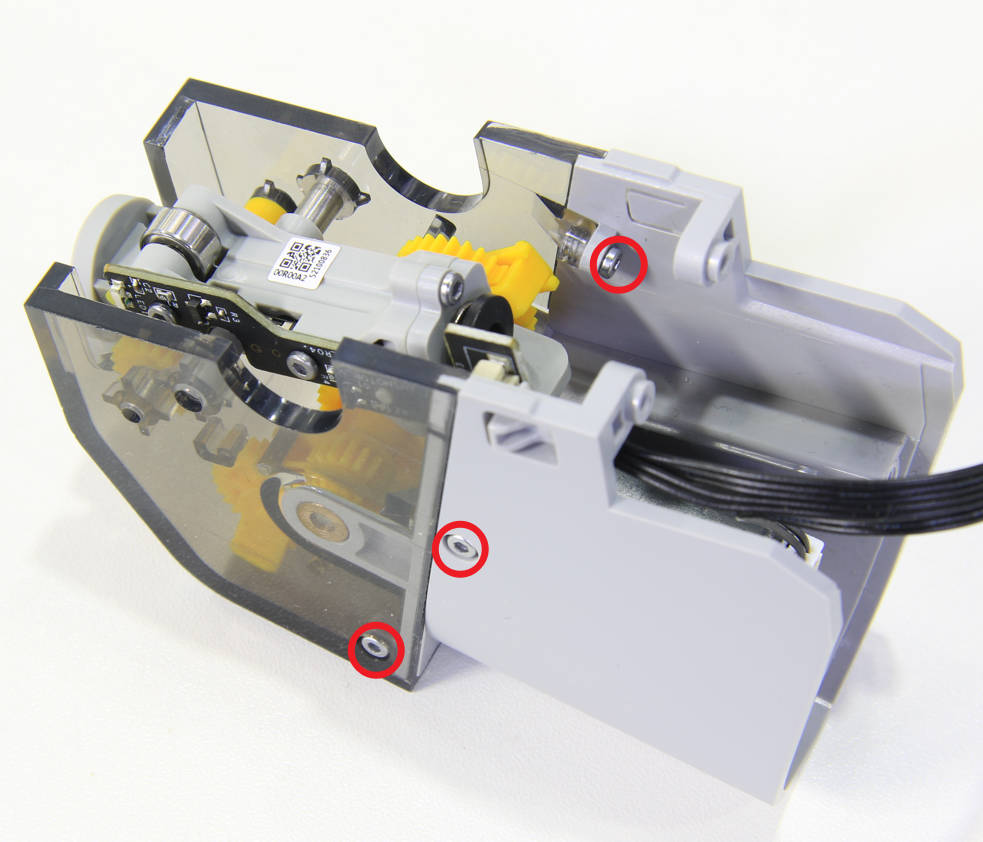
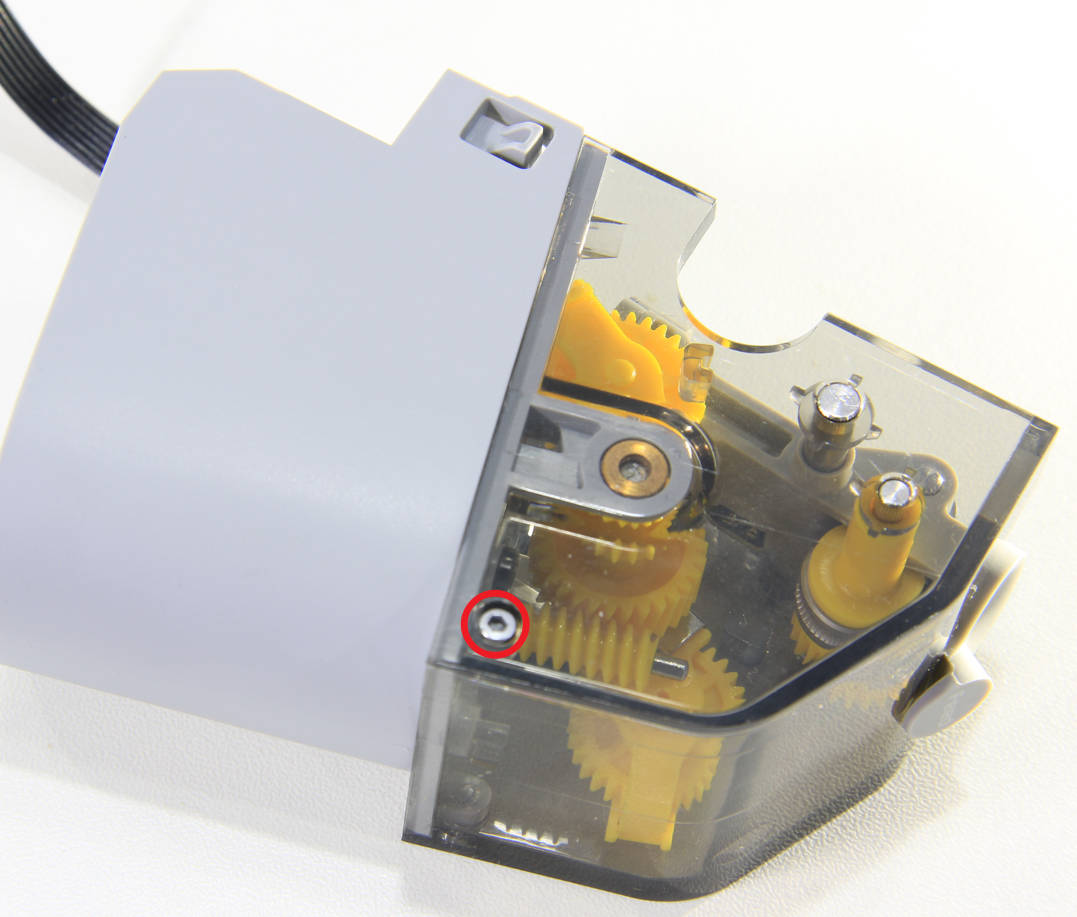
Remove 4 screws with the H1.5 hex key.
 |
 |
¶ Step 3 - Detach the bottom base and the upper cover
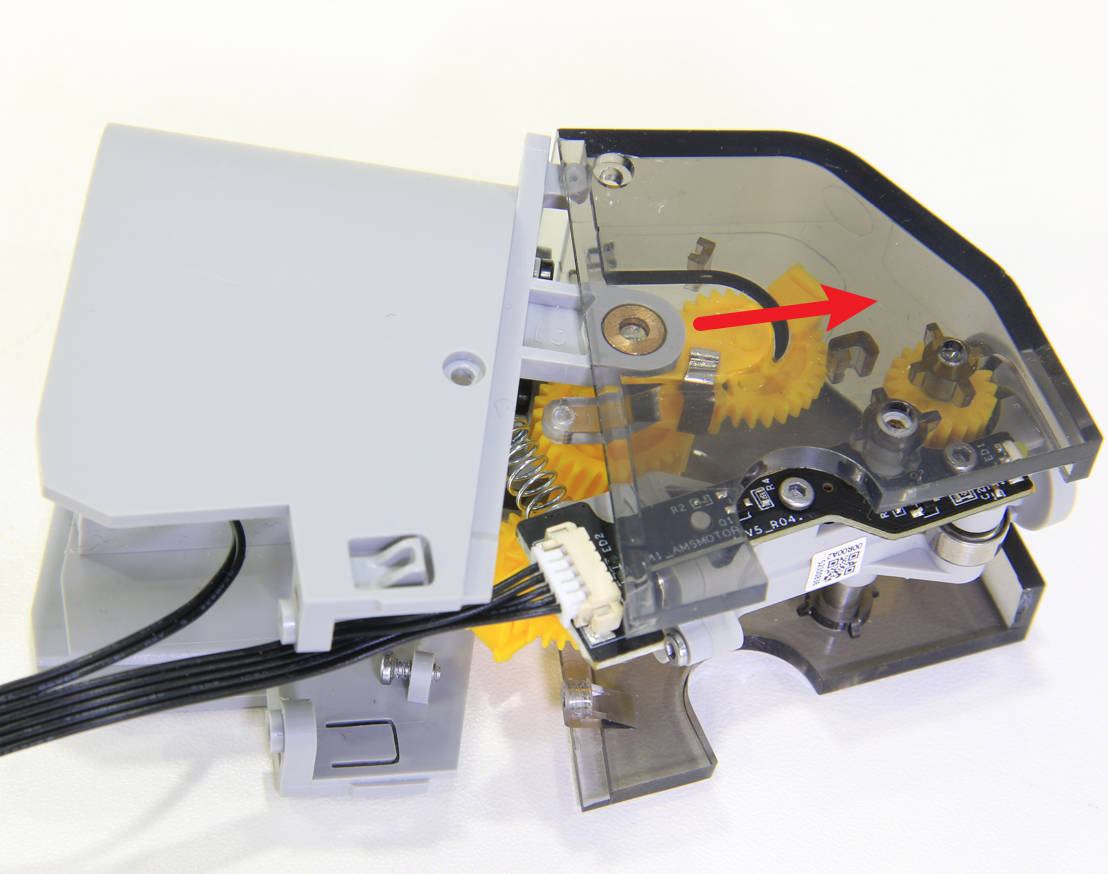
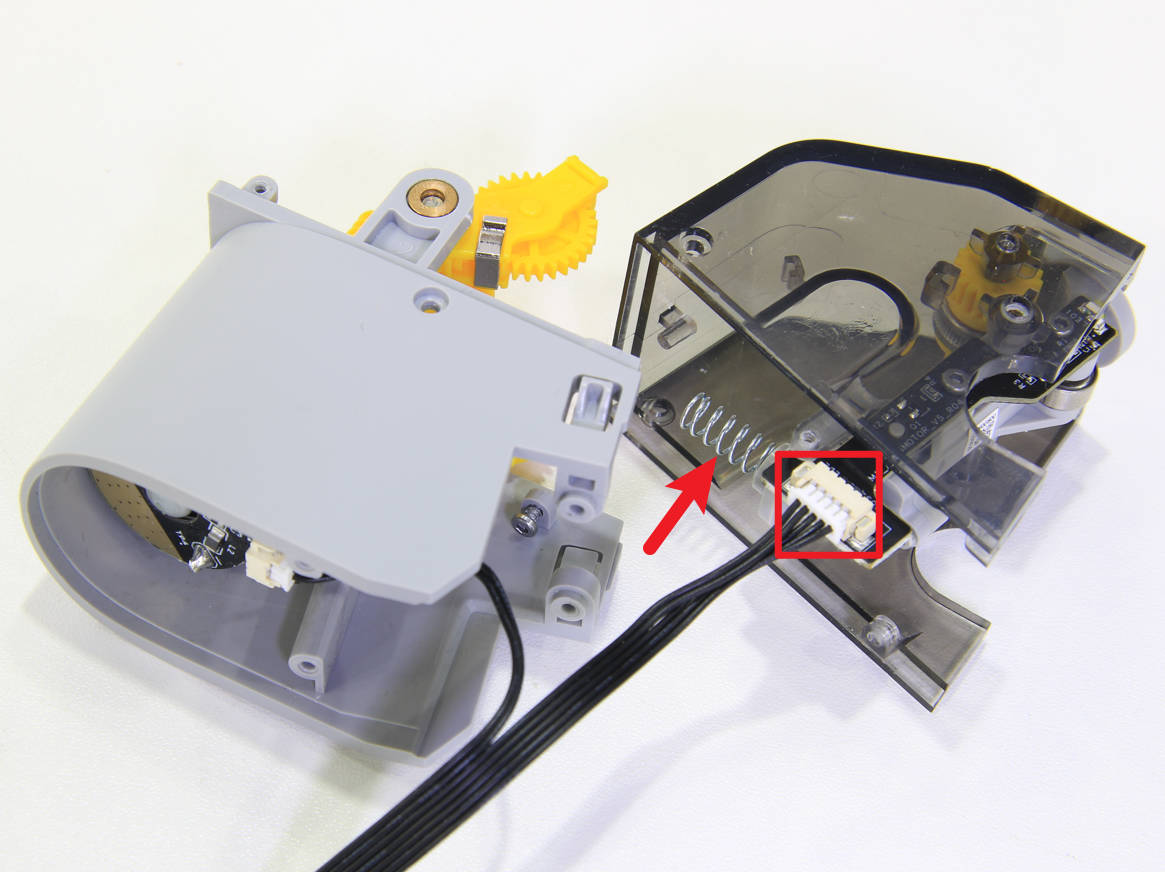
Detach the upper cover from the bottom base, remove the springs, and disconnect the cable from the circuit board.
 |
 |
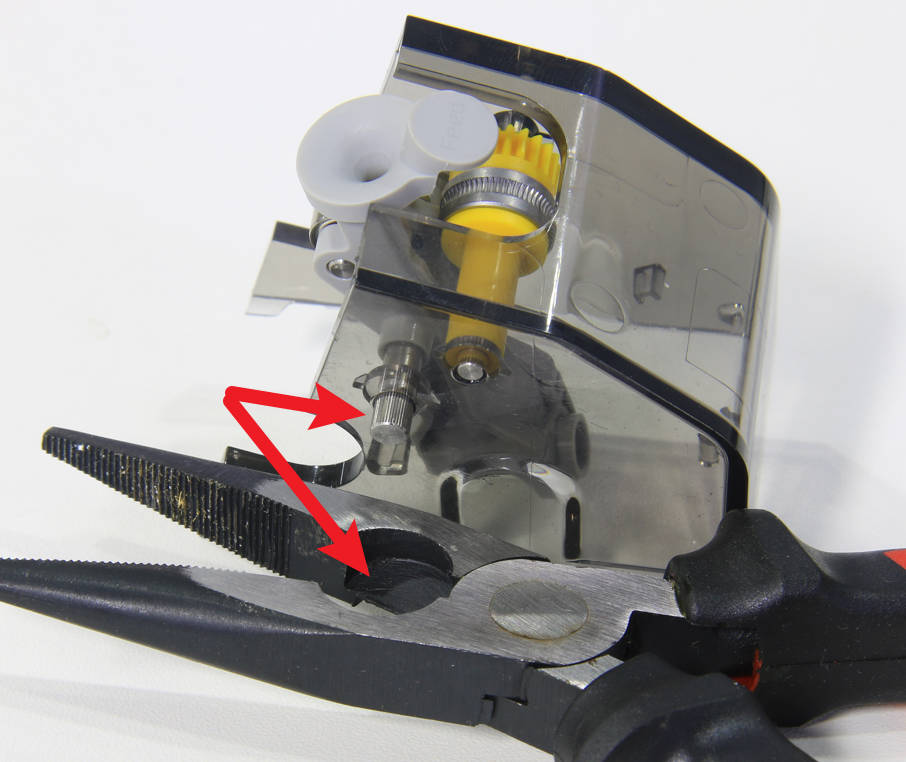
¶ Step 4 - Knock out the shaft
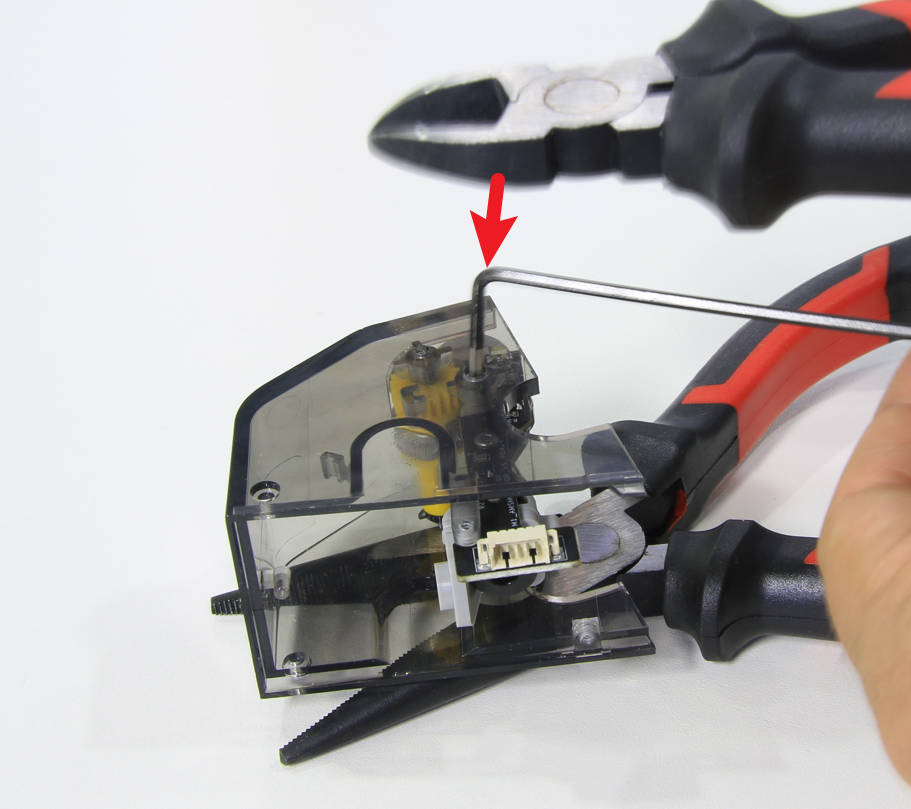
Knock out the feed funnel assy shaft with the H1.5 hex key and pliers, pay attention to the place where the shaft comes out, and leave a place for avoidance.
 |
 |
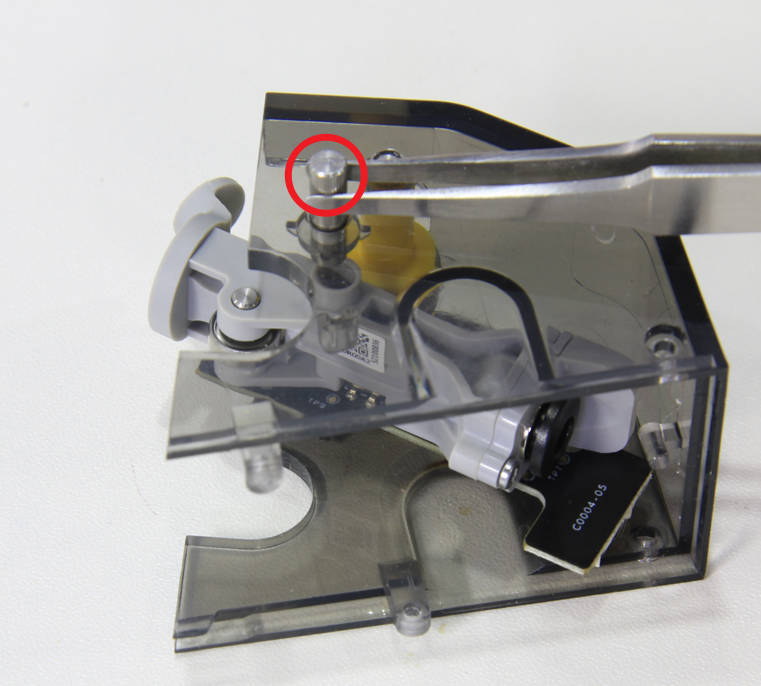
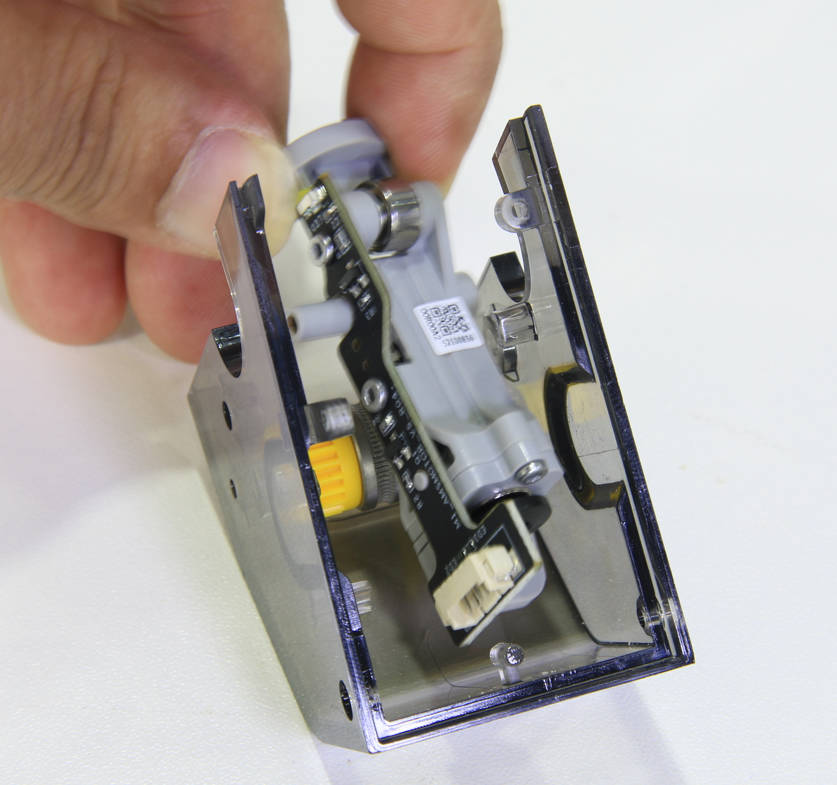
¶ Step 5 - Remove the shaft, and take off the AMS feeder funnel unit
Remove the shaft with tweezers, and then take off the AMS feeder funnel unit.
 |
 |
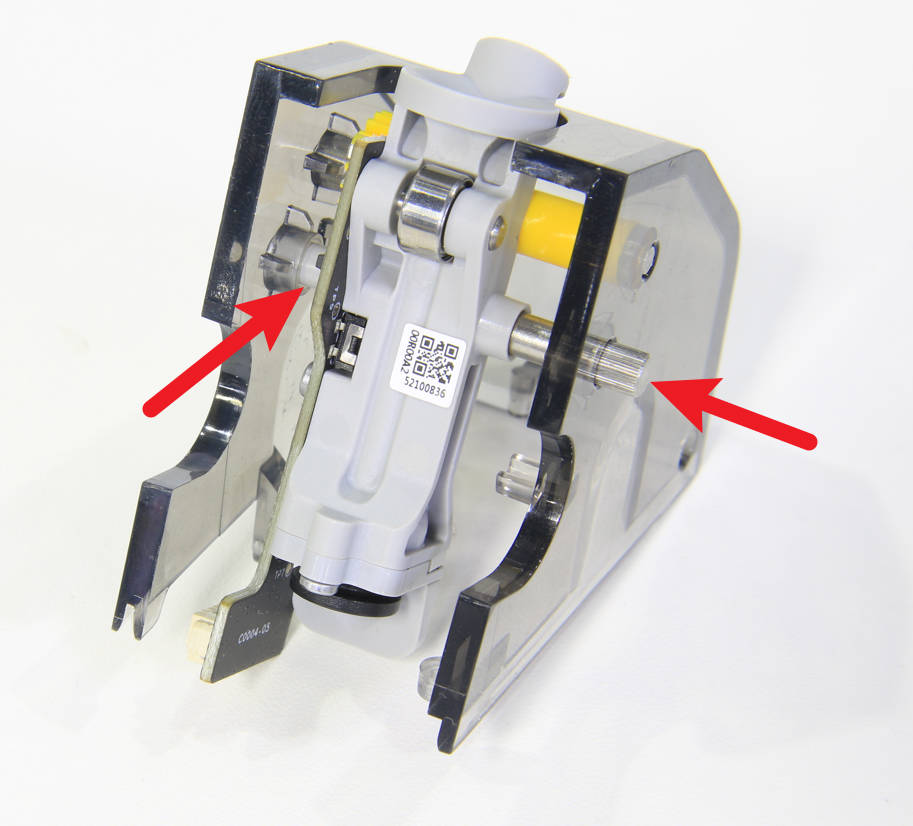
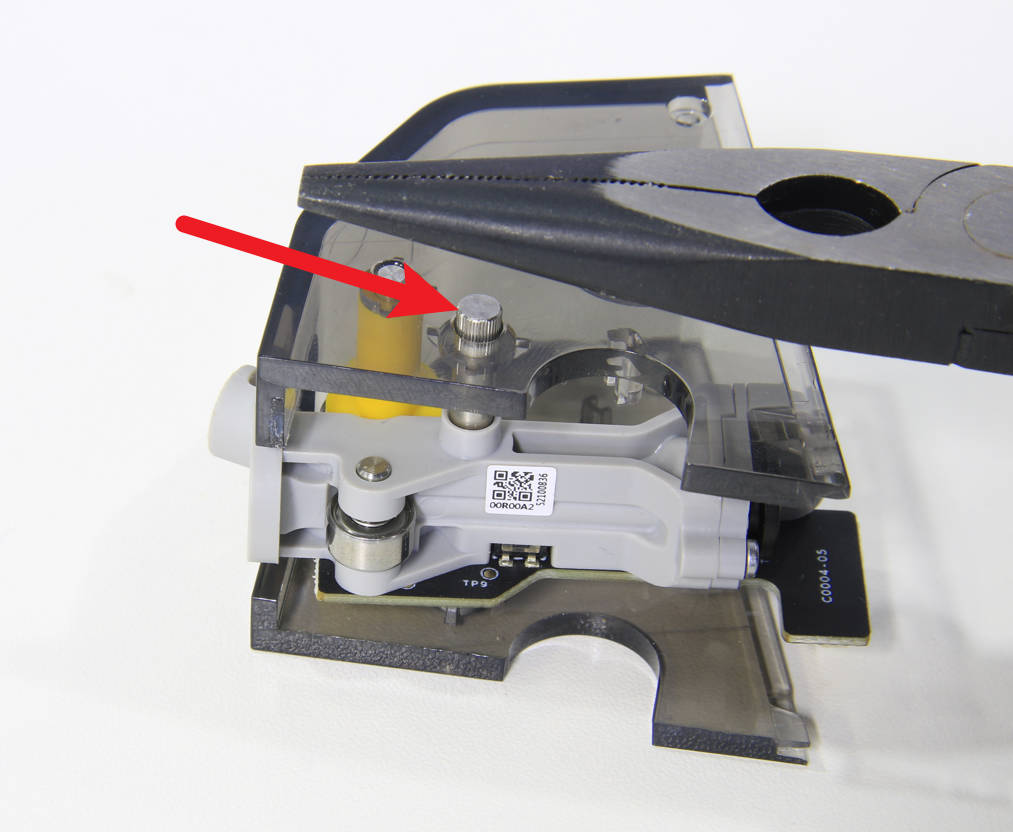
¶ Step 5 - Install the AMS feeder funnel unit and the shaft
Install the AMS feeder funnel unit and the shaft, the shaft can be knocked into place with pliers.
 |
 |
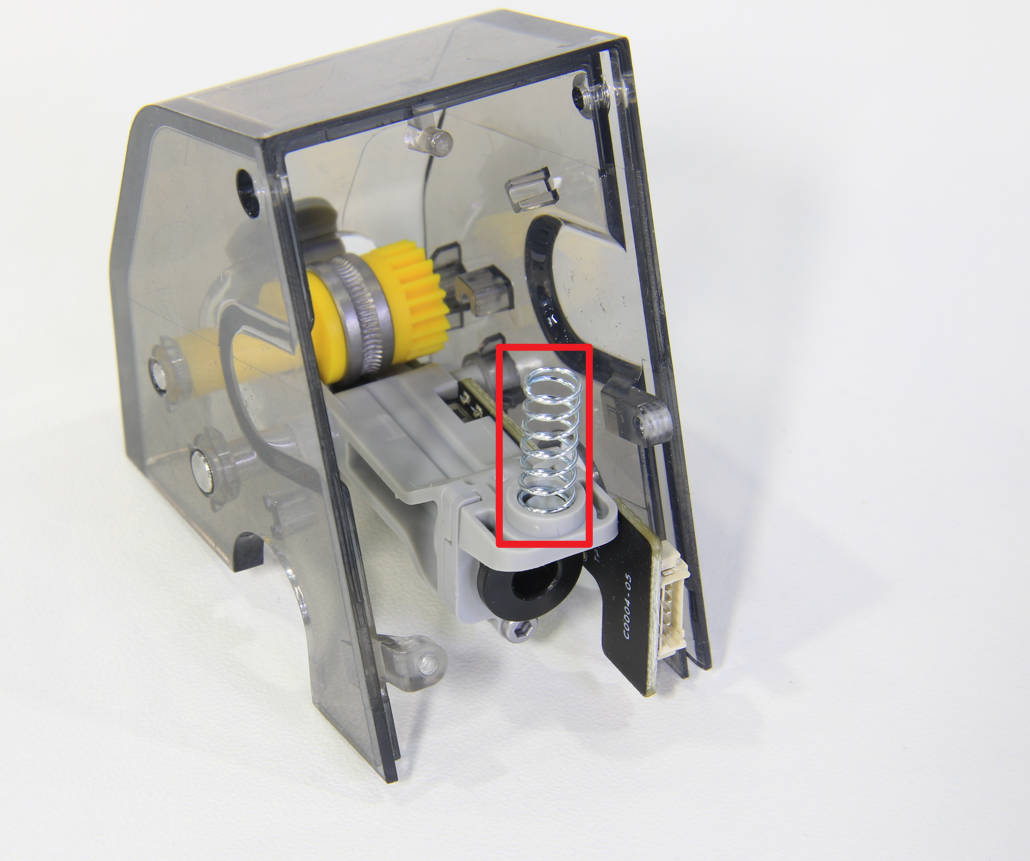
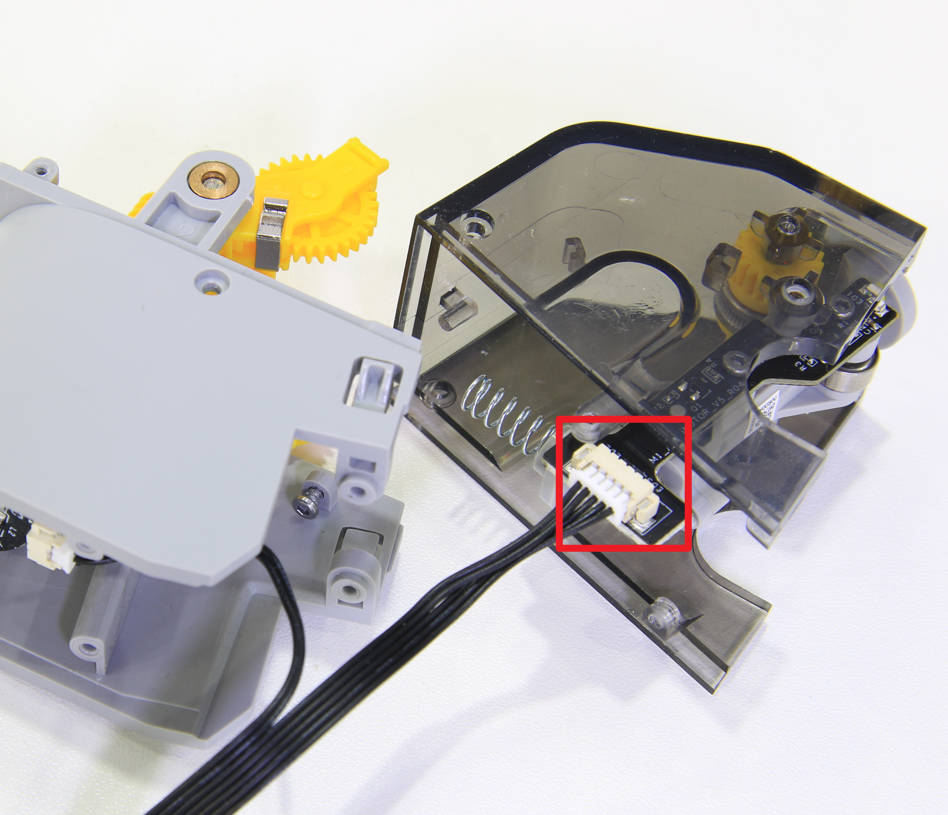
¶ Step 6 - Install the spring, and connect the cable
Install the spring to the feed funnel assy and connect the cable to the connector on the circuit board.
 |
 |
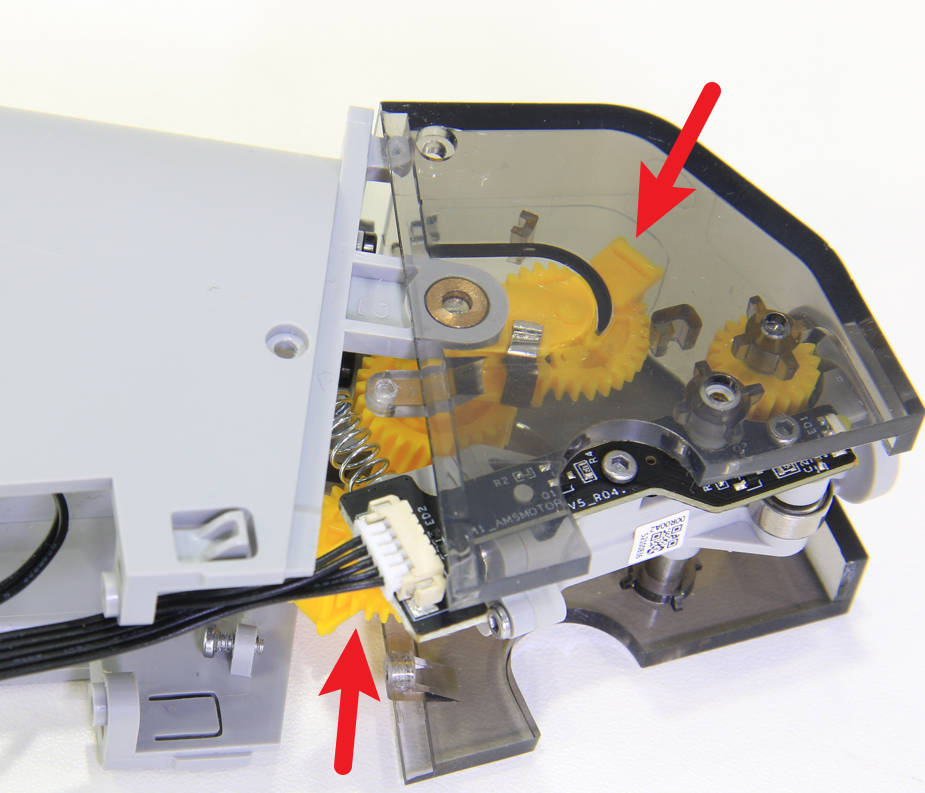
¶ Step 7 - Assemble the upper cover and the bottom base
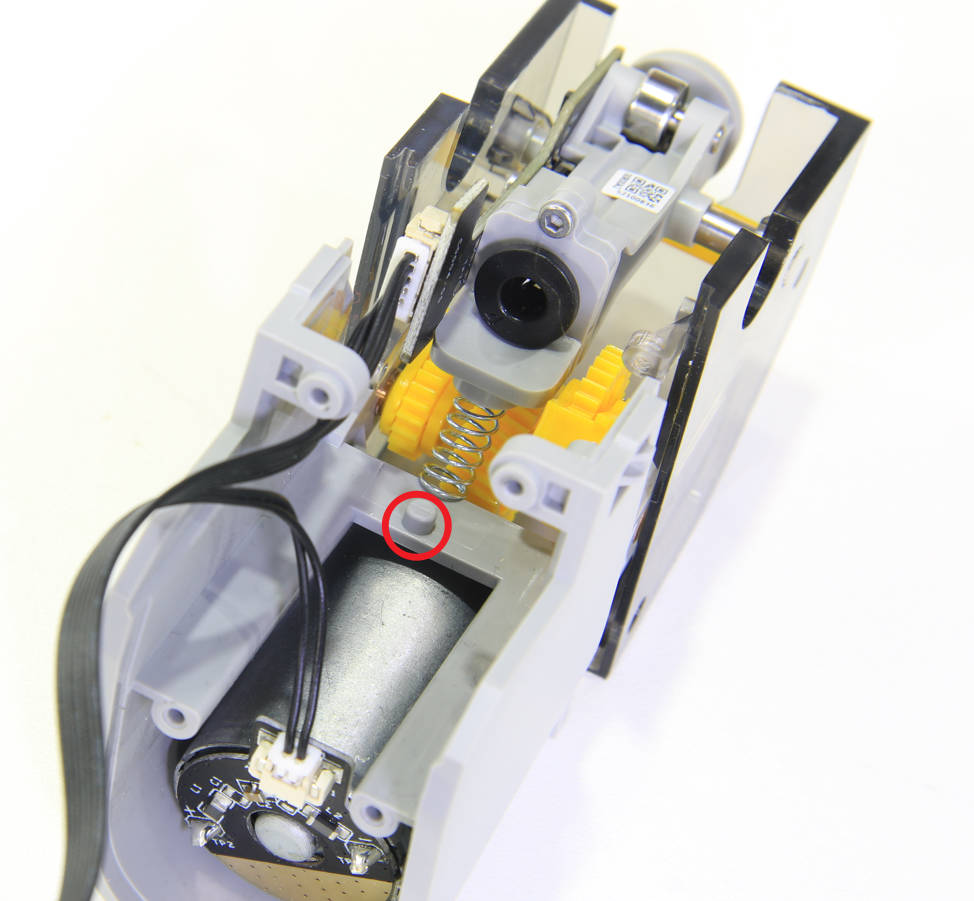
Adjust the position of the gear sets, and mount the upper cover and the bottom base. During the process, use tweezers to adjust the position of the spring and install its other end to the boss on the base.
 |
 |
¶ Step 8 - Check the gear sets position
After mounting in place, double-check the position of the gear sets(should be as shown in the pictures below), if the positions are not correct, please adjust the positions of the gear sets and remount the upper cover.
 |

|
¶ Step 9 - Lock Screws
Lock in 4 screws to fix them, just lock the screws in place, and do not tighten them vigorously to prevent slipping.
 |

|
¶ Step 10 - Install the first stage feeder to AMS
Please refer to steps 8~14 of Replacing the AMS first stage feeder to connect the PTFE tube and install the first stage feeder to the AMS, and then assemble the AMS.
¶ How to verify completion/success
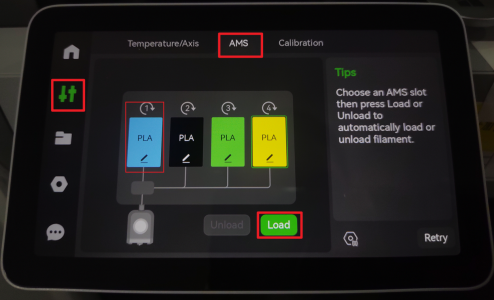
Connect the AMS to the printer and power it on. Load filaments to the slot you just replace the feed funnel assy, click "Load" on the screen to start loading the filament.
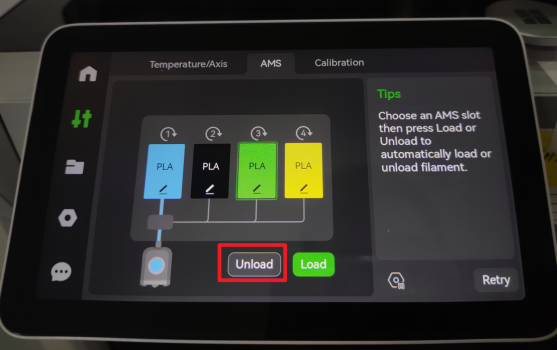
And then click unload to unload the filament.
Repeat the loading process 3 times, if all functions are OK, the replacement is complete and successful. Otherwise, check the connections of the cables and filament tubes, if no error is found and still malfunctions, contact the service team for solution advice.