¶ What is a micro Lidar?
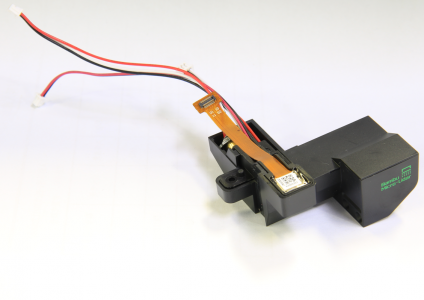
The Bambu micro lidar is a sensor capable of measuring depth in micrometers. It brings micrometer-level precision into 3D printing. The system probes the nozzle height from the bed's surface, calibrates the flow extruded from the nozzle, and scans the first layer.
Before replacing the micro lidar or TH board for X1C/X1, please determine their versions to avoid the wrong version, which results in compatibility issues. Bambu Lab micro lidar introduction and methods for distinguishing versions(single red or dual red)
¶ When does the micro lidar need changing?
If at any point, your printer brings up a warning on the screen related to “lasers” shows up some warning about the lasers (for example, the laser is not lit), you checked the connections but did not help.
¶ Tools and materials required
- New Bambu micro lidar module
- H1.5 Allen key
- Hair dryer
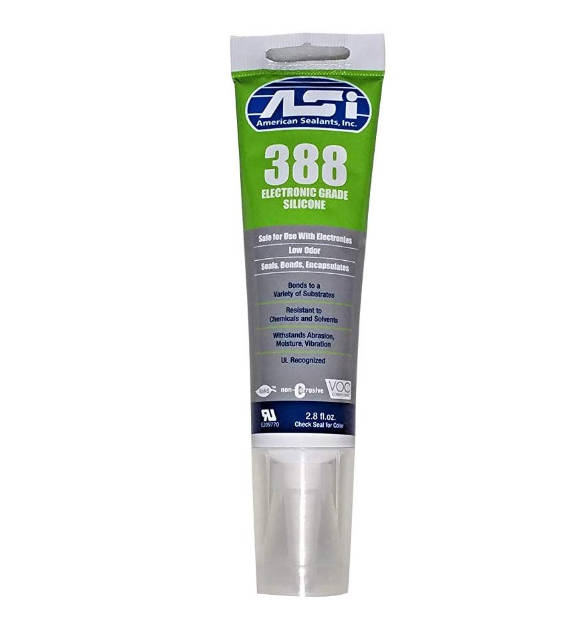
- Silicon glue
¶ Safety warning and Machine state before starting operation
Please follow this guide steps carefully in order to perform the replacement. Make sure the machine is powered off before commencing any disassembly and assembly.
¶ Operational guide
¶ Step 1 - (Disassembly) Lower the heatbed
Power ON the printer, Navigate to the movement menu on the display, and lower the heat bed all the way to the bottom of the machine. Once done, power off the printer and remove the top glass cover plate.
¶ Step 2 - Removing the rear cover of the toolhead
Undo the 4 screws securing the back cover of the tool head using the Allen key and remove the back cover.

¶ Step 3 - Disconnecting the flex cable
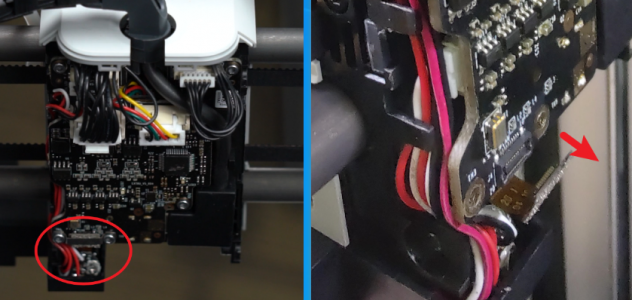
Undo the 2 screws located at the bottom left-hand corner of the board which secure the flex cable. Once done, gently unplug the flex cable connector.
¶ Step 4 - Loosen board screws
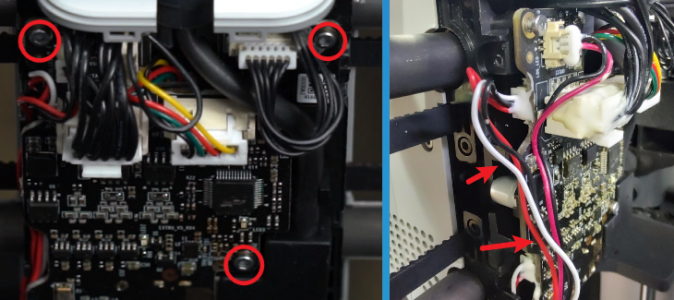
Loosen the 3 screws securing the breakout board just a little bit, just enough to make it easier to remove the micro lidar cables.
¶ Step 5 - Disconnecting cable connectors
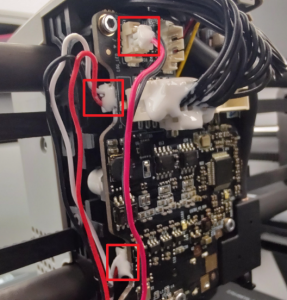
The connectors are secured in place with some hot glue in order to make sure they remain that way during operation. In order to unplug the connectors, use a hair dryer to heat up the glue and soften it enough to allow the connectors to easily unplug. Once disconnected, you can remove any of the excess glue that remains attached to the connectors.
¶ Step 6 - Removing the Bambu micro lidar
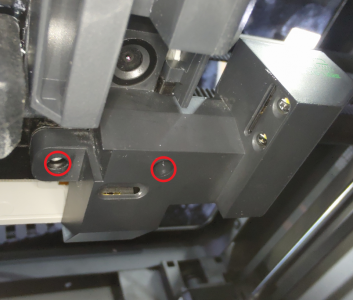
Undo the 2 screws holding the micro lidar in place which are located at the underside of the toolhead. Once done, the micro lidar should come off and can now be replaced.
¶ Step 7 - (Assembly) Installing the new Bambu micro lidar
We will now reverse all the disassembly steps in order to install a Bambu micro lidar to the toolhead, starting off with positioning the micro lidar at the bottom of the toolhead and securing it with the 2 screws.

¶ Step 8 - Connecting the 3 cables
Connect all three wires to the breakout board as shown below, it would be better to apply a little silicone glue to secure them in place and let stand for 30 minutes until the glue hardens completely. Once done, secure the breakout board in place with 3 screws.
.png)
¶ Step 9 - Routing the cables
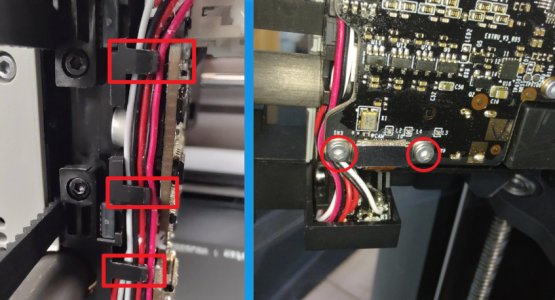
Route the cables along the side of the breakout board by pushing them along the edge as shown in the photo below. Then, very carefully, plug in the connector of the ribbon cable applying gentle pressure. Once done, secure the connector plate of the ribbon cable in place with 2 screws.
¶ Step 10 - Installing the rear cover of the tool head
Re-install the back cover of the tool head and secure it with 4 screws (2 on each side). Once done, place the top glass cover back on the machine

¶ Verifying functionality
Once you power on the printer, a message should pop up indicating that a new micro lidar is detected.
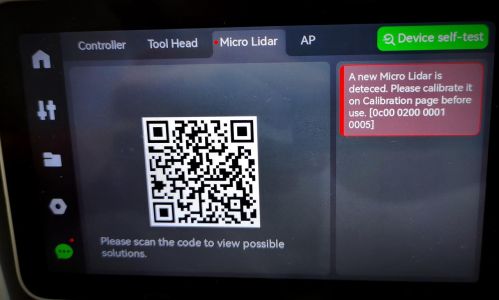
Make sure the chamber is clear of any prints or extrusions on the bed, go to the settings menu on the screen, then select Calibration and press “Start Calibration”
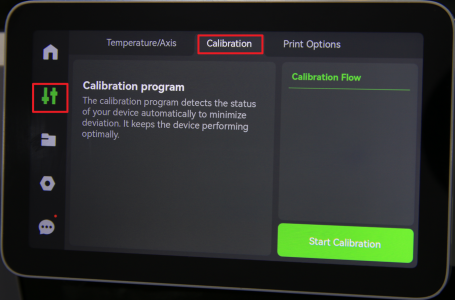
Once the calibration is complete, perform a device self-test as indicated below.
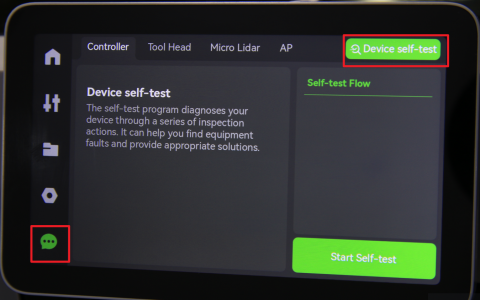
If everything went according to plan, and no errors or warnings occur during the calibration and self-test, the replacement was successfully completed. Otherwise, check the connections and retry again. If any issues persist, please contact the service team for further assistance.