In this guide we will show the process of replacing the hinge attached to the High Resolution Screen of the X1 Series
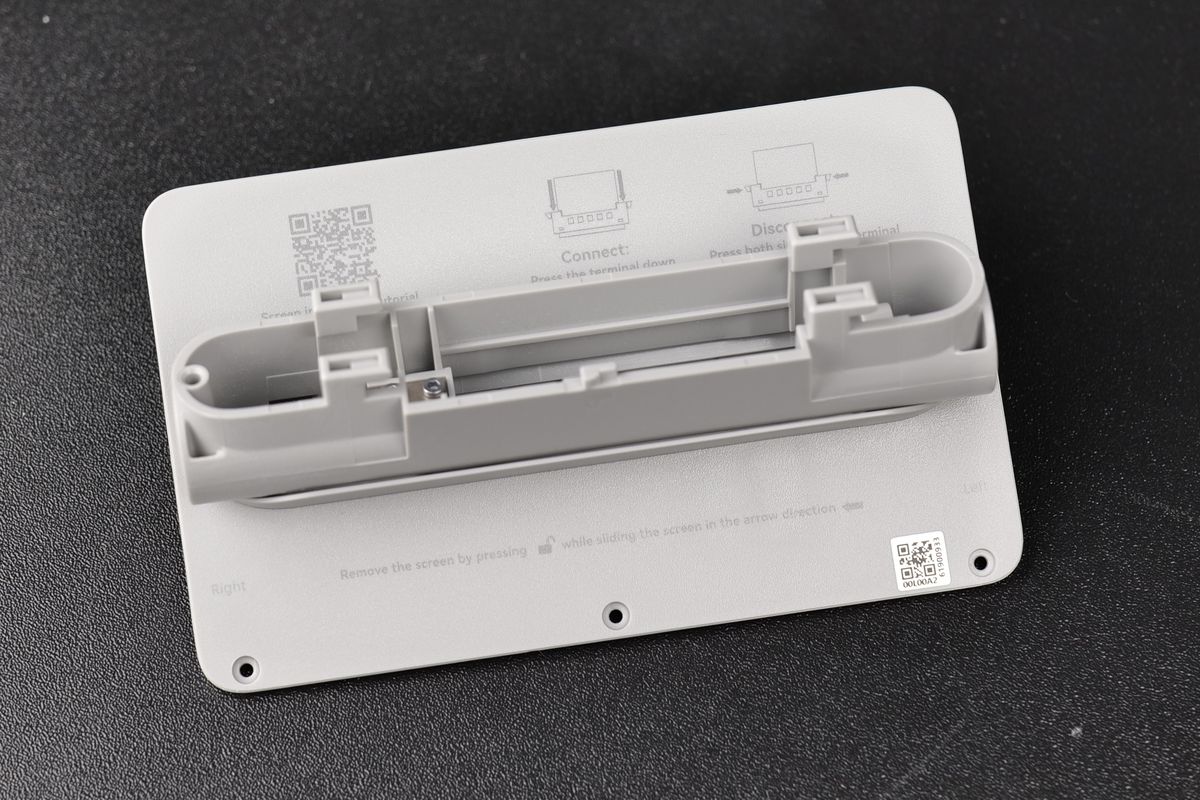
¶ When to use?
This guide should be used if the hinge of the High Resolution Screen is damaged or not working correctly.
Common issues of the hinge are:
- The plastic clips of the screen are broken
- The screen wobbles due to the hinge being damaged
- Recommended by Bambu Lab Customer Support
¶ Tools and materials needed
Bambu Lab High Resolution Screen Hinge
- H2.0 hex wrench
- Prying tool
- 10-15 minutes
¶ Safety Warning
IMPORTANT!
It's crucial to power off the printer before performing any maintenance work on the printer and its electronics, including tool head wires, because leaving the printer on while conducting such tasks can cause a short circuit, which can lead to additional electronic damage and safety hazards.
When you perform maintenane or troubleshooting on the printer, you may be required to disassemble some parts, including the hotend. This process can expose wires and electrical components that could potentially short circuit if they come into contact with each other or with other metal or electronic components while the printer is still on. This can damage the electronics of the printer and cause further damage.
Therefore, it's essential to switch off the printer and disconnect it from the power source before doing any maintenance work. This will prevent any short circuits or damage to the printer's electronics. By doing so, you can avoid potential damage to the printer's electronic components and ensure that the maintenance work is performed safely and effectively.
If you have any concerns or questions about following this guide, open a new ticket in our Support Page and we will do our best to respond promptly and provide you with the assistance you need.
¶ Steps to remove the high resolution screen hinge
¶ Step 1. Unlock the screen
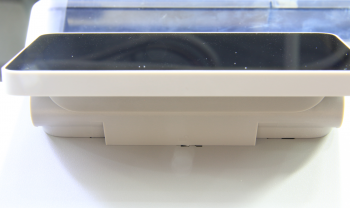
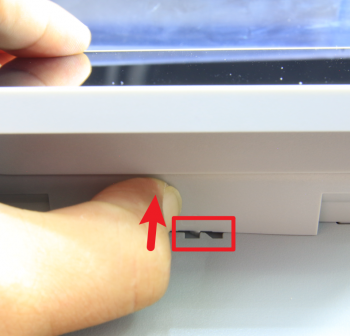
Tilt the screen up and press underneath with light force to release the buckle and push rightward to unlock the LCD high resolution screen.
IMPORTANT!
Do not forcibly pull off the screen as it is connected to the FPC cable, which needs to be disconnected. If the cable is damaged, a replacement is available in our store.
 |
 |
¶ Step 2. Disconnect the FPC cable
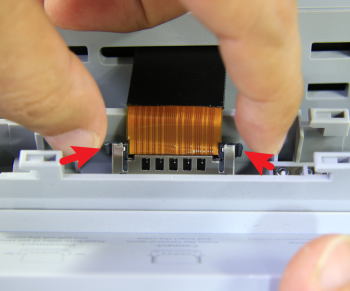
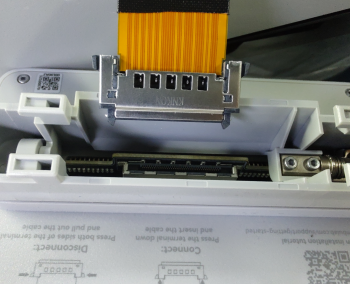
Press both sides of the FPC connector to unlock the connection and remove the LCD high resolution screen.
 |
 |
¶ Remove the Micro SD Card (if present)
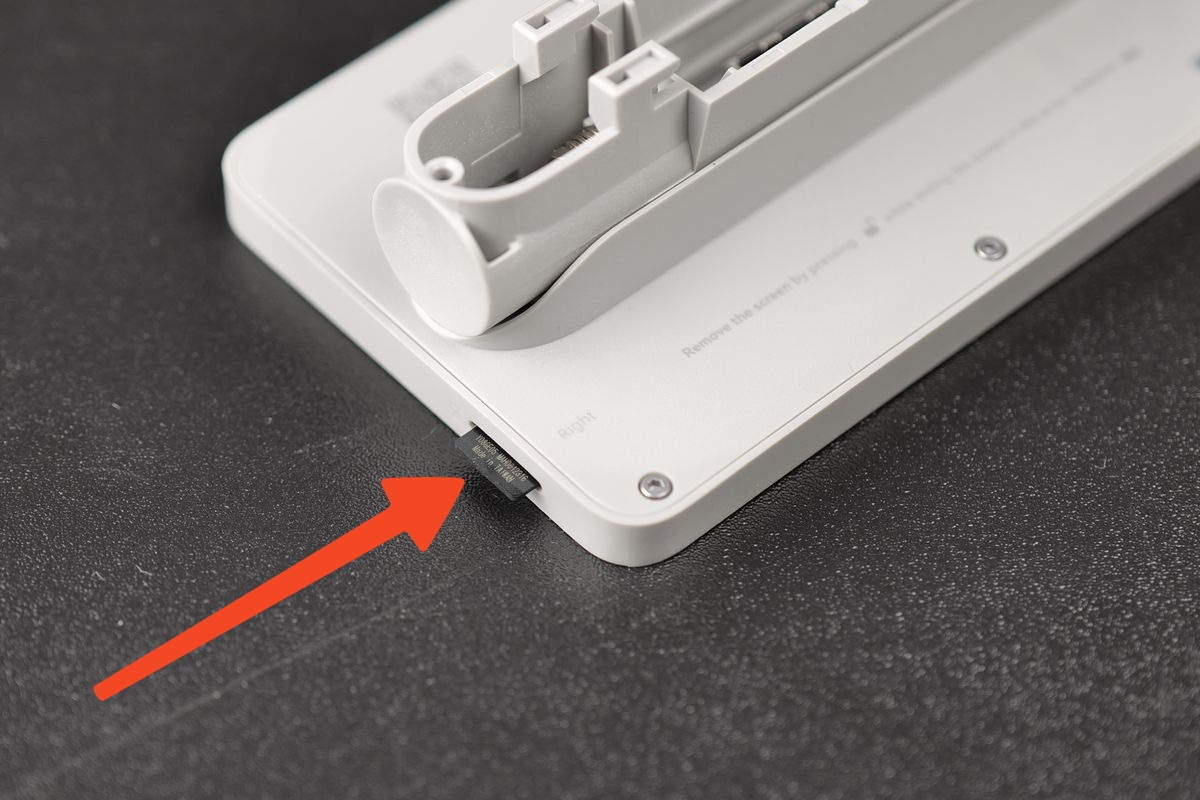
Push on the Micro SD card to release it from the screen, then take it out.
This step is important, as the back cover cannot be removed if the MicroSD card is installed
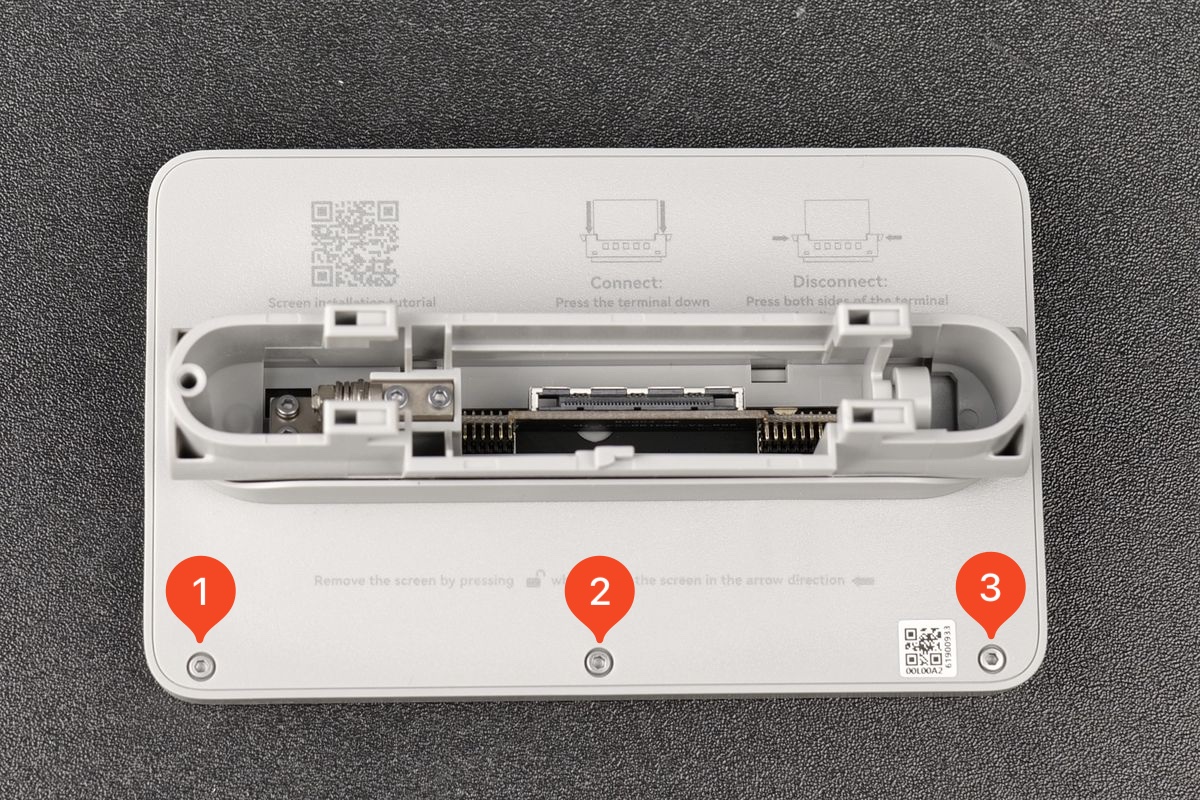
¶ Remove the three screws
¶ Steps to remove the plastic hinge
¶ Step 1. Gently pull the screen upwards by the hinge. This step will give you access to an opening on the bottom.
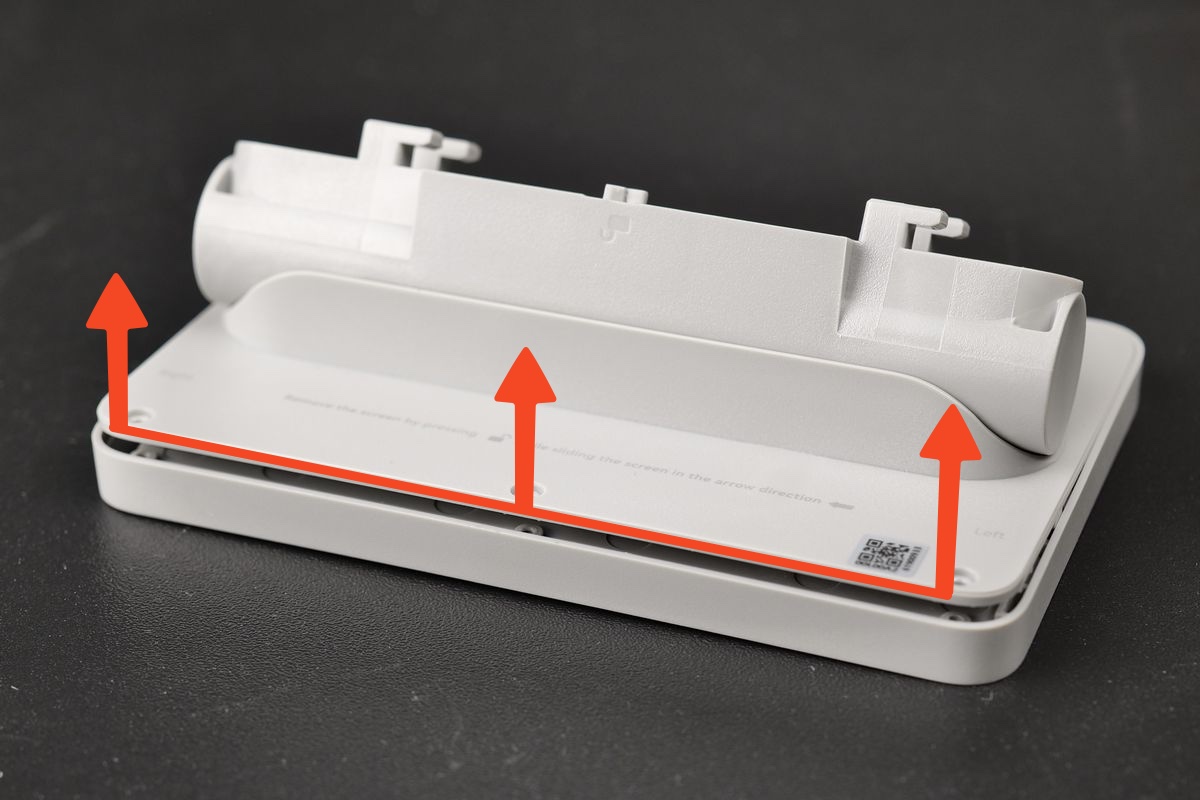
¶ Step 2. Use a prying tool or a flat object to carefully pry open the clips on both sides along the edges.
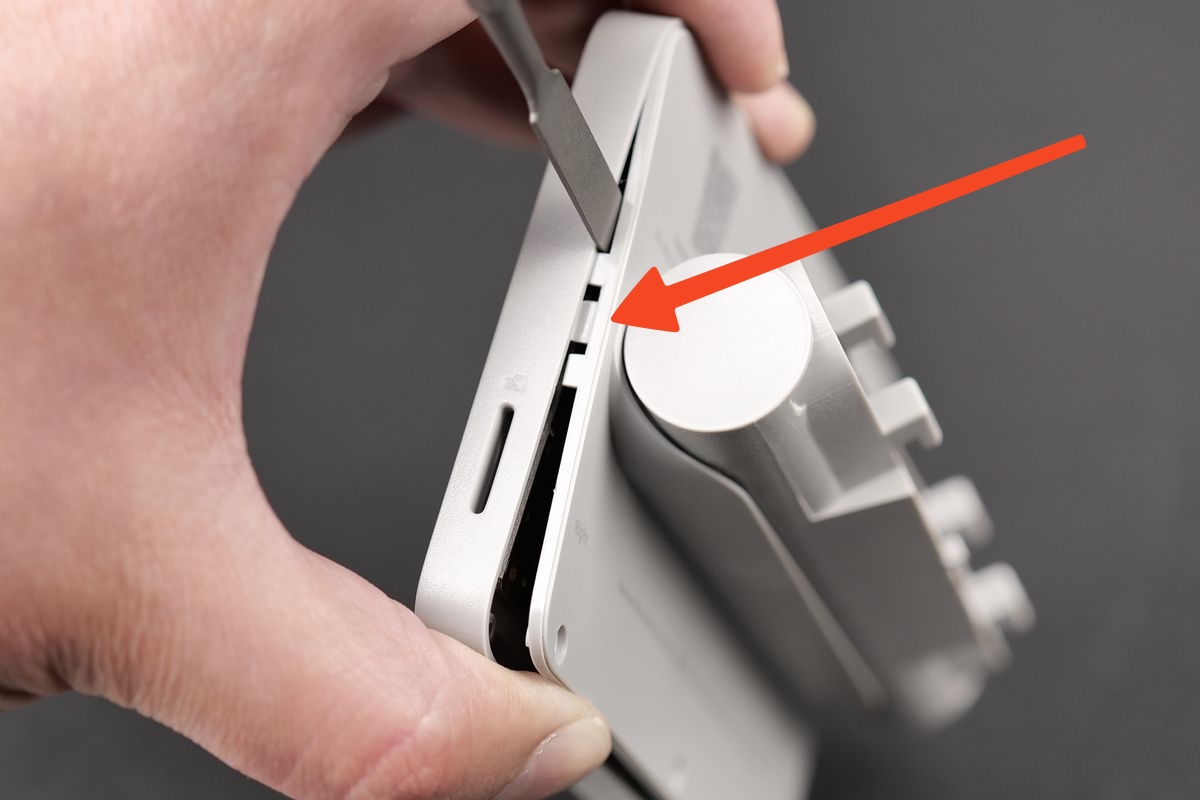
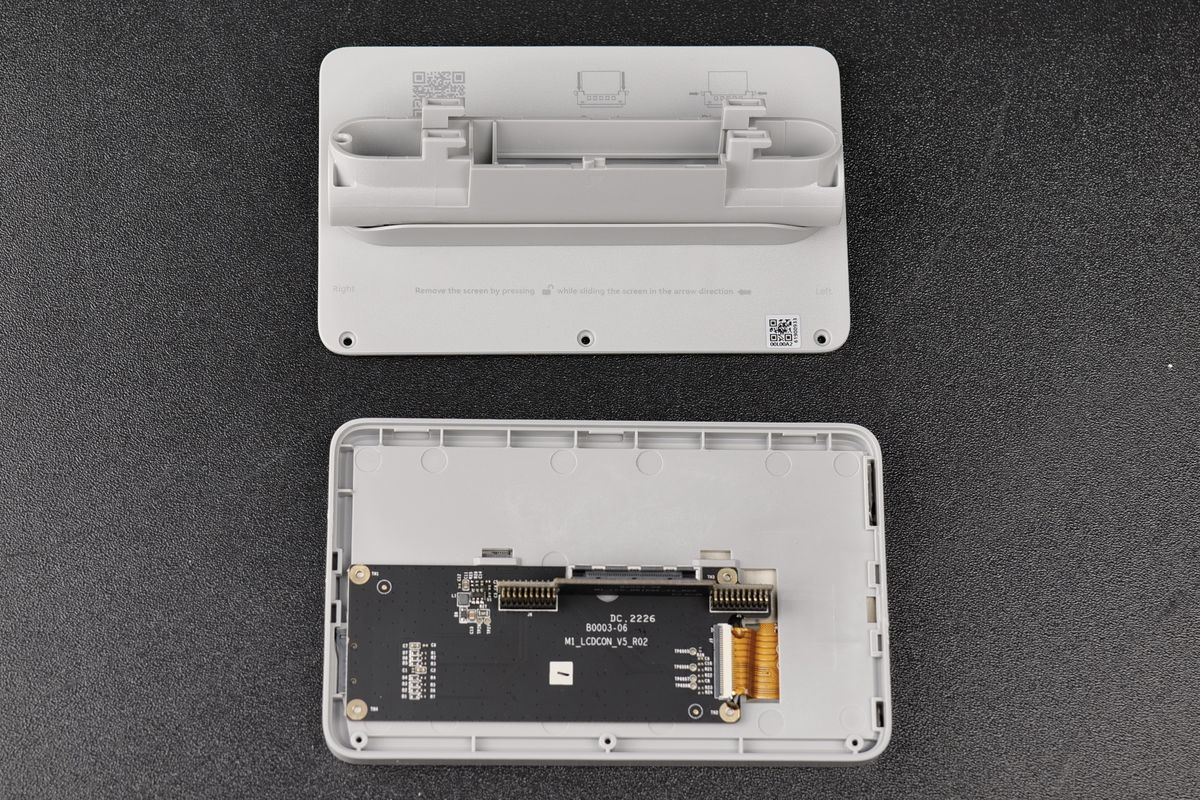
¶ Step 3. When the side clips on the sides are released, slide the back cover downwards to release the back cover.
Important!
Do not directly pry open the back cover to avoid damaging it.
¶ Steps to install the new high resolution screen hinge
¶ Step 1. Align the FPC cable connector and the opening of the hinge, and the top clips, push the back cover in place
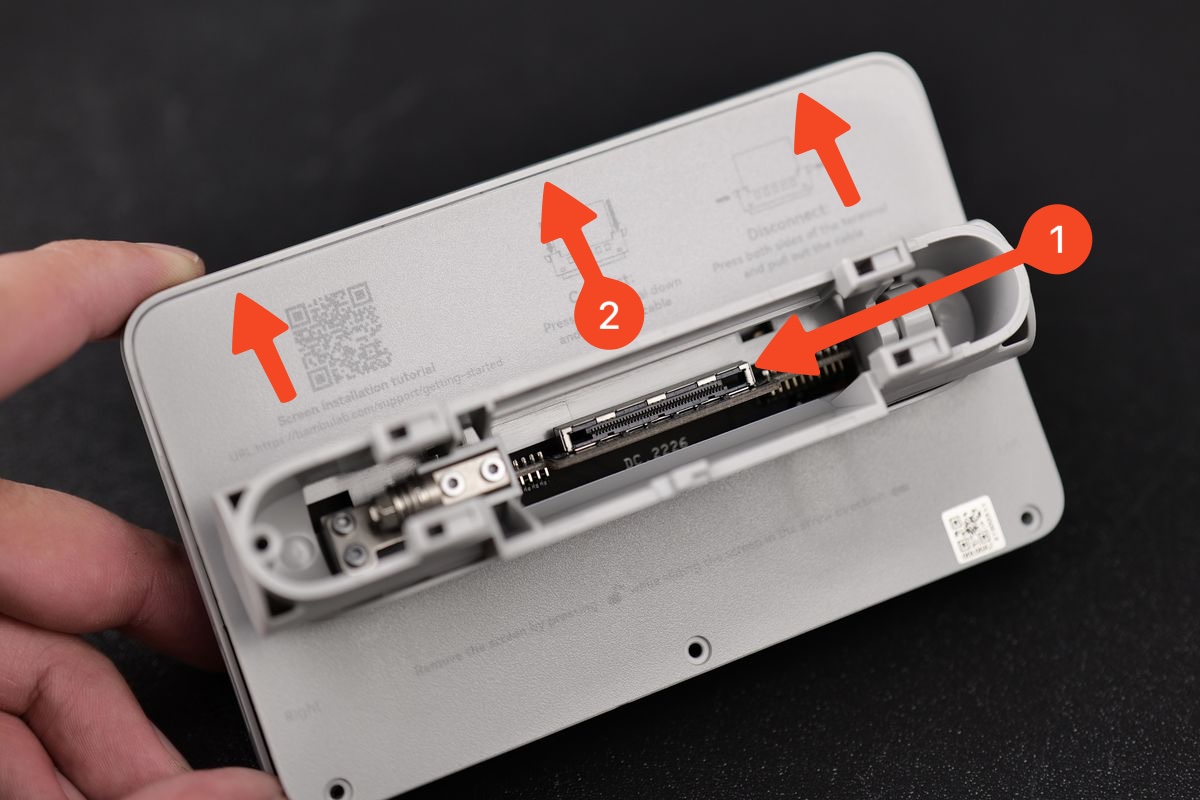
¶ Step 2. Press the back cover along the edges to secure the other clips
¶ Step 3. Install the three screws and do not over-tighten them

¶ Steps to install the screen on the printer
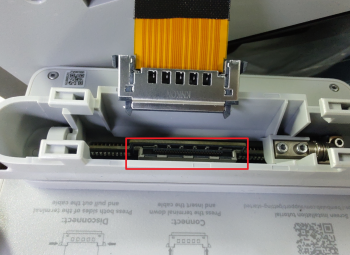
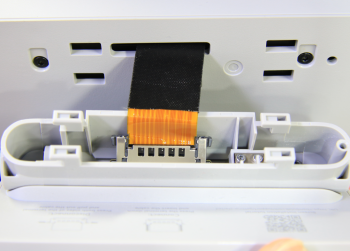
¶ Step 1. Pull the FPC cable out, and press both sides of the FPC connector and insert the cable into the port in the back of screen
 |
 |
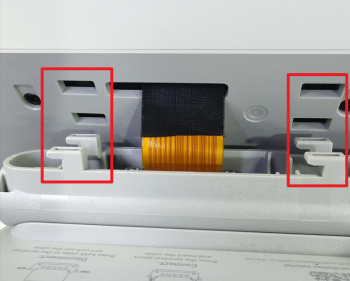
¶ Step 2. Insert the excess FPC cable into the printer and mount the screen into the 4 slots
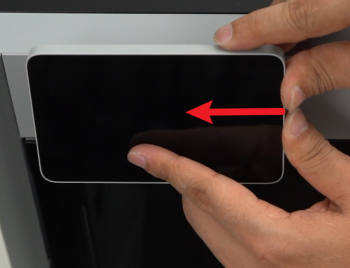
¶ Step 3. Push the screen gently to the left untill you hear the buckle clicks
¶ Verify completion/success
Power on the printer. If the screen lights up, the display is without errors, and the touch screen response feels normal, then the replacement is successful.
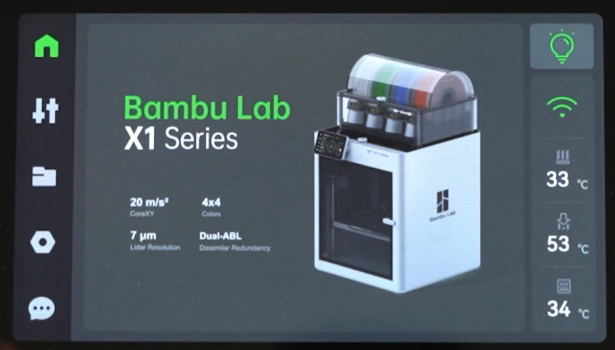
Otherwise, check all the connections again and retry. If the problem is still there, please contact the Bambu Lab support team for further assistance.
¶ End Notes
We hope that the detailed guide we shared with you was helpful and informative.
We want to ensure that you can perform it safely and effectively. If you have any concerns or questions regarding the process described in this article, we encourage you to reach out to our friendly customer service team before starting the operation. Our team is always ready to help you and answer any questions you may have.
Click here to open a new ticket in our Support Page.
We will do our best to respond promptly and provide you with the assistance you need.