¶ Introduction
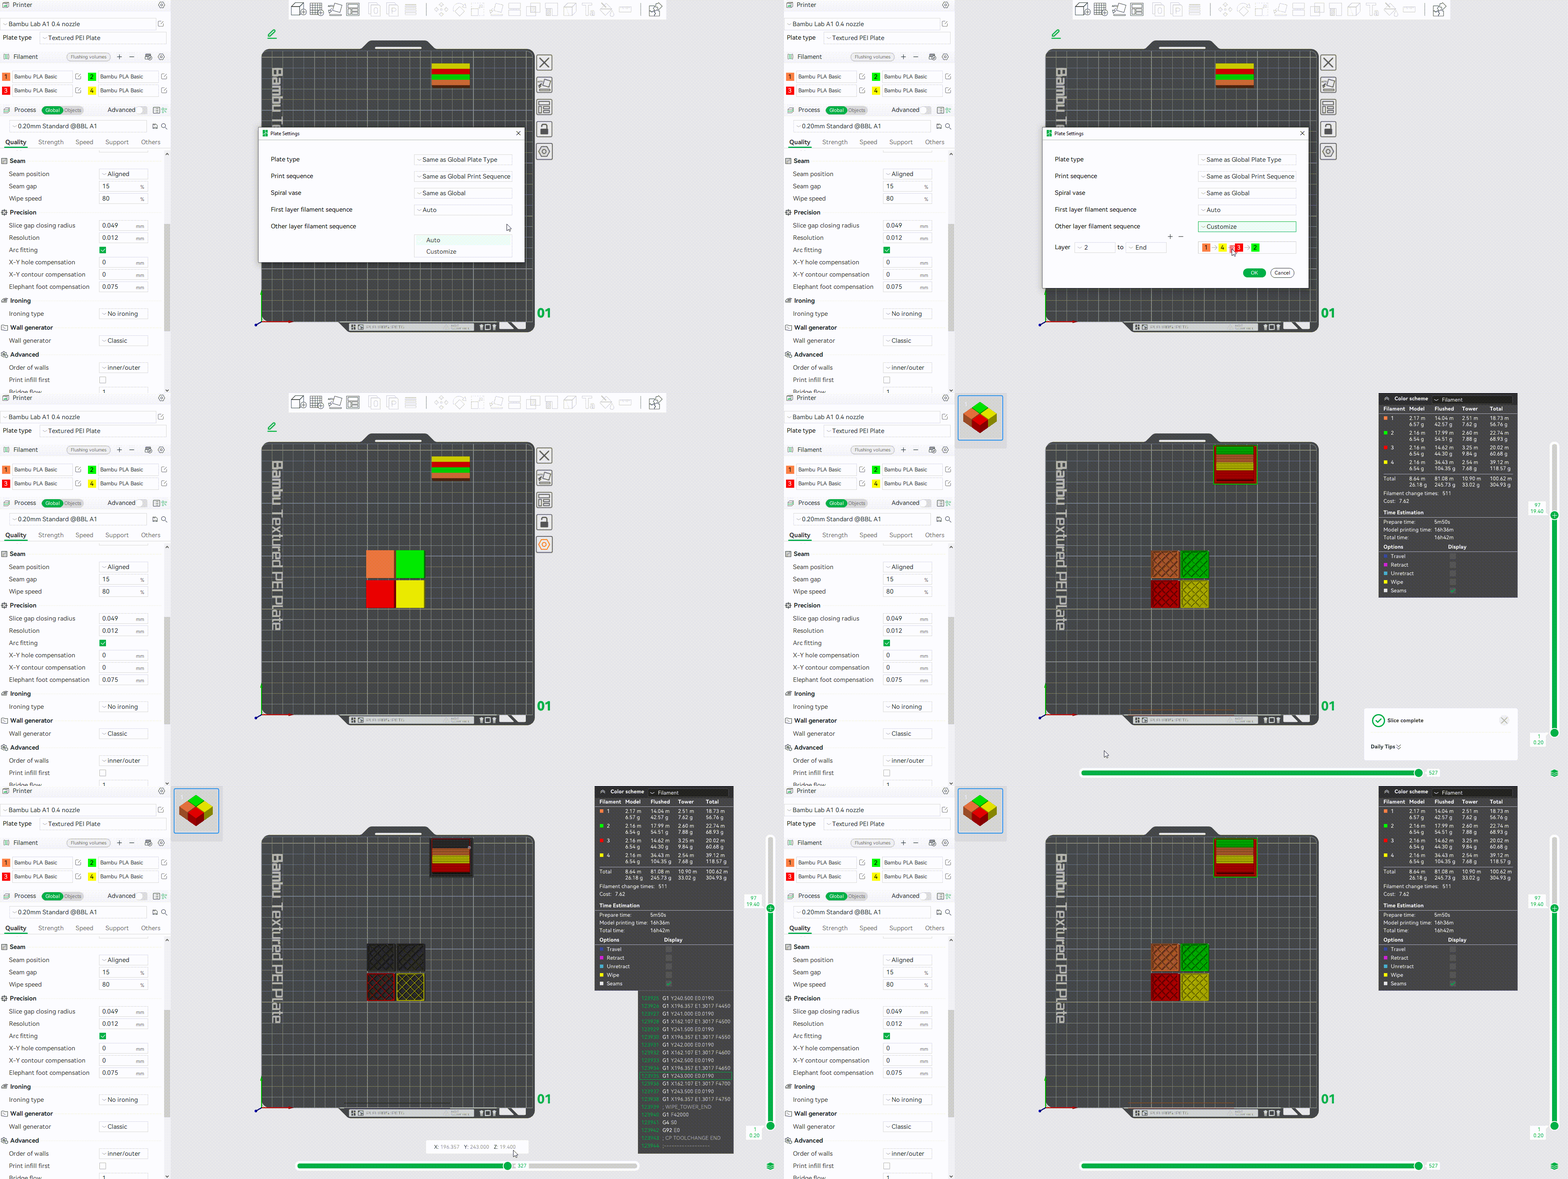
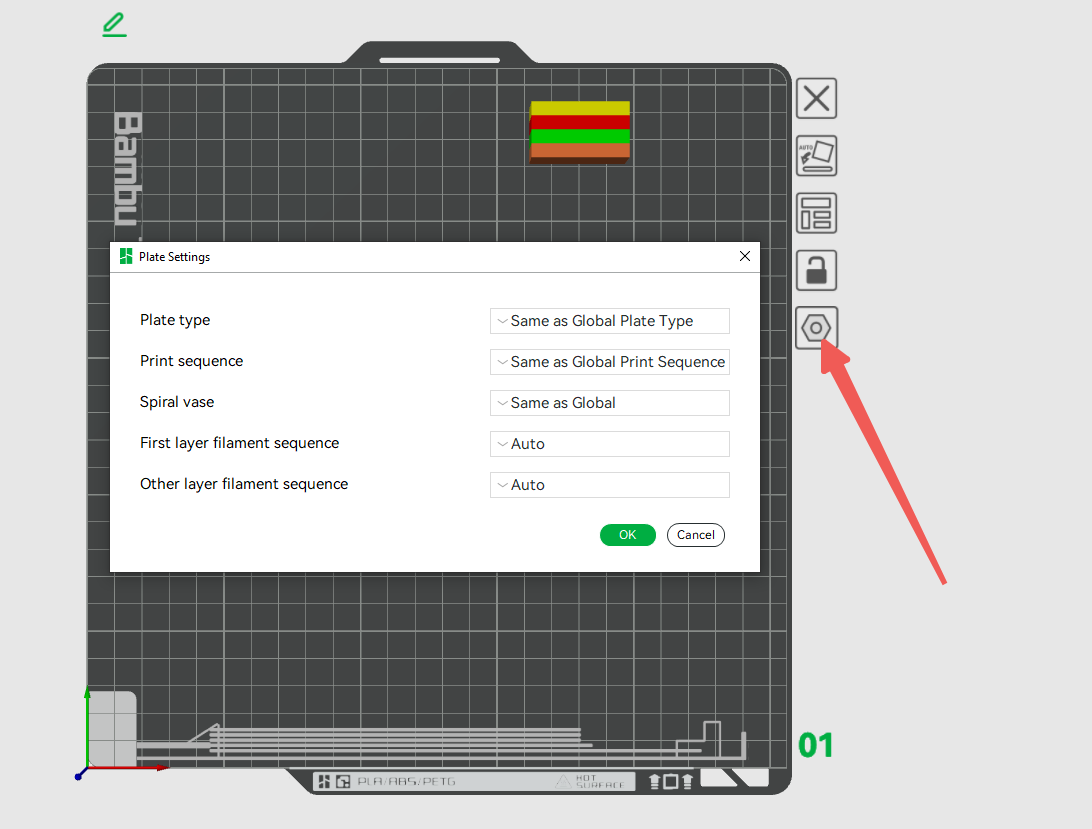
In multi-color (multi-material) printing tasks, we can customize the filament printing sequence for different layers, including setting the first layer and other layer printing sequences. On the preparation page of Bambu Studio, click the Settings icon next to the build plate. In the pop-up "Plate Settings" window, you can set the printing sequence of the first layer and other layers of filaments.
¶ Operation procedure
¶ First layer filament sequence
There are two filament printing sequences for the first layer: Auto and Customize;
¶ Auto
Automatically assign the filament sequence of the first layer, the logic of the sequence is as follows:
1. Compare the minimum independent contour of each color area and print the filament in descending order of the minimum contour area. As shown below, the minimum contour of the green area > the minimum contour of the orange area, so print the green filament area first.
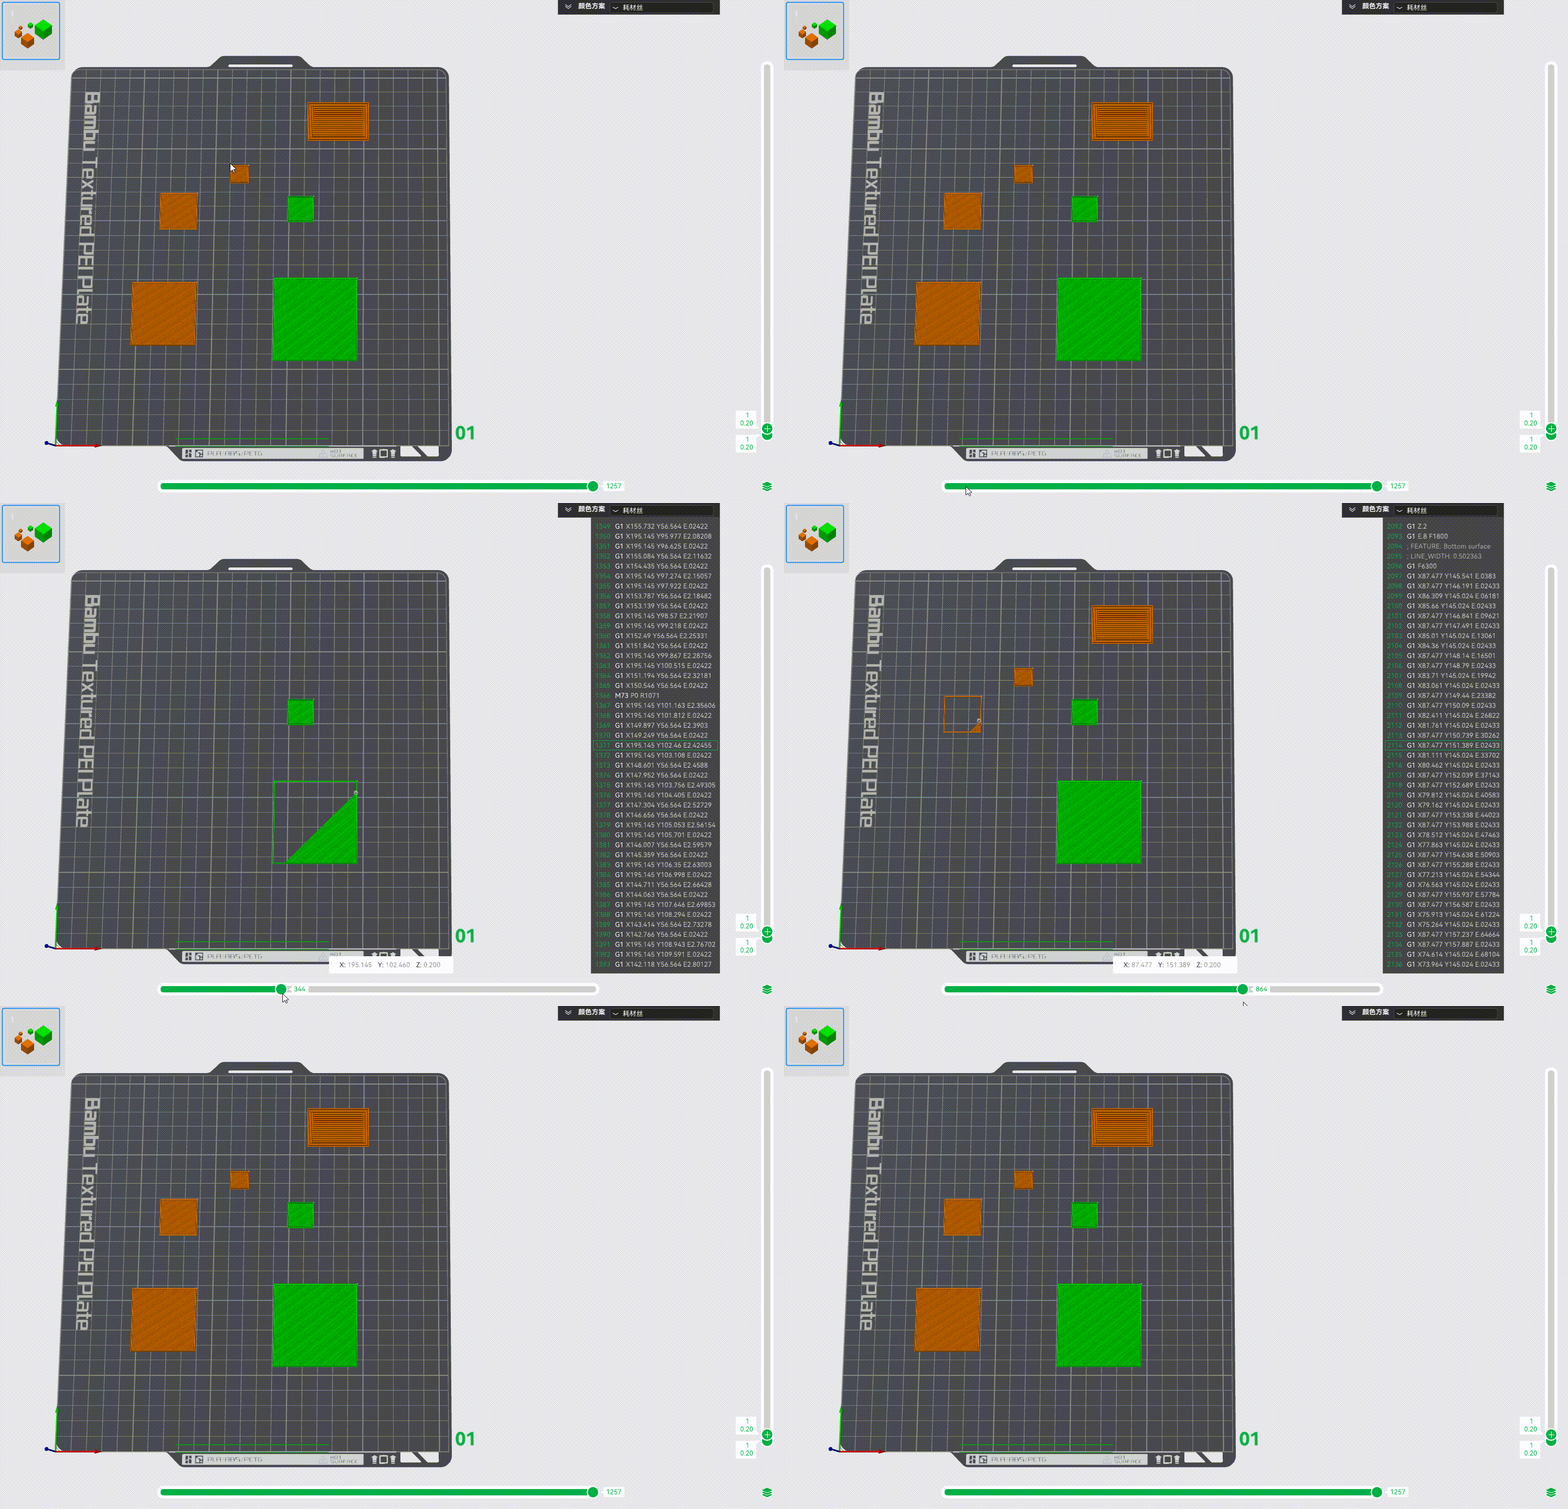
2. If the area of independent contours of different colors is the same, they will be printed in the order listed in the filament list.

¶ Customize
Select "Customize" from the drop-down list and drag each color box to set the printing sequence of the first layer.
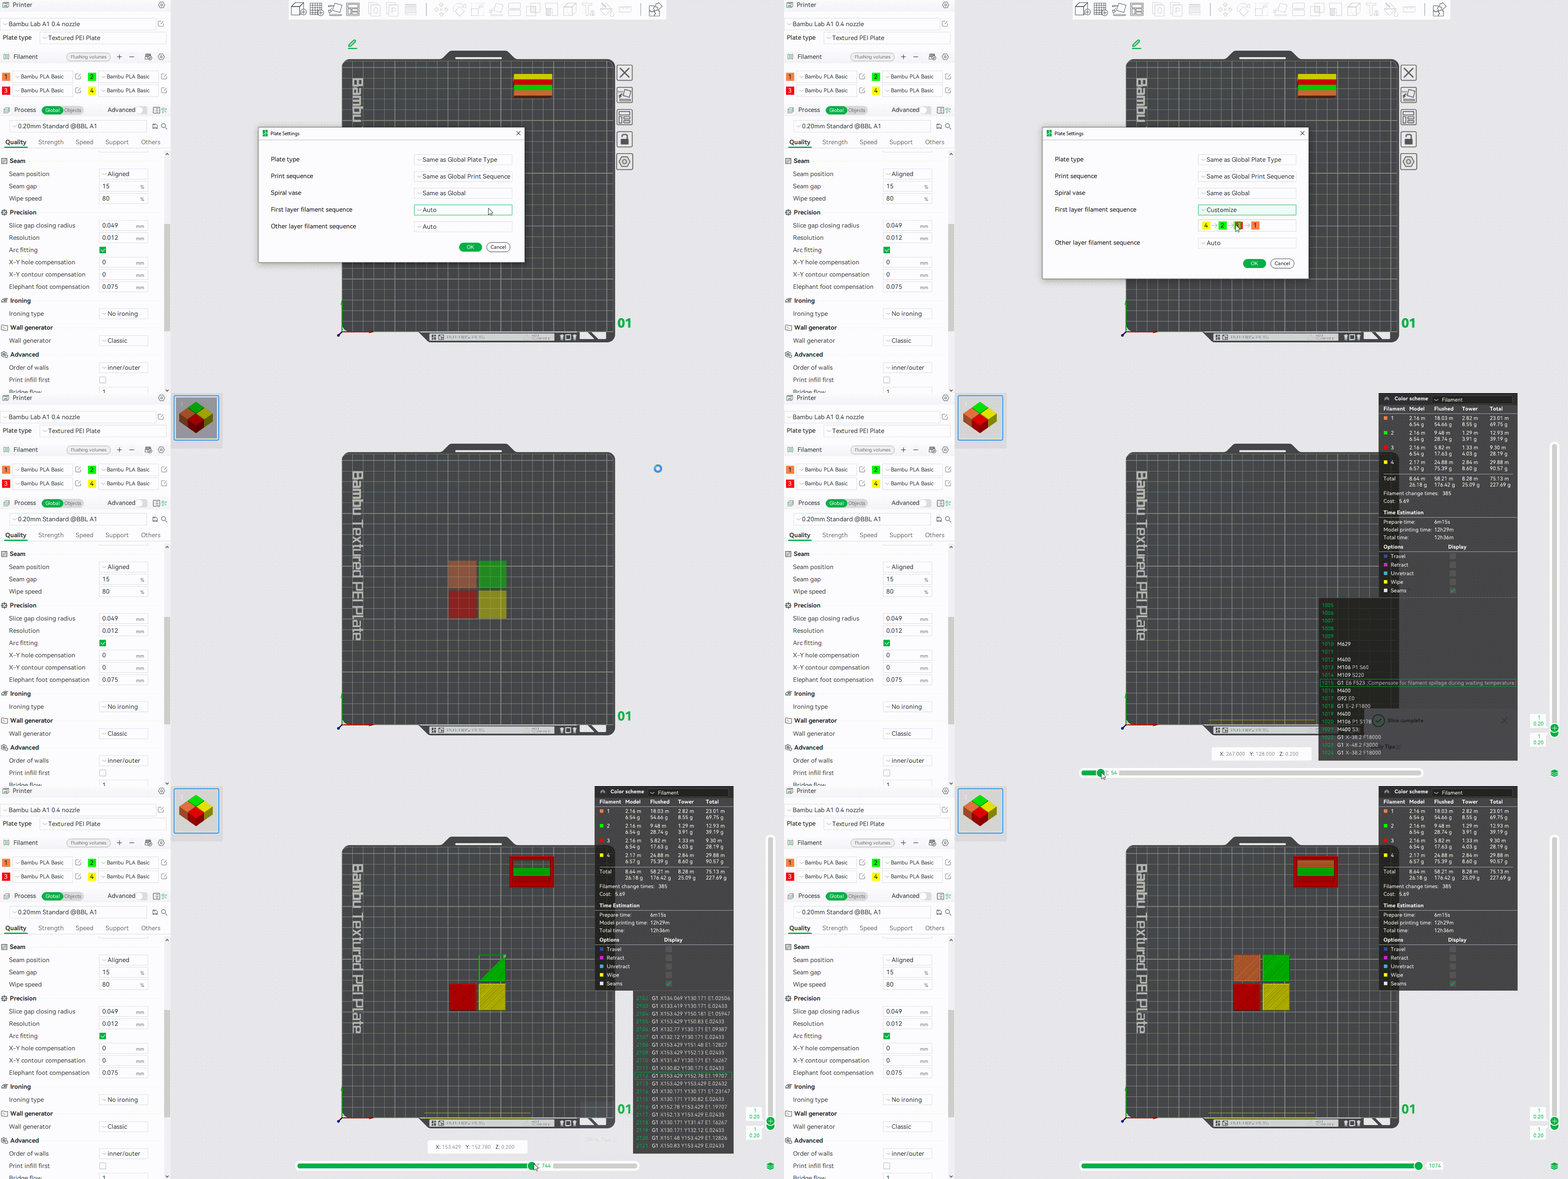
¶ Other layer filament sequence
Used to set the filament printing sequence for all layers except the first layer. We can specify a specific height range to customize the filament printing sequence. It is also available in Auto and Customize options:
¶ Auto
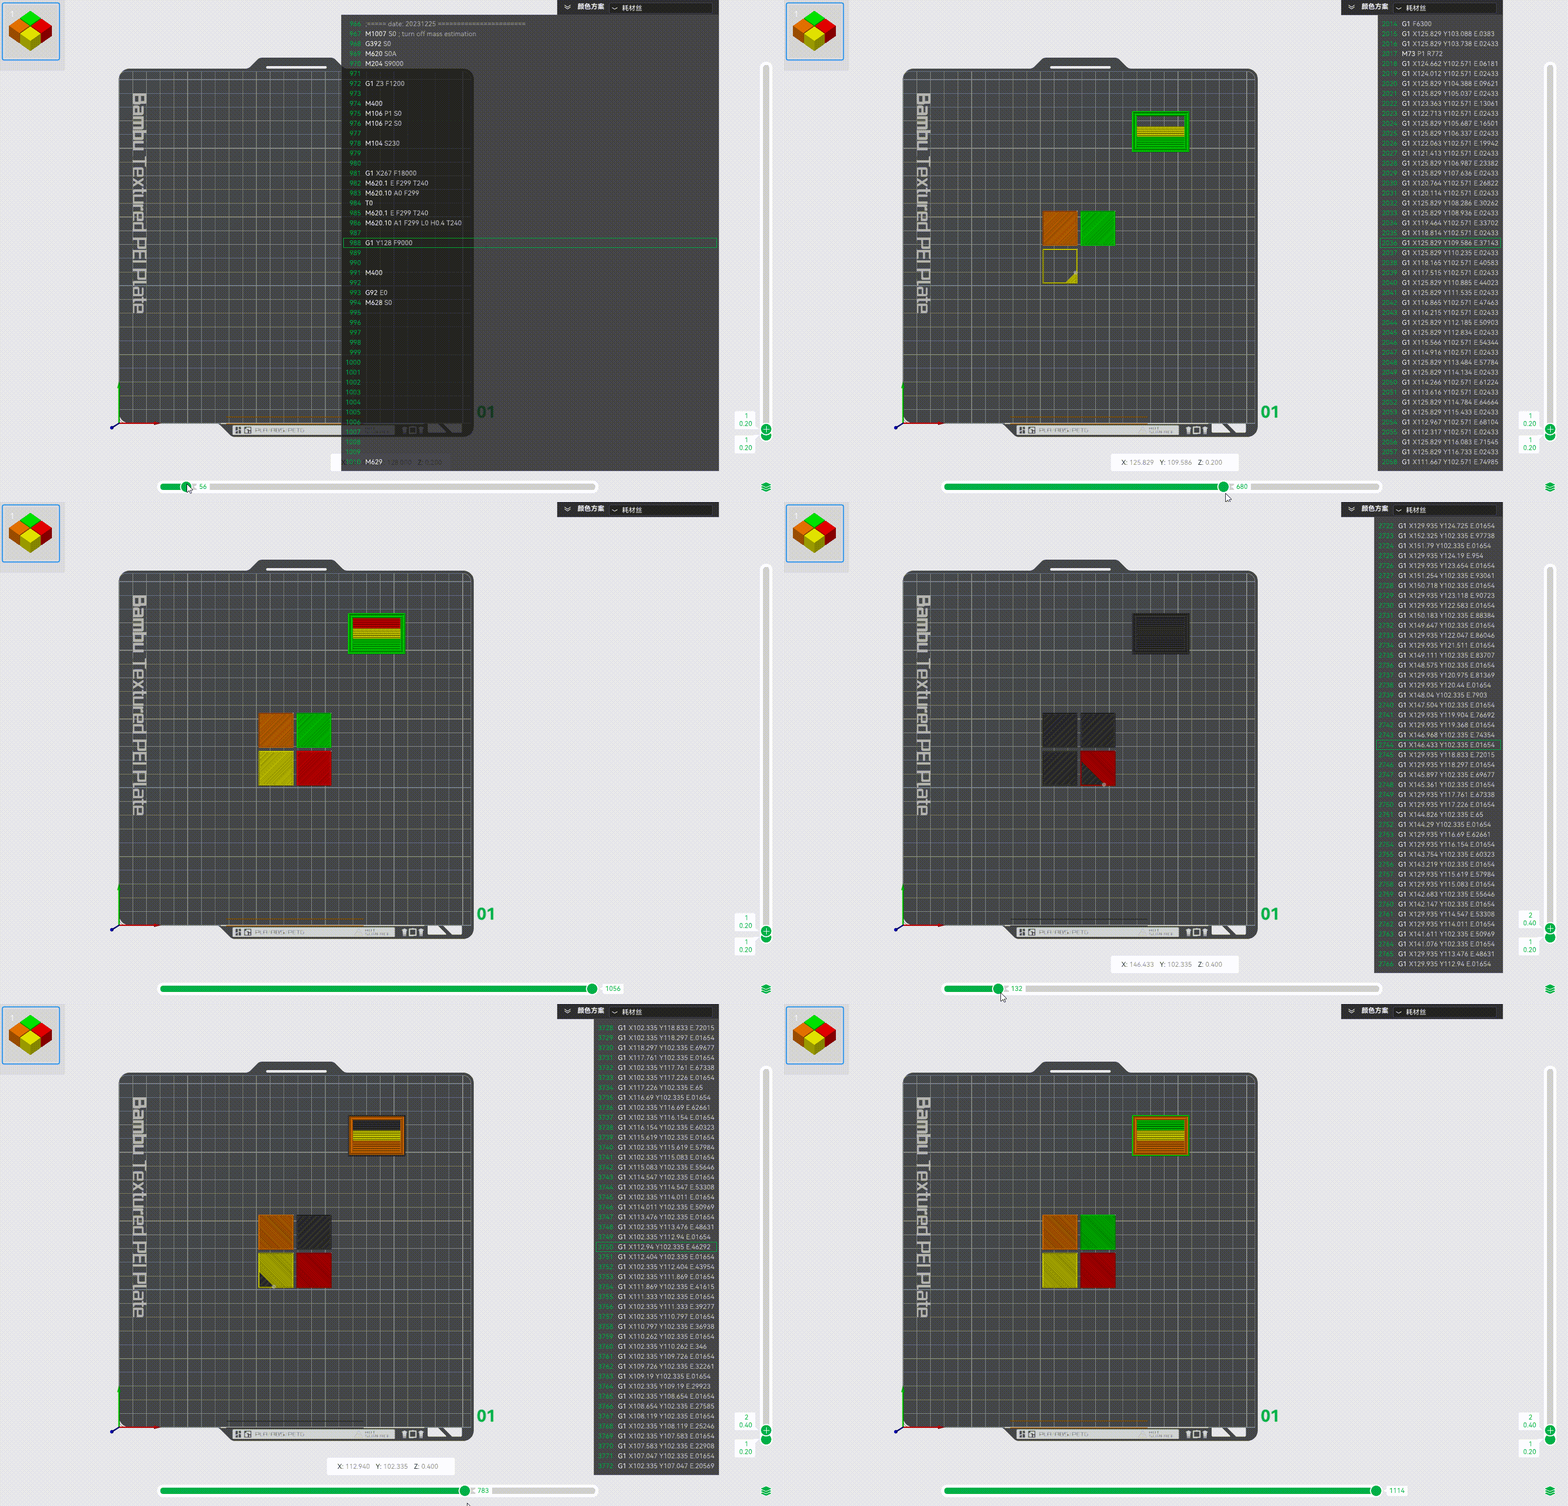
1. Try to make the first filament printed on the next layer the same as the last filament printed on the previous layer as much as possible. As shown in the following GIF, if the last filament printed on the previous layer is the red filament, the next layer will start printing from the red filament to minimize the number of filament switches as much as possible:
2. Try to use the filament sequence with the smallest flushing amount in this layer as much as possible. For example, if the total flushing amount of filament sequence 1->2->3 is greater than that of 1->3->2, the latter will be used as the printing sequence for this layer.
¶ Customize
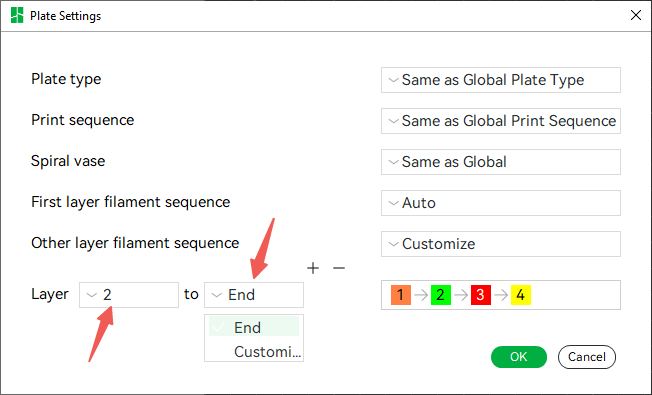
1. We can customize the range of layers that need to be modified, by default from the second layer to the end.
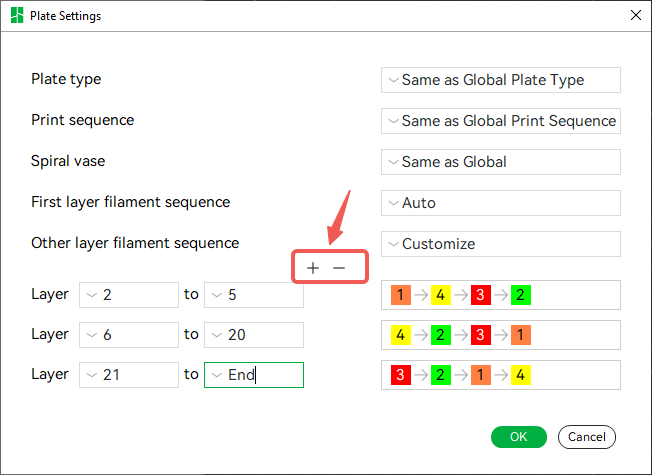
2. We can also add custom layer height range intervals, for example, in the following figure, three layer height intervals are set, and each layer height interval can independently set the printing sequence,
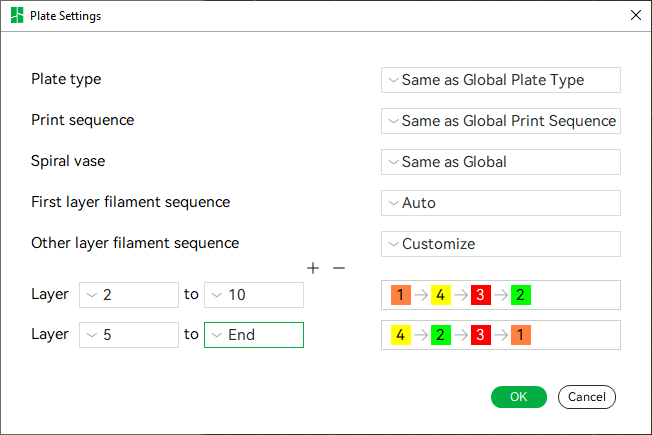
3. If there is overlap between two layer height intervals, the printing sequence of the overlapping interval should be prioritized using the printing sequence of the later, as shown in the figure below. The two intervals are [2-10] and [5-End]. It will actually be split into two sections [2-4] and [5-End] to set the printing filament sequence.
4. If the custom height interval does not contain all the layers of the object, the remaining layers will use "Auto" logic to set the printing sequence. As shown in the figure below, the printing sequence of [2-10] layer interval is set, and the total layer of the object is more than 10 layers, then the printing sequence of [11-End] layer interval will be set automatically.
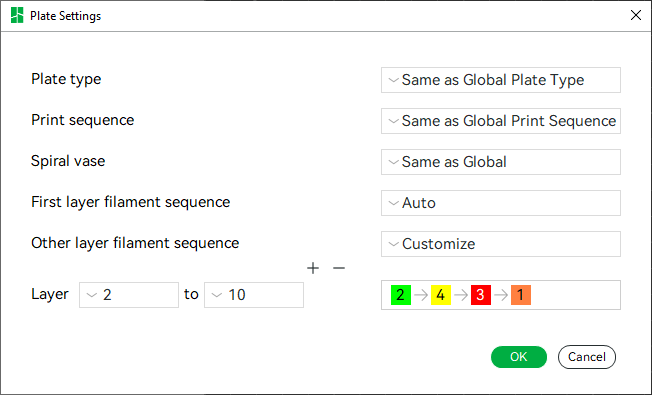
5. We can customize the printing sequence of other layers by dragging the color squares in the diagram. After slicing in the preview we can see that any of the layers in the middle are printed in the order we customized.
