¶ Slicing Parameters
Bambu Studio has hundreds of slicing parameters, which are used to adjust the behavior of the slicer process to produce desired printing effects. These parameters are divided into three categories: printer, filament and process.
In a category, once values for all parameters have been set, it can be saved as a parameter preset. For example, we can set all parameter values from printer category according to Bambu Lab X1 and save it as a printer preset named "Bambu Lab X1 0.4 nozzle".
For ease of use, Bambu Studio provides some built-in presets for each category. Most of the time, you can easily select presets according to your requirements to meet basic slicing needs.
¶ Printer Presets
The printer preset contains all of the printer hardware settings, such as the maximum print speed of each axis, limitations of the print area, and the nozzle's diameter.
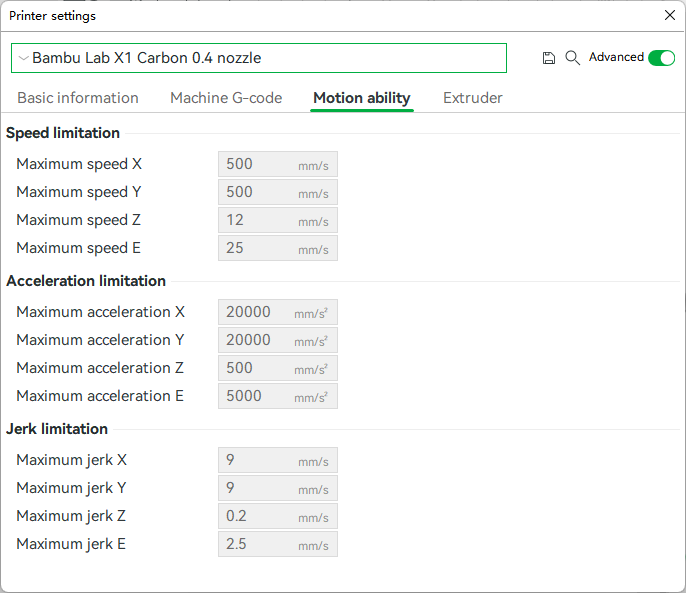
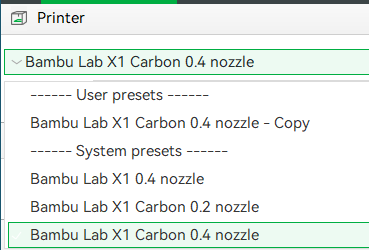
Before slicing, you need to select the correct printer preset according to your machine.
¶ Filament presets
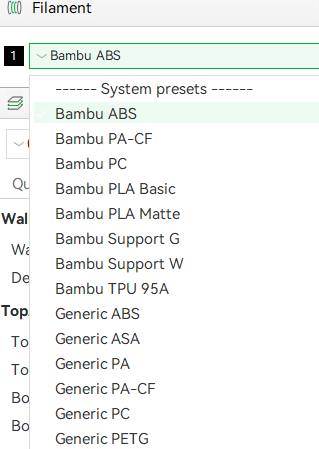
Filament presets contain all of the filament-specific settings, such as print temperature, hotbed temperature, and flow ratio.
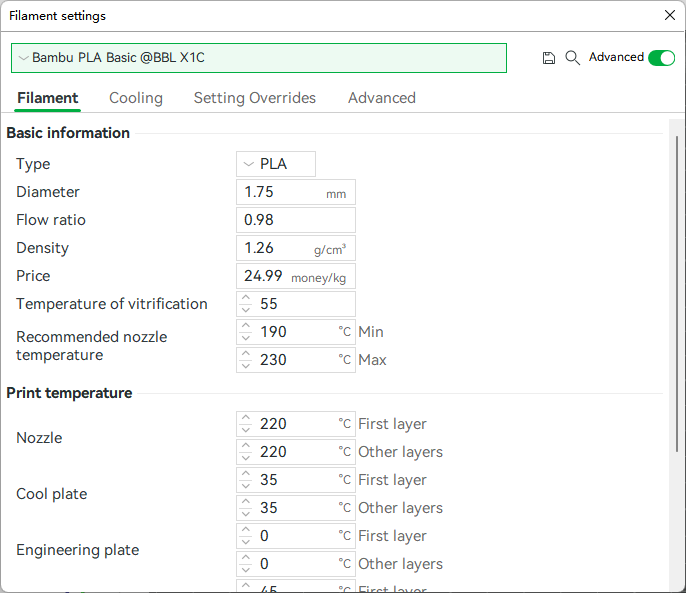
Before slicing, users need to select the correct filament to print their model.
¶ Process presets
The process preset contains all the settings for a specific print job such as layer height, support details, and extrusion width.
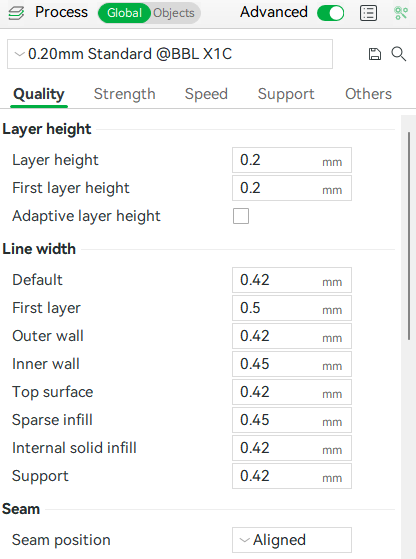
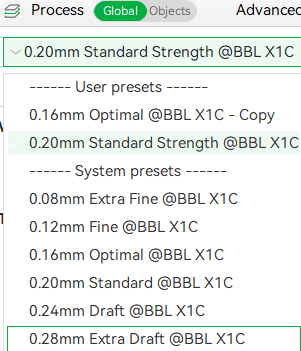
The figure below shows how to choose a process preset.
¶ Create your own preset
Bambu Studio supports custom presets (printer, filament, or process presets). This is especially useful when you have special requirements. For example, you may create a process preset that increases the overall strengh of a model by increasing infill density, wall number and top/bottom shell number. Or you may create a filament preset for a 3rd party filament whose filament presets are not built into Bambu Studio.
Parameter Preset introduces how to create your own preset in detail.
¶ Set Slicing Parameters
¶ Set Printer or Filament parameters
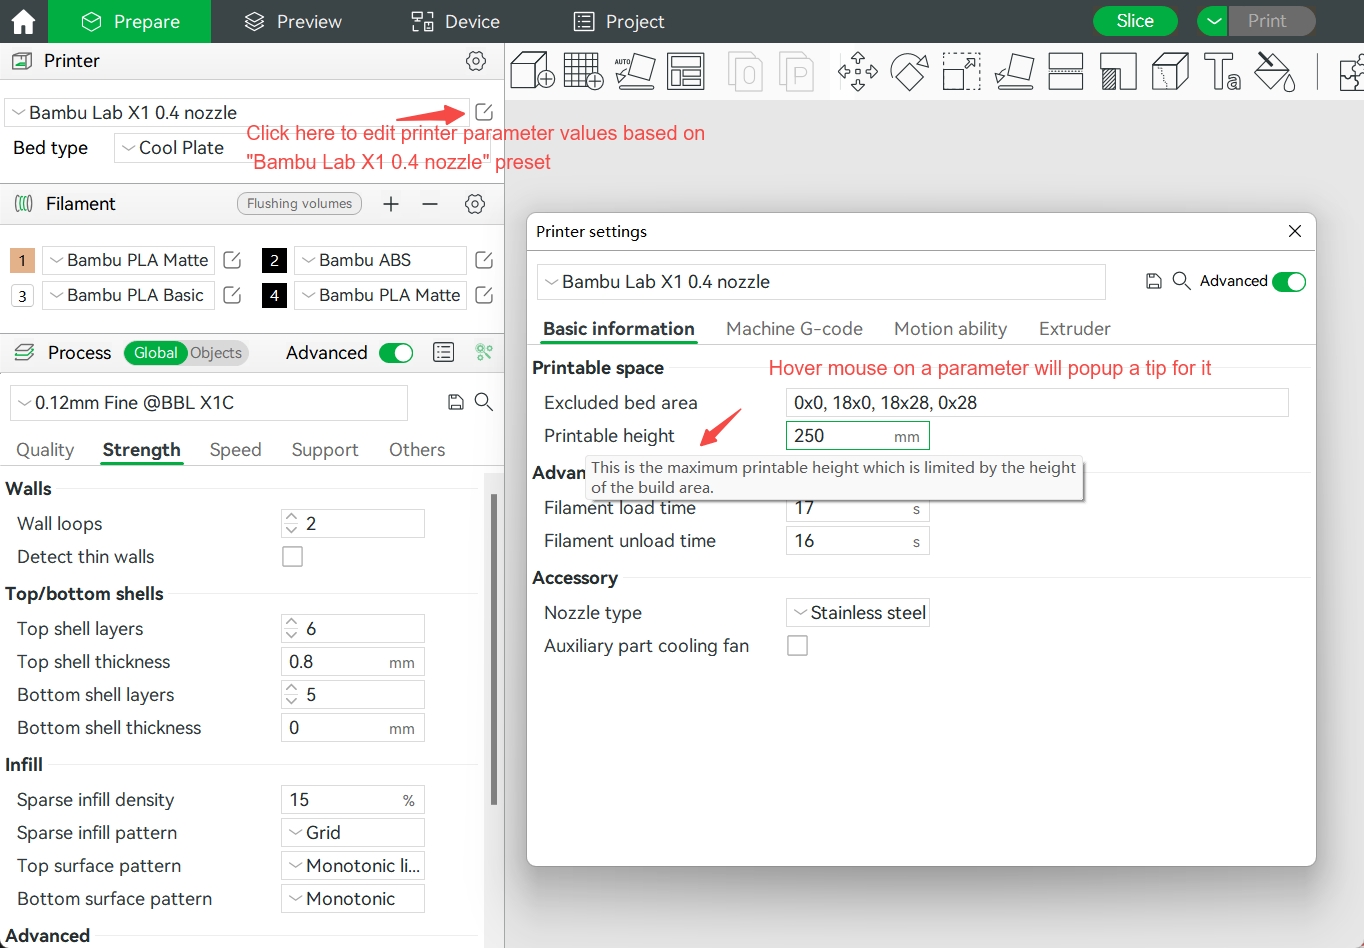
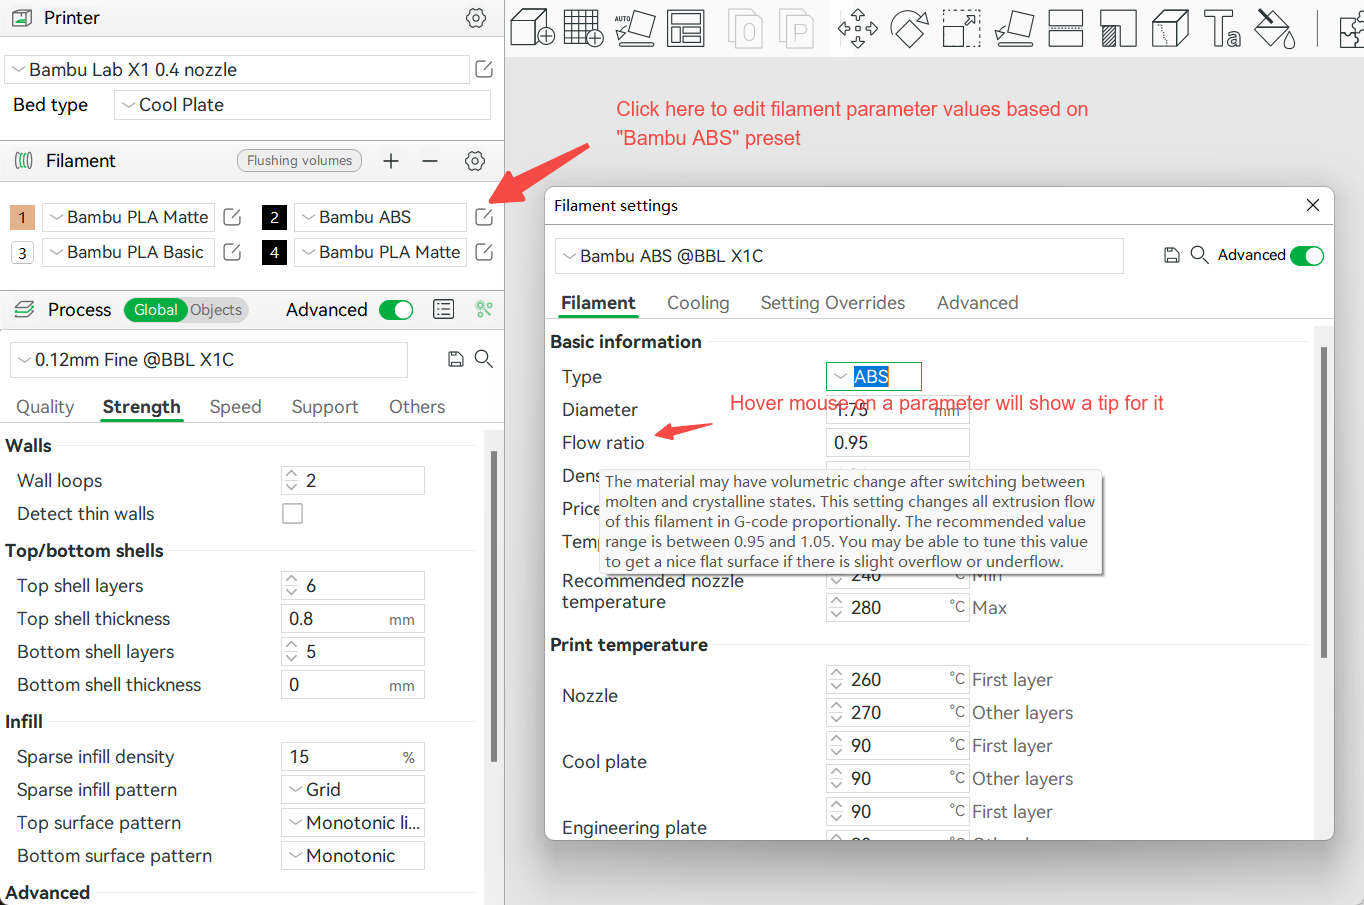
You can set parameters according to the following pictures
¶ Set Process parameters
For parameters in the process category, Bambu Studio supports setting values in several fields of reference or levels:
-
Global
A parameter that is set in global level takes effect for each object in the project. -
Object
A parameter that is set in the object level takes effect for all parts in the currently selected object. -
Part
A parameter that is set in part level takes effect for the currently selected part. -
Modifier
A modifier is a special part of an object. It is designed to change parameters for object regions that are intersected with the modifier part.
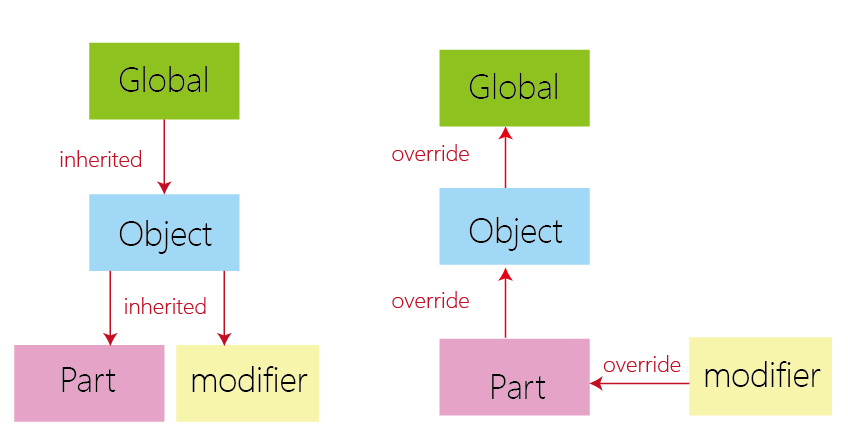
Usually, if the same parameter is set in multiple levels at different values, the value from the smallest level will be used, as described in the below picture.
¶ Global Level Parameters
Global parameter values will be applied to all objects in the project. For instance, sparse infill density is set to 5% in the global parameters below, so all objects will have a 5% infill density.
Therefore, it is highly recommended to set global parameters to be suitable for most objects.
<img /software/bambu-studio/hierarchical-parameters/figure1.jpg width=720 />
Note: Parameter presets are global. Only global parameter modifications can be saved to a (user or project) preset.
¶ Object Level Parameters
For an object that requires special parameter settings, we need to set its values in the object field of reference.
First, we change the process setting mode from “Global” to “Object” and then set our cone's infill density to 20%. After slicing, the infill density of the cone becomes 20%, and that of other models remains at 5% (the global value). Parameters set at the object level override those at the global level.
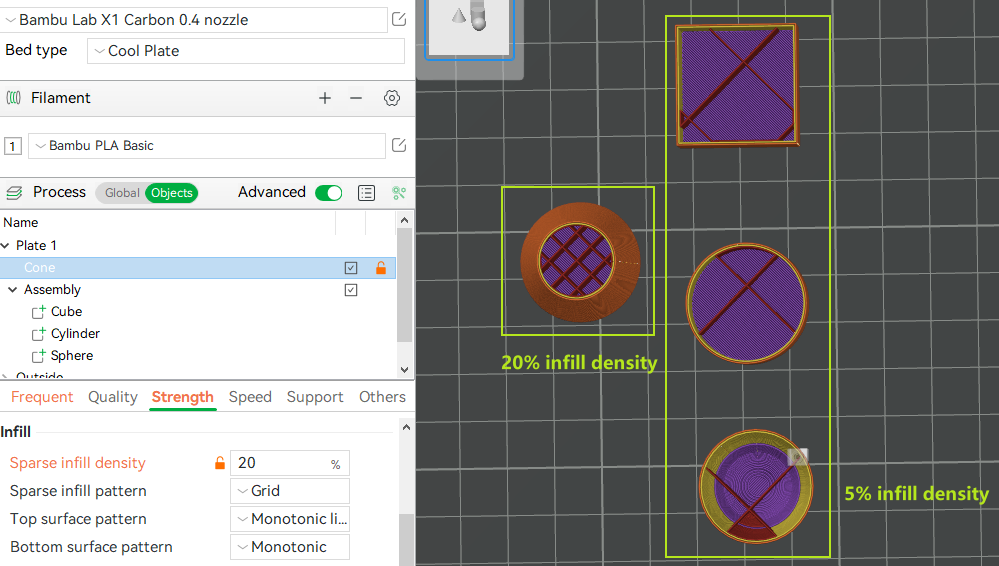
TIP: Bambu Studio supports selecting multiple objects and setting their parameter values together.
¶ Part Level Parameters
If you want to use different parameter values among different parts of an object, you can select a part in the object list and change its parameter values.
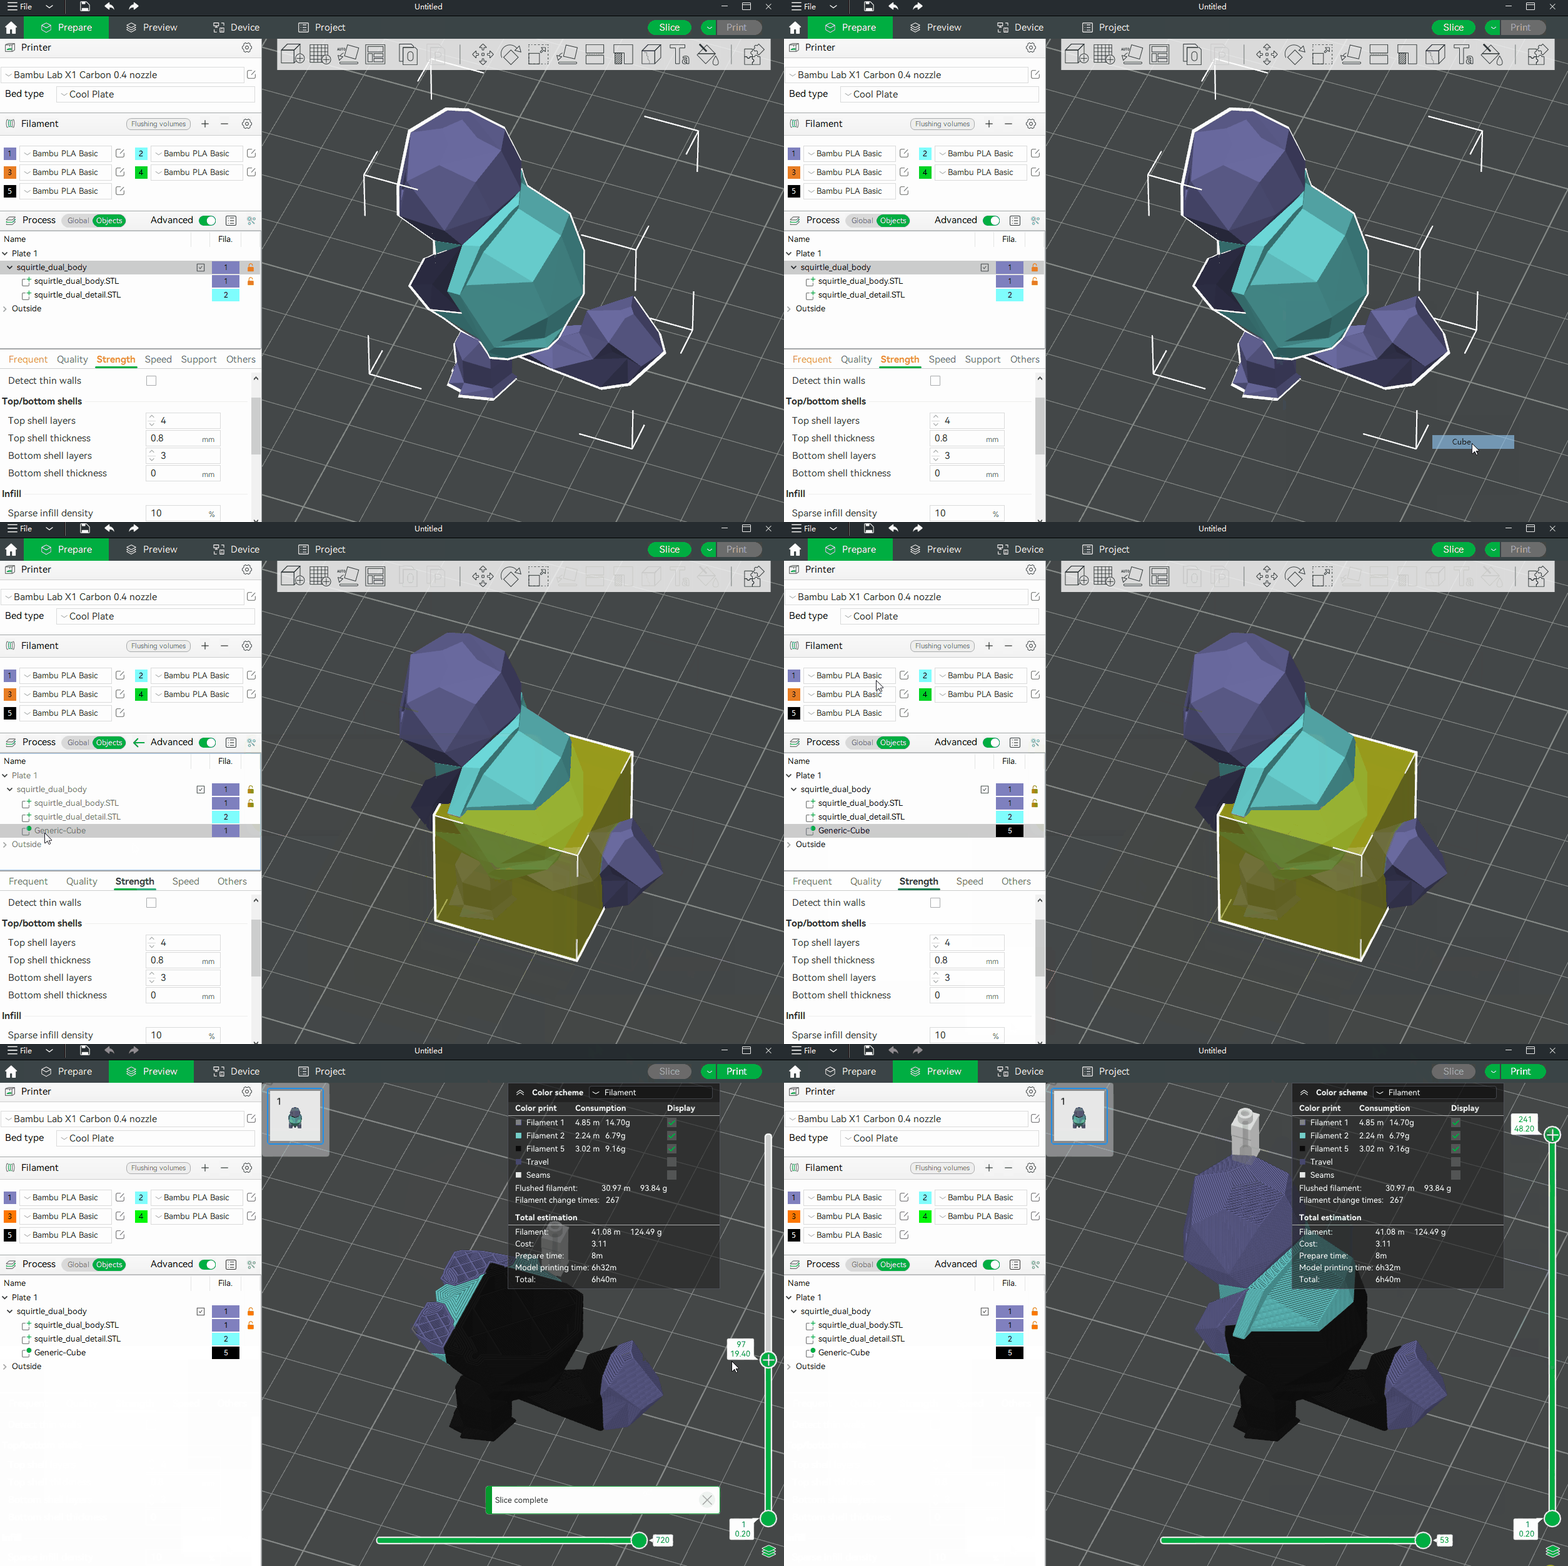
Take the object in the following figure as an example. If we set the object's filament to #1(blue), and set the part named squirtle_dule_detail.STL to #2(orange), the squirtle_dule_detail.STL will be printed with filament #2. Parameters set at the part level override those at the object or global levels.
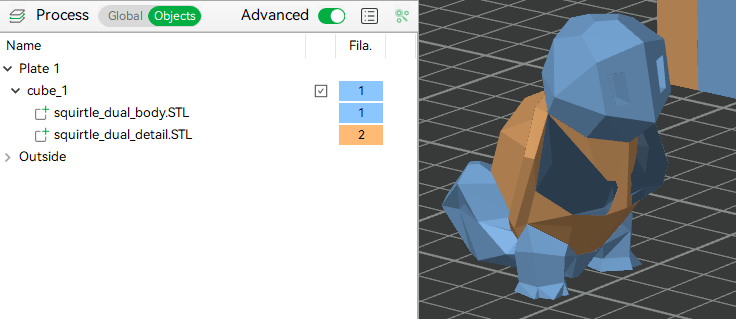
TIP: Bambu Studio Supports selecting multiple parts from the same object, and setting their parameter values together.
¶ Modifiers
The modifier is a special part of an object, not an object to be printed. As it's name suggests, it is designed to modify the settings where it overlaps with an object. Parameters set via modifiers override those set at part, object, or global levels.
To create a modifier, right-click on an object, choose "Add Modifier" in the context menu and then select the modifier shape that you want.
The following gif shows an example.
