Bambu Studio provides a planar cut tool. It allows users to rotate the cut plane to any angle and change its position freely. It can be useful in the following cases:
- a model is too big to be printed for the current printer
- create a flat bottom for easy printing
- you only want to print a part of a model
¶ How to Cut an Object
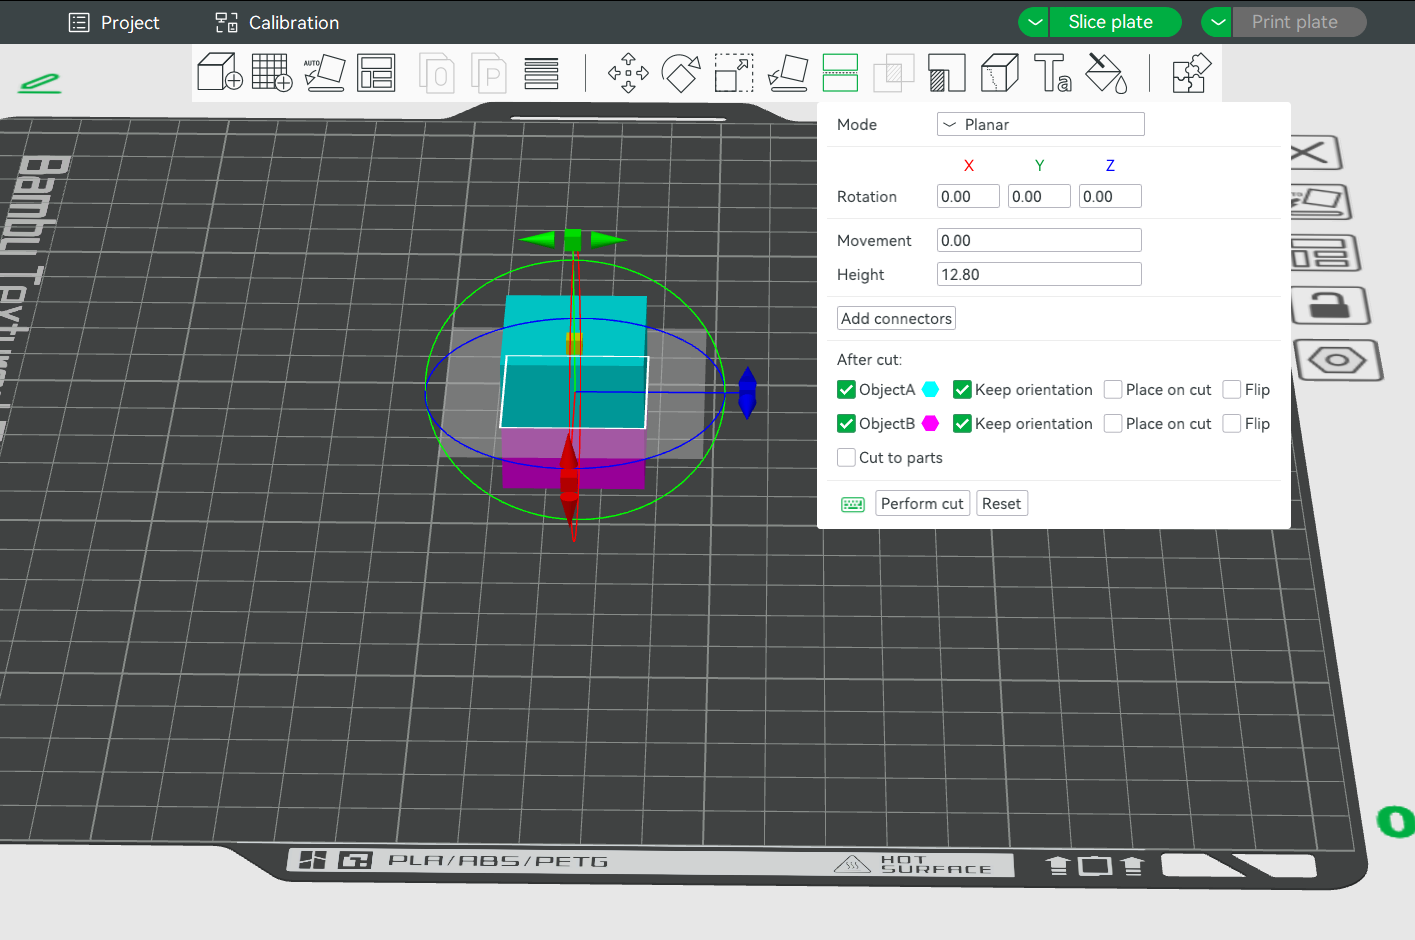
Select an object, open the Cut tool from the toolbar, or with C key. Two cutting modes are available: "Planar" and "Dovetail".
¶ Adjust the cut plane
¶ Rotate the cut plane
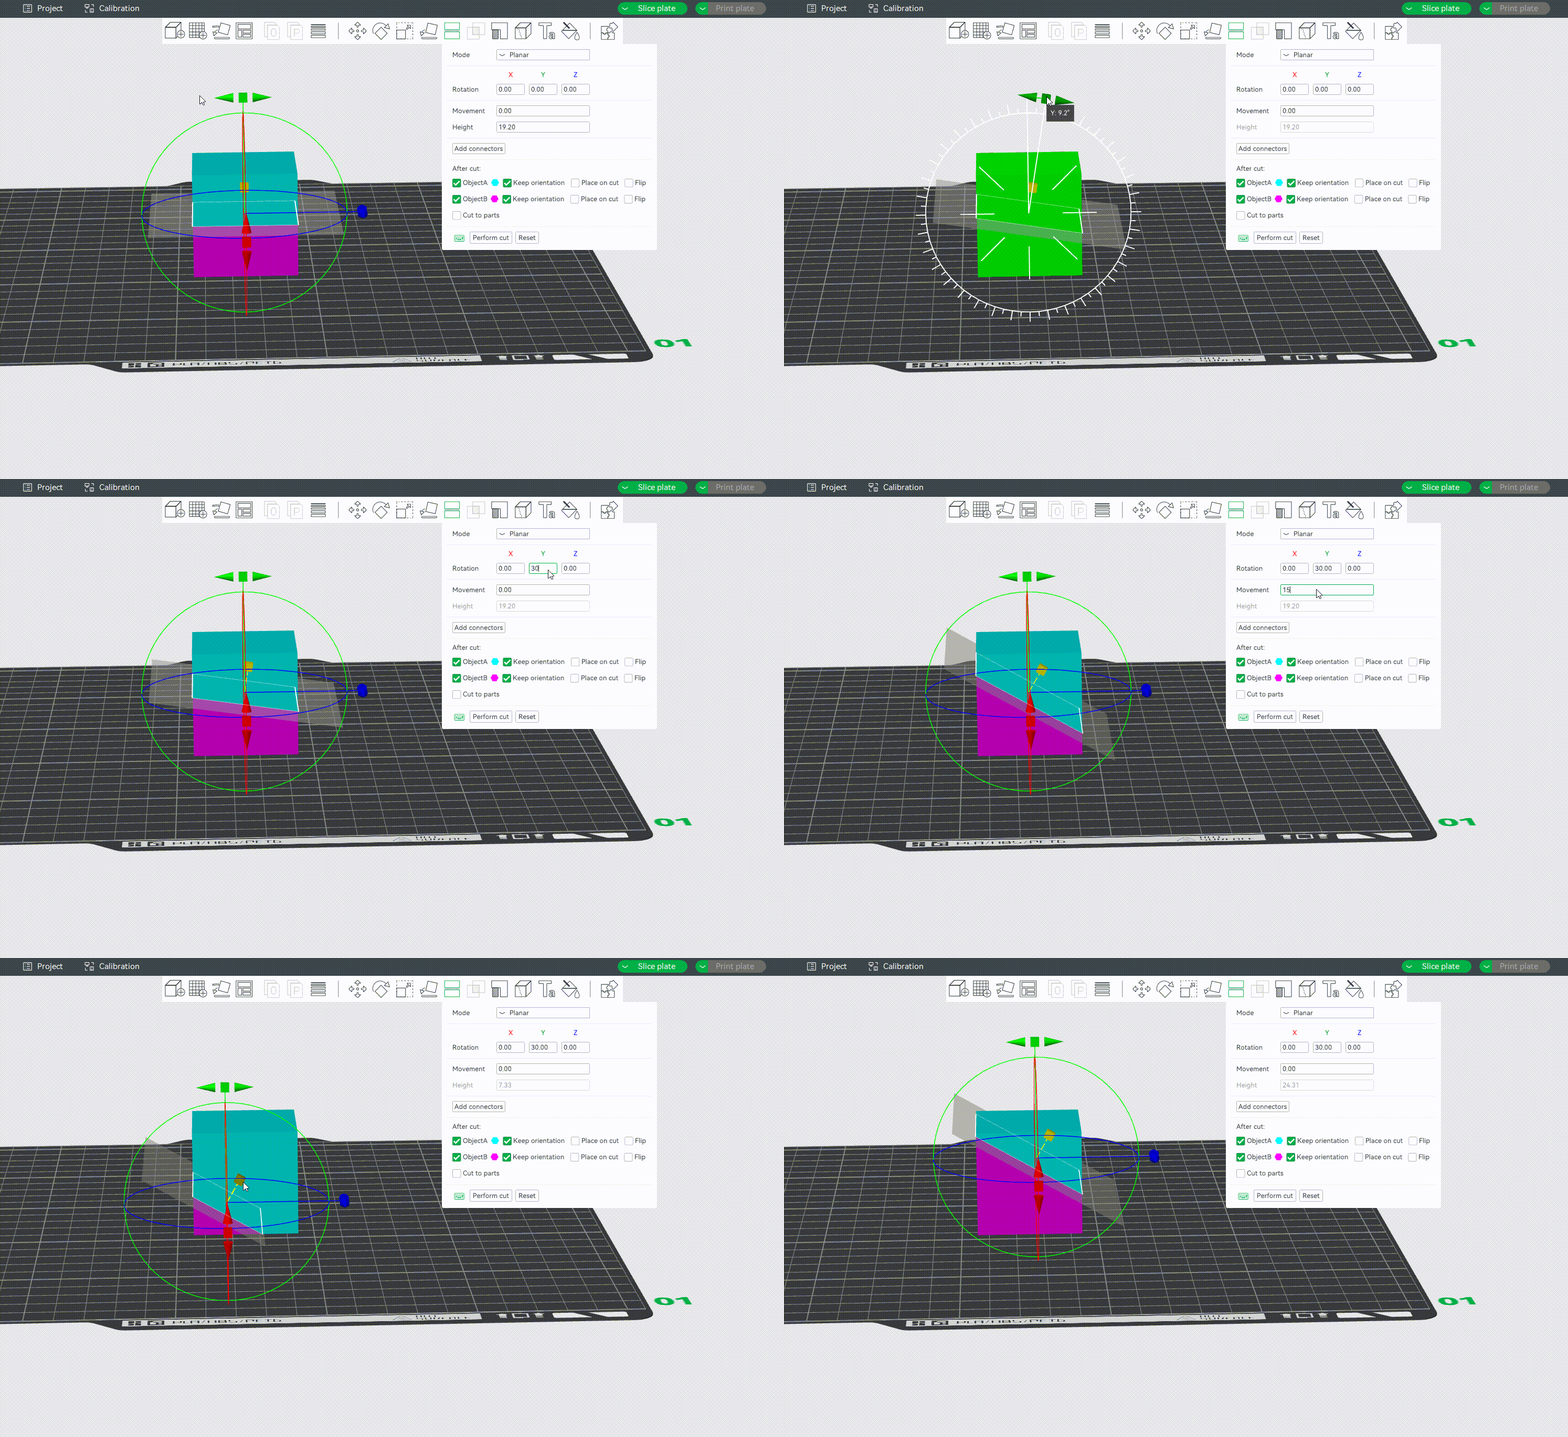
You can rotate the cut plane around the X, Y, or Z-axis by grabbing one of the axes handles.
Alternatively, You may also enter an exact value in degrees [°] in the Rotation input boxes of the context menu. It is a relative rotation from the object's current orientation and will be reset to 0 after the rotation is performed.
¶ Move the cut plane
You can adjust the position of the cut plane by grabbing the yellow cube handle and dragging it along its normal direction.
Alternatively, you can also enter an exact value [mm] in the context menu.Movement is the relative offset from the plane's current position. It will be reset to 0 after each movement action.Height is the absolute height of the middle point of the cutting plane. It would be very useful when you want to cut an object at a specific height. The height value can only be set when the cutting plane is parallel to the heat bed.
¶ Drag the mouse to define a cutting plane
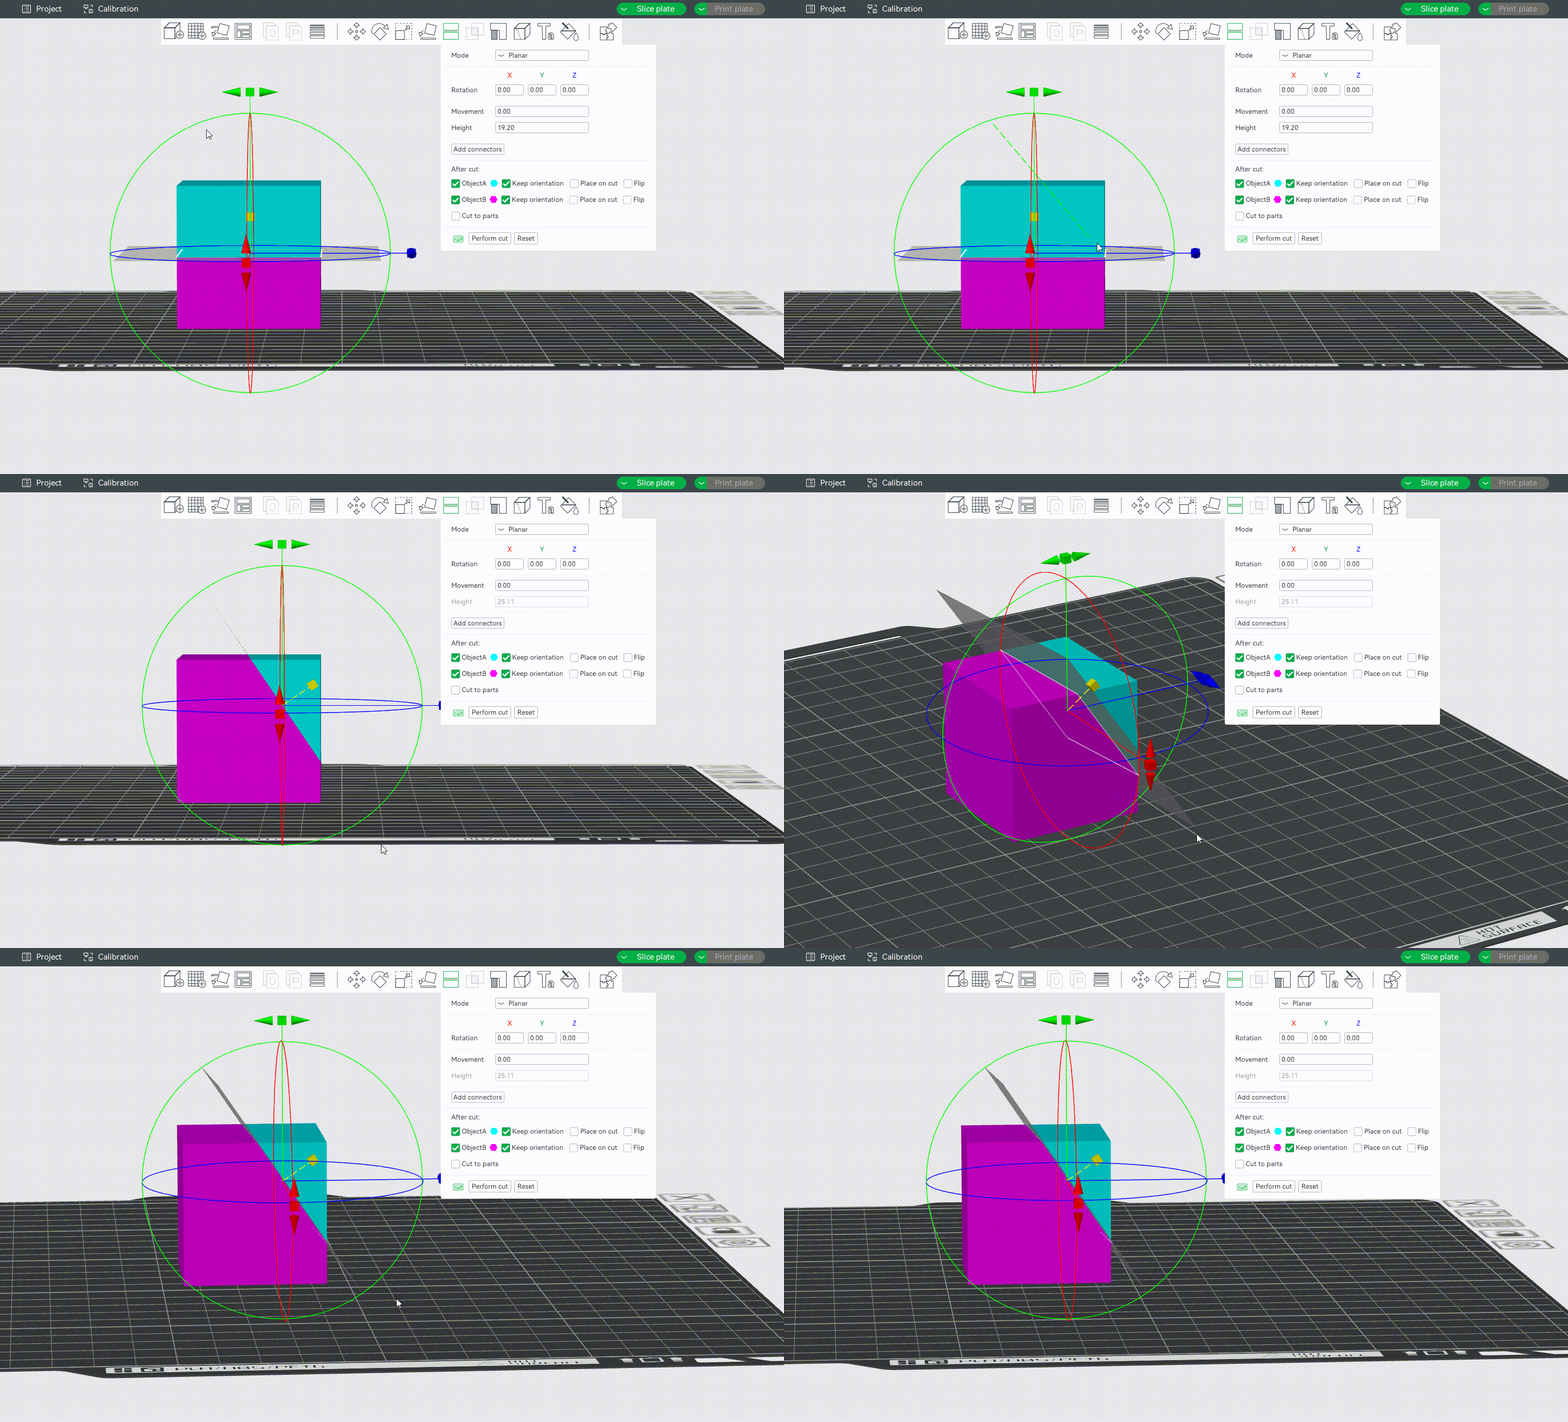
You can also hold down the "shift" key and drag the mouse while holding down the left mouse button to define a cutting plane quickly. The cutting plane will be perpendicular to the current view.
¶ Choose which part you want to keep
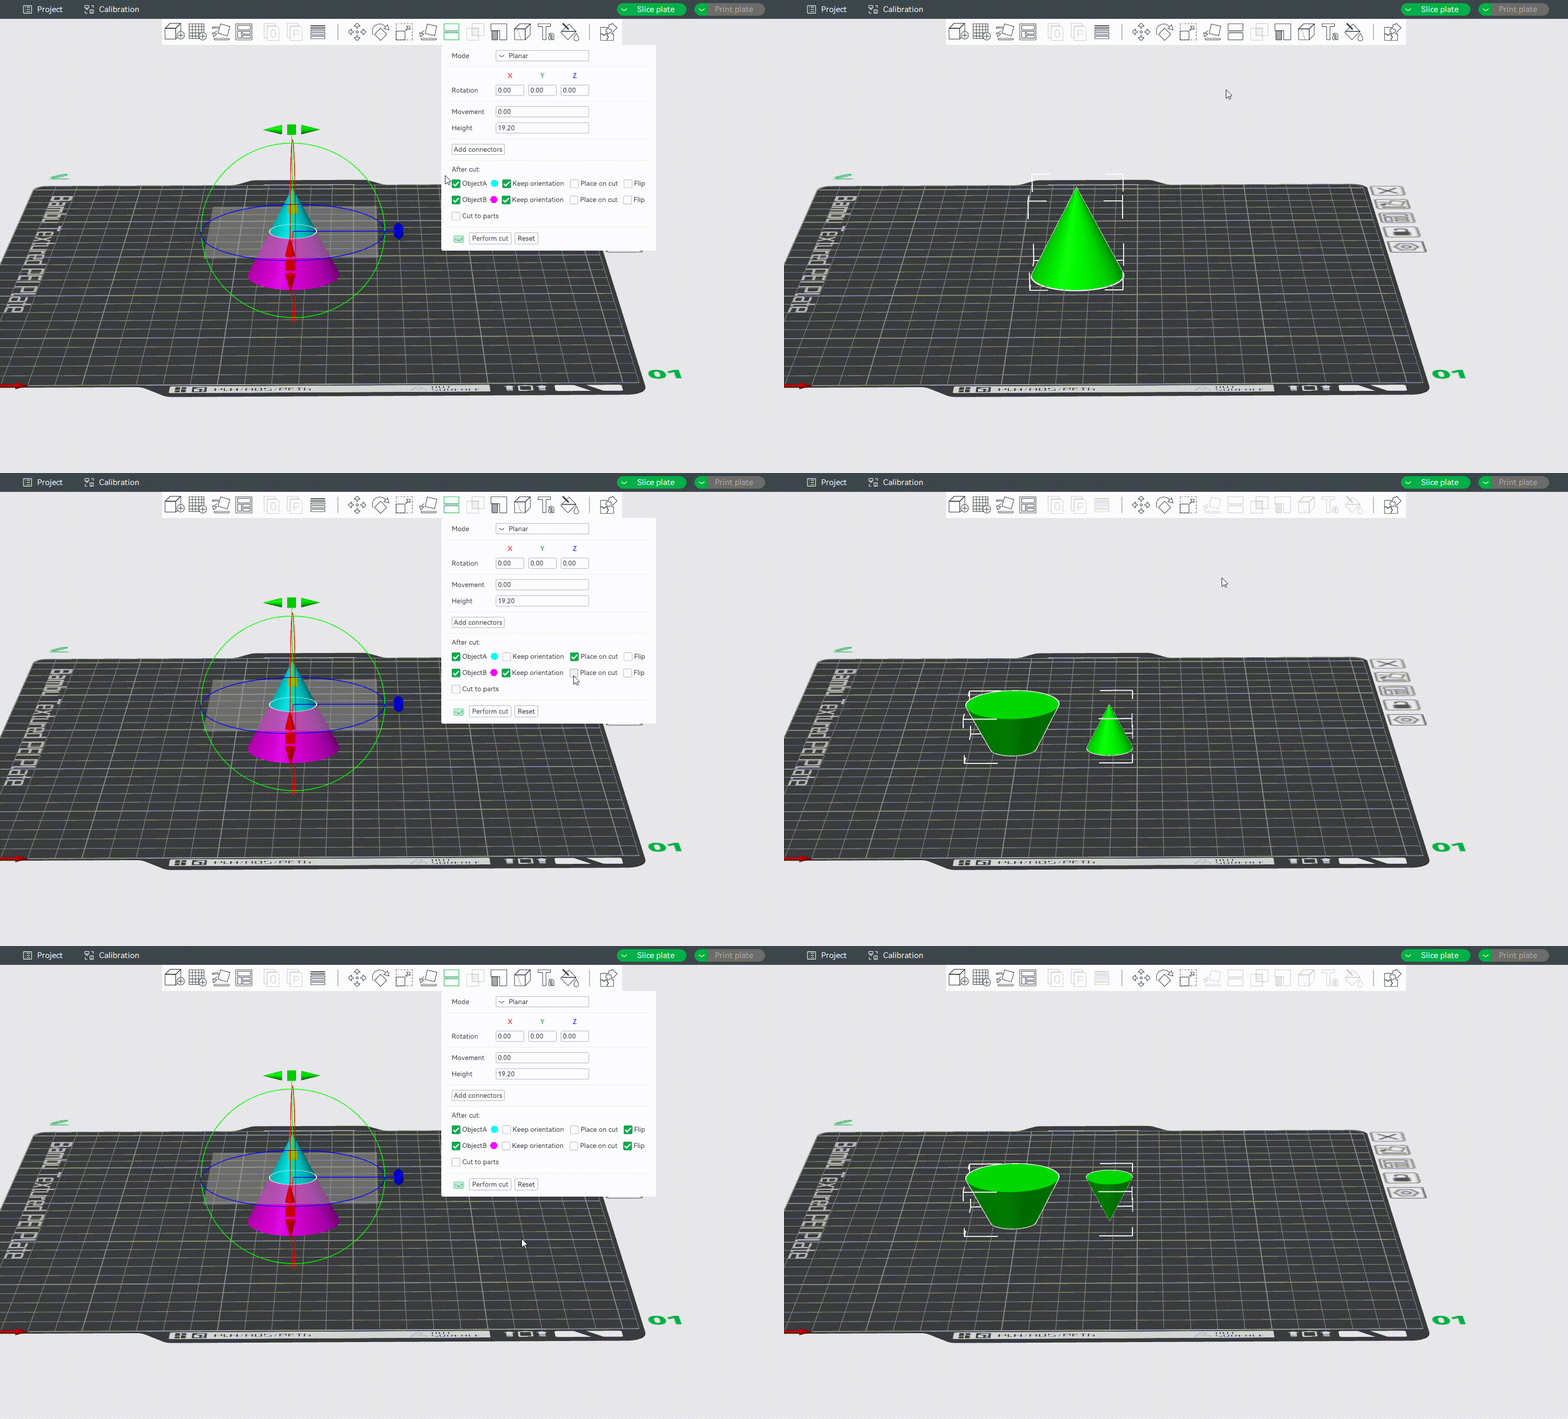
After cutting, the object will be split into two parts. By default, both parts are kept, but you can also discard either the upper or the lower part by toggling off Object A or Object B. In addition, you can also choose the orientation of the model after cutting by selecting Keep orientation, Place on cut and Flip. As shown below:
¶ Cut to objects/parts
It is supported to cut the object into multiple objects(default) or a multi-part object (the difference between parts and objects can be found in the wiki: Split to Objects/Parts | Bambu Lab Wiki). Here is an example of cutting a model into a multi-part object and coloring it.
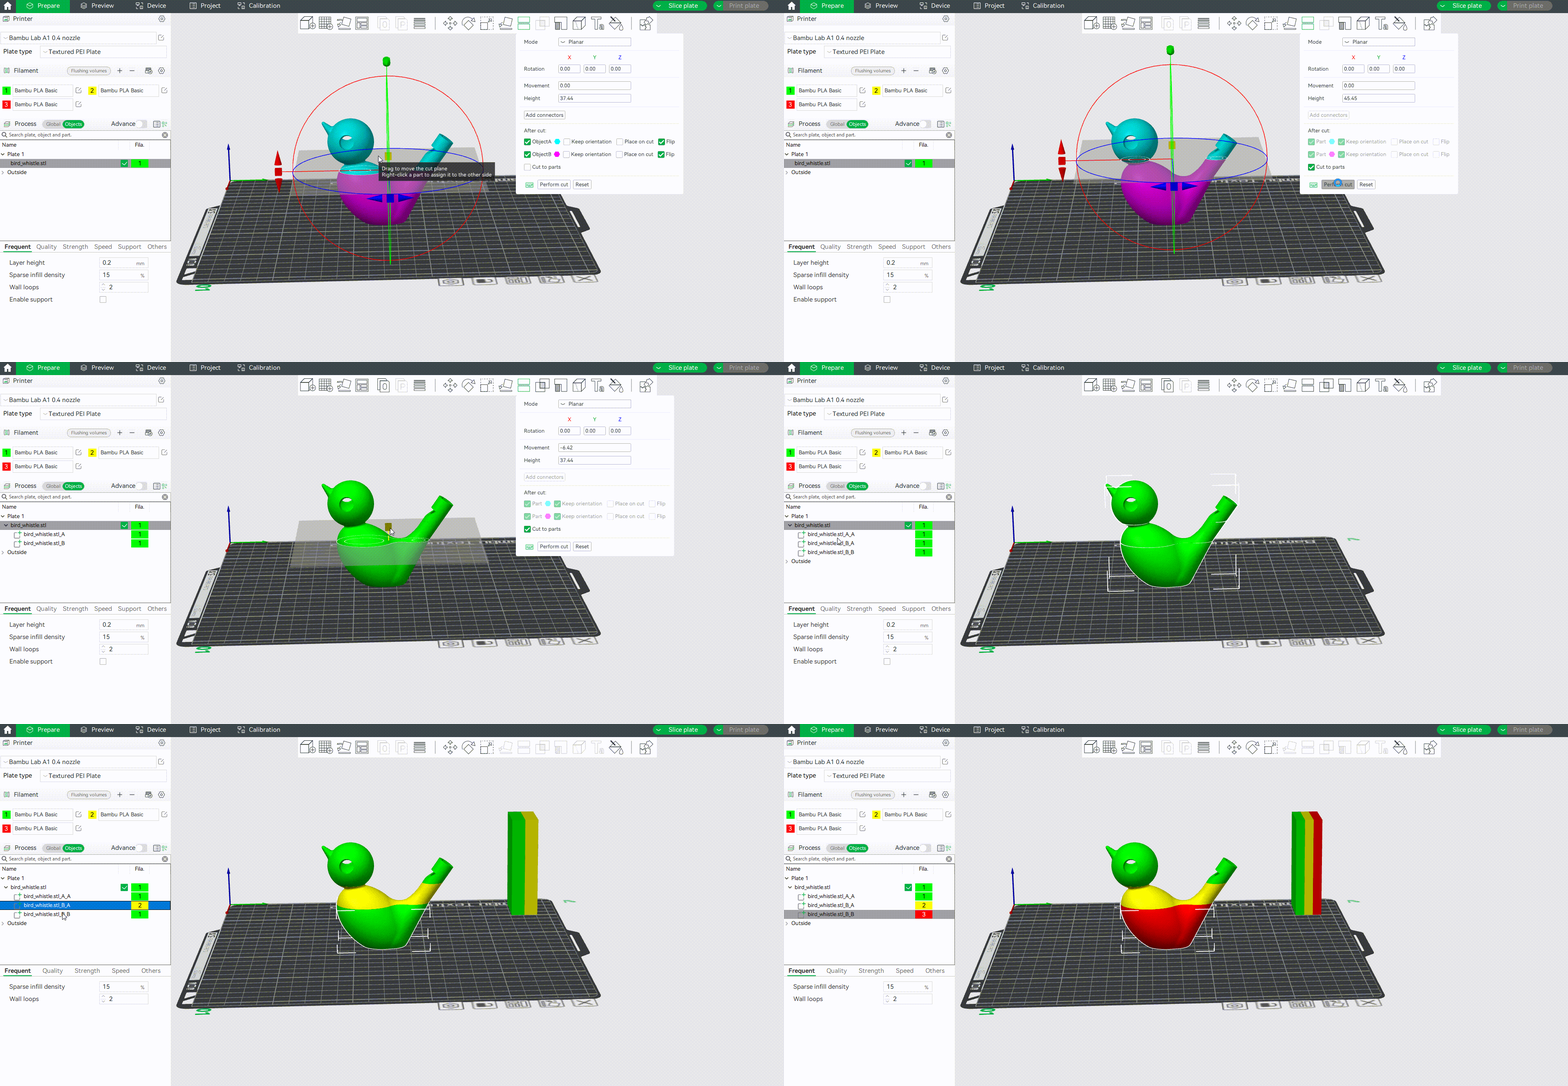
Tips: in this example, we use numeric shortcut keys to quickly assign the filament for each part.
¶ Add connectors
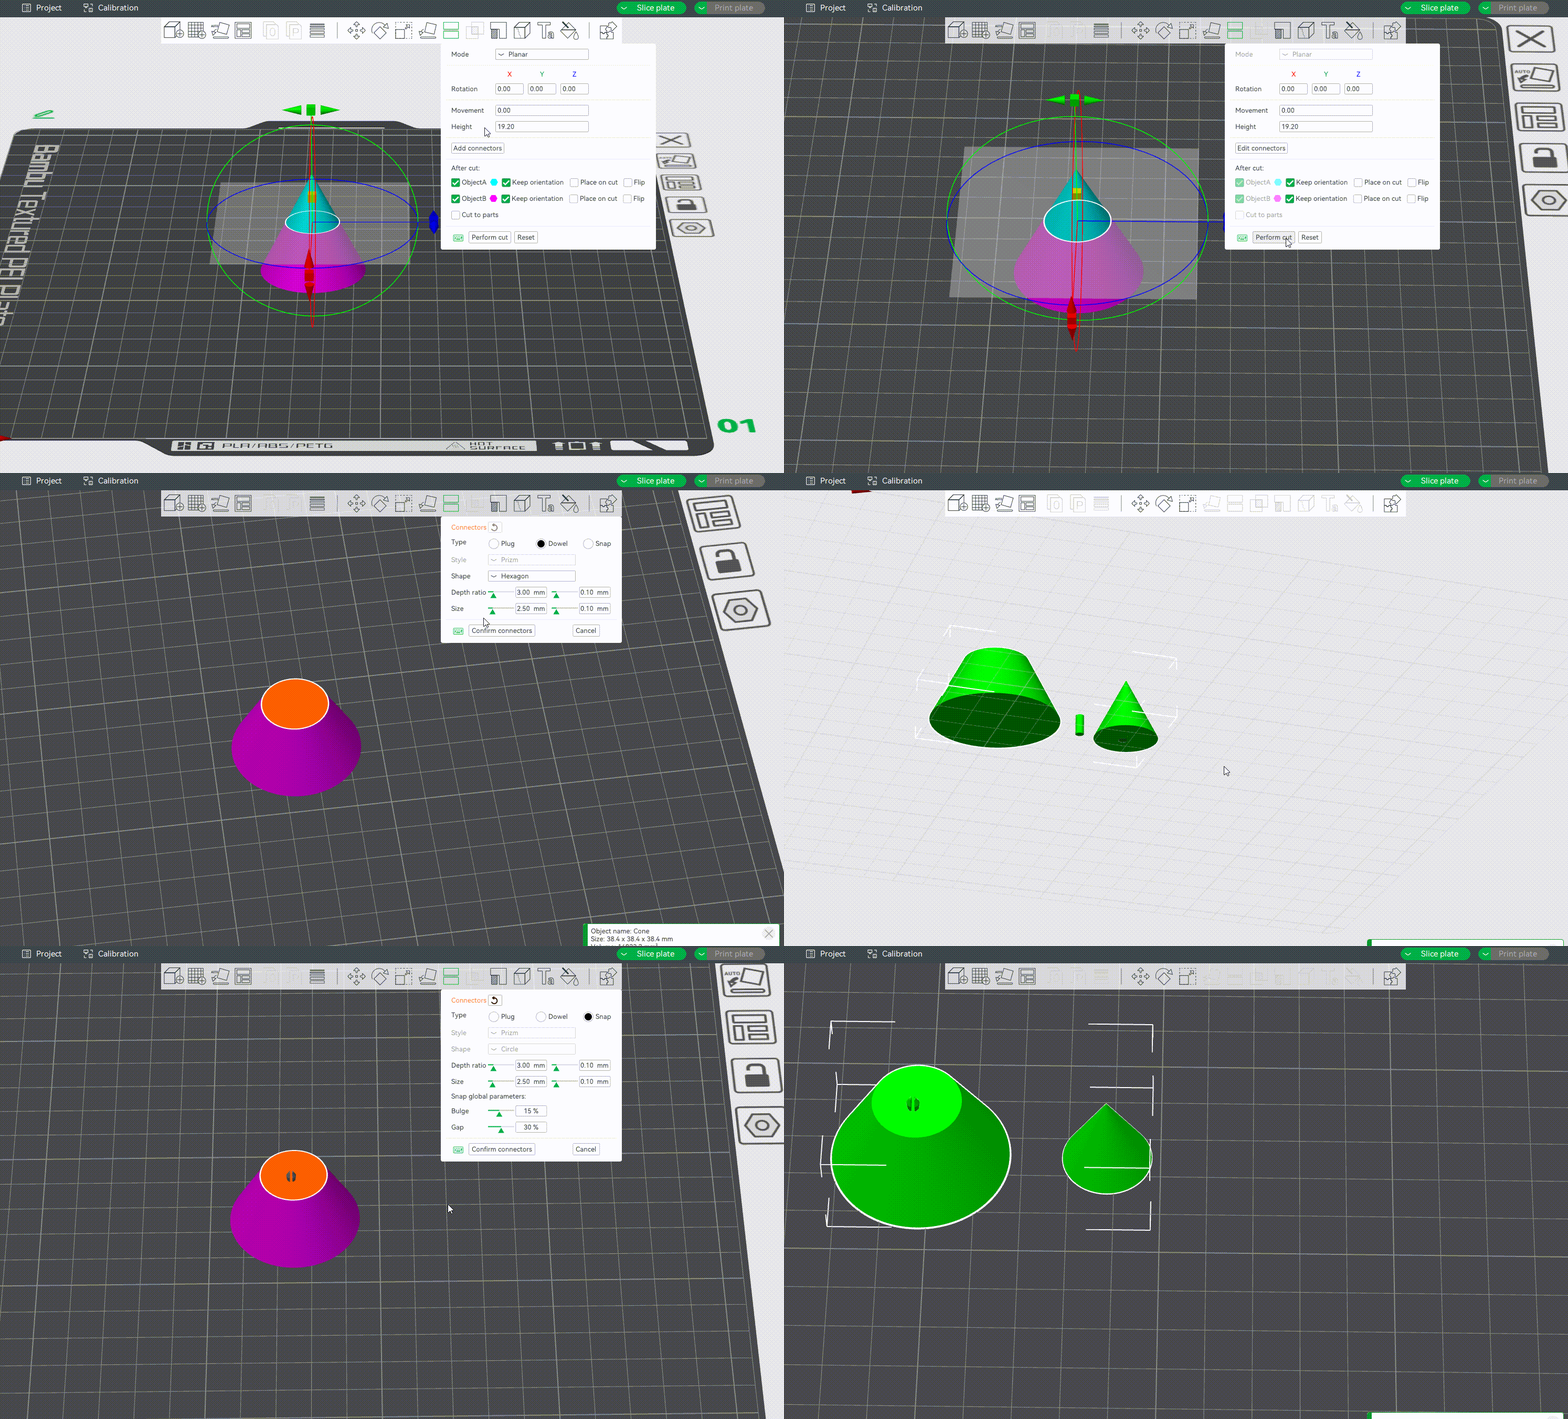
It supports adding and customizing connectors to connect separated parts, ensuring that separated objects can be reassembled after cutting.
At present, the connectors that can be added are Plug, Dowel and Snap, as shown below:
¶ Dovetail
In addition to adding connectors, you can also change the cutting mode to Dovetail, adding dovetail mortise and tenon structures on the cut surface for assembling the cut object. The Depth, Width, Flap Angle and Goove Angle can be adjusted as required, and theTolerancecan also be adjusted appropriately to make the assembly more accurate.
After dovetail cutting, sometimes a pop-up window will indicate that there are non-mainfold edges after cutting. Click to fix the model according to the prompt, and then slice it.
