¶ Flow Dynamics Calibration
¶ What is Flow Dynamics Calibration ?
From fluid mechanics, when a newtonian fluid flow through a hole, it needs pressure, and the pressure is proportional to the flow rate.
As the filament is not rigid body, when the extruder starts to extrude, the filament will be compressed to generate the pressure. The compression process will delay the response of the real flow, as the extruder only provides the amount of the filament that needs to extrude, no extra.
So we implemented the flow dynamic control to solve the problem, similar to the "Pressure advance" in Klipper or the "Linear advance" in Marlin, with some non-linear effect compensation added. When executing a flow rate cmd, the printer will do a fast extra extrusion to generate the pressure as fast as possible, to make the response of the flow can catch the response of the toolhead movement.
But how much "extra" extrusion is needed for a specific filament? As different filament has different stiffness and viscosity, under a certain flow rate, different filaments will need different amount. That's why flow dynamics calibration is needed.
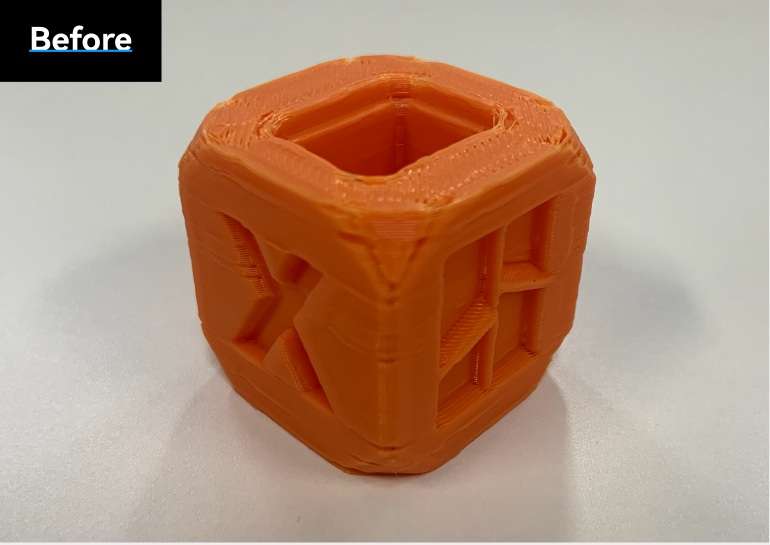
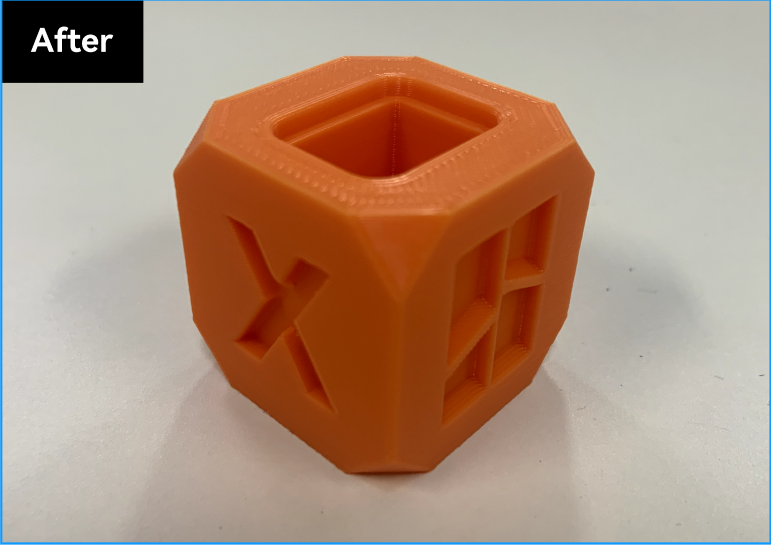
¶ When to do the Flow Dynamics Calibration?
We now have added the auto-calibration for different filaments, which is fully automated and the result will be saved into the printer for future use. In the following cases, you will need to do the calibration:
1. If you introduce a new filament of different brands or models ;
2. if the nozzle is worn out, as the friction in the nozzle will change;
3. If you replace a new nozzle, as there is tolerance in the manufacturing;
4. If the filament is damp. Moisture will change the viscosity of the filament.
5. If the max volumetric speed or print temperature is changed in the filament setting.
¶ Is the calibration reliable?
It depends. There are a few cases that will make the calibration result not reliable:
1. The filament is damp, which will make the calibration result not suitable for fresh filament ;
2. The filament is transparent, which will affect the X1 series printer's lidar scan results;
3. The build plate is not sticky (please wash the build plate or apply gluestick) , and the printed calibration lines do not stick to the plate, which will affect the X1 series printer's lidar scan results;
4. The nozzle is worn out or there is an internal blockage;
5. The material is particularly soft, such as TPU. This kind of flexible filament has a high probability of calibration failure;
6. The third-party hotend is used. Especially for A1 Series printer, Flow Dynamics Calibration uses the eddy current sensor to detect the extrusion pressure, and if a third-party hotend is used, the calibration results may be inaccurate;
Except for the above cases, the calibration result is reliable in our test.
¶ Why are calibration results always not the same in each calibration?
The calibration results have about 10% jitter in our test. We are still investigating the root cause.
¶ Start a Calibration on the Calibration Page of Studio
¶ Two modes of calibration
On the calibration page of Bambu Studio, Flow Dynamics Calibration has two modes: manual and automatic.
Manual mode: the user needs to judge which parameter to use by observing the quality of the calibration line on the printed board.
Automatic mode: the user only needs to start the calibration, and the printer will return the calibration results after the printing.
¶ How to start a calibration?
Note: X1 and A1 series printers support auto calibration. The A1 series printer only supports auto flow dynamic calibration from firmware version 01.04.00.00. Please ensure the printer firmware and Bambu Studio are updated to the latest version.
¶ Automatic mode
(1) How to start
The printer must be connected before calibration.
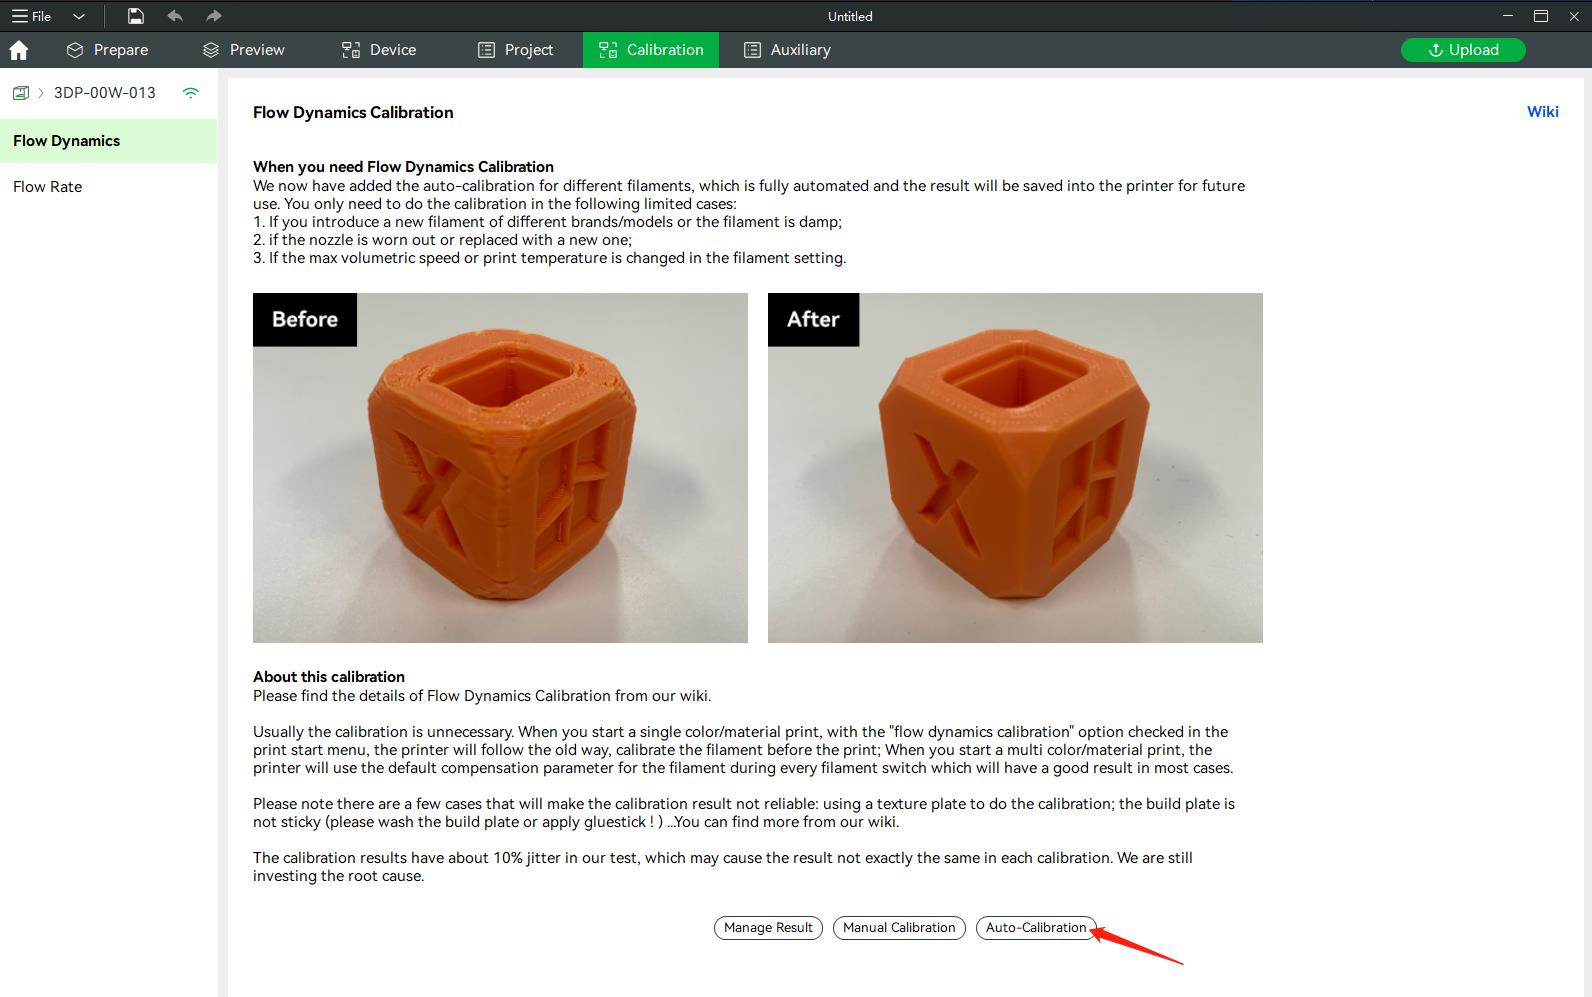
(2) Select the material to be calibrated
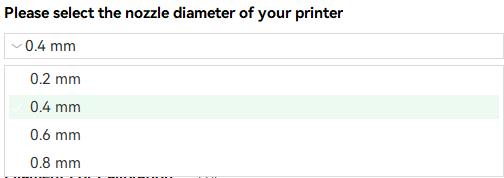
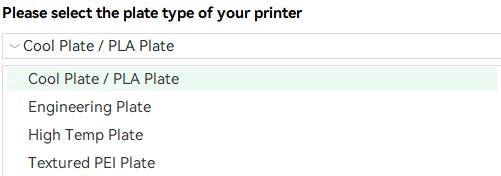
We will select all the necessary parameter information by default, and you can also modify some of the parameters according to your own situation.
Select the nozzle diameter of your printer
Select the plate type of your printer
Synchronize filament list information from ams

Select the filament you want to calibrate, and you can select the filament preset for printing through the filament combo box.
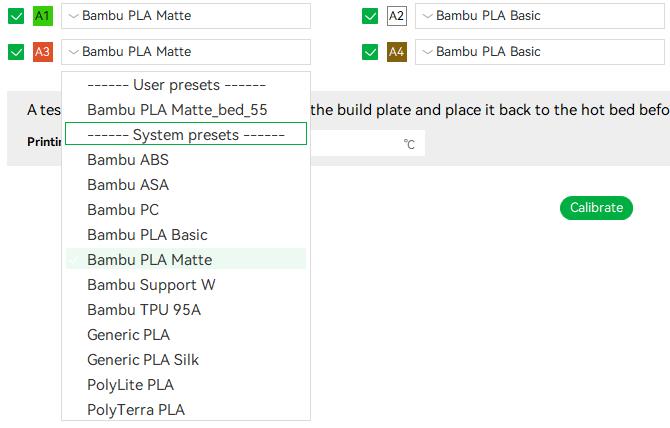
When you have set the required information, you can start the calibration by pressing the "calibration" button.
(3) Start calibration.
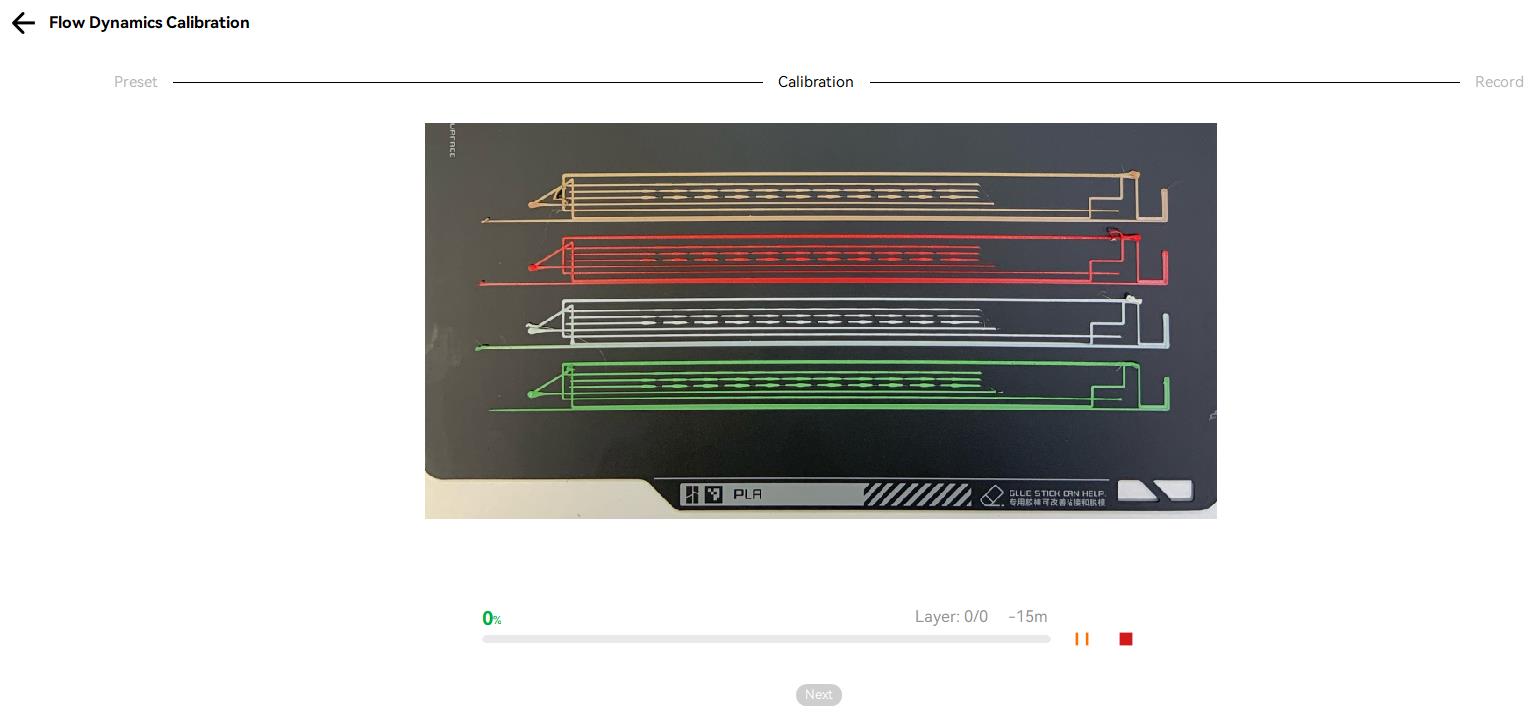
The X1 series printer will print calibration lines on the build plate, and then use the lidar to scan the calibration lines for auto dynamic flow calibration. The A1 series printer will move the tool head to the purge wiper to purge the filament and use the eddy current sensor of the tool head to detect the extrusion force, thereby calibrating the dynamic flow.
|
The X1 series printer will print calibration lines on the build plate |
The A1 series printer will extrude the filament at the purge wiper |
 |
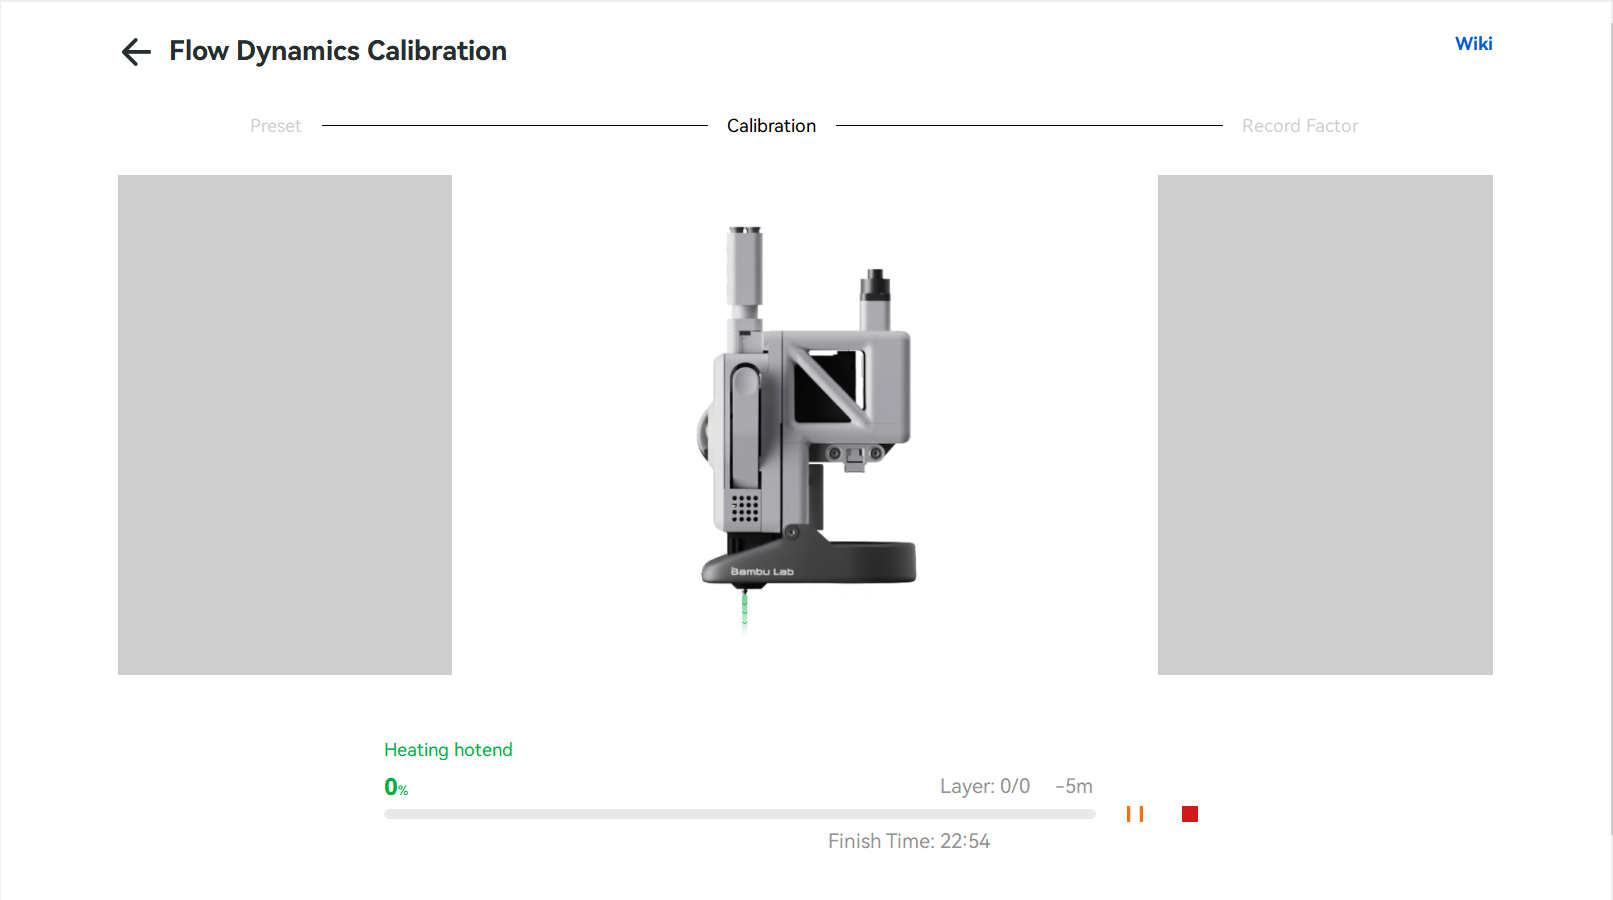 |
When it's finished, you can click the next button to go to the next step.
(4) Save calibration results
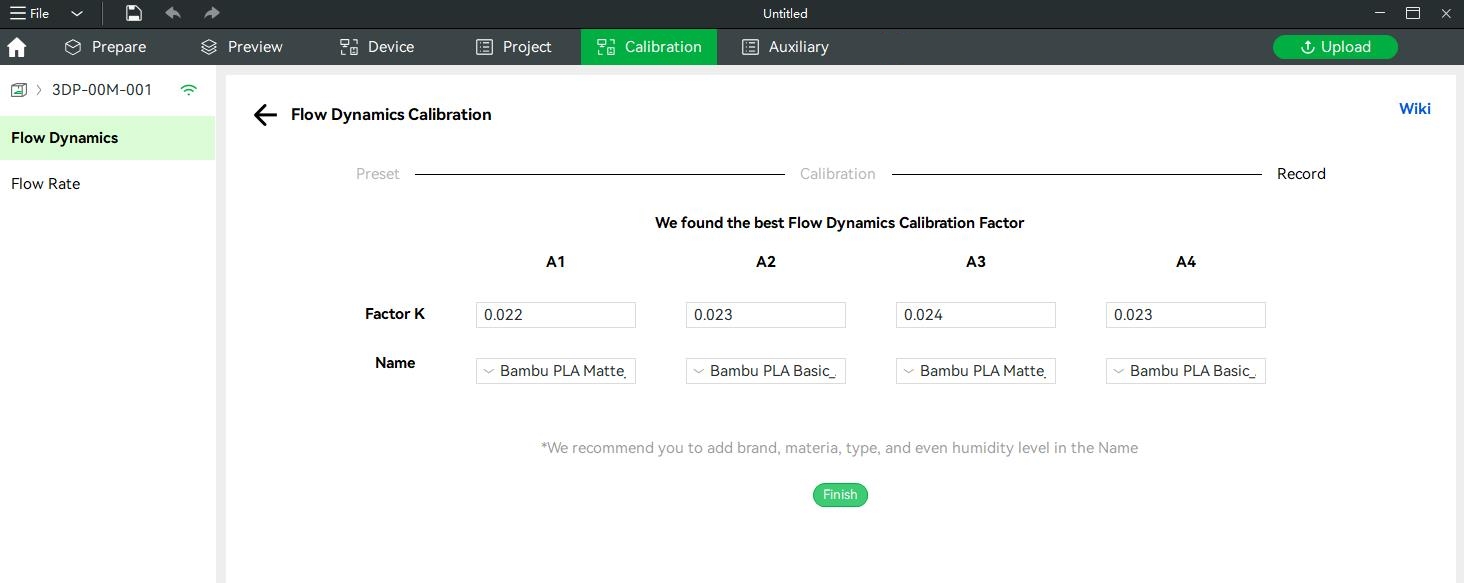
After the printing is finished, the machine will return the results, and you can save the returned results. Each set of parameters can record a name, and you can modify this name.
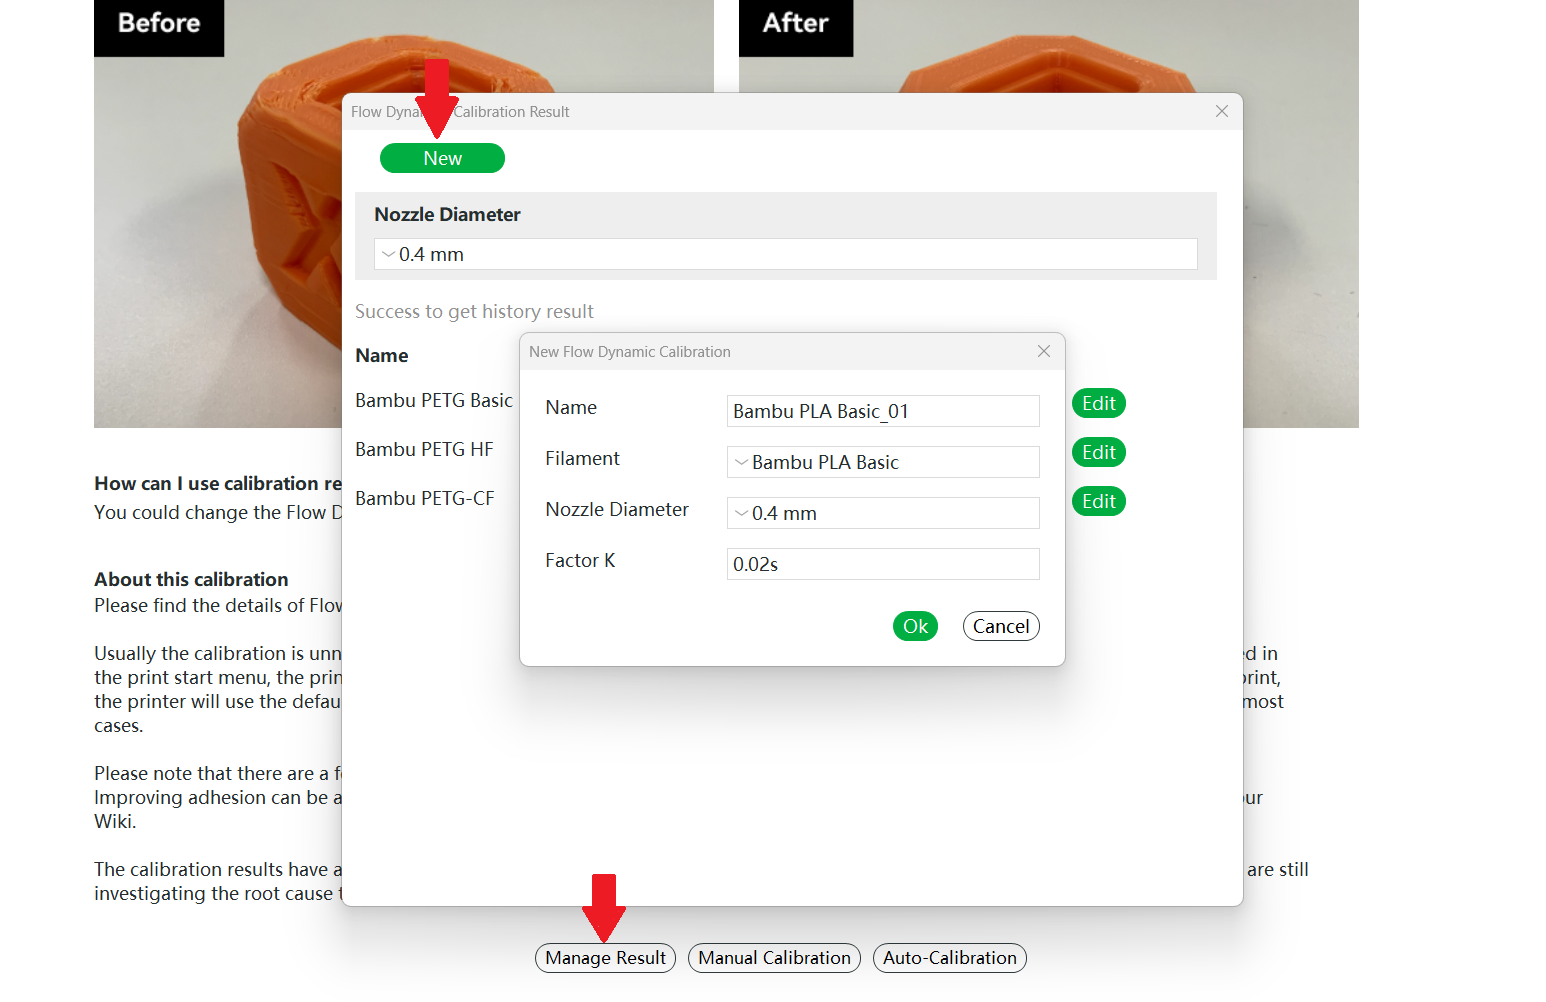
All saved results can be viewed by clicking the "Manage Result" button on the homepage,
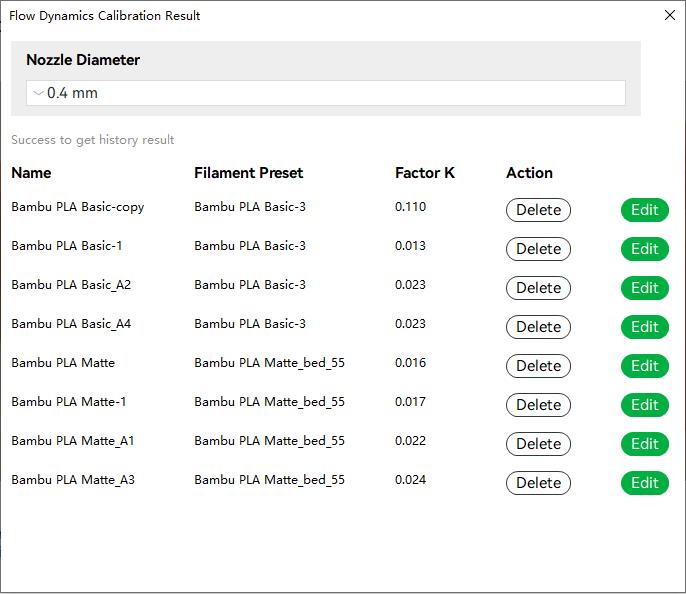
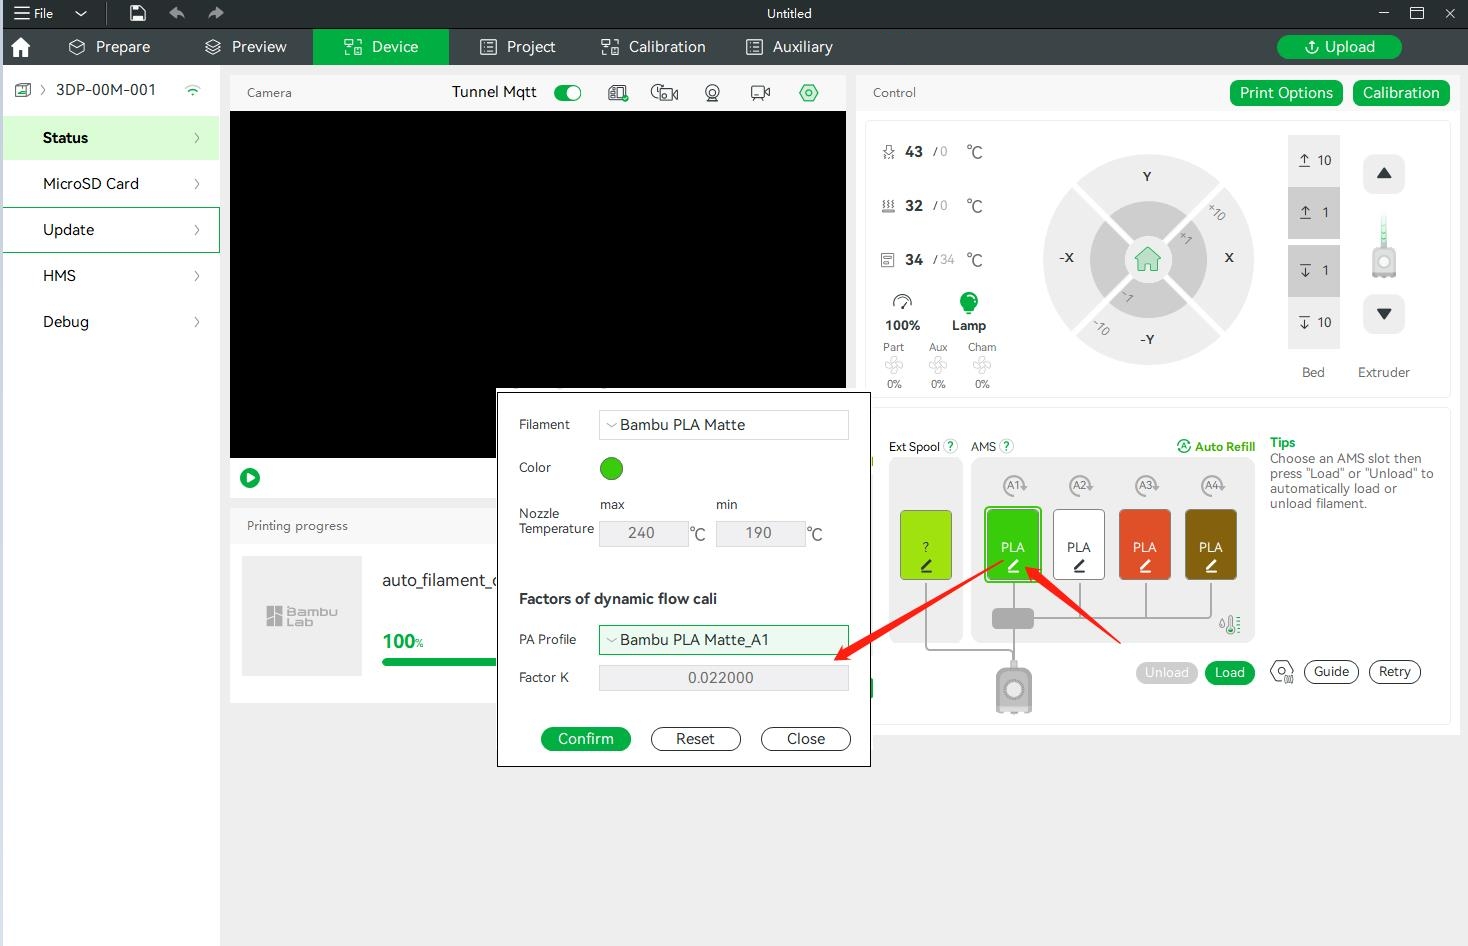
and you can set the K value you want to use for each slot in the material dialog on the device page.
Attention: After our testing, both X1 series and A1 series printers using a 0.2mm hot end have a high probability of inaccurate or failed automatic flow calibration results. Therefore, we recommend that you refer to the manual calibration steps below when using a 0.2mm hot end to obtain more accurate calibration results.
¶ Manual mode
(1) How to start
Click the “Manual Calibration”.
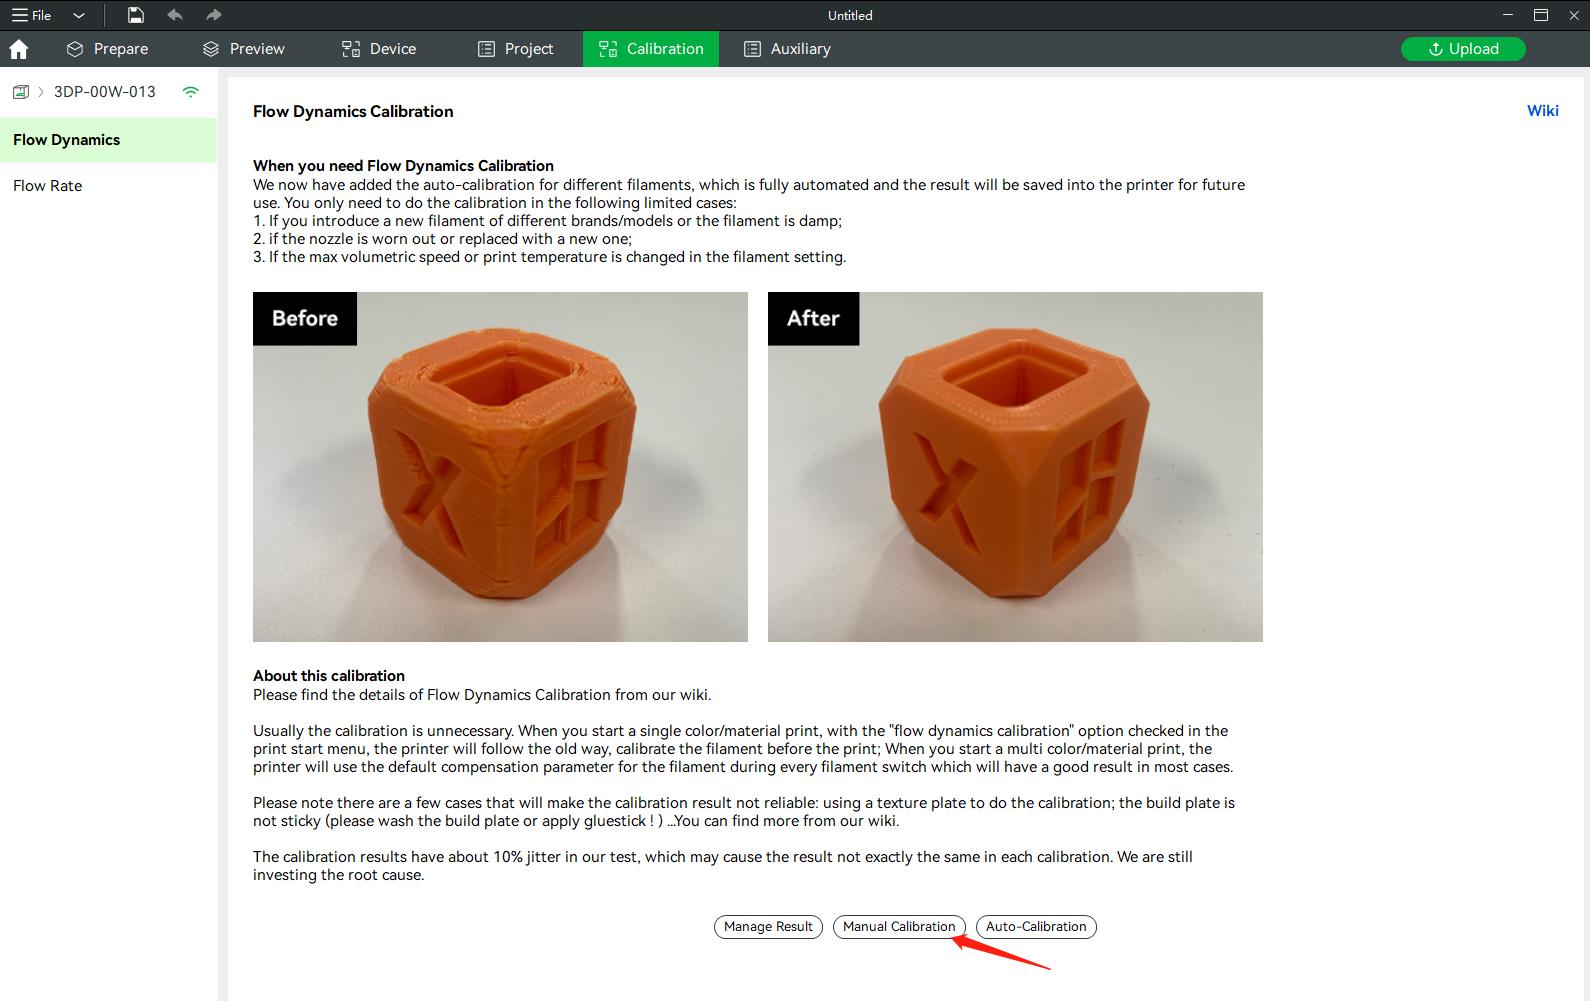
(2) Select the material to be calibrated
Same as automatic calibration, but the manual mode can only calibrate one material at a time.
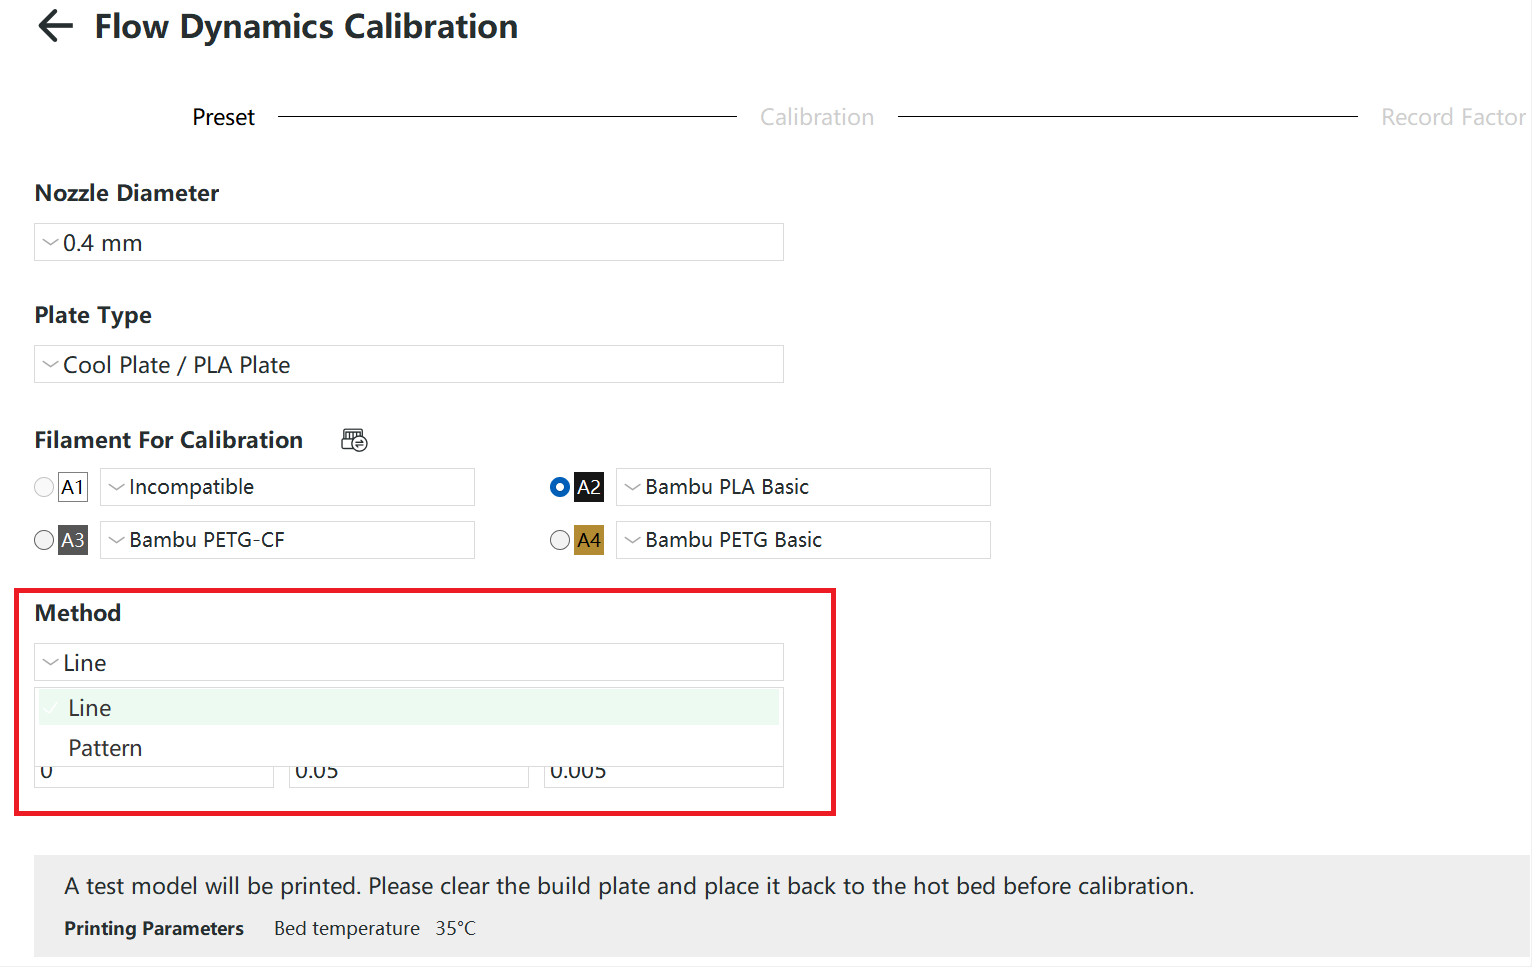
(3) Select the calibration mode
Currently, line or pattern modes can be selected.
|
Line |
Pattern |
 |
 |
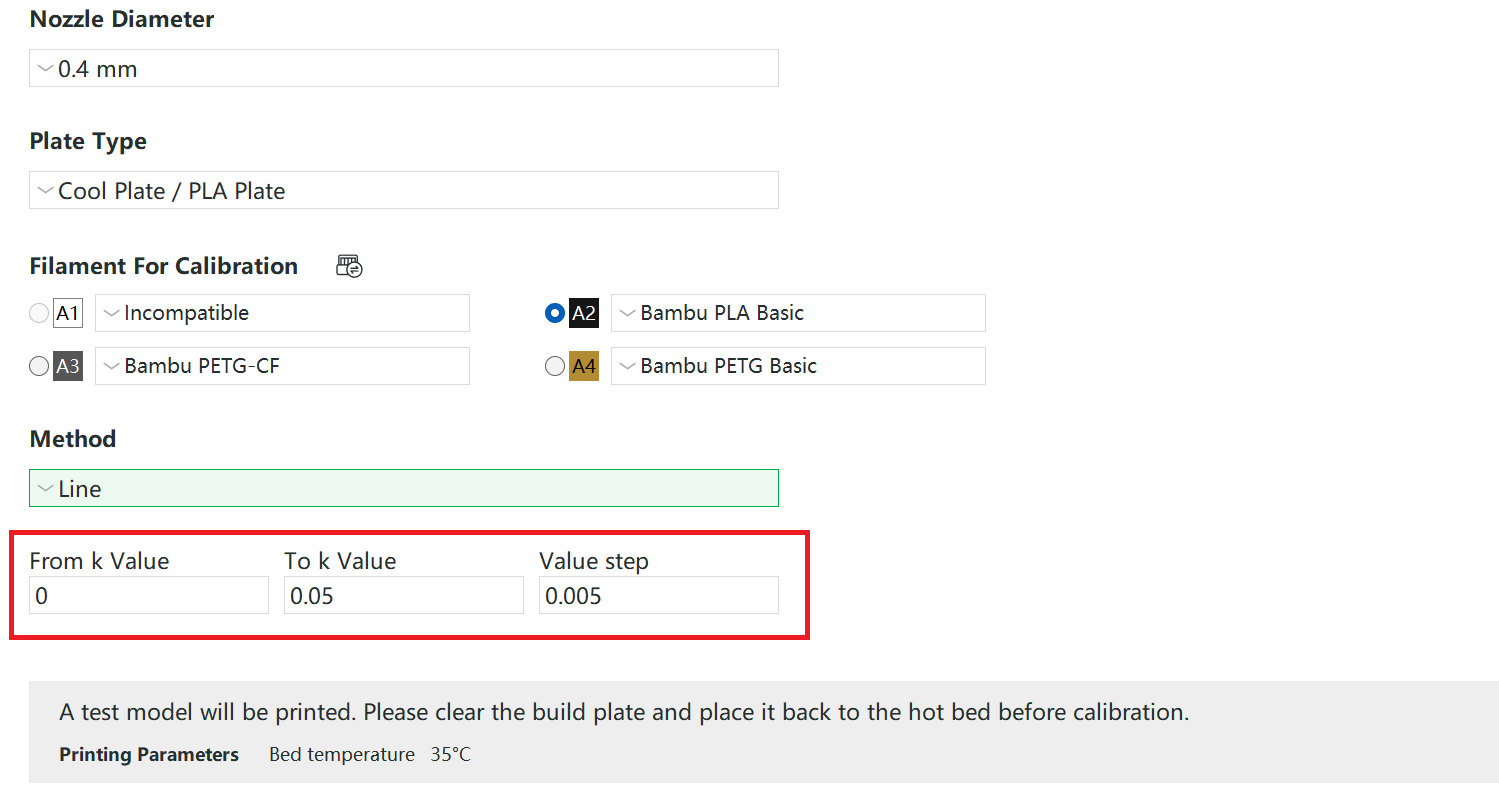
(4) Select the step size to print the calibration line
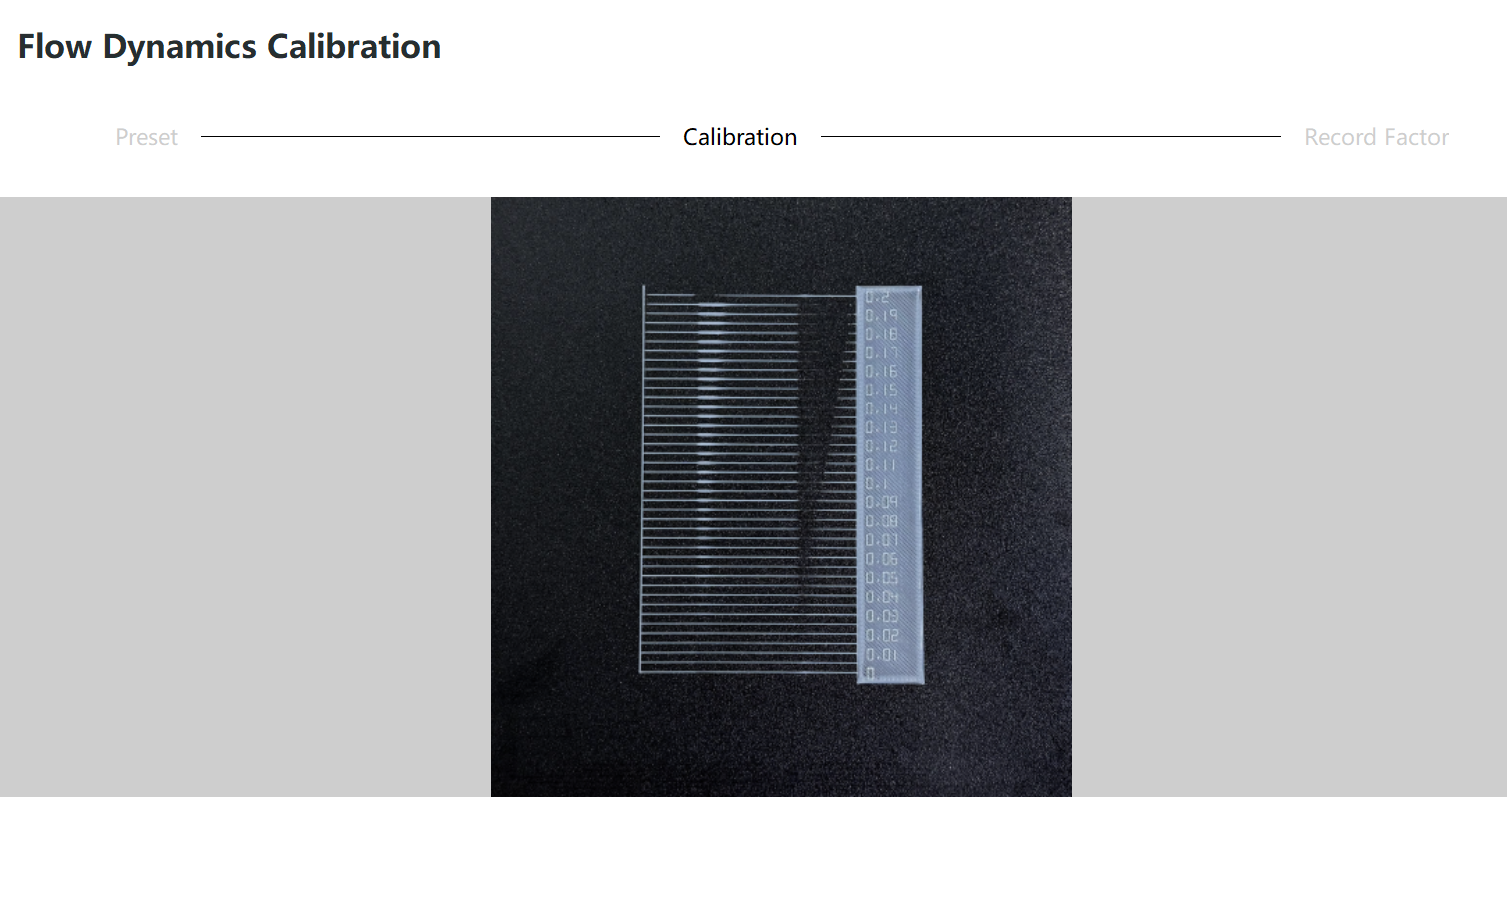
(5) Calibration printing in progress.
(6) Save calibration results
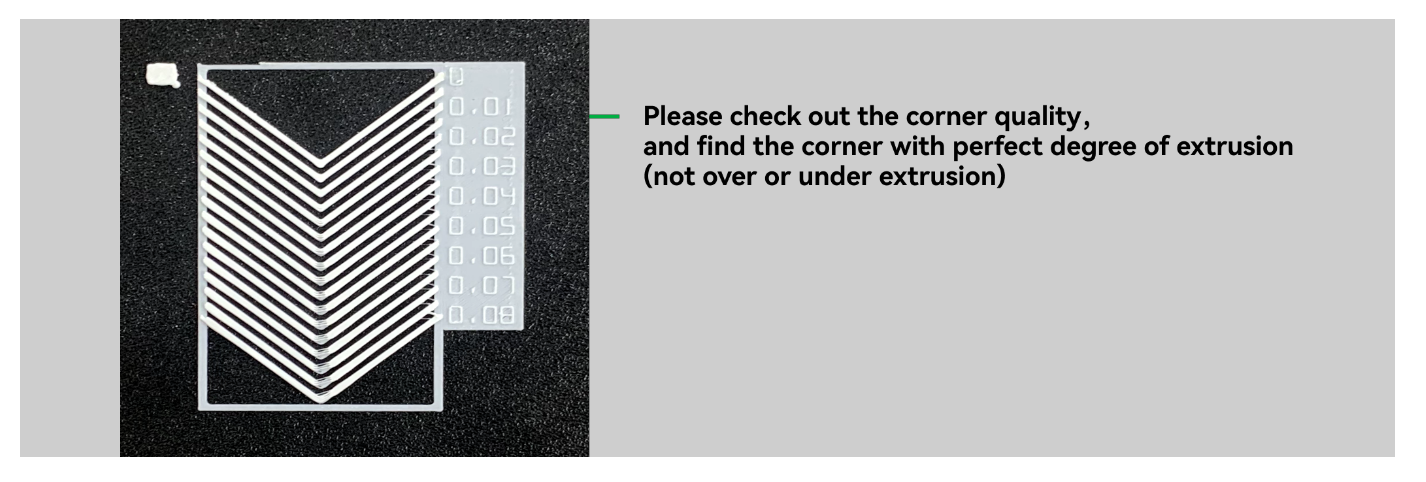
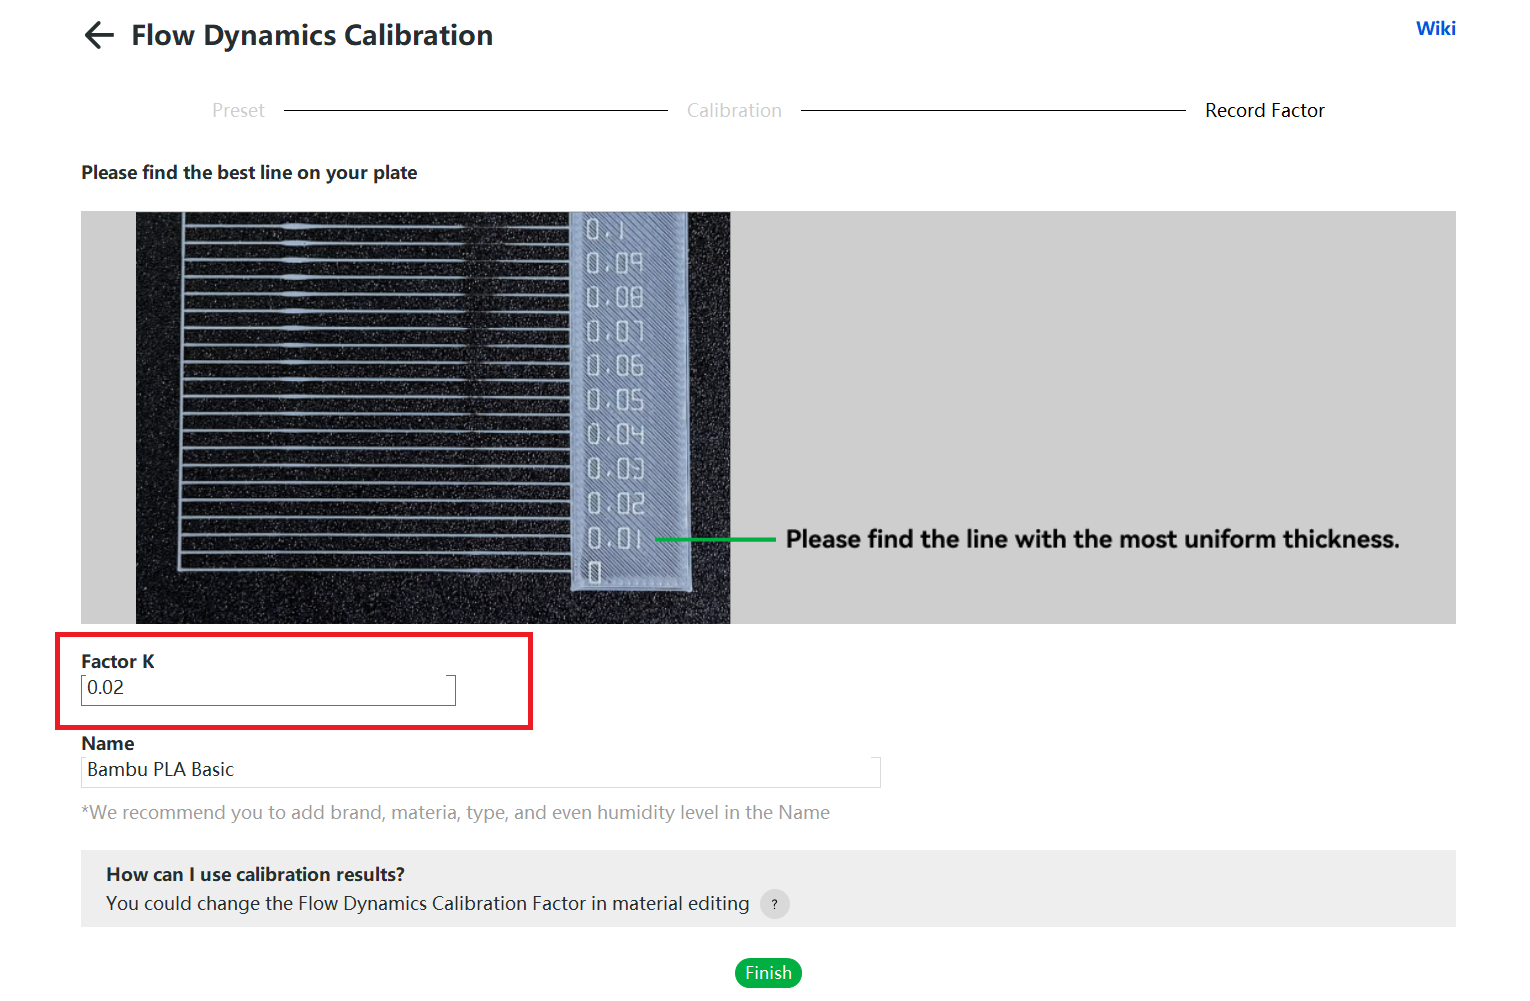
By observing the calibration line, select the number corresponding to the calibration line with the best printing effect. Fill in the K value edit box with the number, and you can also view the saved history in the history dialog box after saving.
¶ Select Flow Dynamics Calibration Before Printing
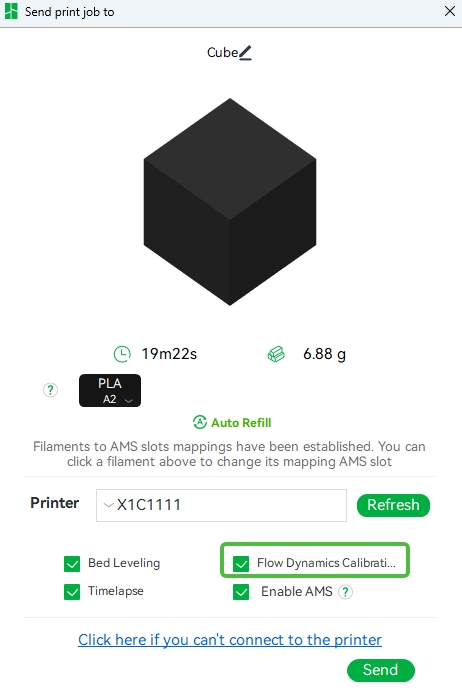
If you check "Flow Dynamics Calibration" before initiating each printing, the printer will calibrate the flow rate in the printing preparation stage, and this printing task will use the calibrated K value instead of the K value you set manually. There are slight differences between different models, please refer to the following for details. P1 series printers do not have this option as they do not support automatic calibration.
¶ X1 Series Printer
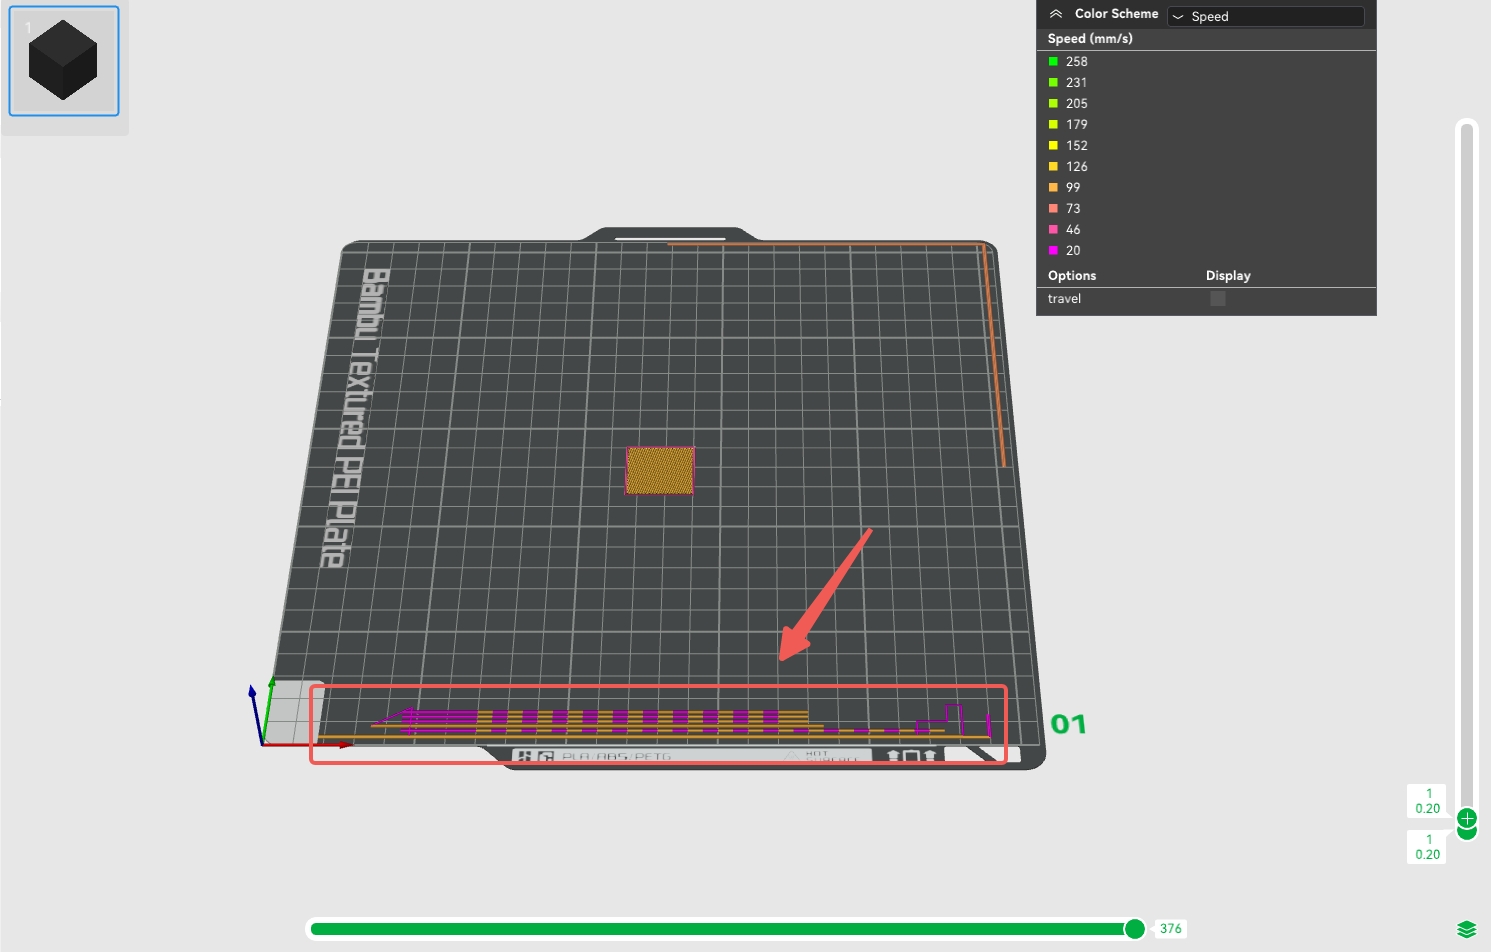
For the X1 series printer, if "Flow Dynamics Calibration" is checked in the window that sends prints, it will print a calibration line on the build board during the print preparation stage to calibrate the first filament used in this print job. If multiple filaments are used in this printing task, other materials will use the K value you set manually. If the K value of materials in other slots has not been manually configured, the default compensation value will be used. This calibration method will occupy a certain area of the print plate, as shown in the figure below.
¶ A1 Series Printer
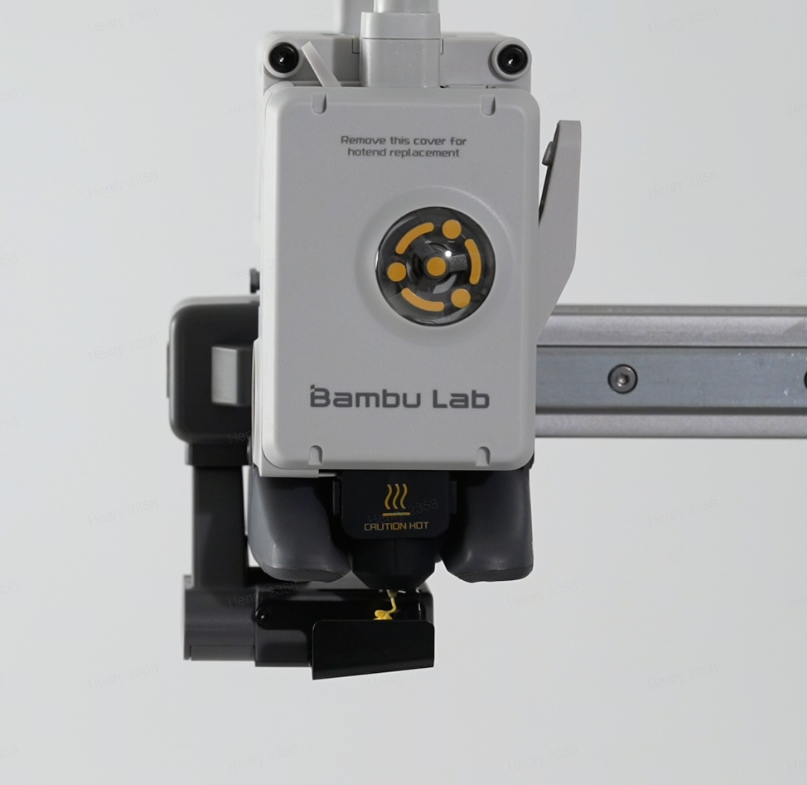
For the A1 series printer, the flow dynamics calibration process is to discharge material at the position of the discharge assembly during the printing preparation stage and calculate the suitable K value for the material based on the pressure changes detected by the eddy current sensor above the hotend. If "Flow Dynamics Calibration" is checked before printing, a flow calibration will be performed when each filament of this printing task is replaced for the first time, so all materials used in this printing task will be calibrated by flow (supported since version 01.03.00.00).
This calibration method is greatly affected by the hotend. Please ensure that you are using the official Bambu hot end. If you use a third-party hotend, the calibration value may be inaccurate.
.webp)
¶ What happens if you don't calibrate the flow?
1. If you are on the filament configuration page, you have not selected any PA profile for the supplies filament for this slot, and “Flow Dynamics Calibration” is not checked before printing begins. In this case, it will use the default extrusion compensation parameters. In most cases, it is possible to get good printing results with the default parameters.
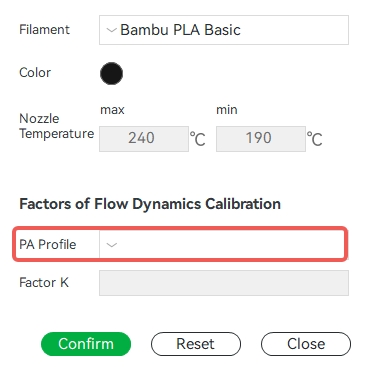
2. If you are familiar with the characteristics of a particular filament, you can manually create a PA profile for the consumable filament directly from the Flow Dynamics Calibration Management Result page in Studio. This allows you to configure an extrusion compensation parameter for the filament without calibration, but this feature is supported by Bambu Studio version 1.9.1 and above.
