Cooling is important for the printing quality of FDM printers, especially when the model has overhangs, bridges, or sharp, small details. The following are pictures of some bad quality models when printing very fast but cooling is insufficient.

Cooling settings are available on the filament page. The full page is shown below.
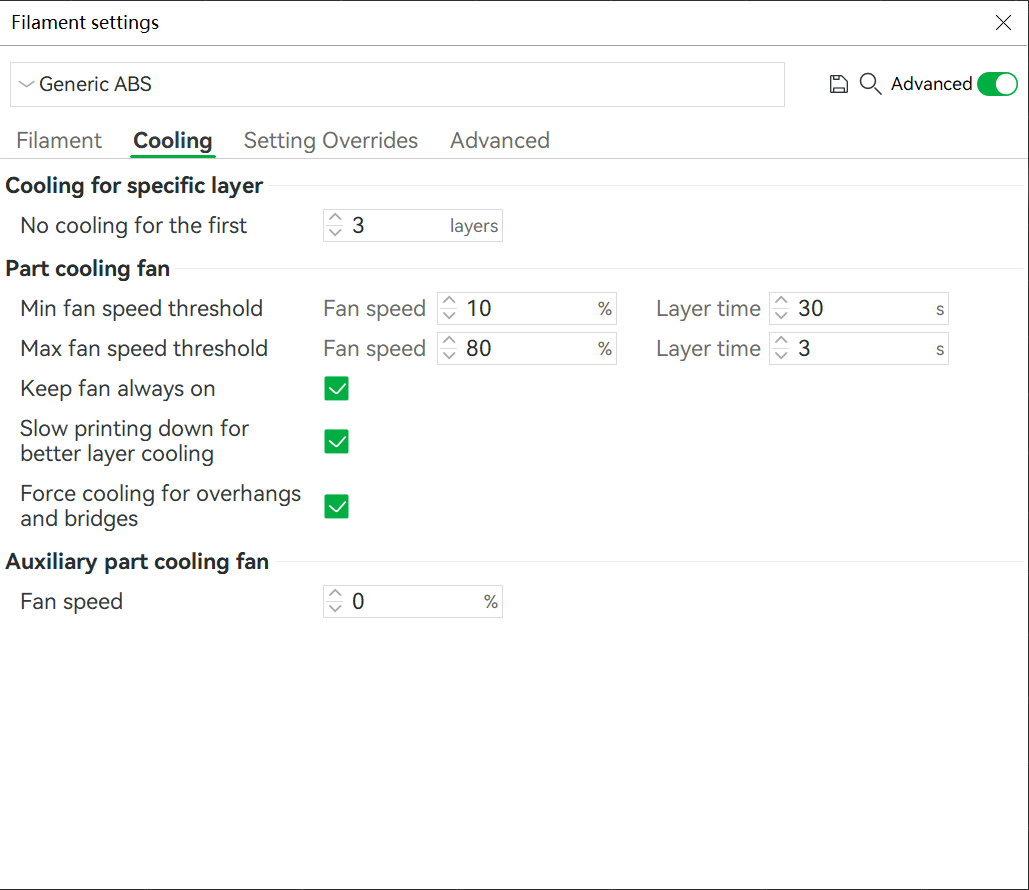
These settings control the cooling fan speed and limit the printing speed of every layer. Some settings may not be easy to understand, so we'll go into more detail next.
¶ Specification of cooling settings
¶ Cooling for specific layer
The first setting is "No cooling for the first x layers". This is used to turn off all cooling fans for the first certain layers. For example, the X1C machine has one part cooling fan on the extruder and one auxiliary part cooling fan on the left of the machine box.
When "No cooling for the first x layers" is 3, this means that these two cooling fans are forced to be off when printing the first 3 layers. This can improve the bed adhesion of the model.
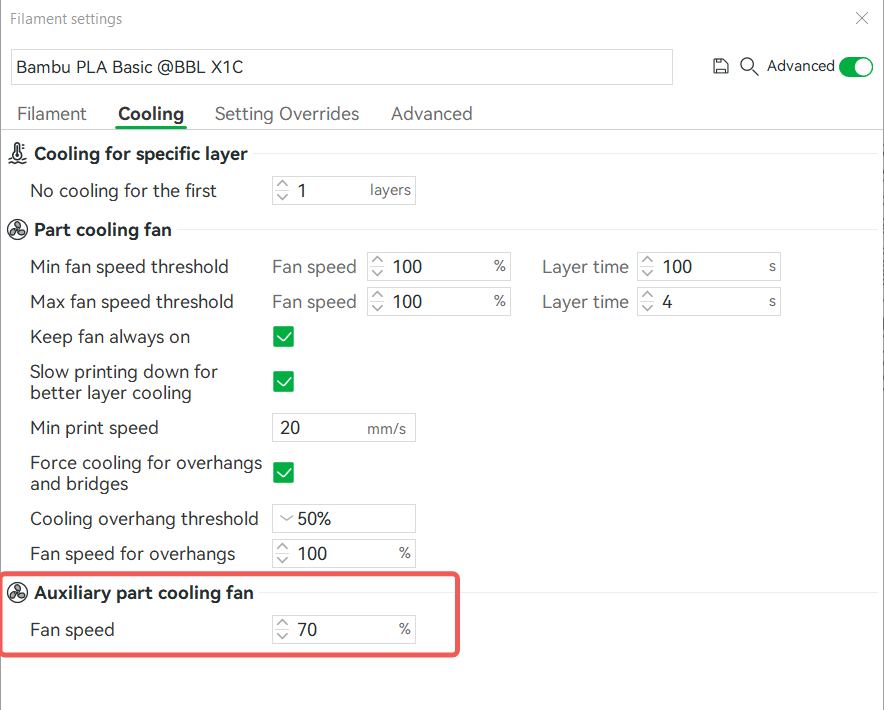
¶ Auxiliary part cooling fan
This is the speed of the auxiliary part cooling fan which runs at a fixed speed during printing and can't be changed automatically. For printers that don't have an auxiliary part cooling fan, this setting is ignored.
¶ Part cooling fan
¶ Fan speed
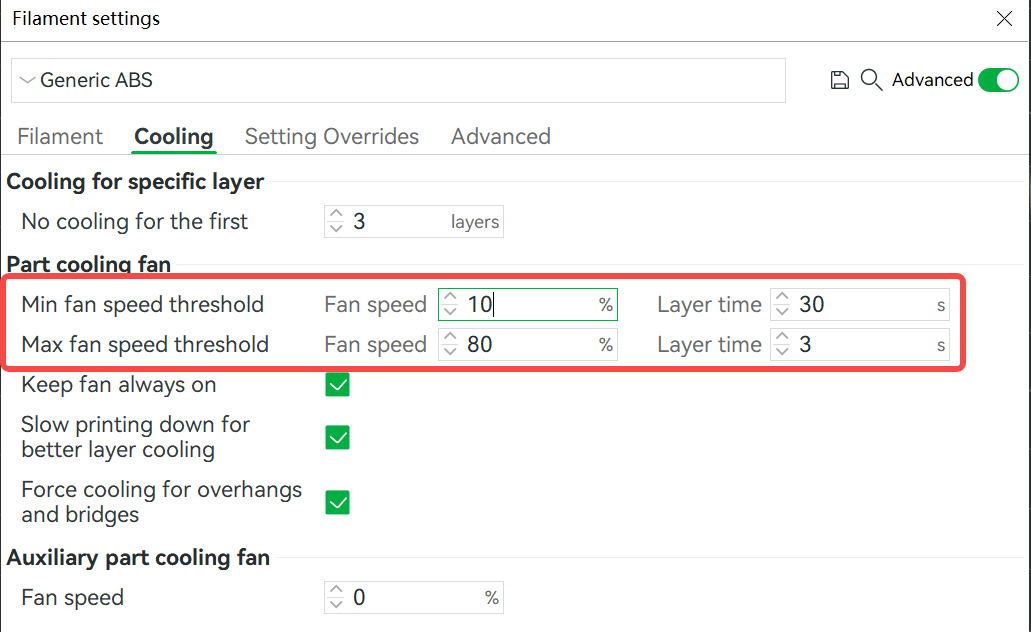
The speed of the part cooling fan is variable according to the layer printing time. It is controlled by two speed thresholds and two layer-time thresholds.
In brief, when real layer time is between these two layer time thresholds, the fan speed is calculated according to the interpolated value of two speed thresholds.
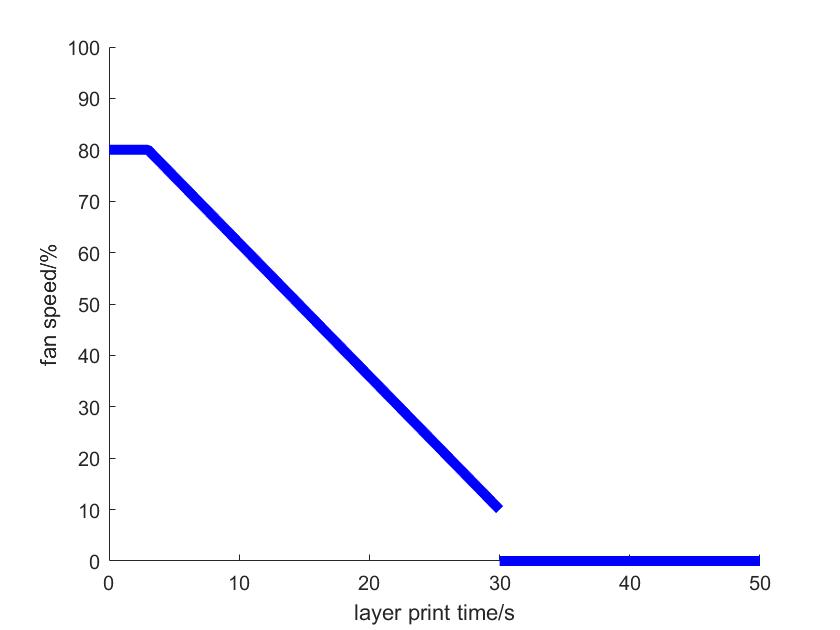
An example is shown below. The two fan speed thresholds are 10% and 80%, and the relevant layer time thresholds are 30 seconds and 3 seconds. When the single-layer printing time does not exceed 3 seconds, the fan speed will reach 80%, and when the single-layer printing time reaches 30 seconds, the fan speed will decrease to 10%. When the actual single-layer printing time is between 3~30s, the fan speed is calculated based on the interpolation values of the two speed thresholds, which means that the fan speed will be between 10%—80%.
Then, the final fan speed when printing one layer is decided by the printing time of this layer by the following curve.
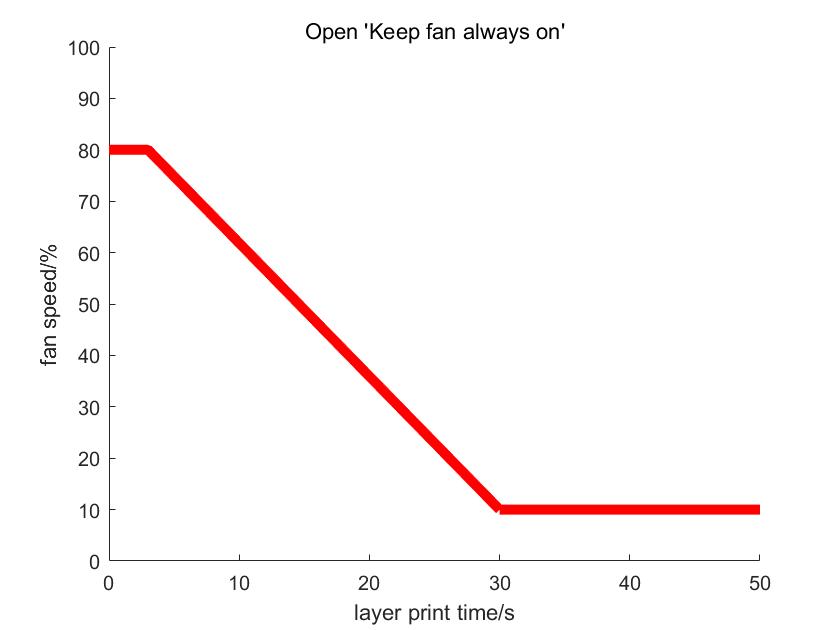
But this is not over yet. Another setting that also influences part cooling fan speed is "Keep fan always on". If enabled this setting, the part cooling fan will never be stopped and will run at least at a minimum speed to reduce the frequency of starting and stopping. The minimum speed is defined in the "Min fan speed threshold".
So the fan speed curve can be influenced by setting "Keep fan always on" as below.
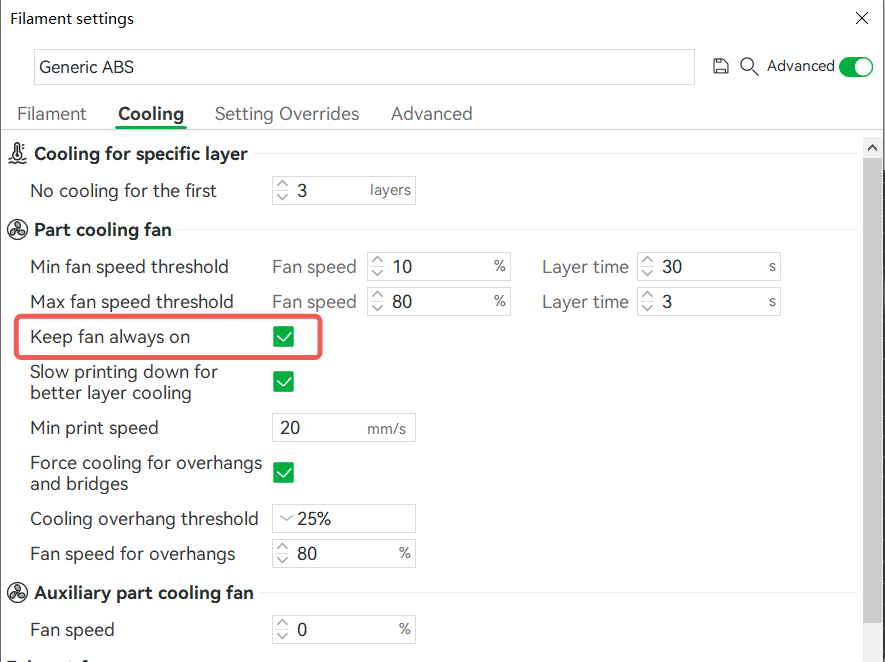
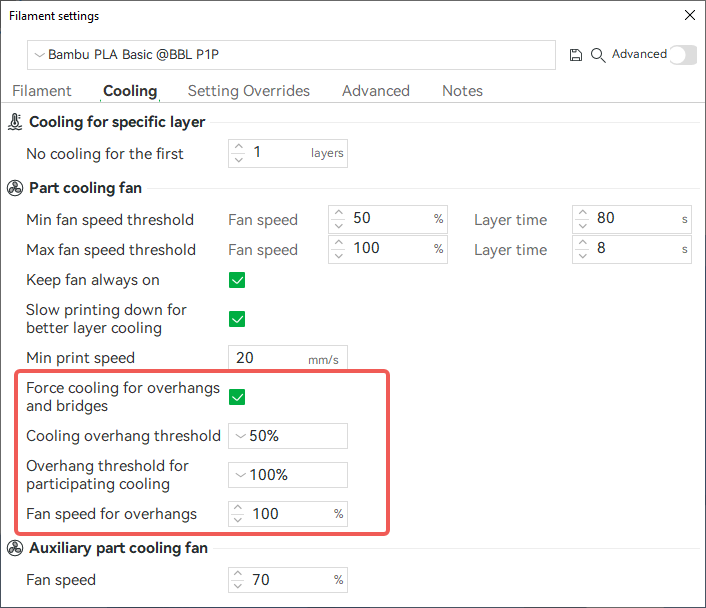
For overhangs and bridge parts, the fan speed is not controlled by layer print time according to the curve mentioned above. Instead, you can set a faster fan speed for the overhang part above the overhang threshold. Bambu Studio has tested the best group of fan speeds of filament when printing different overhang degrees and bridges. This information has been built in Studio and can be enabled by setting "Force fan speed for overhangs and bridges". So please keep it default enabled if there is no other special reason to turn it off.
Cooling overhang threshold: Force the cooling fan to be specific speed when the overhang degree of the printed part exceeds this value. Expressed as the percentage which indicates how much width of the line is without support from the lower layer (you can refer to this wiki to learn how to calculate overhang degree: Slow Down for Overhangs | Bambu Lab Wiki). 0% means forcing cooling for all outer walls no matter how much overhang degree.
Fan speed for overhang: Force part cooling fan to be this speed when printing bridges or overhang walls that have a large overhang degree. Forcing cooling for overhangs and bridges can achieve better quality for these parts.
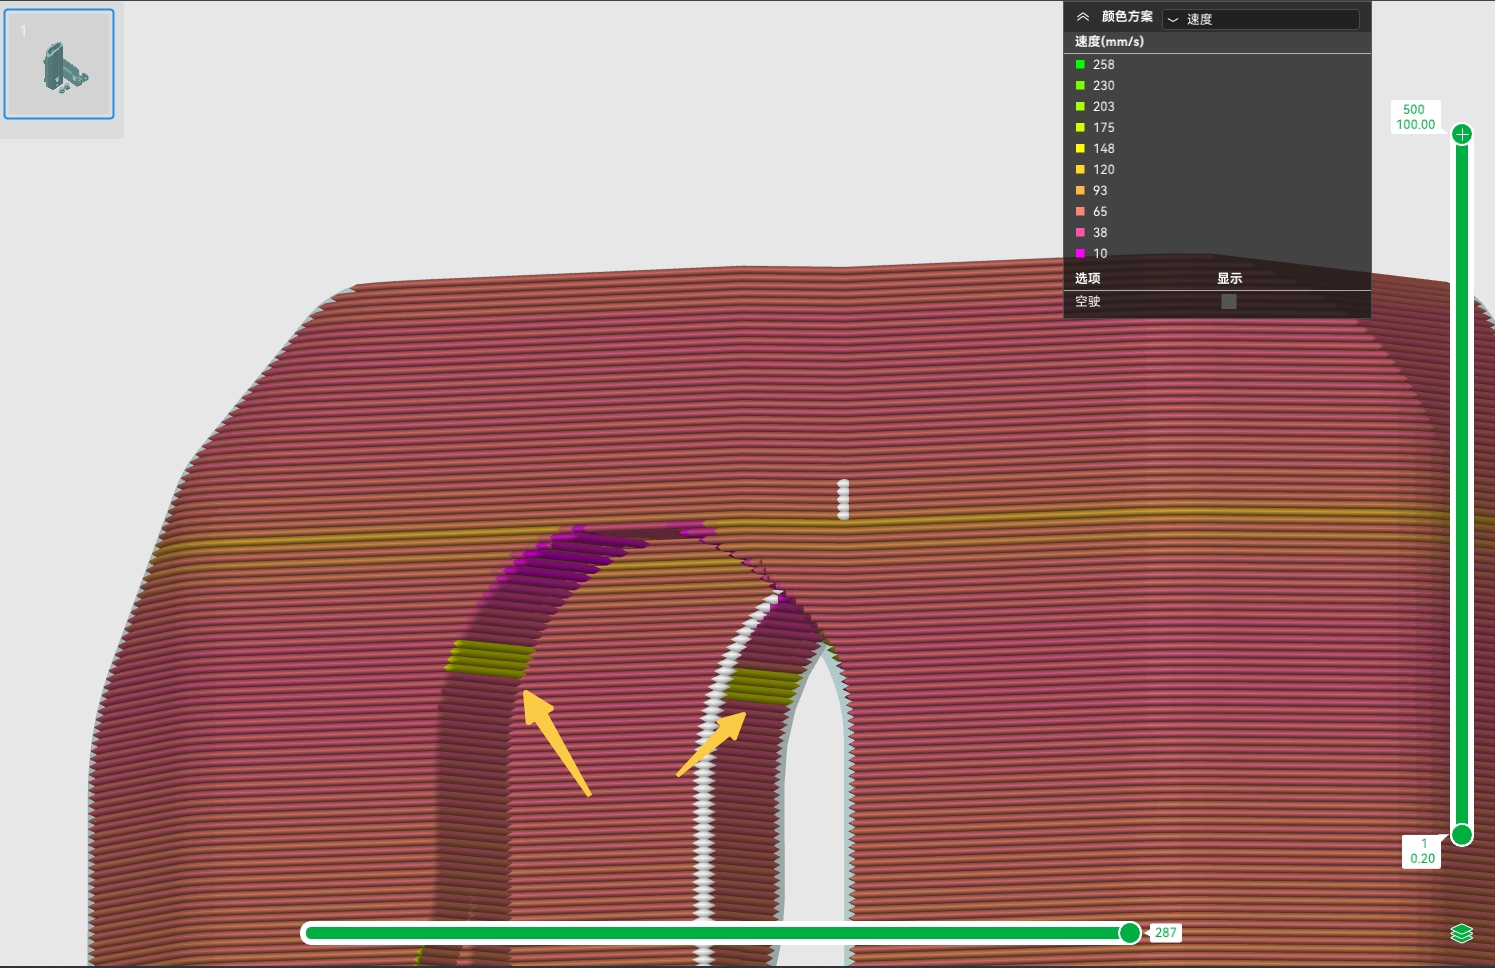
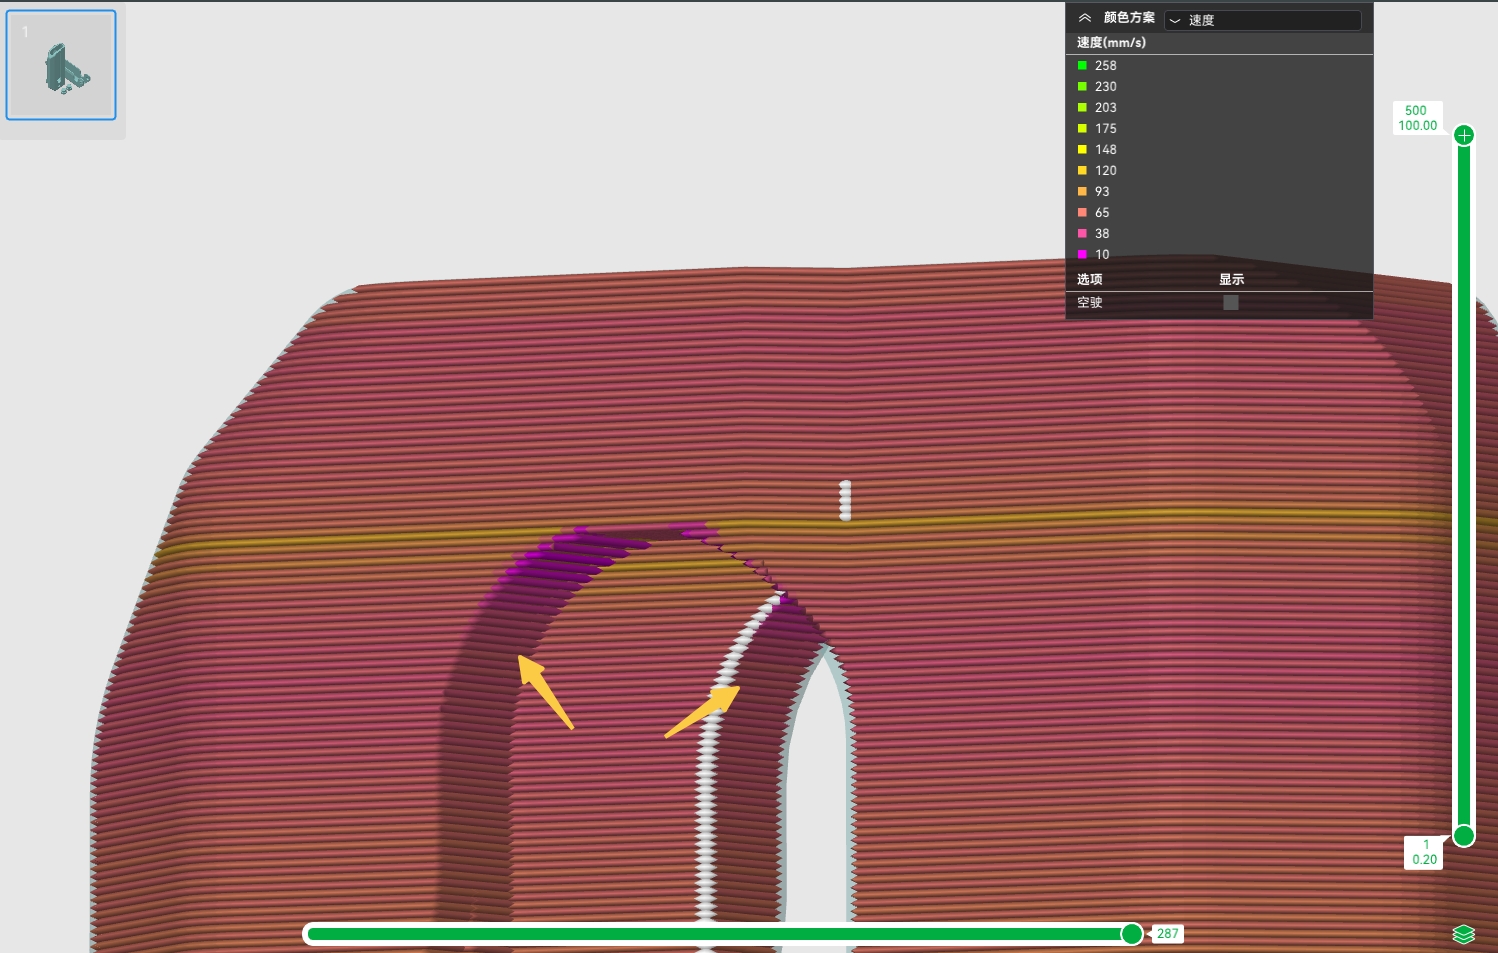
Overhang threshold for participating cooling: Bambu Studio version 1.10 introduced this parameter. In previous versions, the line of the overhanging part was not involved in "slow printing down for better layer cooling" (mentioned below in Print speed). Therefore, some abnormal situations may occur, for example, the speed of the overhanging part is faster than that of the non-overhanging part. When this parameter is enabled, the overhang part will participate in the slowing down for better cooling, avoiding the problem of a sudden increase in the speed of the local overhang part.
The percentage represents the overhang degree. For example, if 25% is selected, all lines with overhang below 25% participate in cooling and slowing, and 100% means that all overhang lines participate in cooling and slowing. The speed after slowing down takes the smaller value of the Min print speed(will be mentioned below) and the original overhang speed.
|
The overhang part is not involved in cooling and slowing |
The overhang part is involved in cooling and slowing |
 |
 |
¶ Print speed
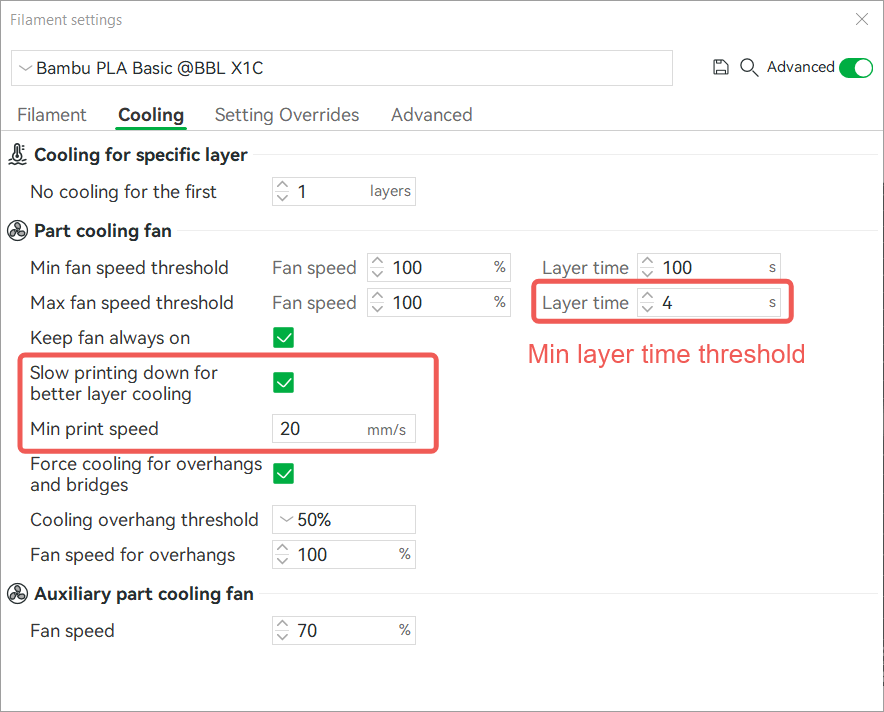
When the fan speed reaches the max threshold, and layer time is still shorter than the minimum layer time threshold, that means cooling is still not enough. So the last improving cooling method is slowing down to make single-layer print time longer.
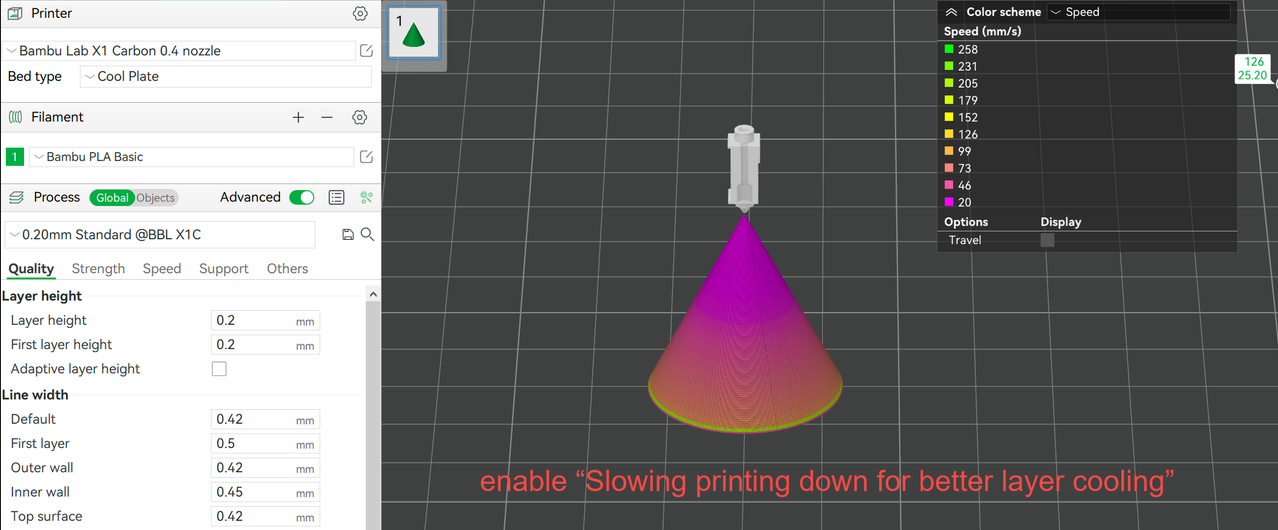
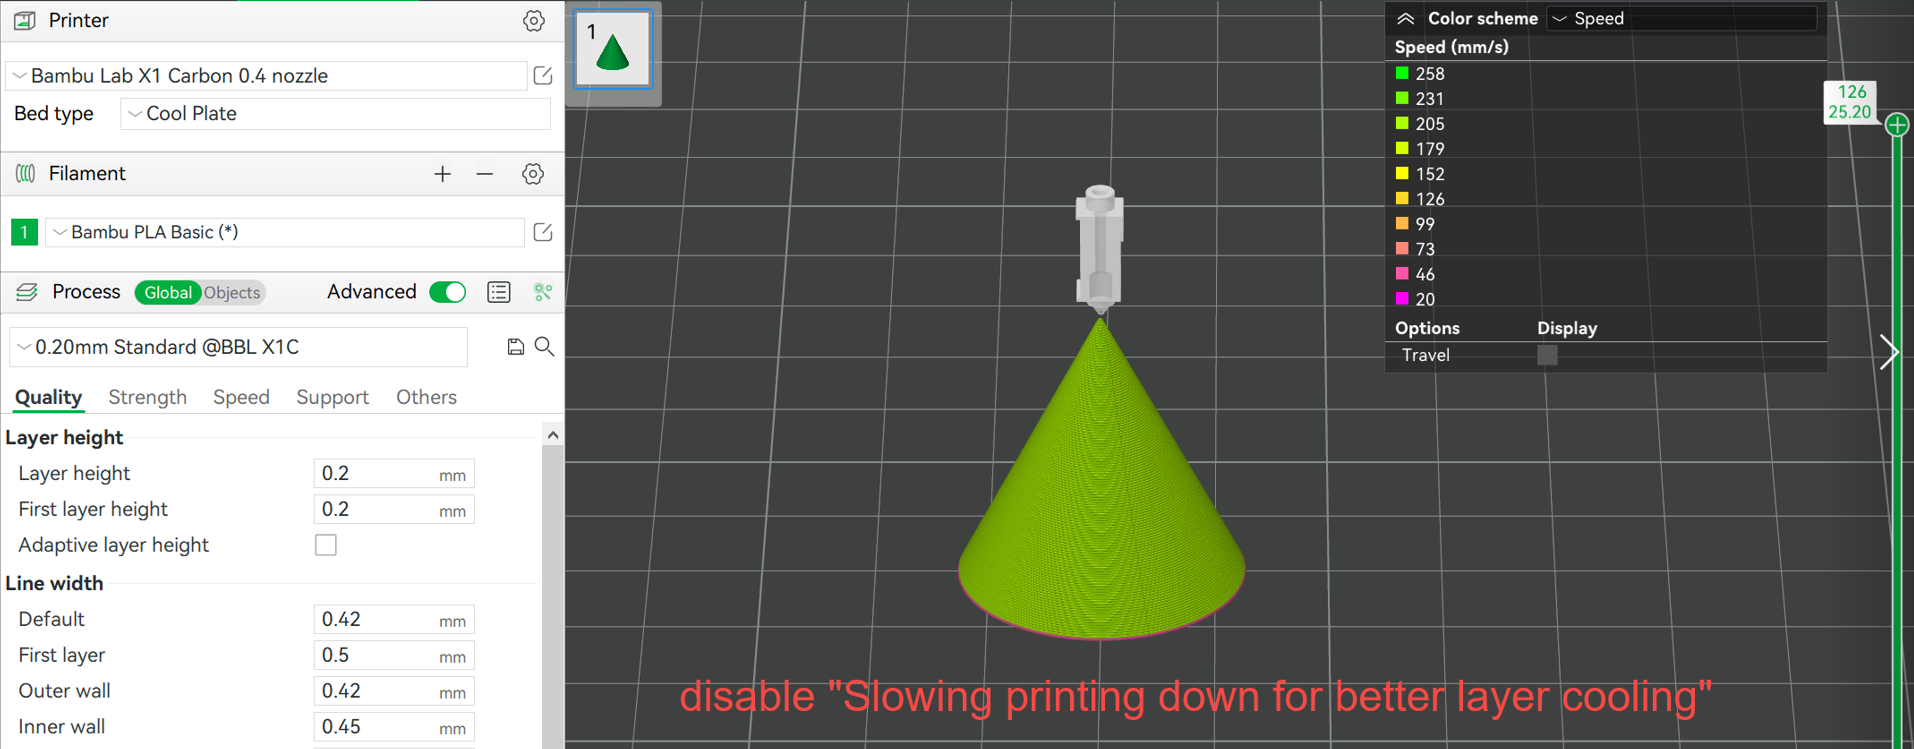
You can enable "Slowing printing down for better layer cooling" and it will lower the printing speed automatically when reprocessing G-code to make the layer time not shorter than the minimum layer time threshold. However, after the print speed is reduced to "min print speed", if it still exceeds the “minimum layer time threshold”, it will not continue to slow down. In other words, it can reduce the print speed to "min print speed" at most. As shown in the following figure, when the printing speed is too fast and the single-layer printing time is less than 4s, it will try to reduce the speed to meet the printing time of at least 4s to improve the cooling time. However, if it is still unable to reach the 4s single-layer printing time after it is reduced to 20mm/s, it will not continue to slow down and will maintain the printing speed of 20mm/s.
The speed comparison is shown below.
