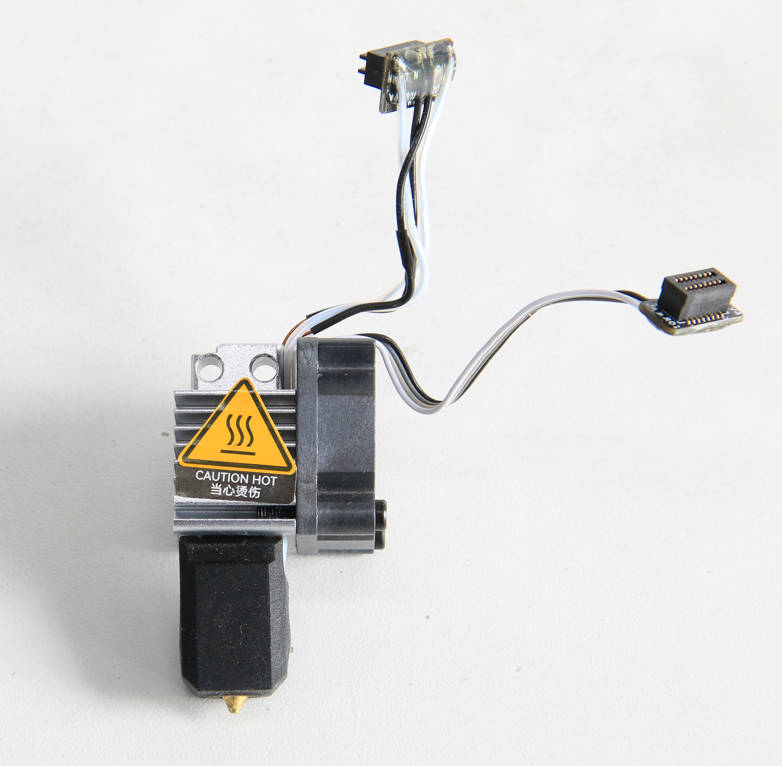
¶ Complete hotend assembly
¶ Safety Warning
IMPORTANT!
It's crucial to power off the printer before performing any maintenance work on the printer and its electronics, including tool head wires, because leaving the printer on while conducting such tasks can cause a short circuit, which can lead to additional electrical damage and safety hazards.
When you perform maintenance or troubleshooting on the printer, you may be required to disassemble some parts, including the hotend. This process can expose wires and electrical components that could potentially short circuit if they come into contact with each other or with other metal or electrical components while the printer is still on. This can damage the electronics of the printer and cause further damage.
Therefore, it's essential to switch off the printer and disconnect it from the power source before doing any maintenance work. This will prevent any short circuits or damage to the printer's electronics. By doing so, you can avoid potential damage to the printer's electronic components and ensure that the maintenance work is performed safely and effectively.
If you have any concerns or questions about following this guide, open a new ticket in our Support Page and we will do our best to respond promptly and provide you with the assistance you need.
¶ Tools
- New hotend assembly
- H2.0 Allen key
¶ Preparation
Unload the filament, and ensure the nozzle temperature has cooled to below 50 degrees and the power to the printer is turned off.
¶ Video guide
¶ Disassembly
¶ Step 1 - Remove the front housing
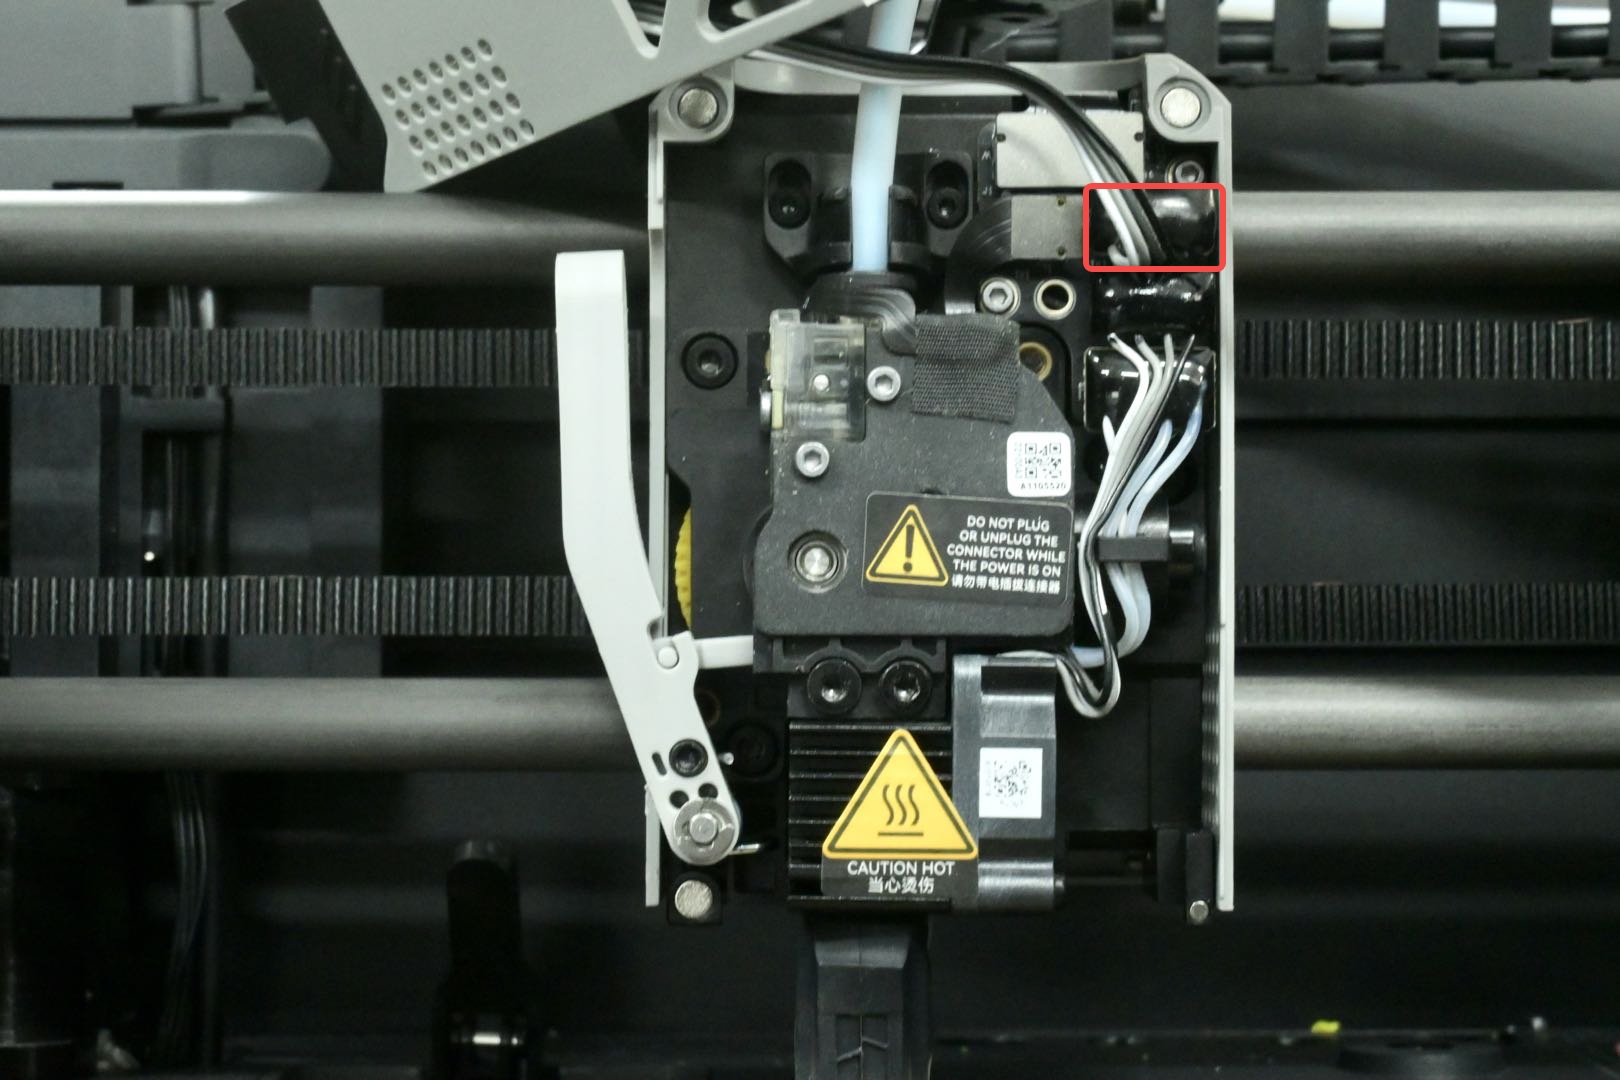
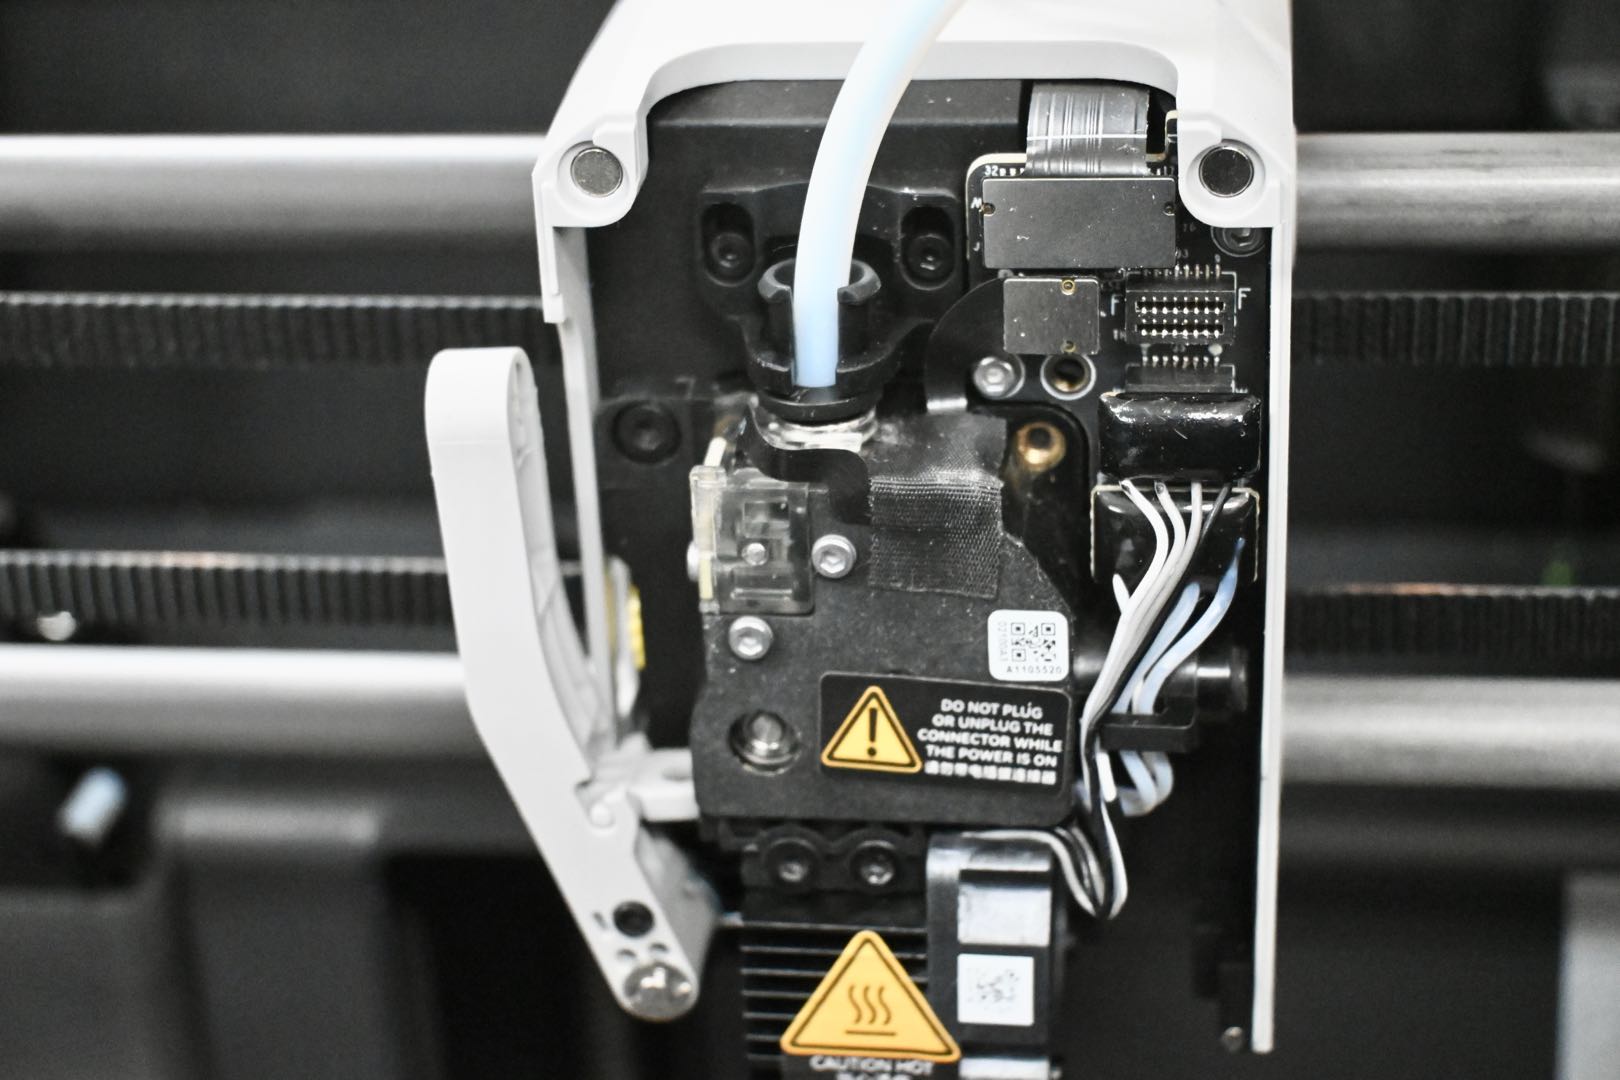
Remove the front housing assembly completely by disconnecting the fan connector.
 |
 |
¶ Step 2 - Disconnect cables
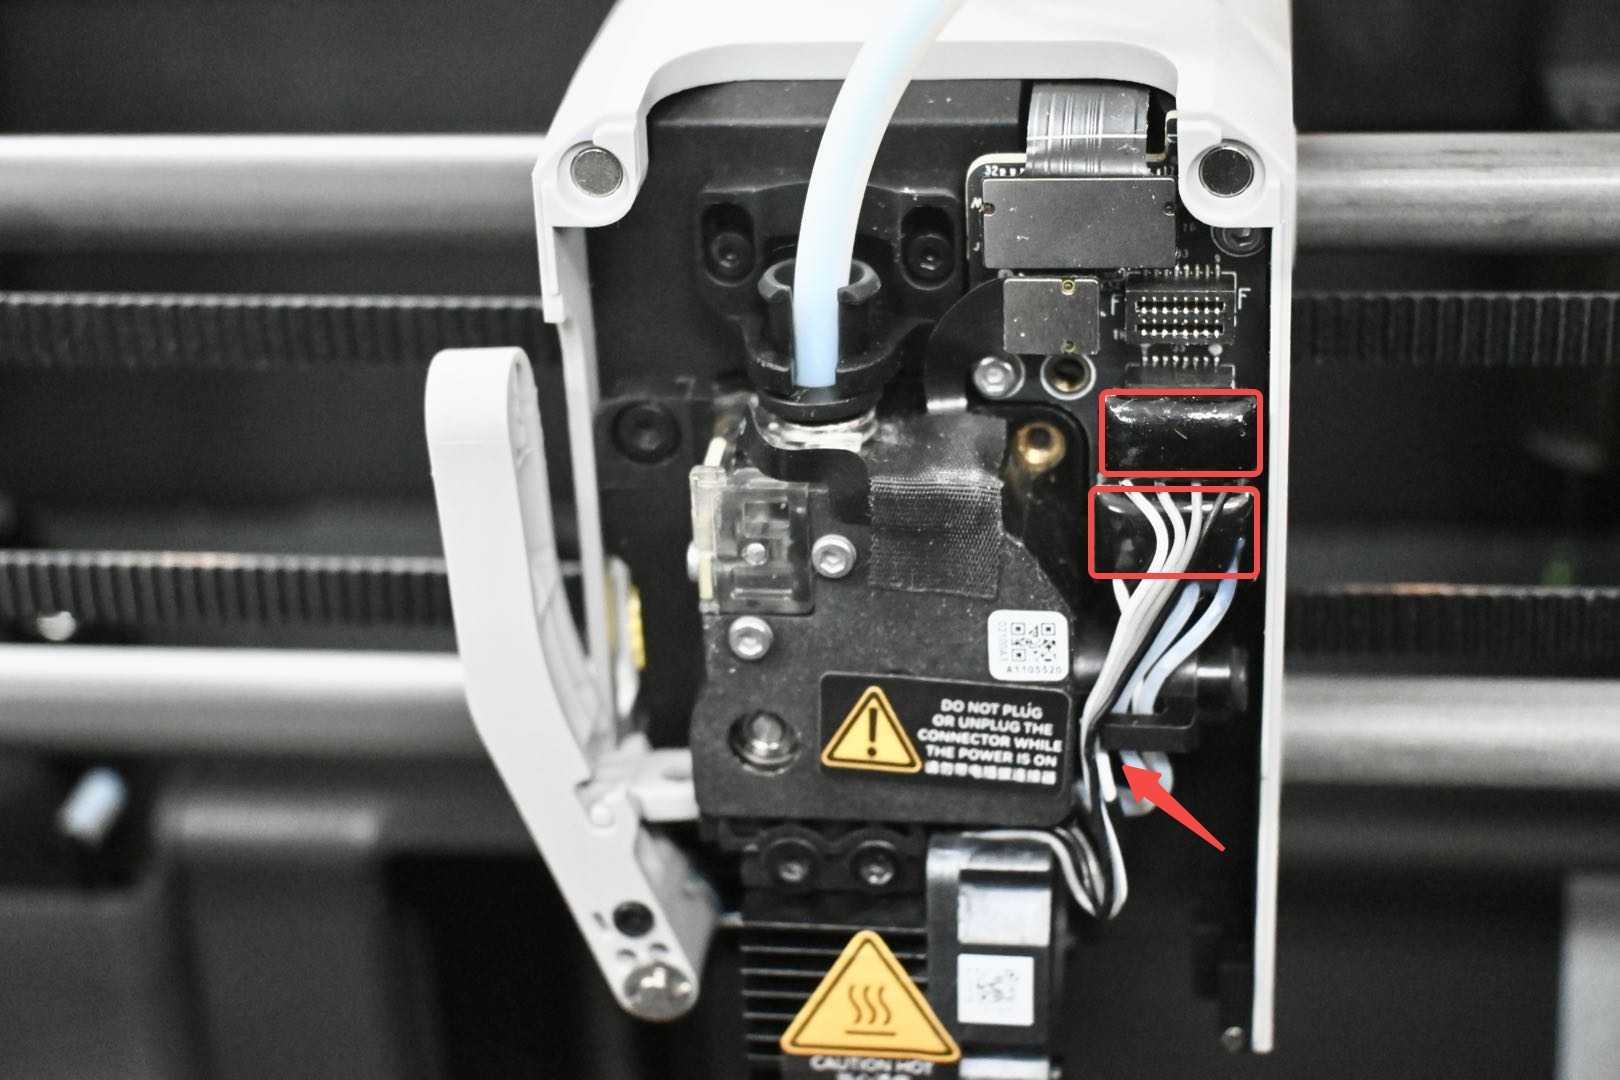
Disconnect the hotend fan and the heater connectors from the board, and remove the wires by sliding them out of the clip shown in the image below (red arrow).
¶ Step 3 - Remove hotend assembly
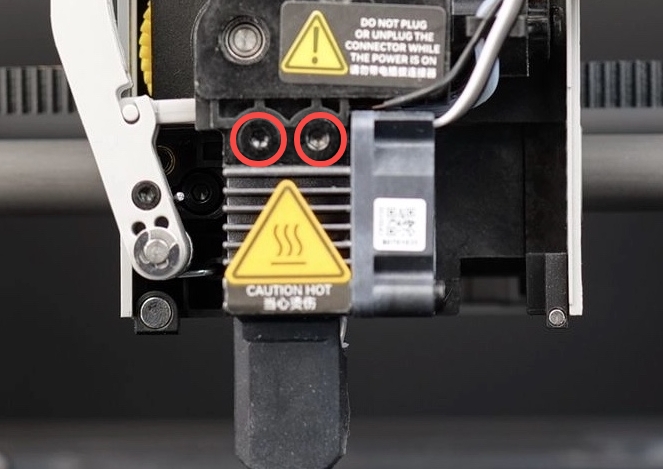
Remove the 2 screws with the H2.0 Allen key, then proceed to remove the hotend assembly by gently pulling downwards.
¶ Assembly
¶ Step 1 - Install the hotend assembly
Insert the new hotend assembly into the extruder and tighten the 2 screws. Ensure the hotend screws are properly tightened with an H2.0 Allen key.

¶ Step 2 - Connect the cables
Then proceed to tuck in the heater cable wires back into the clip (reinsert the connector back into the lower slot on the board for the heater, and the middle slot for the hotend fan) then proceed to do the same for the fan connector.

¶ Step 3 - Install the front housing
Connect the housing assembly by reconnecting the fan connector onto the board (topmost slot) then close the front housing assembly cover.
 |
.jpg) |
¶ How to verify
Power on the printer and run the device ‘Calibration’ process. This process takes about 20 minutes. If the process passes, it means the operation has been successful.

¶ End notes
We hope the detailed guide provided has been helpful and informative.
If this guide does not solve your problem, please submit a technical ticket, we will answer your questions and provide assistance.
If you have any suggestions or feedback on this Wiki, please leave a message in the comment area. Thank you for your support and attention!