¶ Creating custom filaments in Bambu Studio
In the past, adding new filaments relied on Bambu Studio developers, which could require a lengthy wait. Bambu Studio provides two ways to create custom filaments, you can follow the steps described in this article to create them.
¶ Method one
¶ Create new filaments
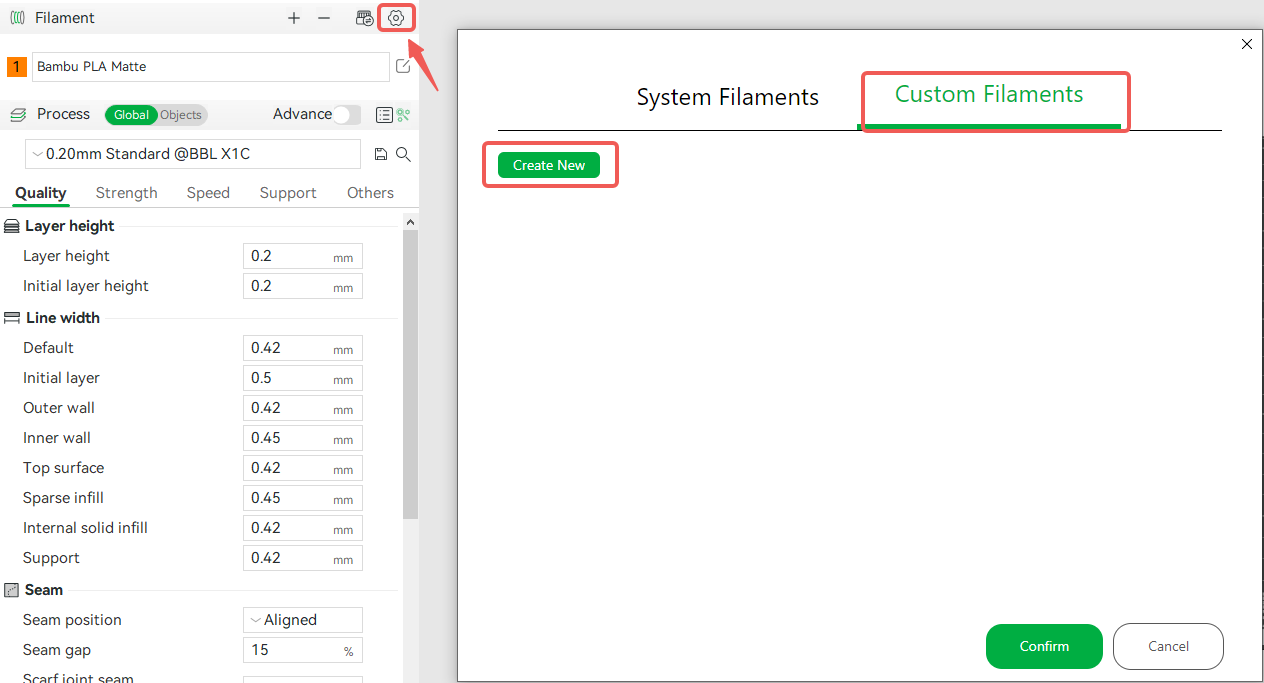
On the filament page, click the Settings icon -- Custom Filaments -- Create New.
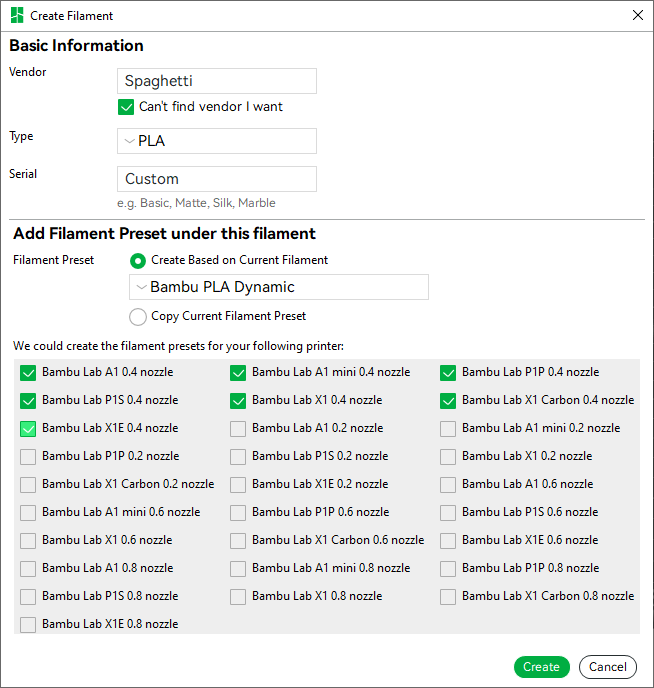
Fill in the basic information of filament, such as vendor, filament type, and filament name. Then, select a base filament to create the new one. The list below displays the printer among your current holdings that have presets for the filament you've chosen. After selecting the corresponding printer, we will create a user filament preset for each of the selected printers.
If you wish to combine the same type of system preset and user filament preset into a new filament, please select 'Copy Current Filament Preset'.
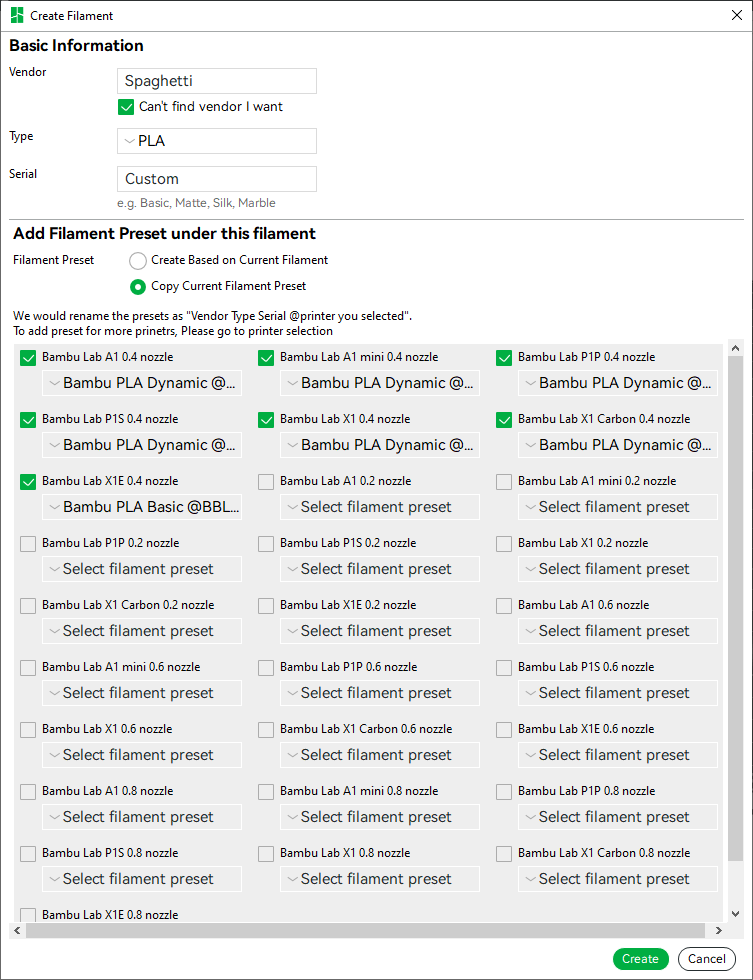
After that, the new filament could be seen in the user presets list. It can be seen that the naming convention for the new filament preset is as follows: "Vendor Type Serial @Printer you selected"
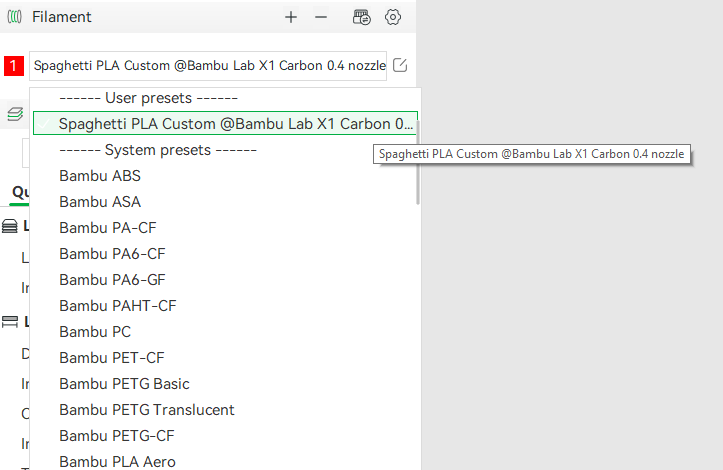
Modify the needed filament parameters on the filament settings page, and save it. The custom filament is created successfully.
¶ Edit, delete preset
If you've added a new printer and want to create a preset for this filament or if you want to delete the filament presets you've created, you can access the Edit Filament page to perform these actions.
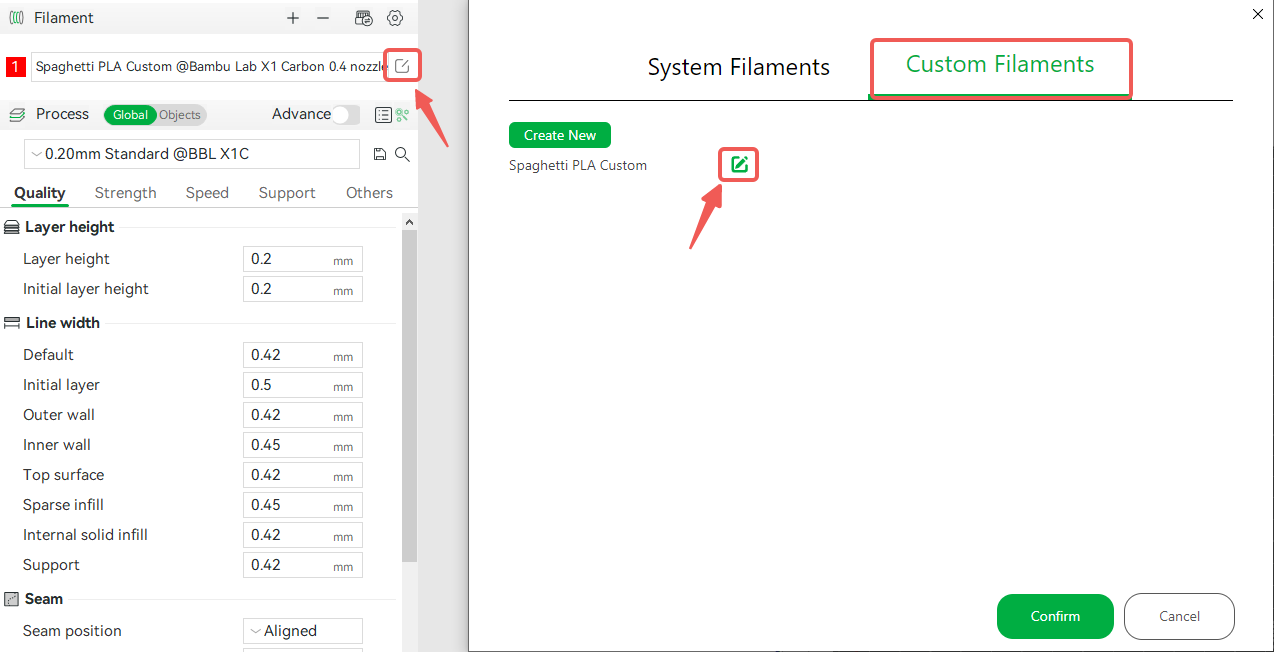
As you can see, this interface is divided into two parts: one part contains the basic information about the filament, and the other part contains the detailed information and functions related to the filament, including preset information display, adding filament presets, and deleting the presets.
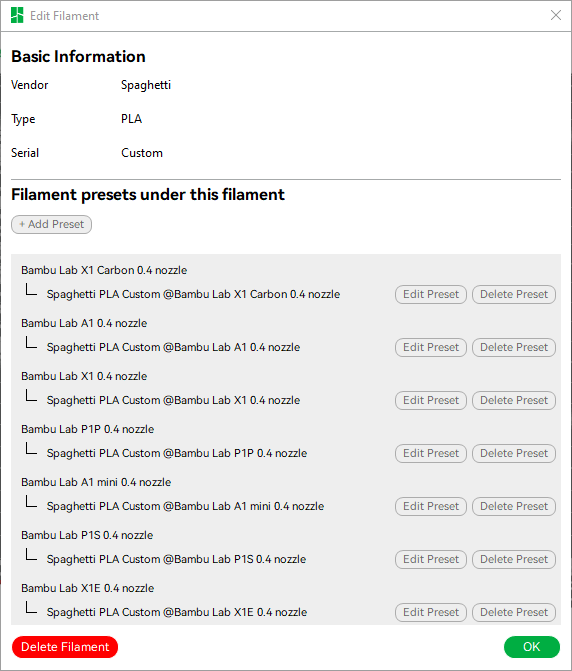
When you want to add the filament preset to a new printer or create a new preset for an existing printer, click the "+Add Preset" button, select the printer you want to add, and select the appropriate base preset. Clicking the ‘OK’ button will update the preset tree.
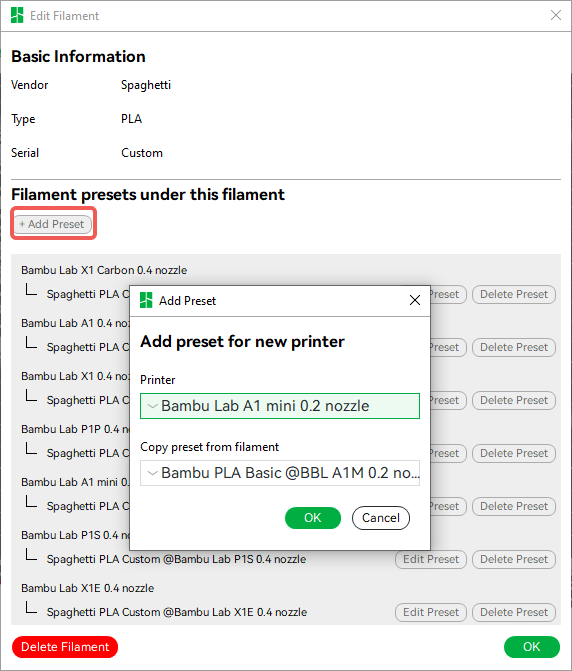
If you no longer need the filament, you can click on the "Delete Filament" button in the lower left corner, which will delete all presets associated with the filament.
Synchronization of custom filaments
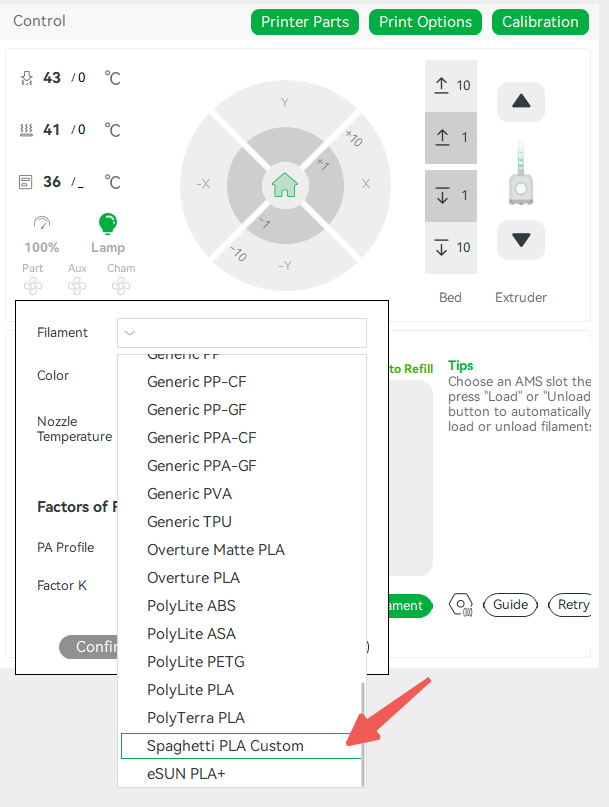
As with the system preset filaments, custom filaments created this way can be selected and printed on the X1 and X1C printer AMS. This feature is available with firmware updates to version 1.6.6 and later.
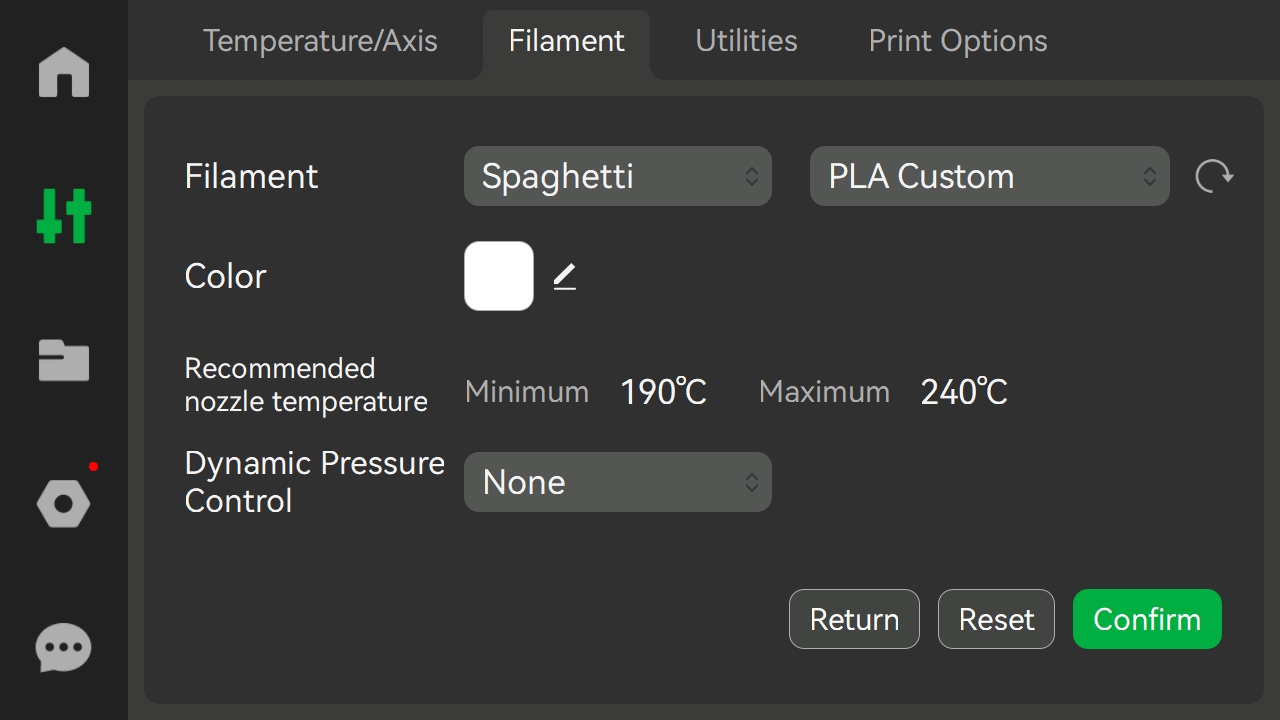
With the preset created in this way, you can select the filament information of the slot of AMS to the customized filament you just created on the Studio 'Device' page.
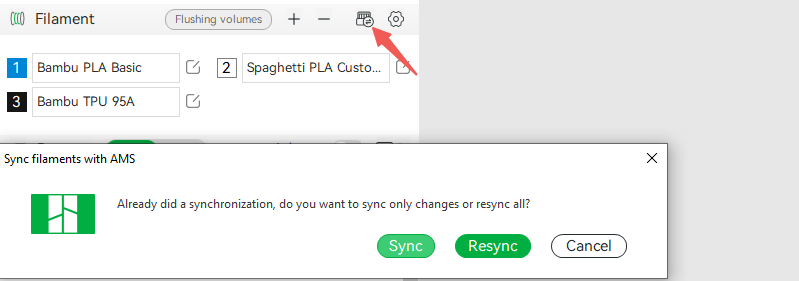
You can also synchronize the custom filament information in AMS to the filament list by clicking on 'Sync' on the Filament part.
¶ Method two
¶ Save as new preset based on existing filament
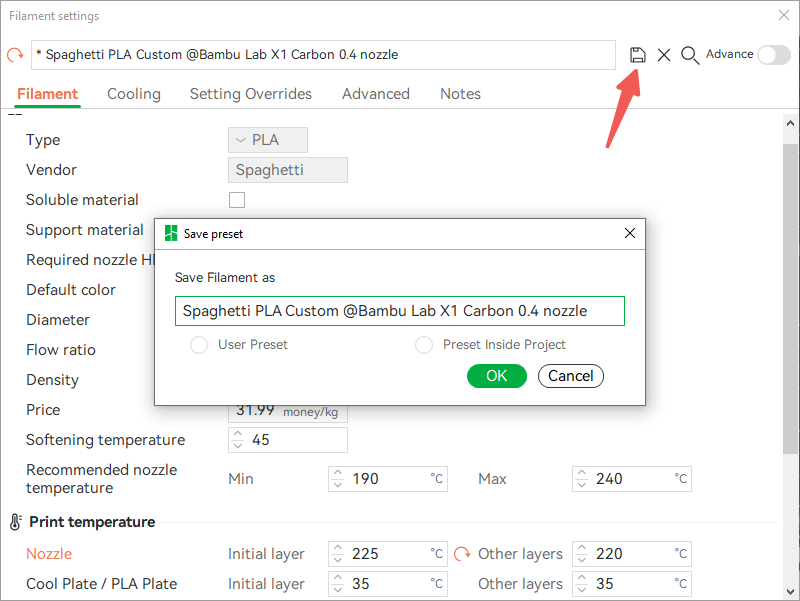
In Filament Settings, select the currently existing filament setting, modify the parameters, and then save as or create a new custom filament. With this method you can save as a user preset or a project preset, if you save as a project preset, it will only be saved in the current project (3mf). However, this method can only create custom filaments for one printer preset at a time, not in batch.

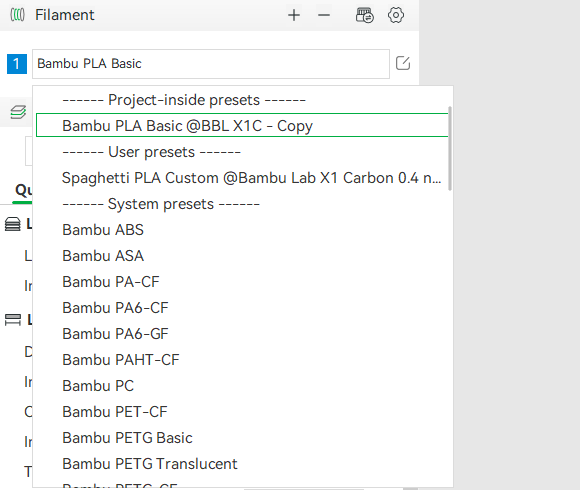
Compared to Method one, Method two is the fastest way to quickly modify and create a new preset based on an existing filament preset. However, the filament created in Method two cannot become a system-level filament preset like the customed filament created in Method one, so it cannot be synced to the printer. It is also not possible to select that filament for an AMS slot on Studio's ‘Device’ page and sync it to the filament list.
¶ Delete preset
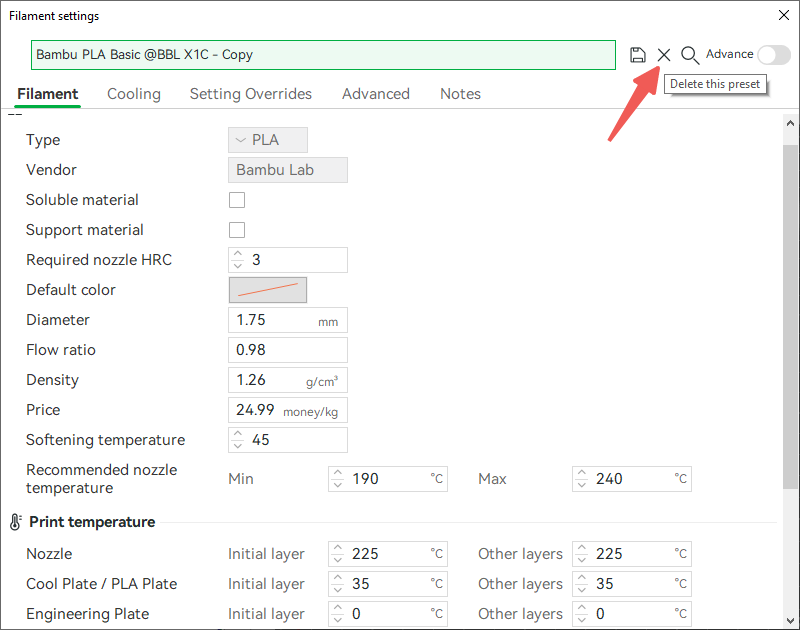
If you create a filament this way, you can delete it by clicking "Delete this preset" in the filament settings.
¶ Cloud user presets limit
When user preset synchronization is enabled, the newly created filaments presets will be uploaded to the server cloud.
However, the server level can only store a limited number of user presets. Currently, we only support 20 printer presets, 100 process presets, and 200 filaments.
When all user presets exceed the above limits, newly created or imported presets will only be saved locally and cannot be synchronized with user presets under the current account on another computer.
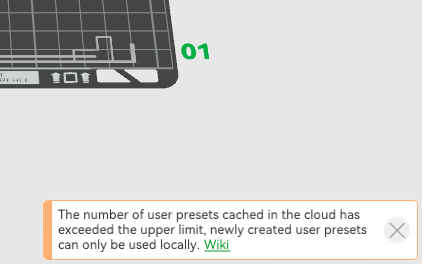
In this case, Studio will have some prompts.
However, you can manually synchronize presets on multiple computers by exporting and importing presets.

