¶ Fault phenomena
When using AMS lite, you may encounter problems that the printer does not detect AMS lite. It can be divided into the following two situations:
- AMS lite failed to power on. After the printer is powered on, the AMS lite failed to power on. The lights in all four slots did not light up, and the AMS page was not displayed on the screen. Under normal circumstances, if the four slots of the AMS lite are not filled with filaments, the four indicator lights should flash in turn.
- The AMS lite communication is lost. After the printer is powered on, it and the AMS lite start normally, but the communication between them is lost. The four slots of the AMS lite are all blinking red, and the AMS page is not displayed on the printer screen.
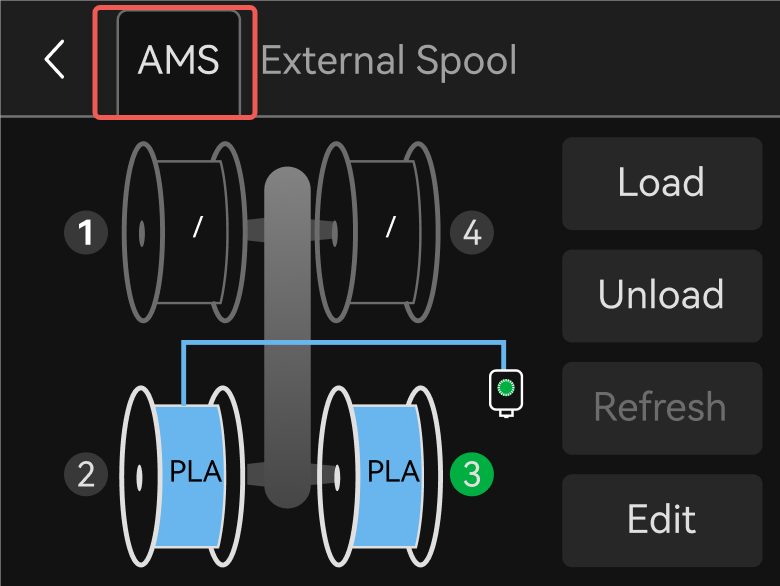
If you encounter either of the above conditions, you can troubleshoot using the methods in this article.
¶ Troubleshooting
¶ AMS lite failed to power on
¶ Measure the voltage of the printer interface
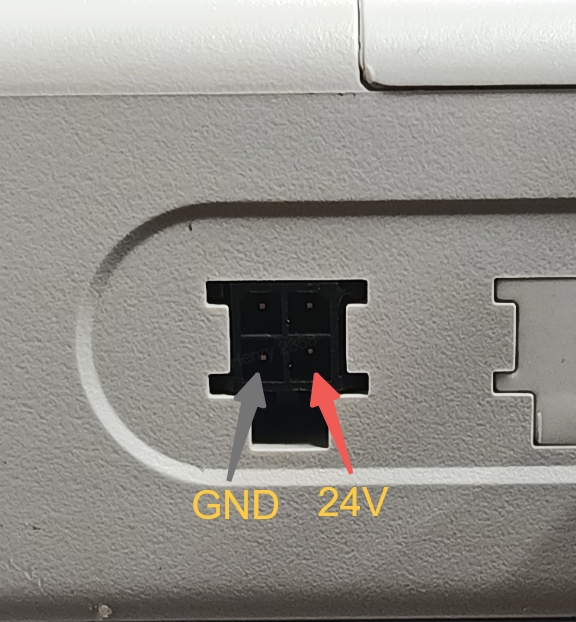
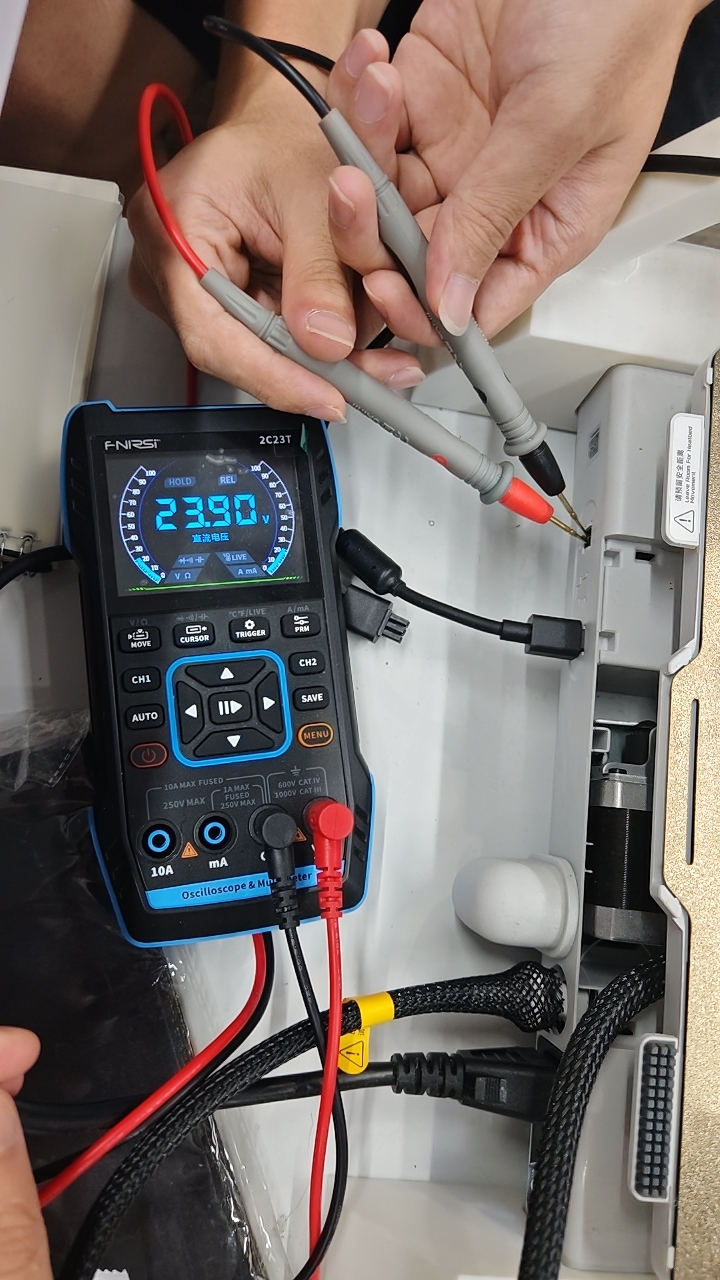
1. After turning on the printer, measure whether the output voltage of the two pins of the printer's 4-pin port is approximately 24V, as shown in the following figure. The printer has two 4-pin ports. If the measured voltage is 24V, but the AMS lite still cannot be powered on successfully, please jump to the Measure the resistance of the AMS lite section of this article.
 |
 |
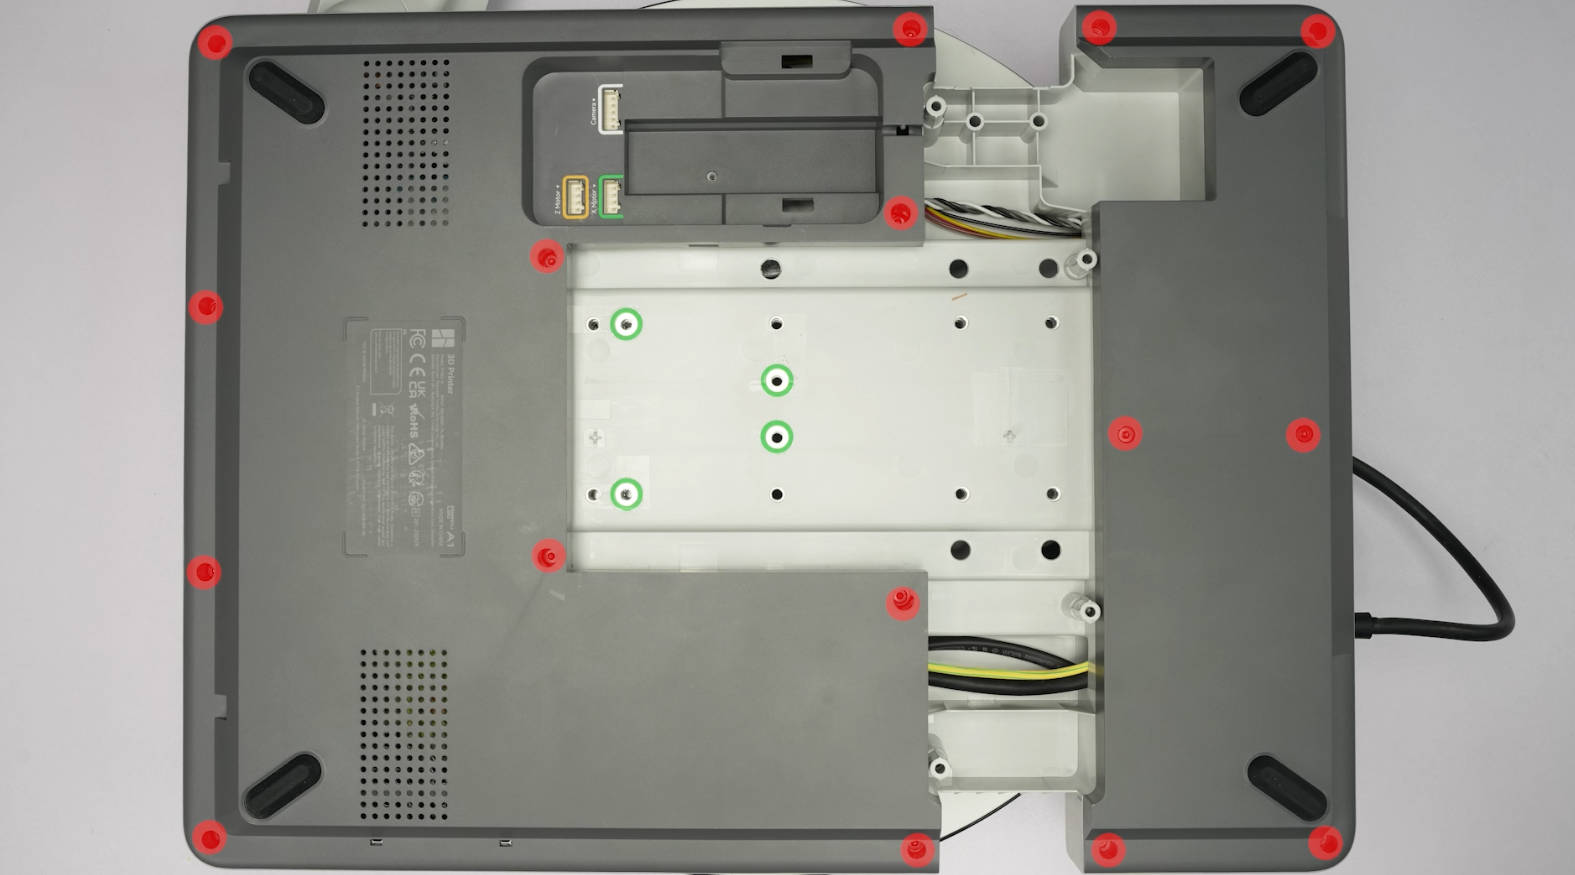
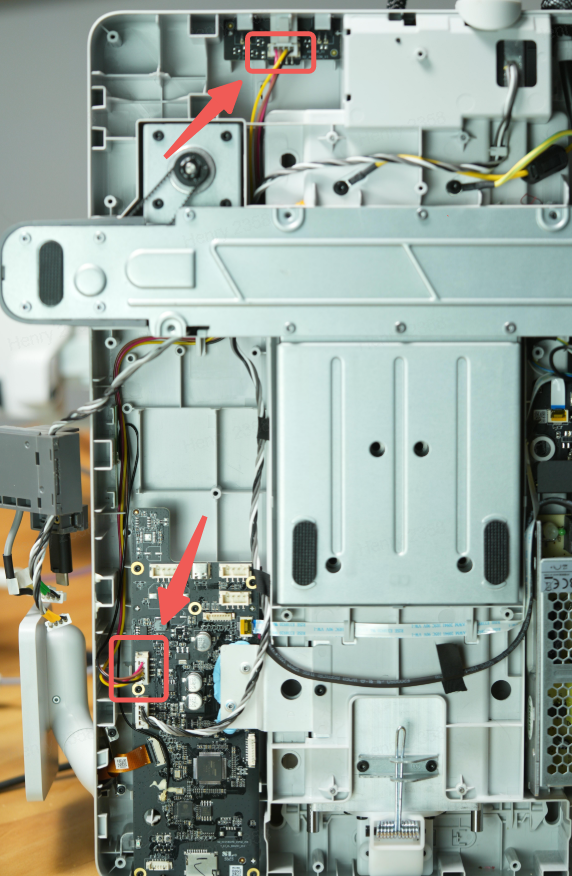
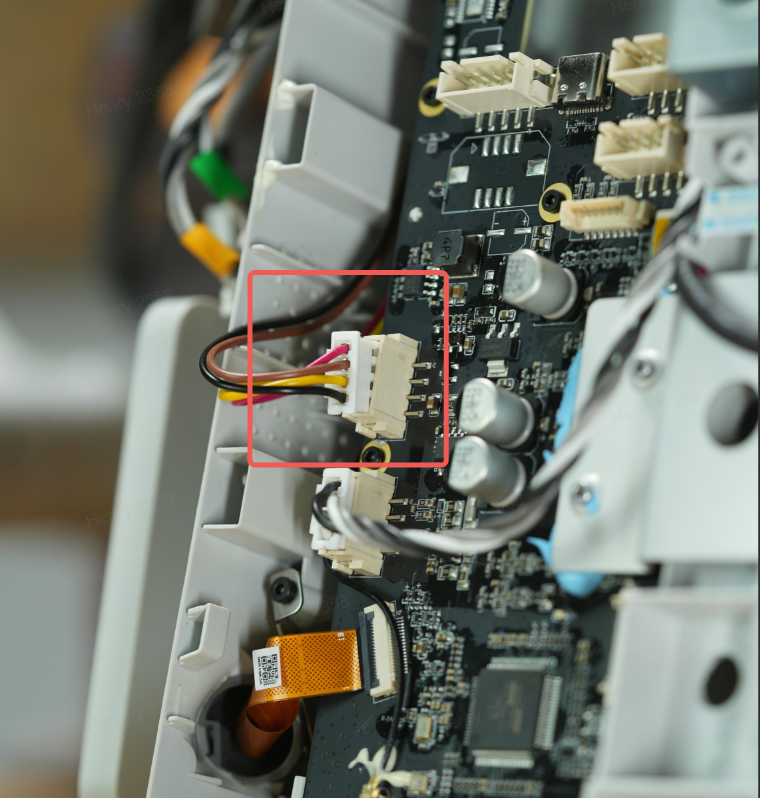
2. If the output voltage of both interfaces is not 24V, if you are using an A1 printer, the cable inside the printer may be loose. Please turn off the printer, disassemble the bottom cover of the printer, and check whether the connection cables from the printer mainboard to the interface board are tightly plugged in (A1 mini users can skip this step).
|
Unscrew the printer bottom cover |
Check whether the connection cables from the printer mainboard to the interface board are tightly plugged in |
Diagram of cables not plugged in tightly |
 |
 |
 |
3. If the 24V voltage still cannot be measured after the cables are plugged in tightly, you can click here to open a new ticket in our Support page, and provide us with specific measurement values for further analysis.
¶ Measure the resistance of AMS lite
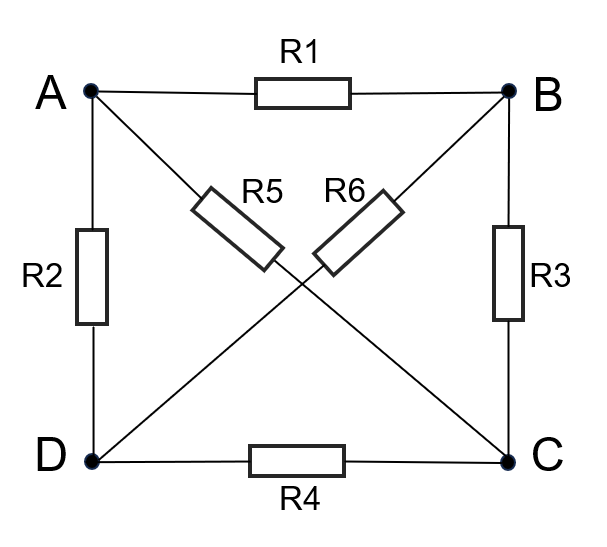
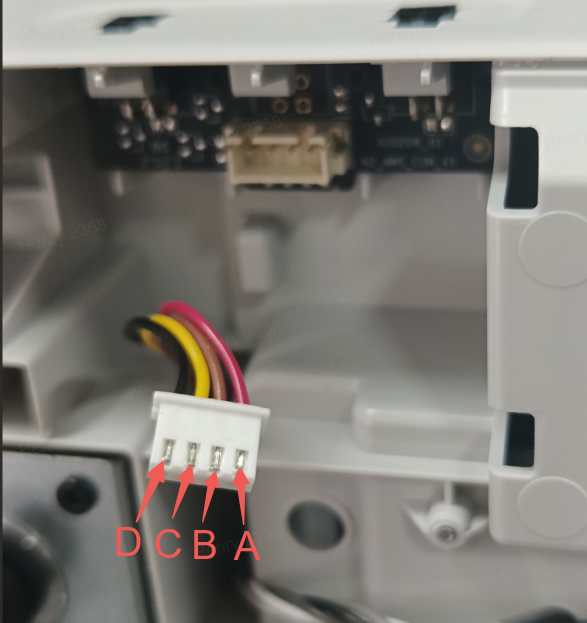
Please unplug the 4-pin cable connecting the AMS lite to the printer, and power off the AMS lite for more than 1 minute. Then, measure the resistance value of the 4-pin cable of the AMS lite. If the following measurement results are abnormal, it indicates that the AMS mainboard is faulty:
- R4 short circuit or its resistance is small (< 500Ω);
- D/C point is open-circuit to other points;
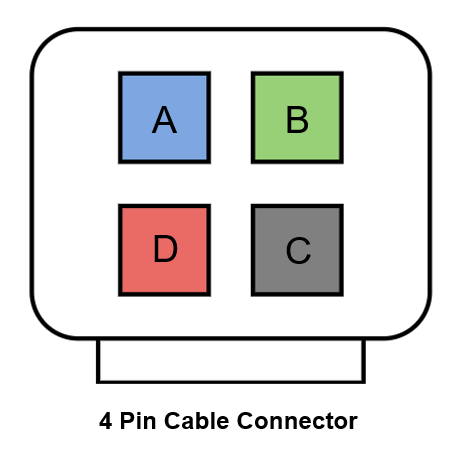
The 4-PIN cable connector is shown as follows:
 |
 |
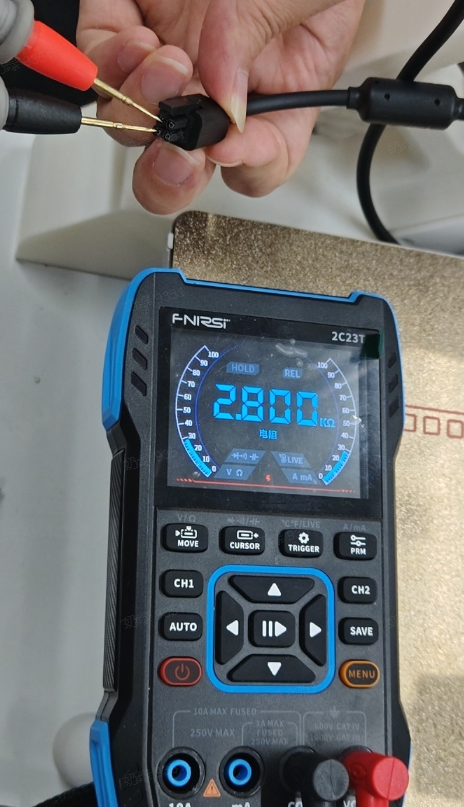 |
The normal resistance values between each two points shown in the figure above are shown in the table below:
| Resistance |
R1 |
R2 |
R3 |
R4 |
R5 |
R6 |
| Value |
320Ω |
130KΩ |
2.7KΩ |
130KΩ |
2.7KΩ |
130KΩ |
Please provide the measured resistance value and click here to open a new ticket on our Support page.
¶ The AMS lite communication is lost
¶ Measure the resistance of AMS lite
The same as the previous steps, measure the resistance of AMS lite through the 4-pin cable. If there are any anomalies, please provide the measured resistance values and click here to open a new ticket to contact our support staff.
¶ Measure the resistance of the printer
¶ A1 mini
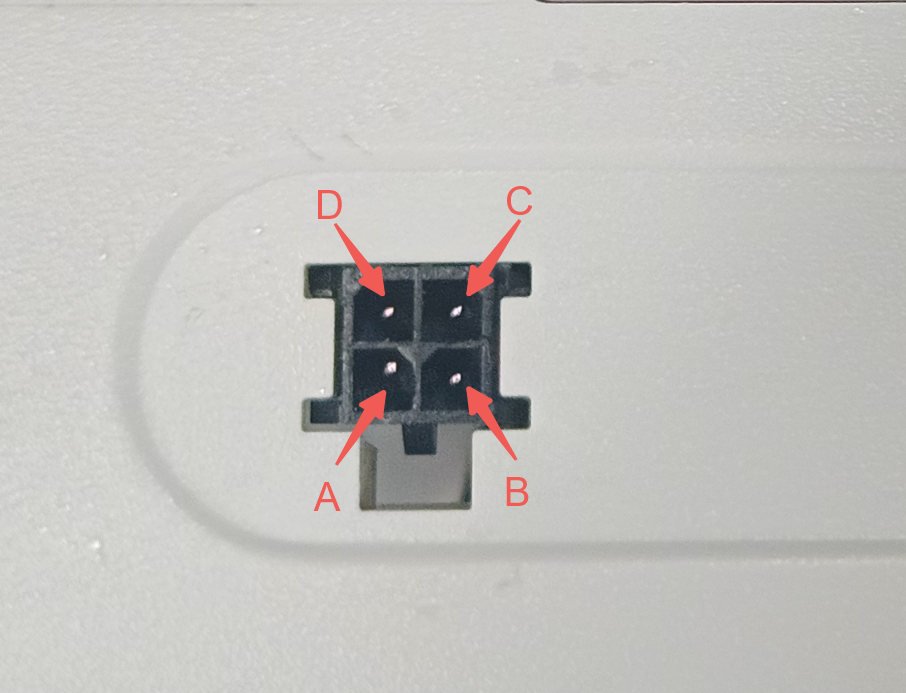
Power off the printer (if it is not powered off, the measured resistance will be inaccurate), and then measure the AC and AD resistance of the printer 4pin port to see if both are about 4.5KΩ~ 5KΩ. If the resistance values are abnormal, it indicates that the printer mainboard is faulty, please provide the measured resistance values to contact our technical support.
¶ A1
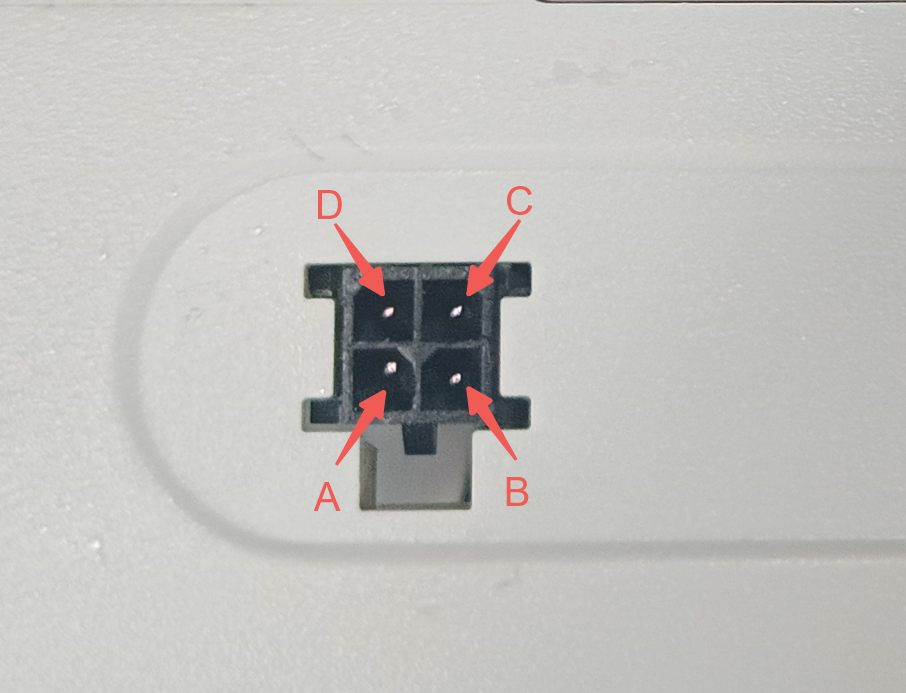
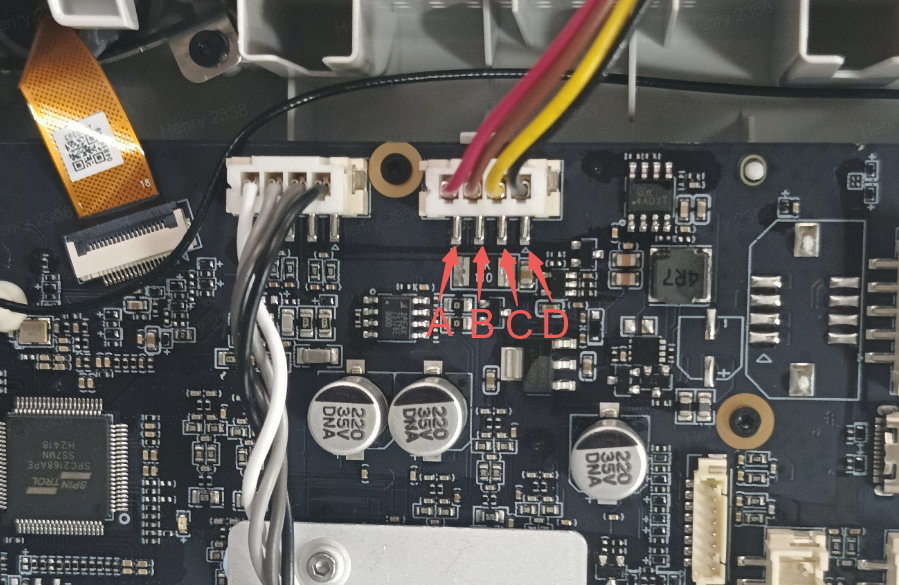
1. Also power off the printer (if it is not powered off, the measured resistance will be inaccurate), and then measure the AC and AD resistance of the printer 4pin port to see whether they are around 4.5KΩ~5KΩ. If the resistance value is abnormal, you need to remove the bottom base of the printer and further measure the AC and AD resistance values on the printer mainboard. If the resistance values measured from the mainboard are not in the normal range, the printer mainboard needs to be replaced.
|
Measure the resistance of the 4-PIN port |
Measure the resistance of the printer mainboard |
 |
 |
2. If the resistance values measured from the mainboard are normal, unplug the cable from the AMS connection board, and continue to measure the AC and AD resistance values to see whether they are within the normal range. If the resistance values measured from the 4-PIN cable are abnormal, the cable is faulty and needs to be replaced. If the resistance values are normal, reconnect the cable to the AMS connection board and measure the AC and AD resistances on the 4-PIN port again. If the resistance values of the 4-PIN port are still abnormal, the AMS connection board is faulty and needs to be replaced.
|
Measure the resistance of the connection cable |
Measure the resistance of the 4-PIN port |
 |
 |
After confirming the fault, please provide the measured resistance values to to contact our technical support.