¶ Dismantling and cleaning the AMS lite Filament Hub
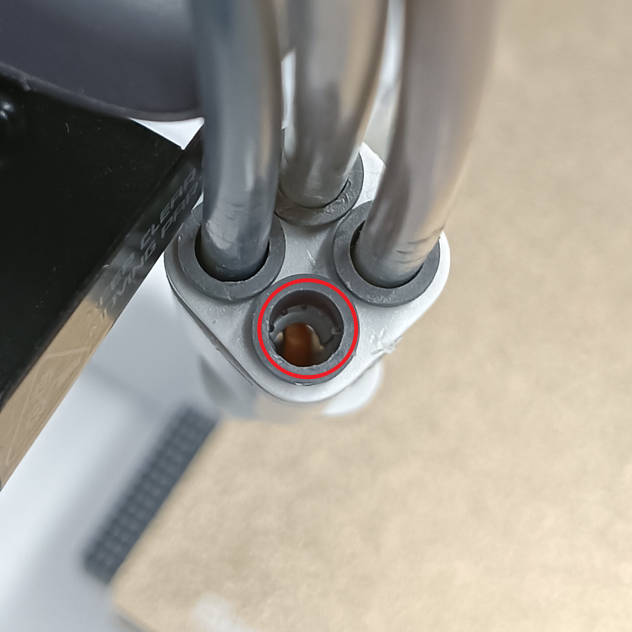
The AMS lite Filament Hub is installed above the extruder of the A-series printer and is an important component in achieving multi-color printing. Affected by the filaments and special scenarios, the filament hub may become jammed.
For example:
- The previous roll of printing filament is exhausted, the tail filament is dragged into the hub, and the bent part is interrupted inside the hub;
- Brittle filament is used, and the fragments are broken inside the hub.
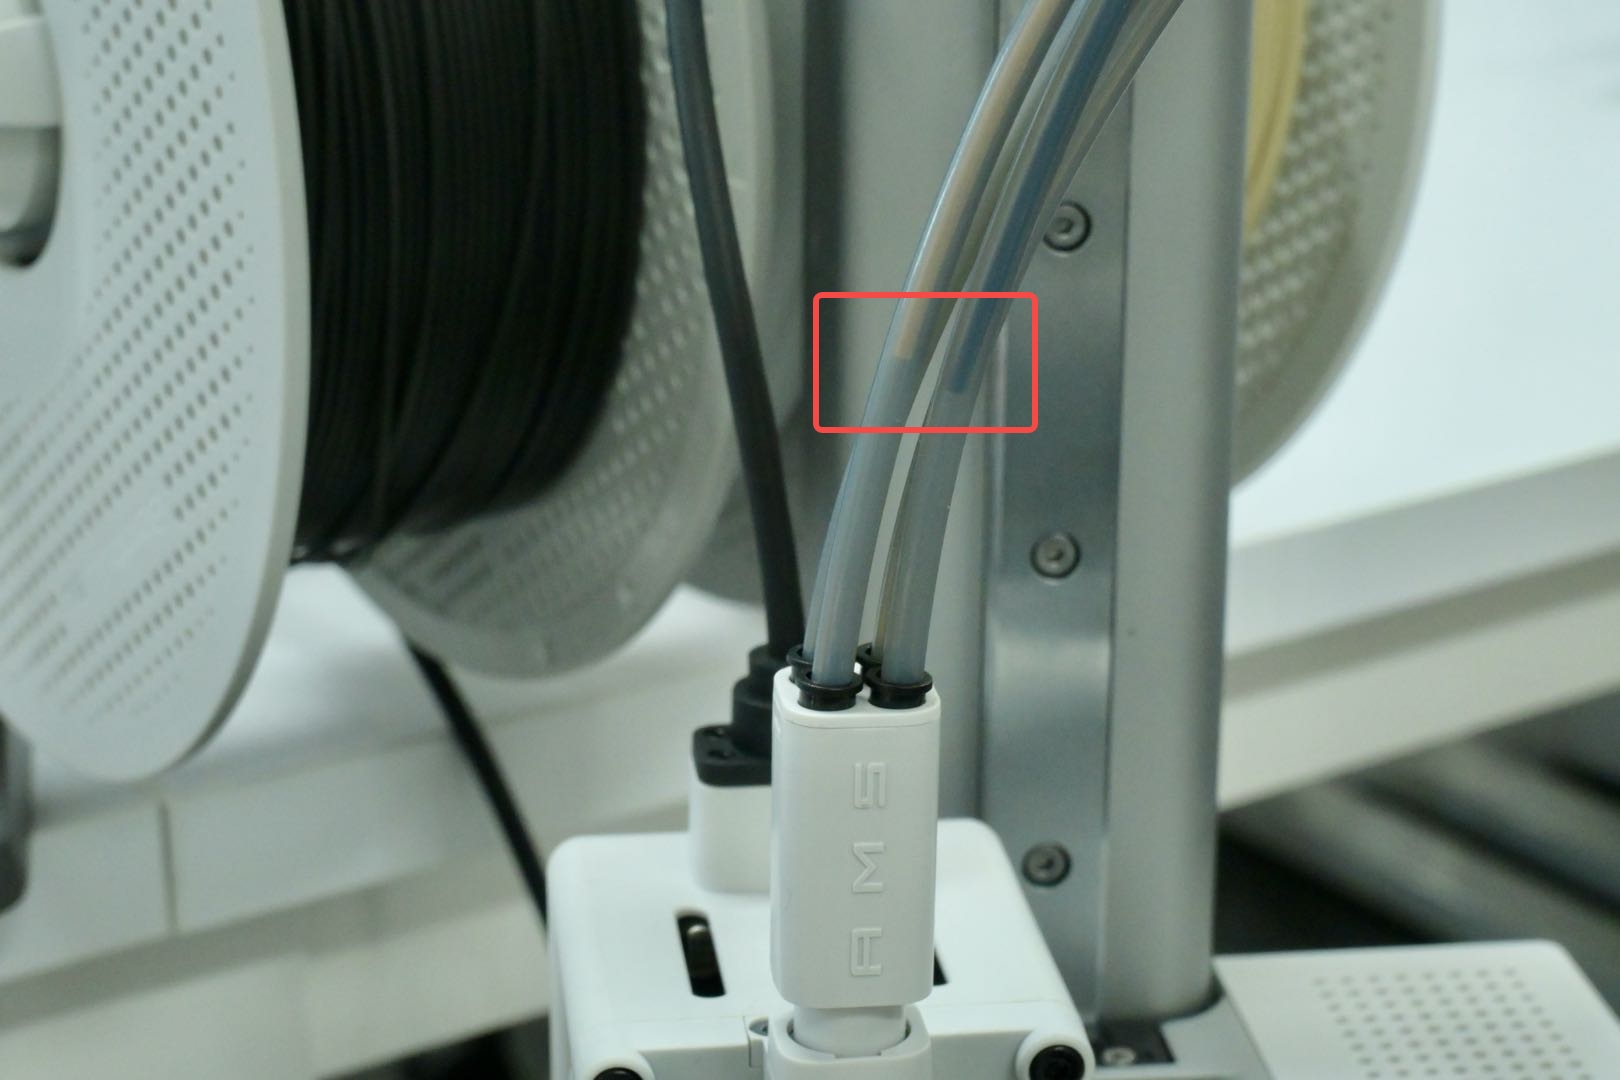
These material residues and fragments may cause increased resistance to loading and unloading filament. In this case, it is recommended to check if multiple filaments are being loaded simultaneously.
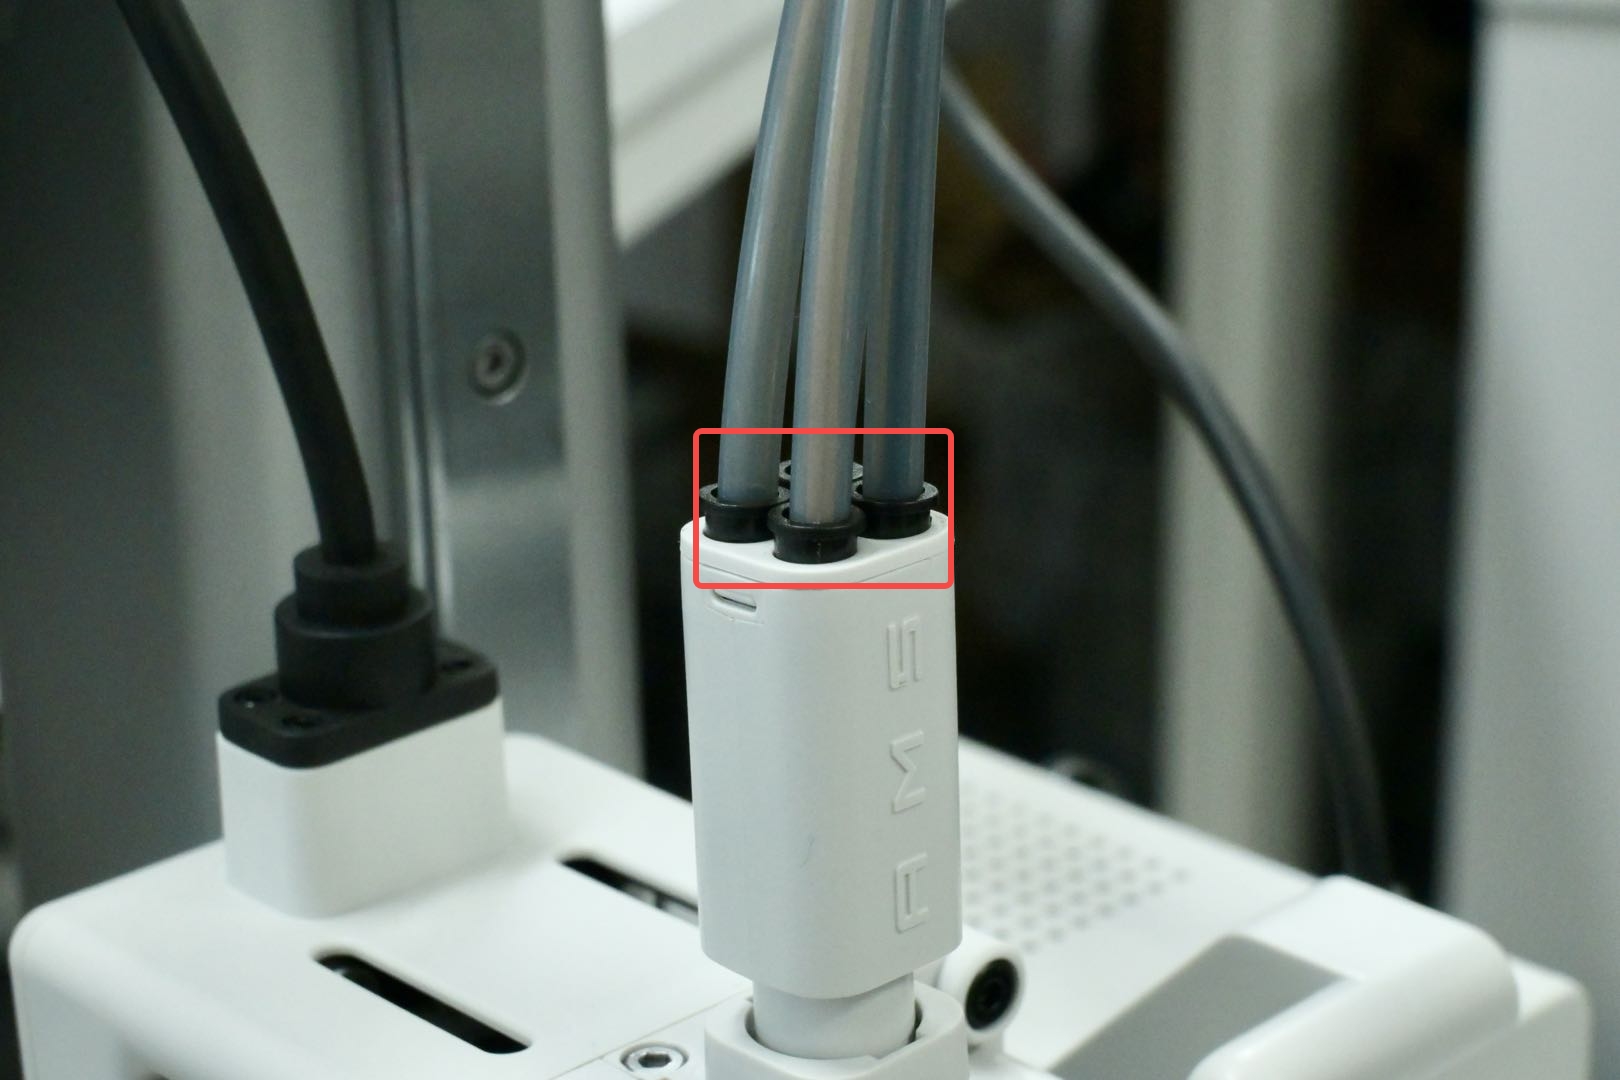
If multiple filaments are loaded at the same time, please follow the instructions below:
- Eject all filaments to the appropriate position first and restart the printer.
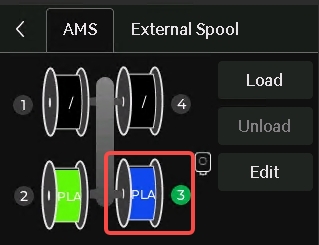
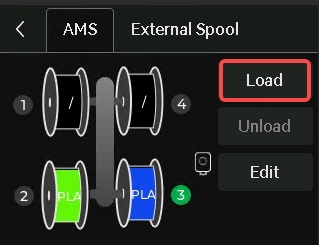
- Select the filaments you need to use in the AMS interface (the outer frame will become thicker after selection). Click the Load button to see if it can be operated smoothly.
 |
 |
If this does not work, please refer to the following instructions to disassemble the filament hub for internal cleaning.
¶ Tools required
- H1.5 & H2.0 Allen key
- Flat Tweezers
¶ Operation Guide
¶ Dismantle and clean the AMS lite Filament Hub
¶ Step 1. Remove the AMS lite Filament Hub
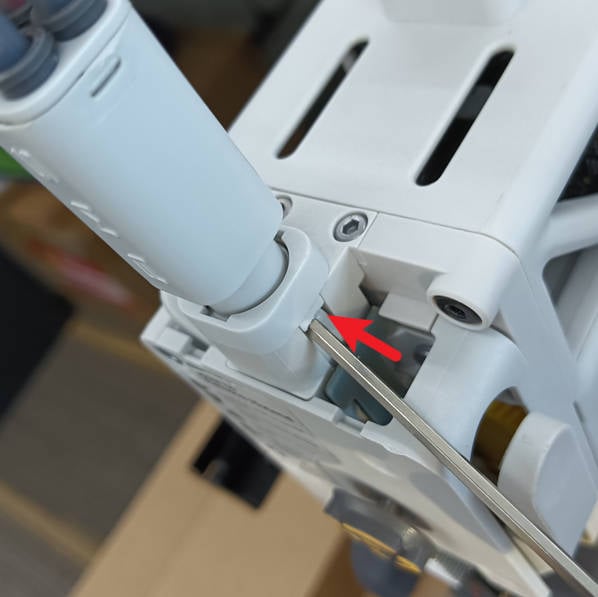
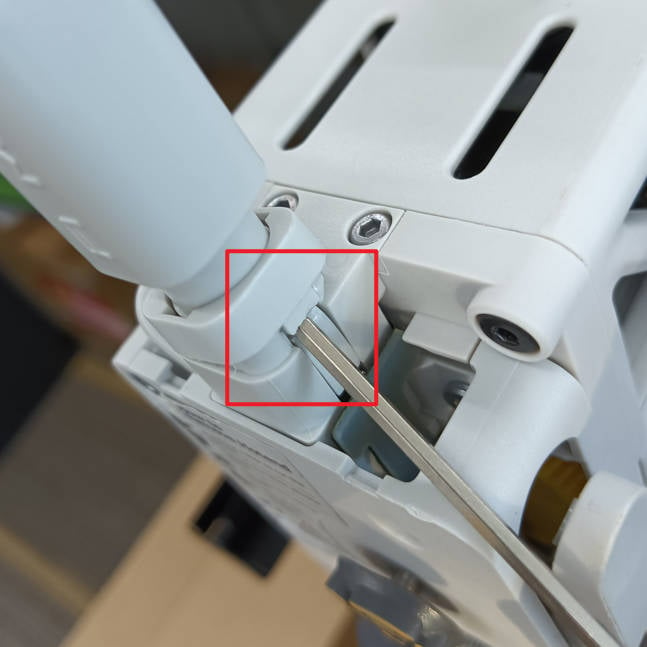
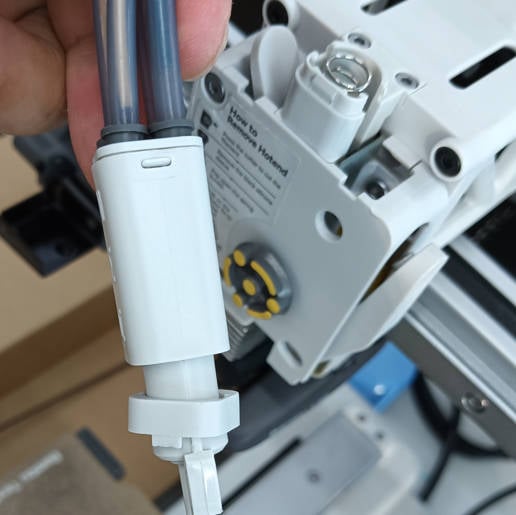
For easier inspection and confirmation, we can remove the Filament Hub. This operation is very simple: use a hex key to slightly pry up the cover, and then the Filaments Hub can be removed.
Note: The base of the filament sensor is coated with damping grease.
 |
 |
 |
¶ Step 2. Unclog the AMS lite Filament Hub with filament
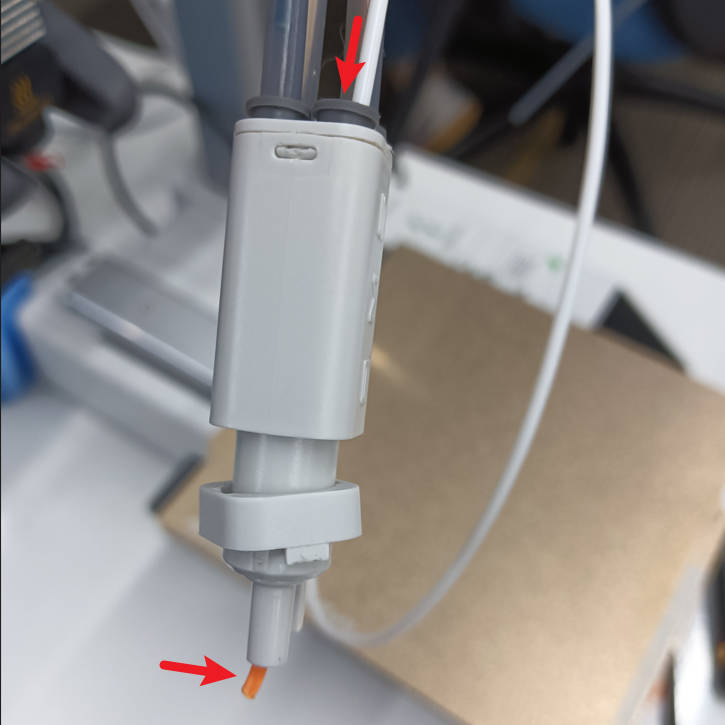
Remove the PTFE tube from the connector with the broken filament inside, then insert a piece of printing filament from the tube joint and try to push the broken filament out from the outlet of the filament hub.
 |
 |
¶ Step 3. Disassemble the Filament Hub
If the filaments or foreign objects blocked inside the hub cannot be directly removed under normal conditions, we need to disassemble the Filament Hub.
Note: To avoid small parts in the filament hub popping out during disassembly and assembly, it is recommended to disassemble with the PTFE tube connected.
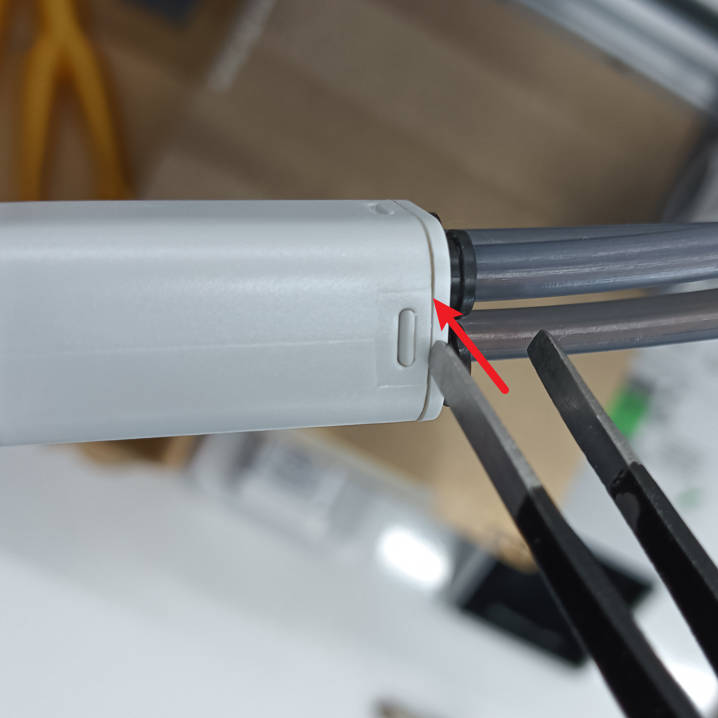
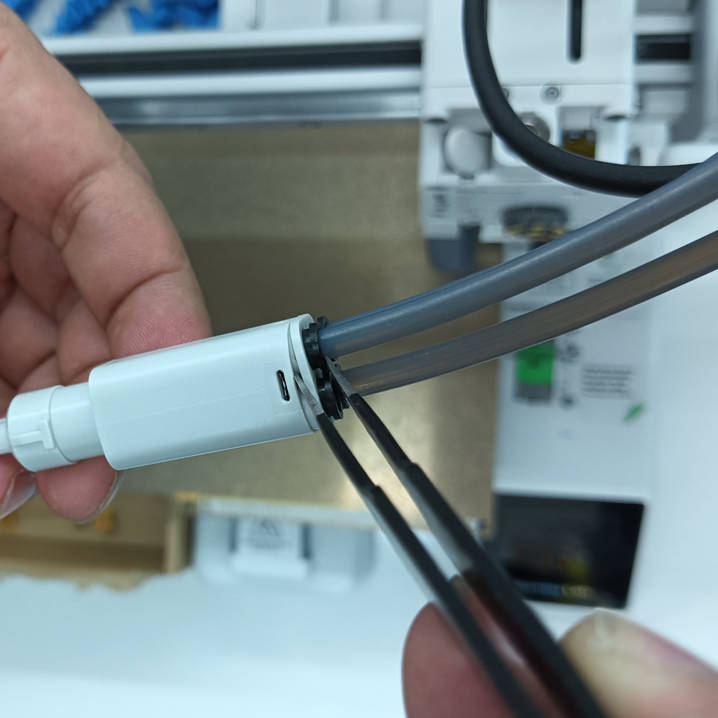
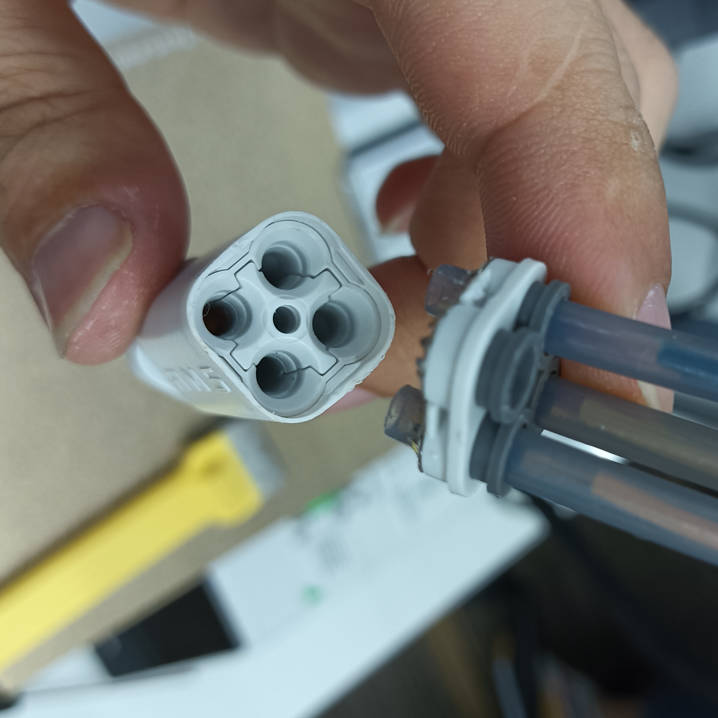
As shown in the figures below, you can use flat-head tweezers to pry it open from the left (or right) side buckle, unlock the buckles, and loosen the cover with the PTFE tube connectors.
 |
 |
 |
¶ Step 4. Internal cleaning
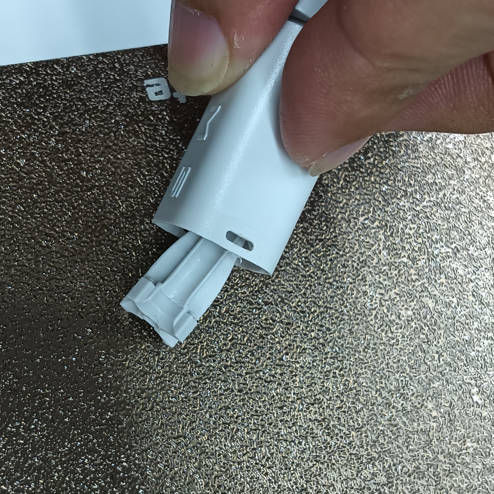
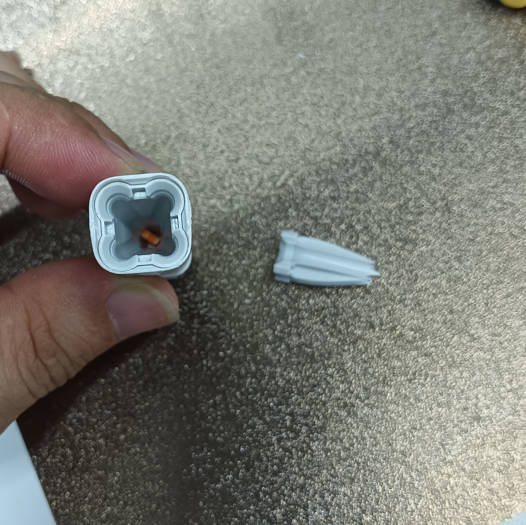
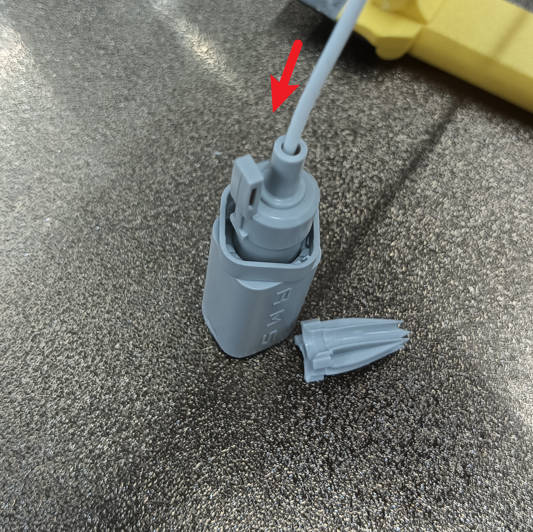
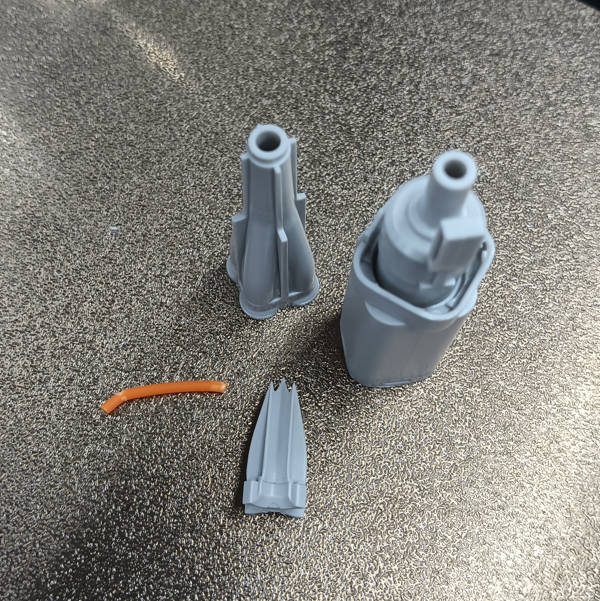
Remove the accessories inside the filament hub, if there is any stuck filament, use another piece of filament to push it out in the opposite direction from the outlet of the hub.
 |
 |
 |
 |
¶ Dismantle and inspect the filament base
¶ Step 1. Disassemble the filament base
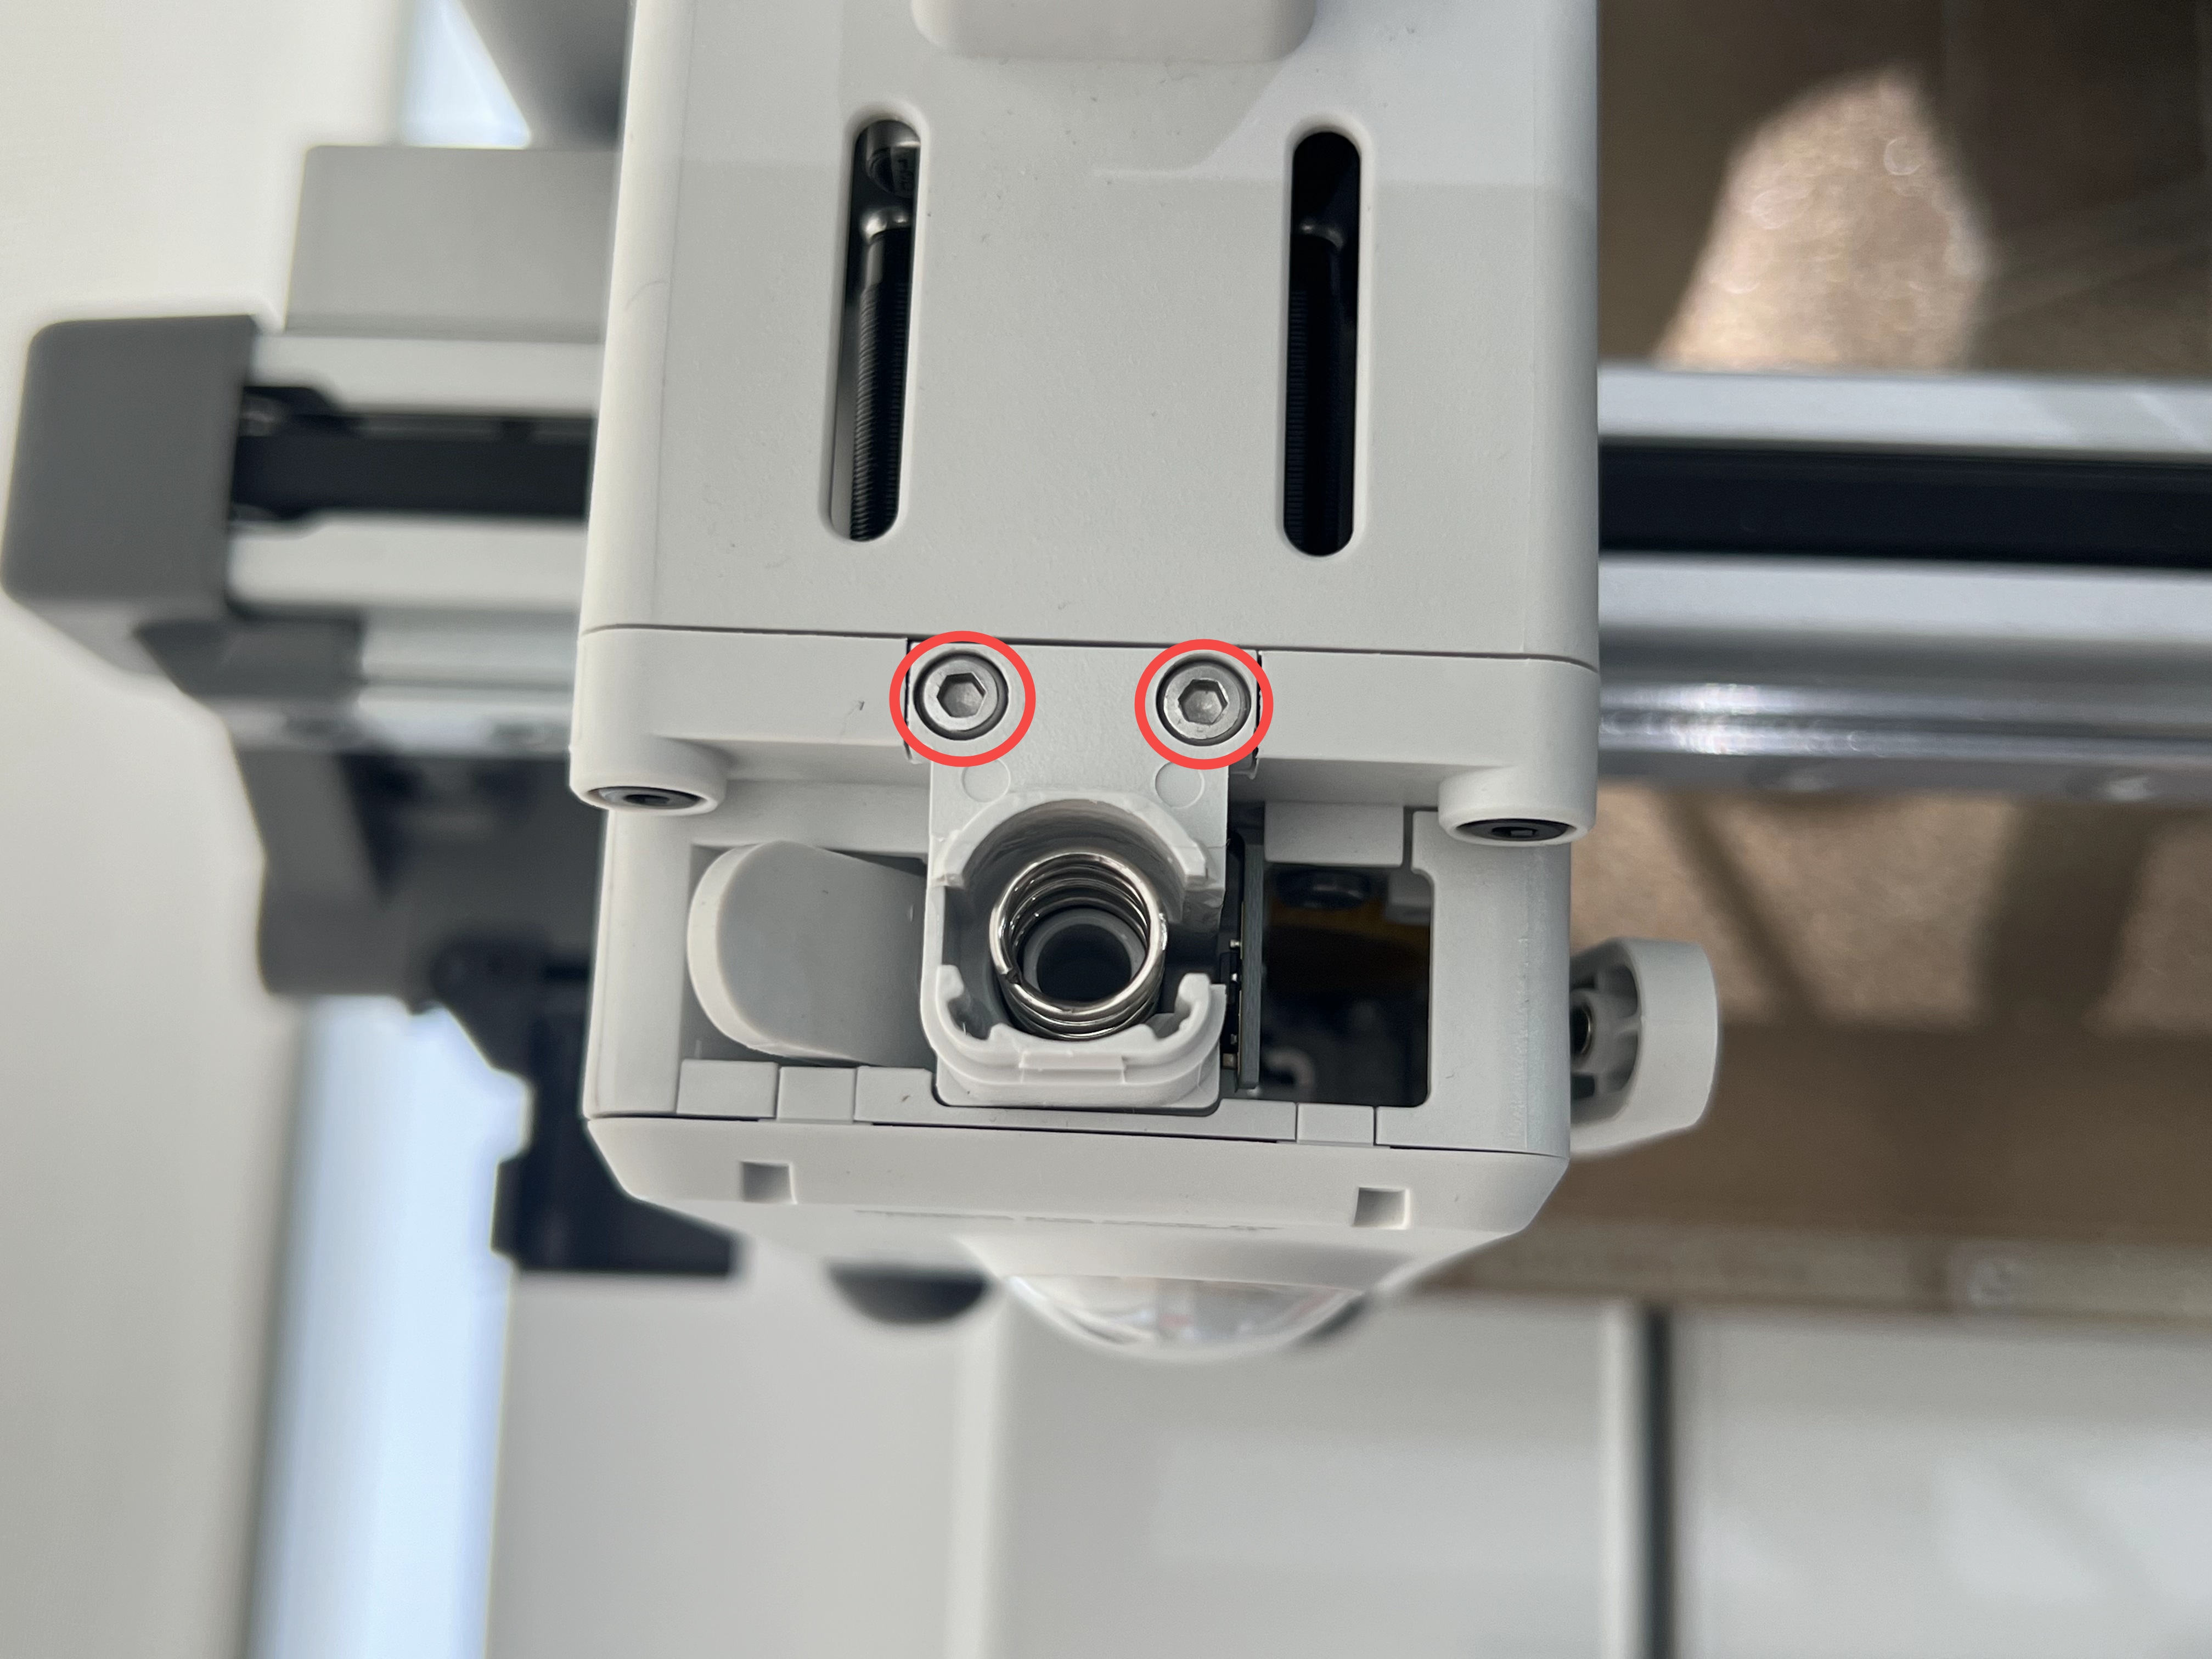
Remove the 2 screws on the top of the filament base using an H2.0 Allen key and remove the filament base.
¶ Step 2. Remove the filament sensor
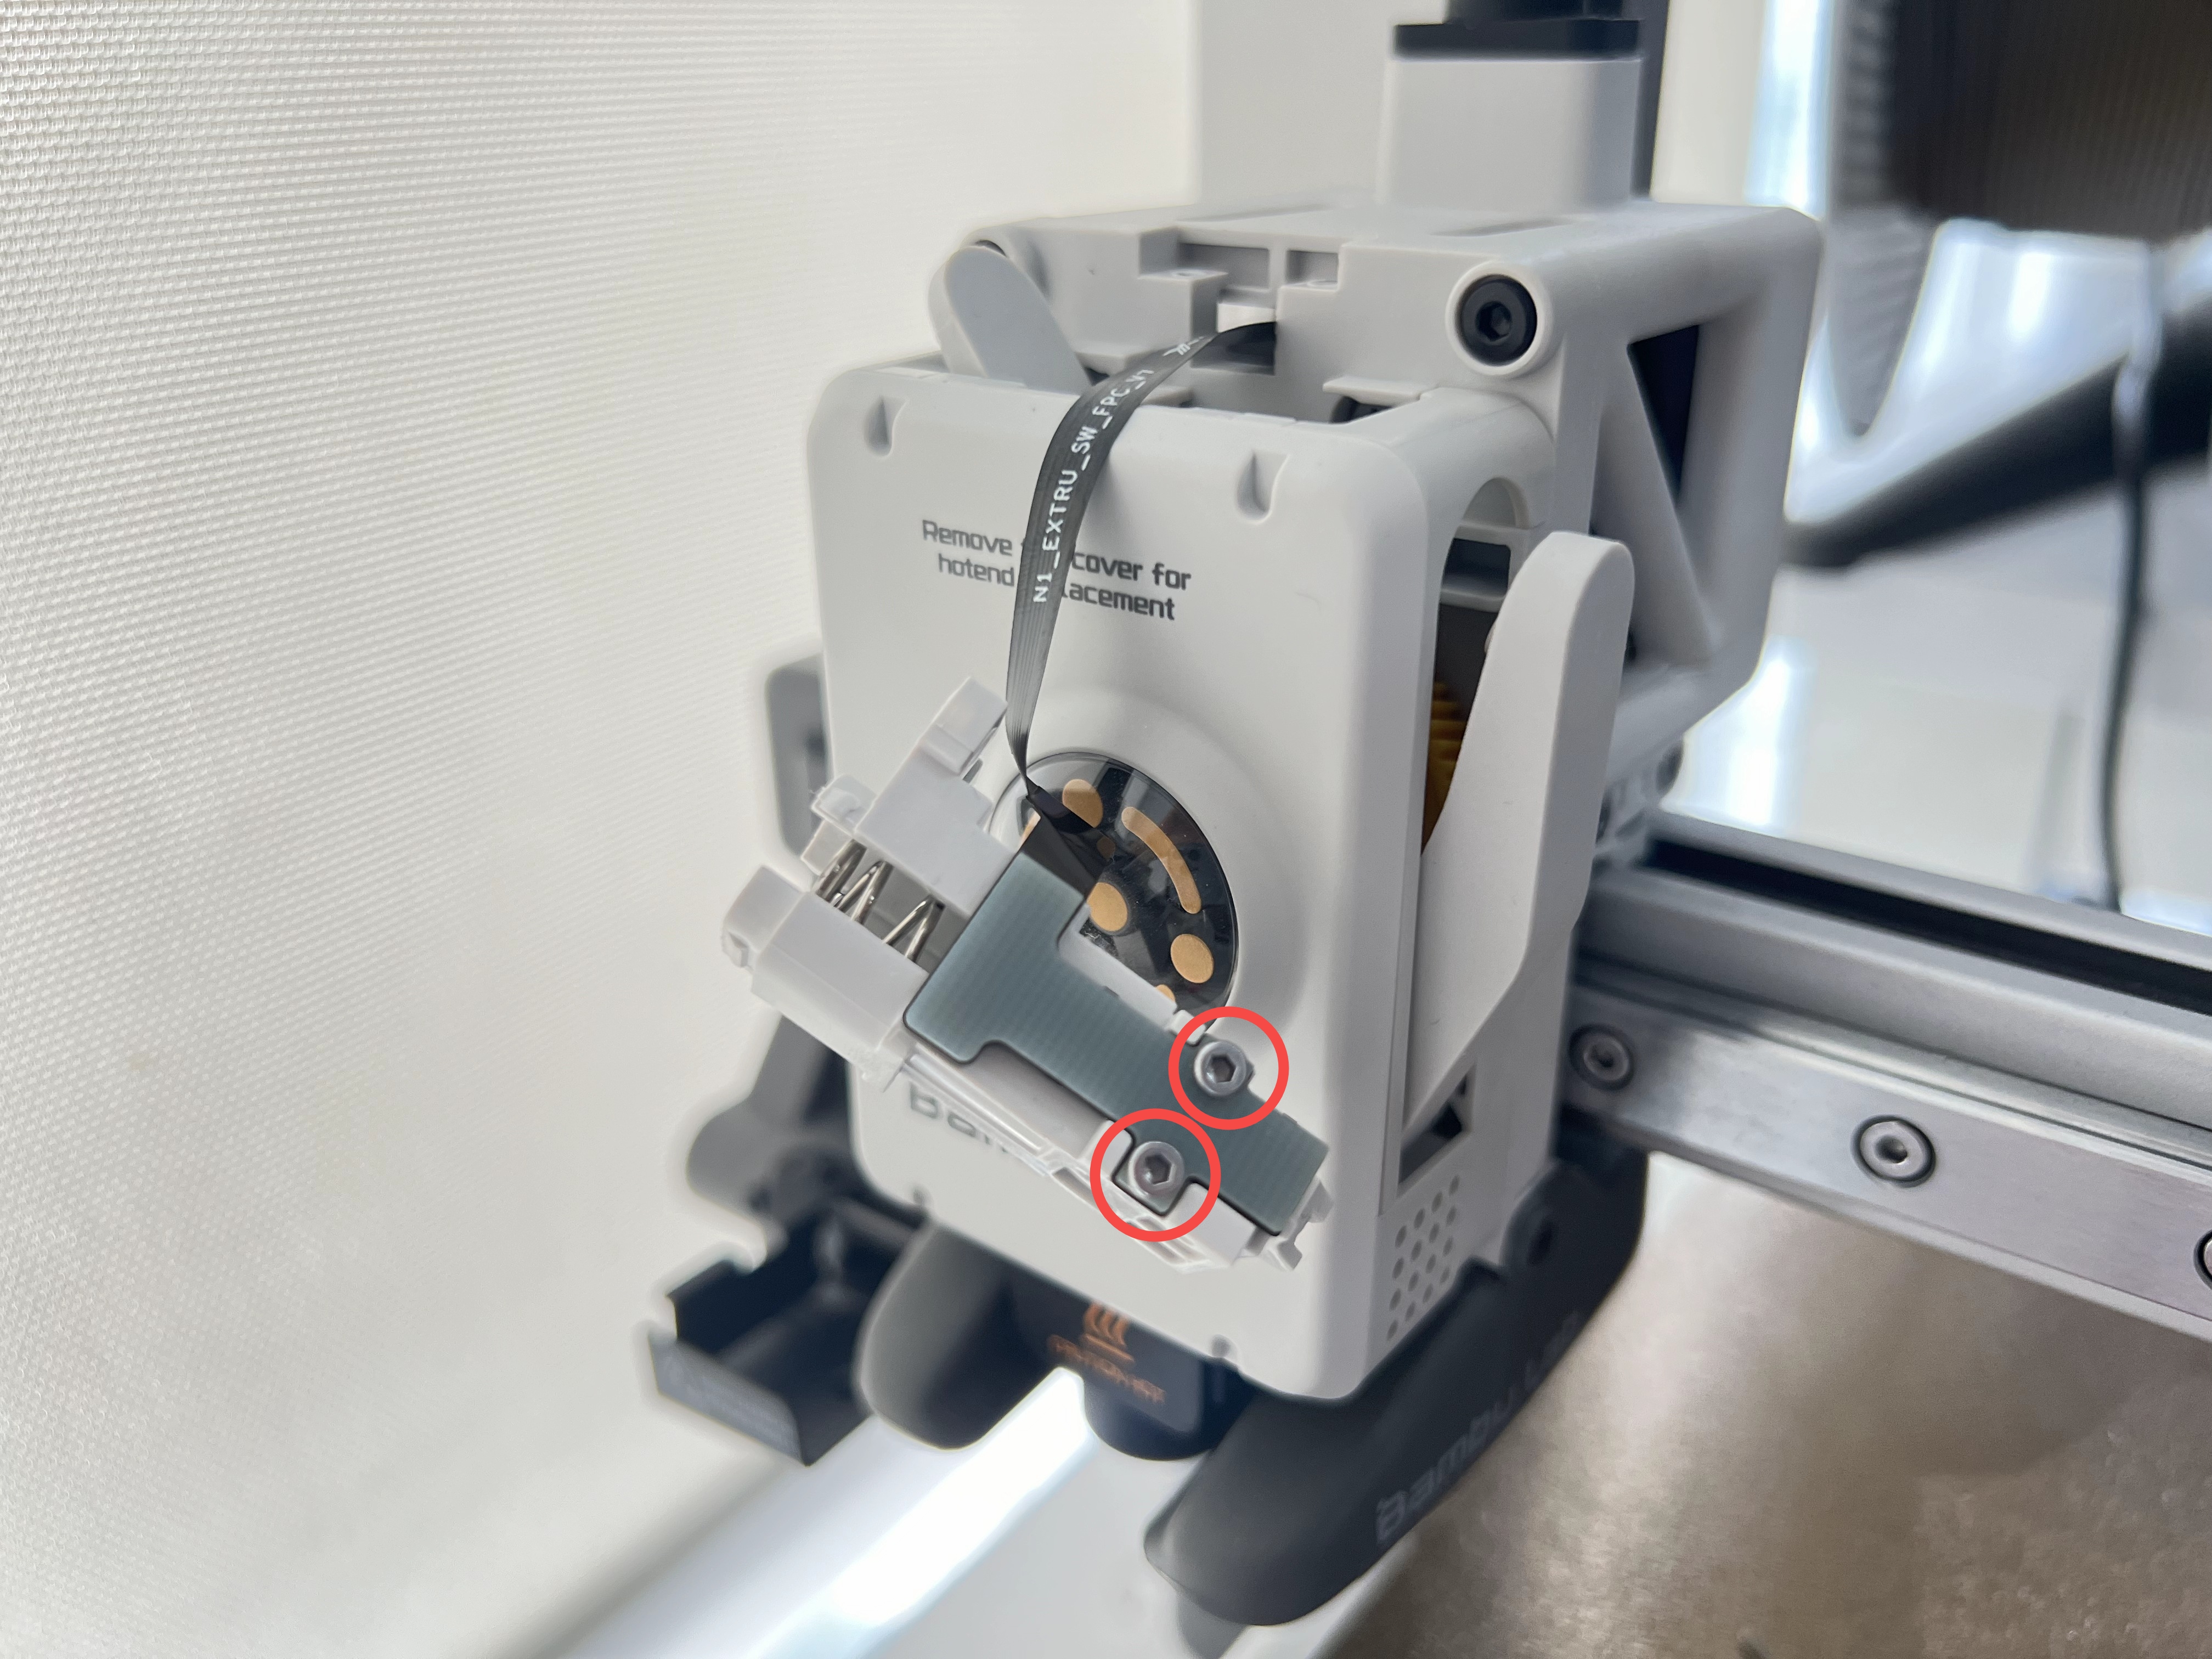
Remove the 2 screws on the filament sensor using an H1.5 Allen key.
¶ Step 3. Inspect the arm
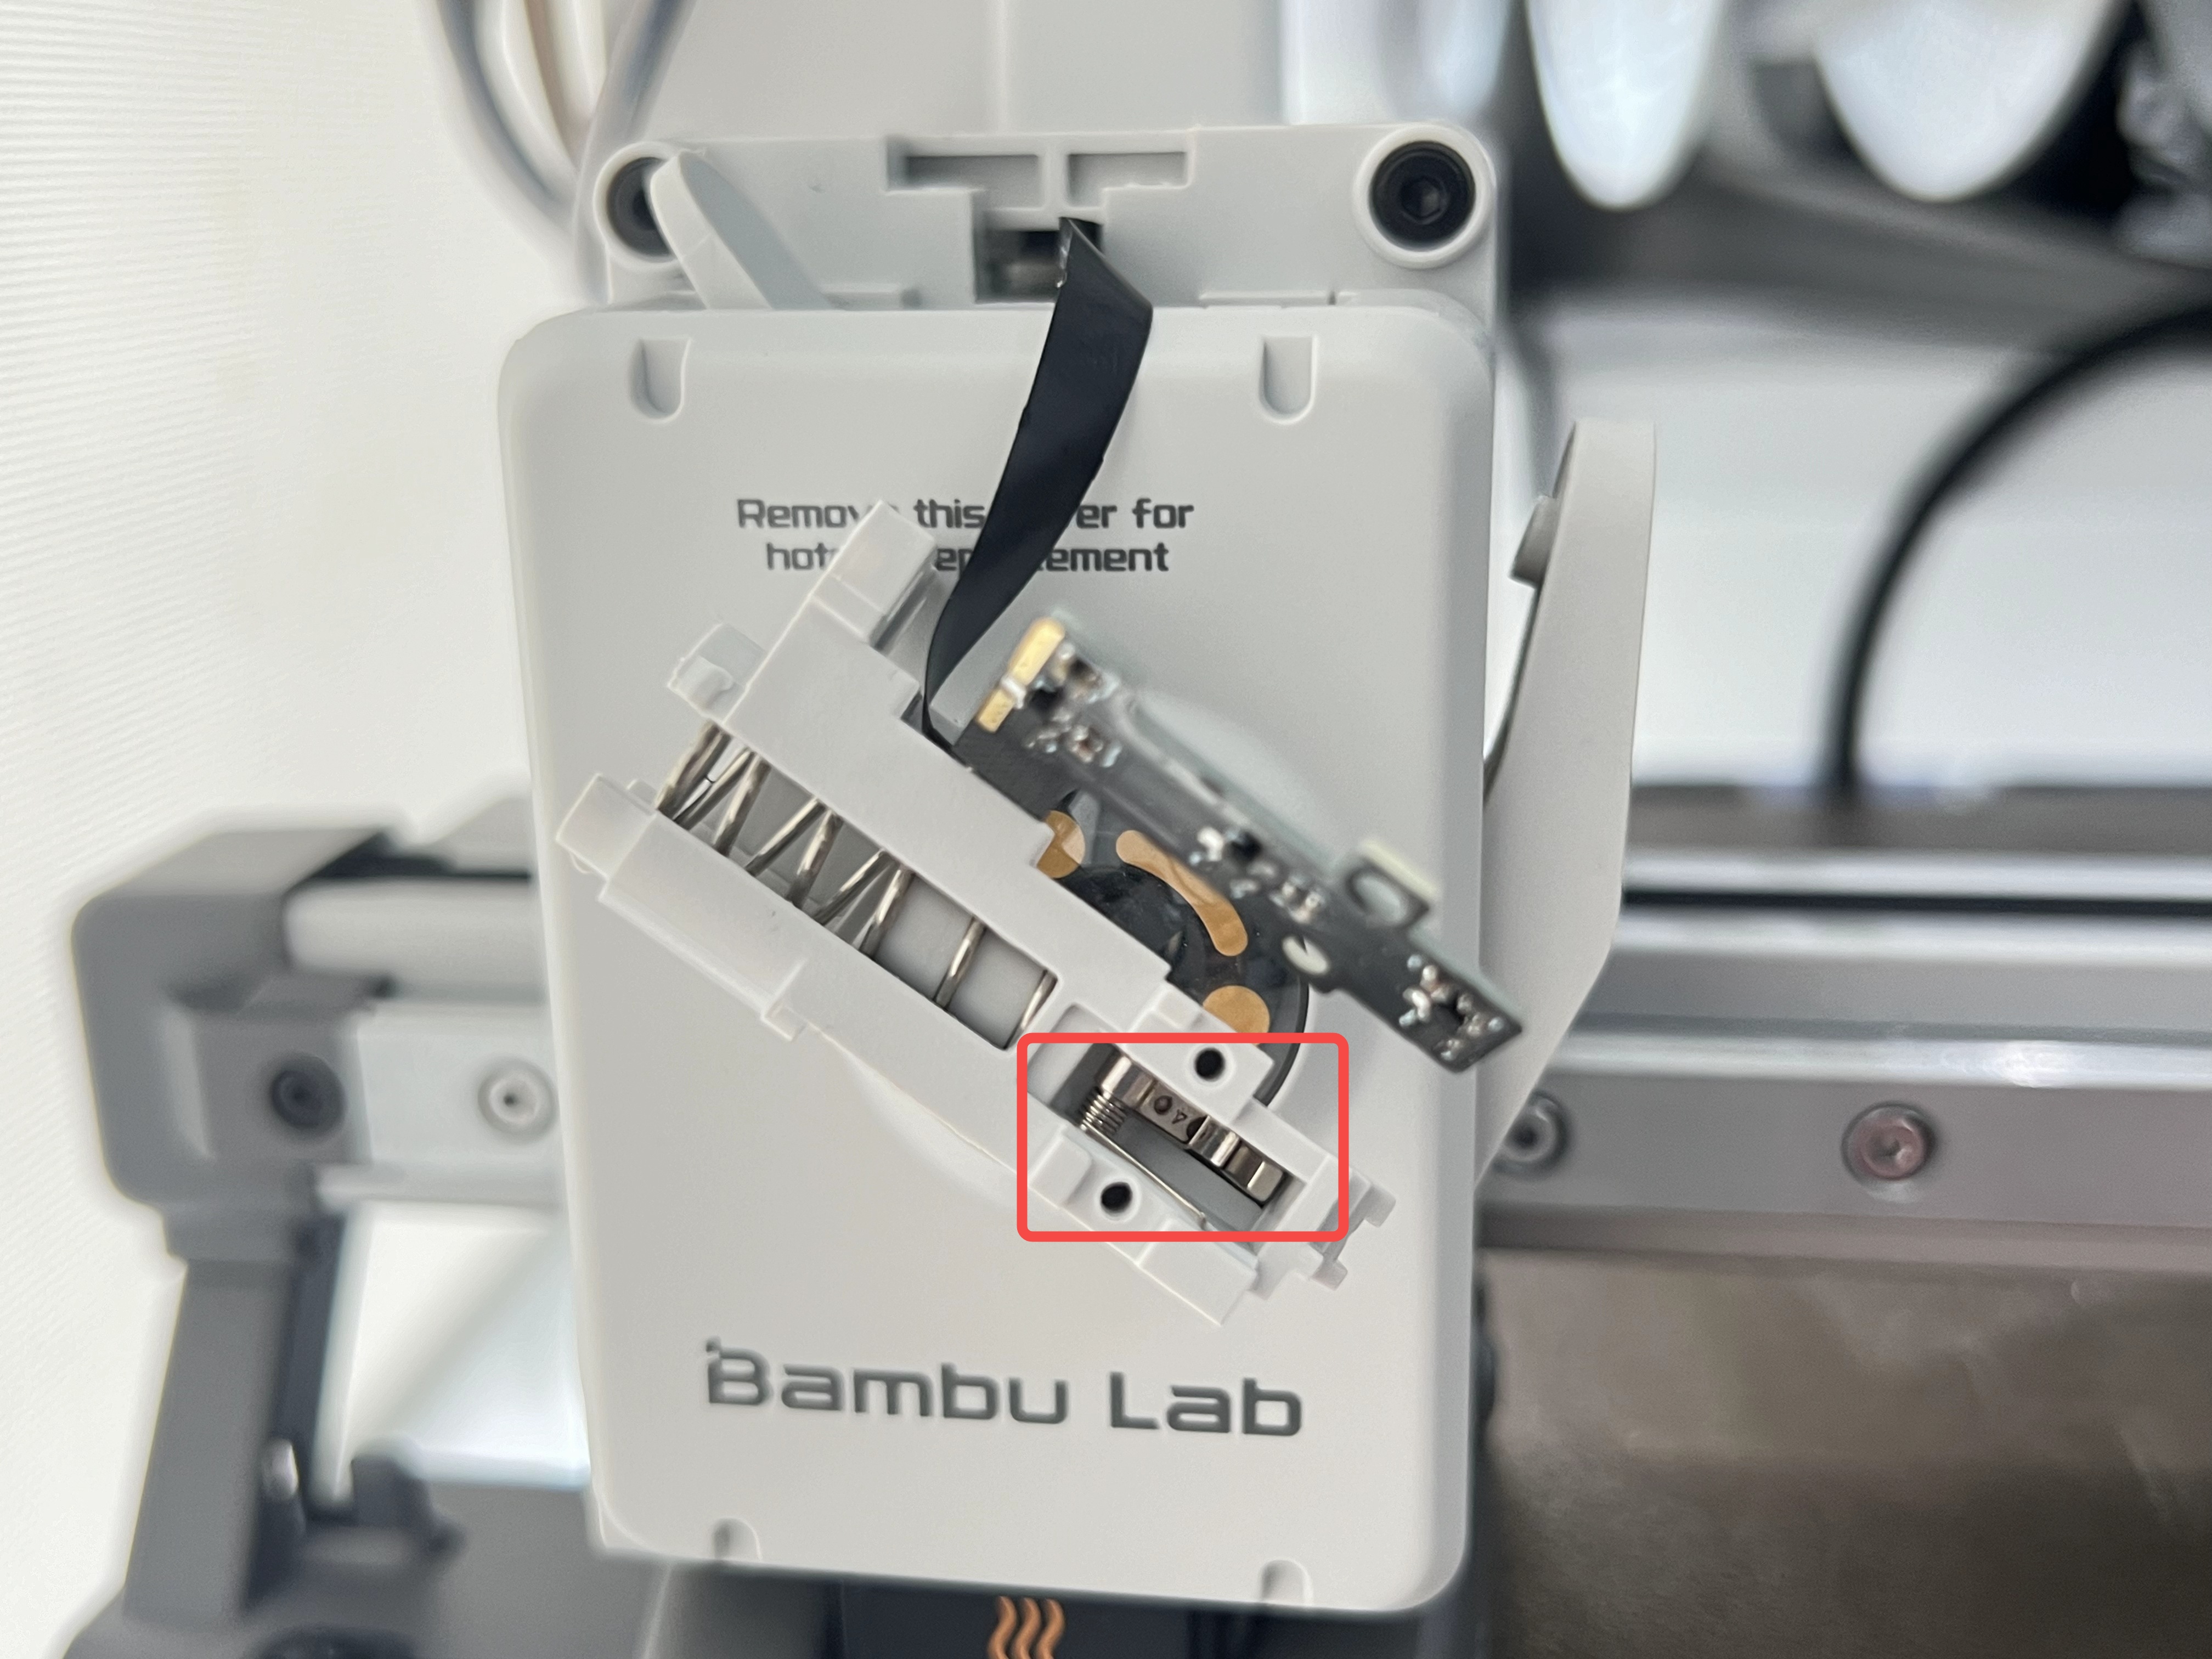
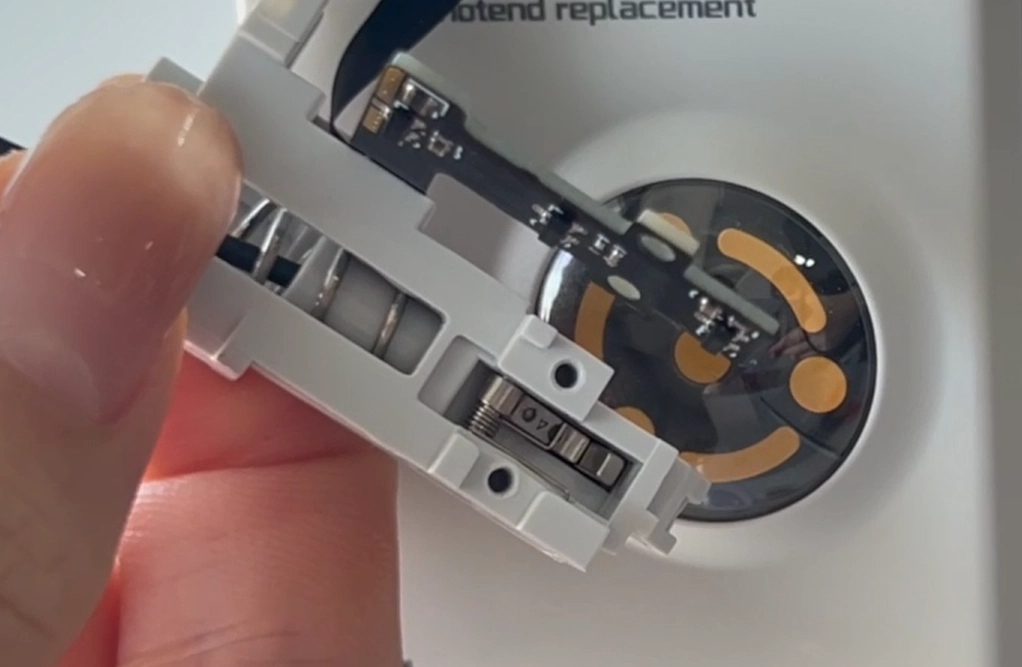
Insert a piece of filament and observe whether the arm operates normally and whether it returns to its original position automatically after the filament is removed.
 |
 |
¶ Step 4. Inspect the outlet
Inspect if the outlet is worn or chipped.
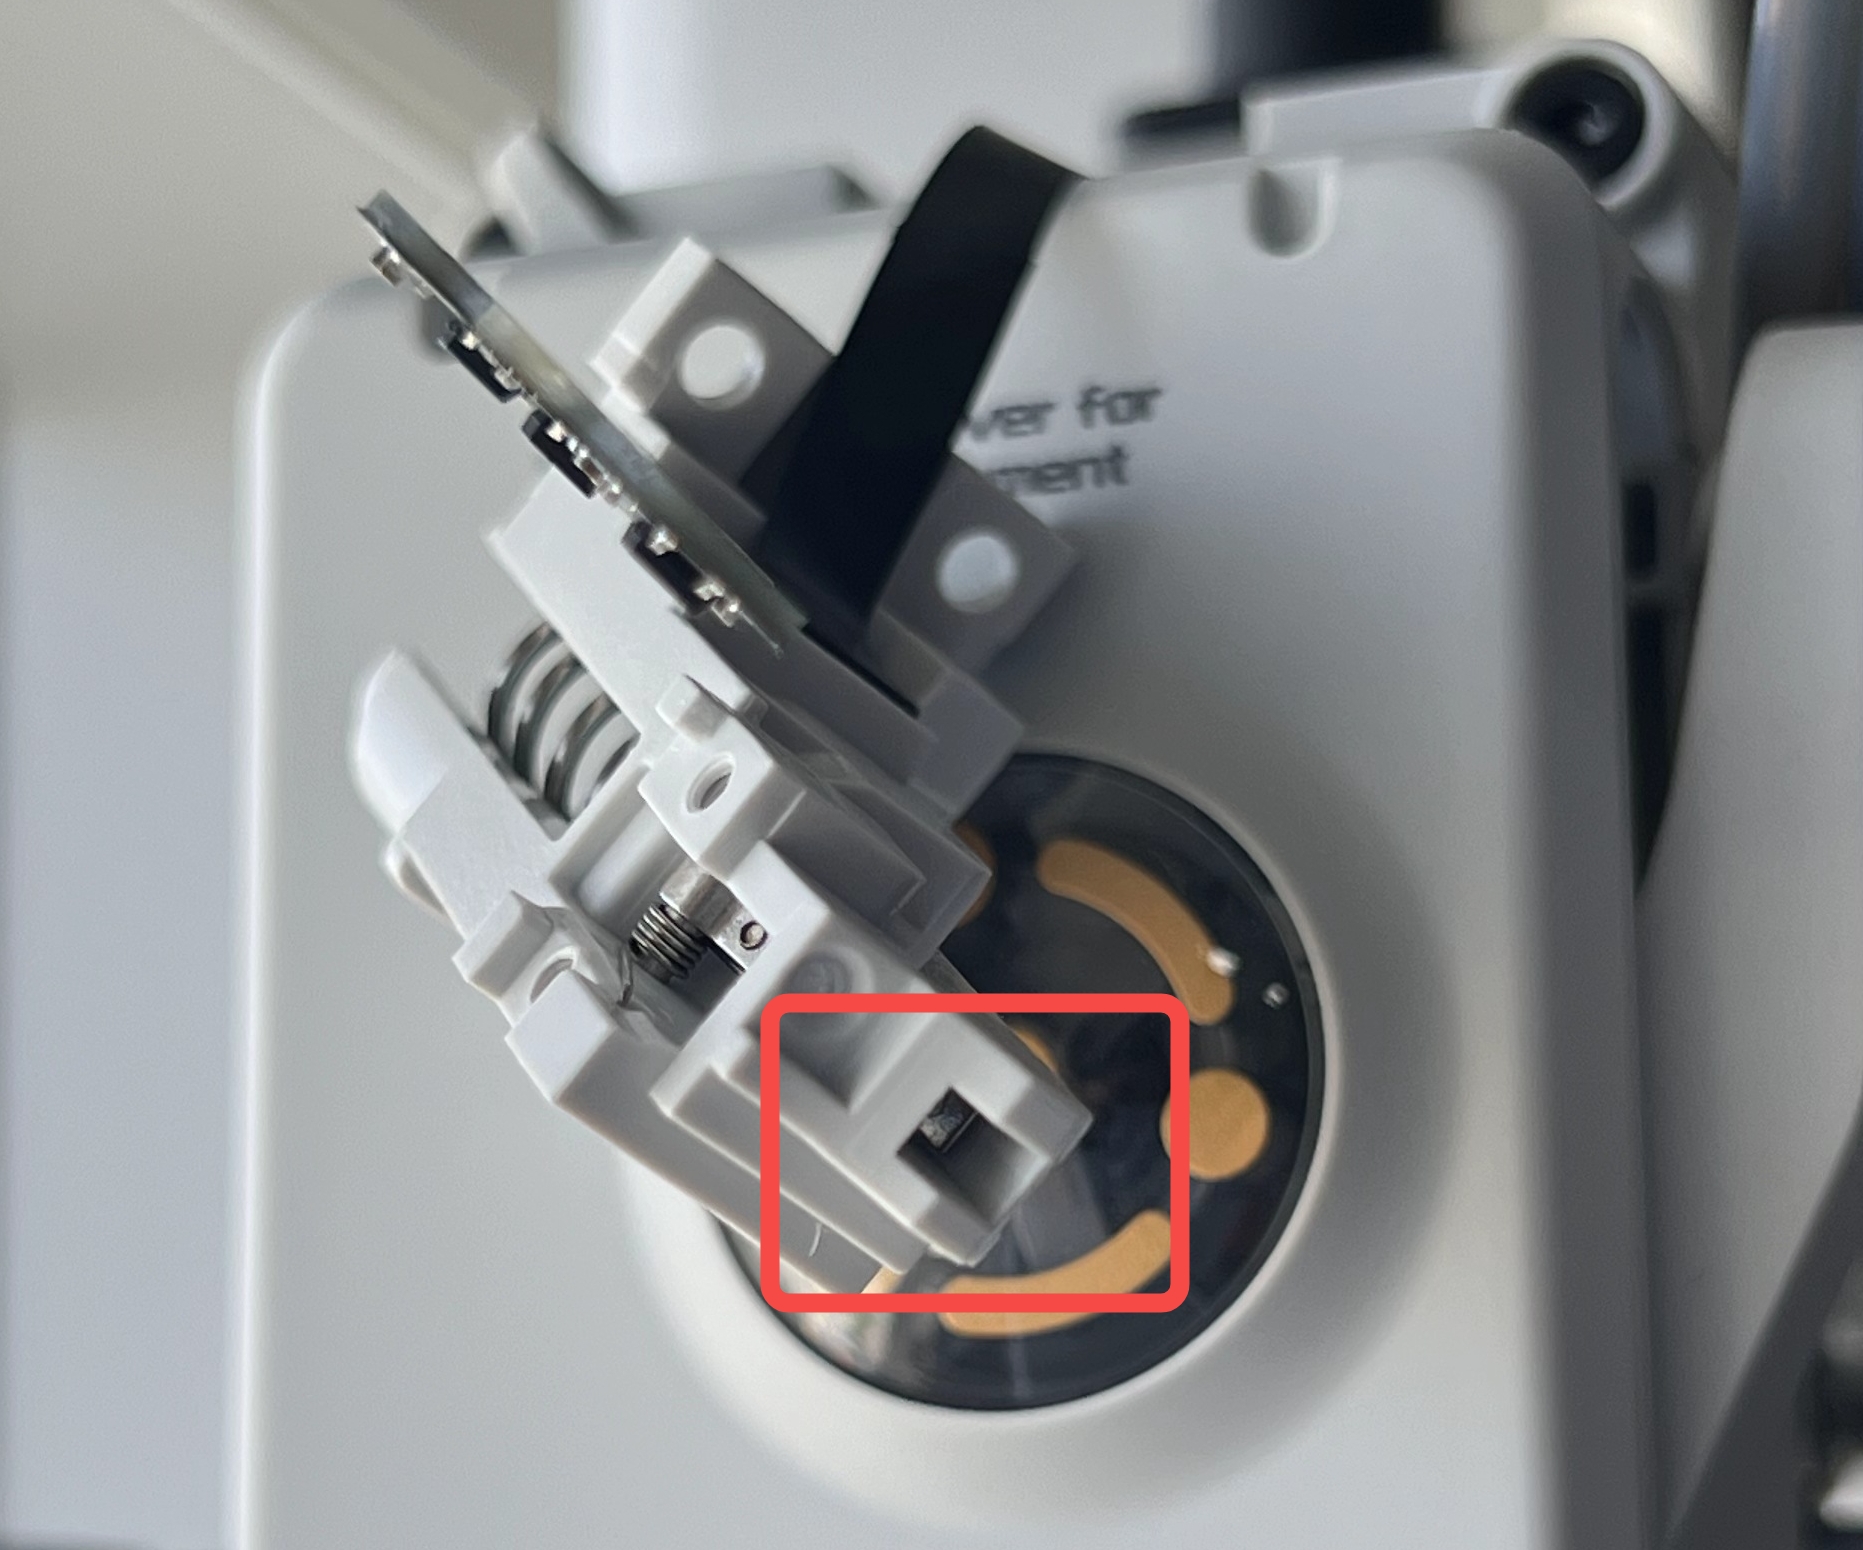
¶ Step 5. Inspect the filament sensor
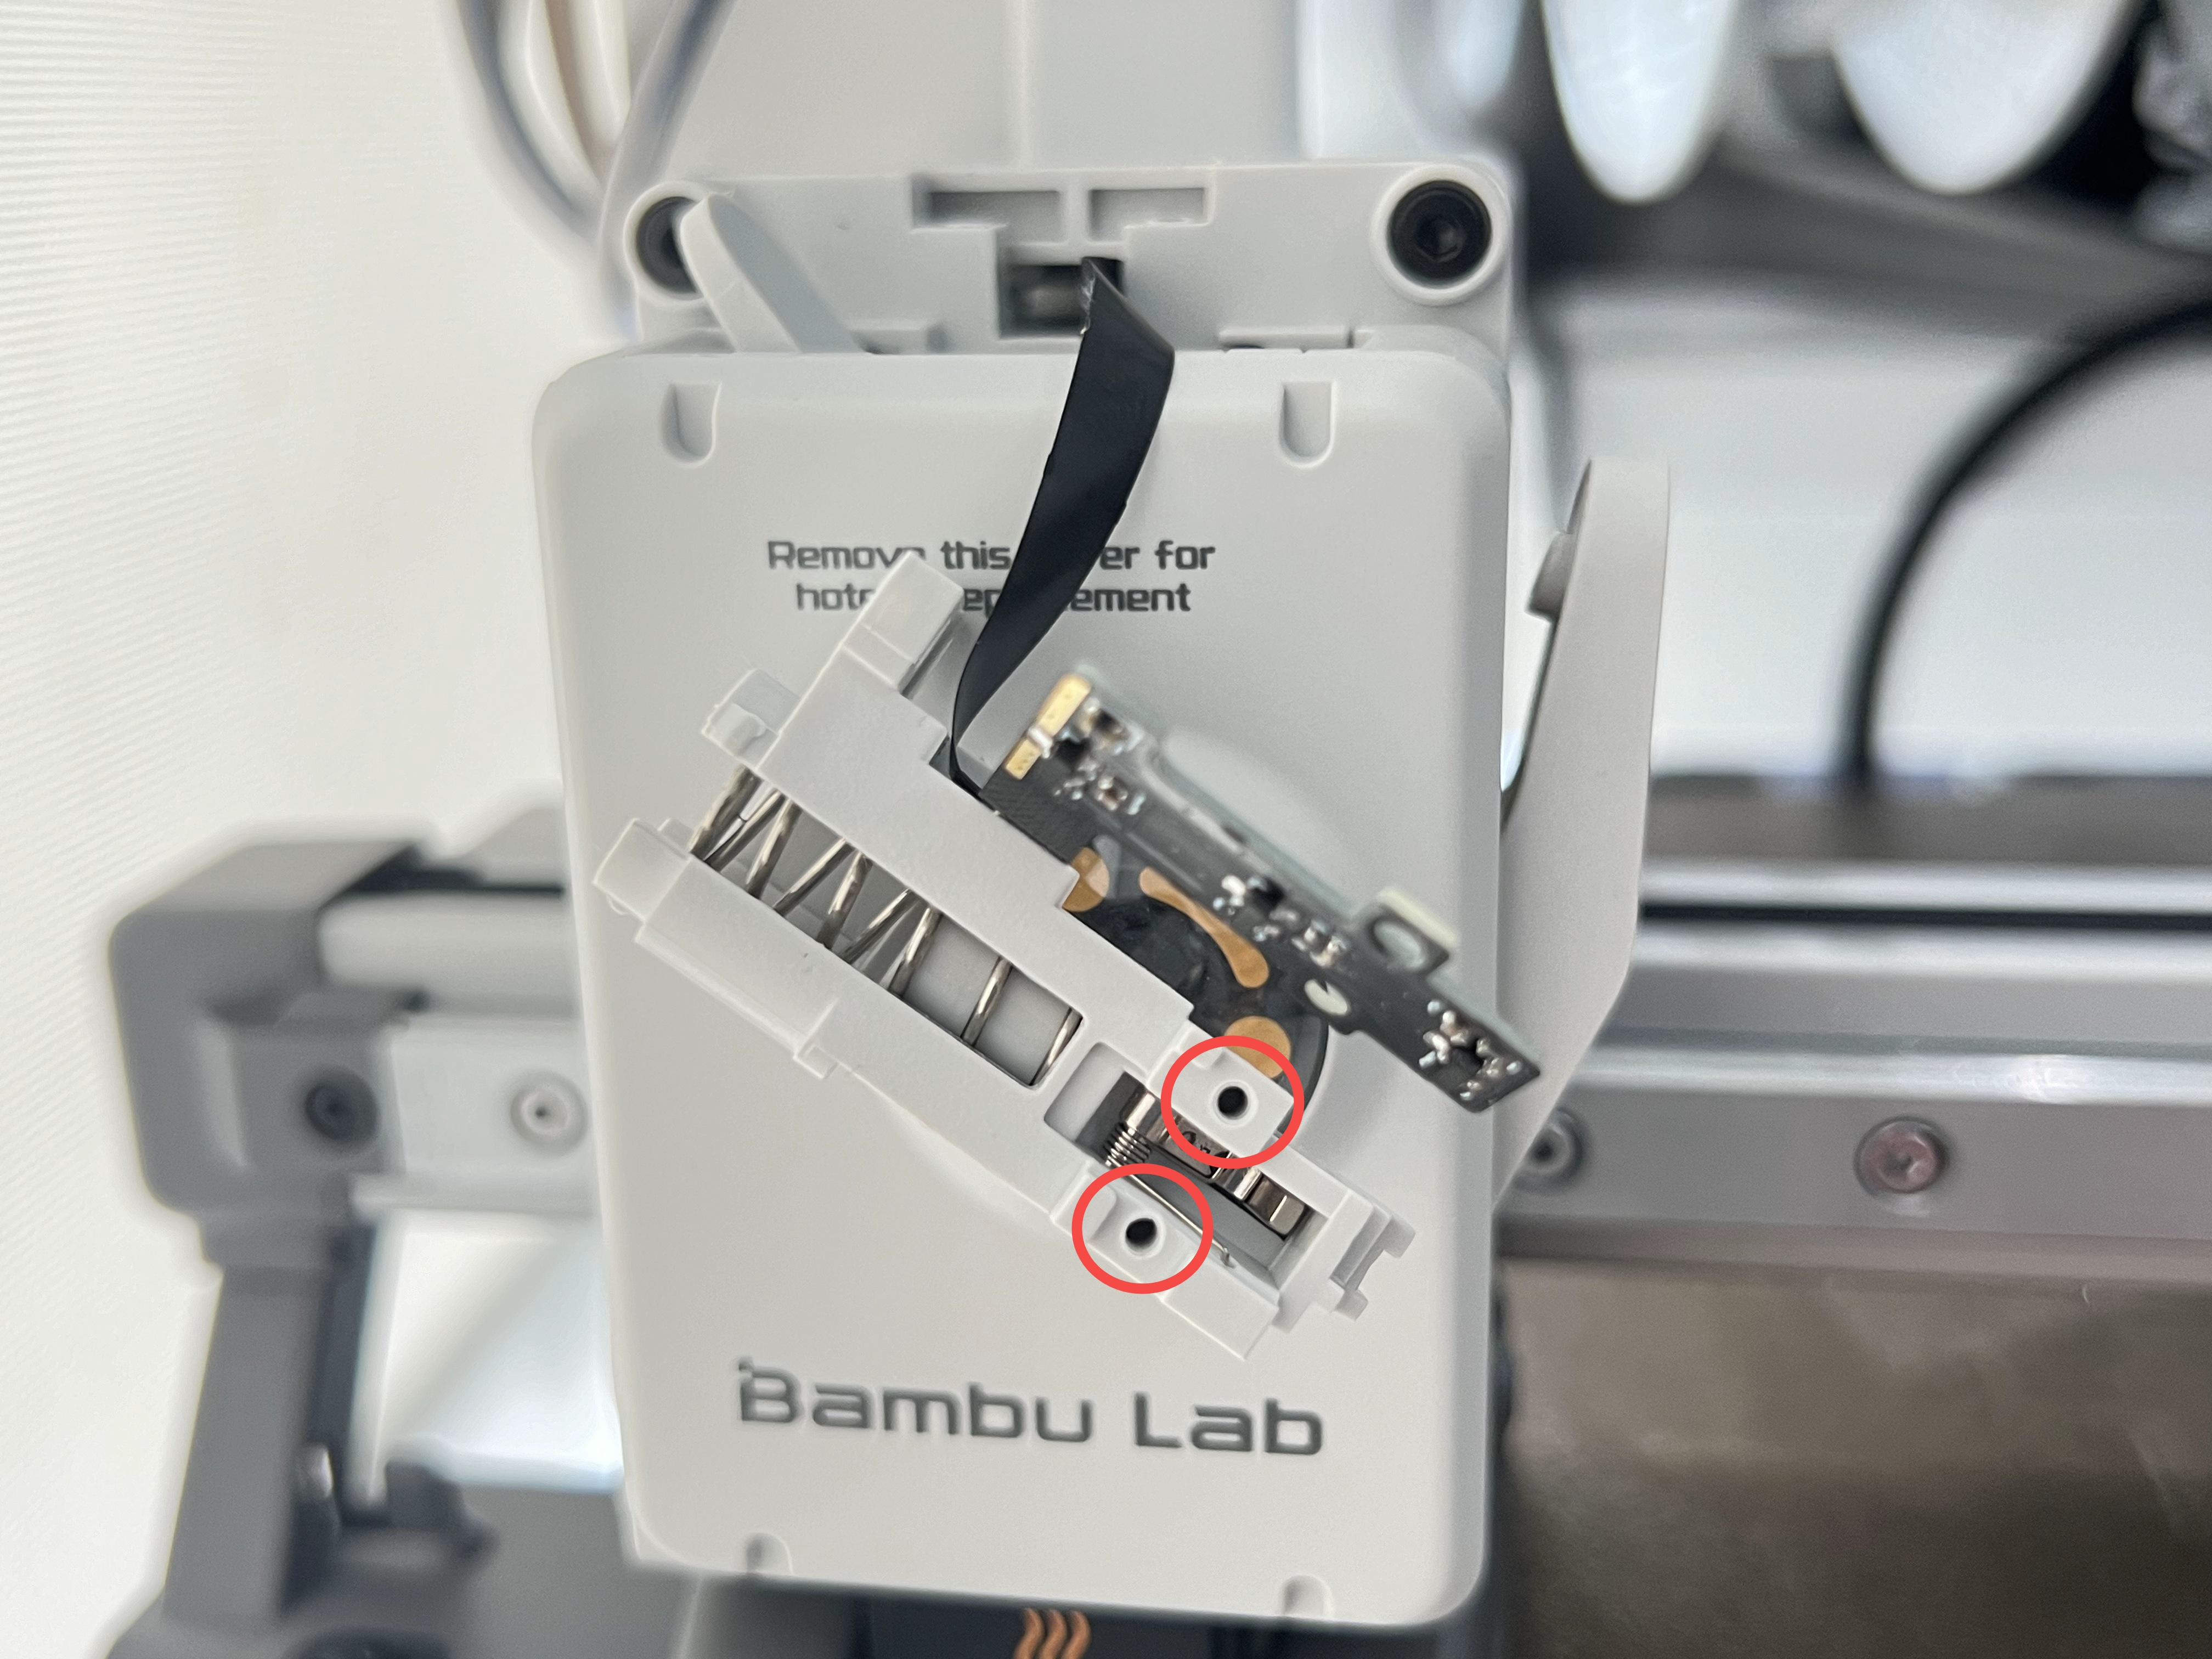
- Cover the filament sensor, amd use an H1.5 Allen key to install the 2 screws.
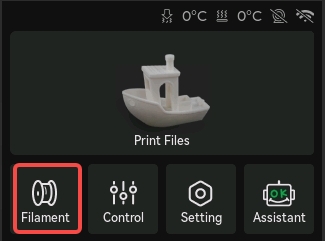
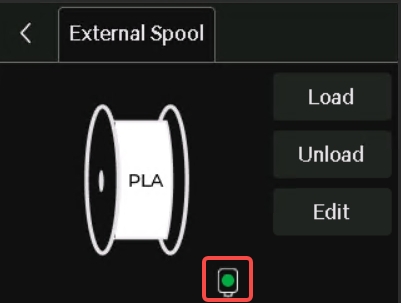
- Turn on the printer and click Filament on the screen.
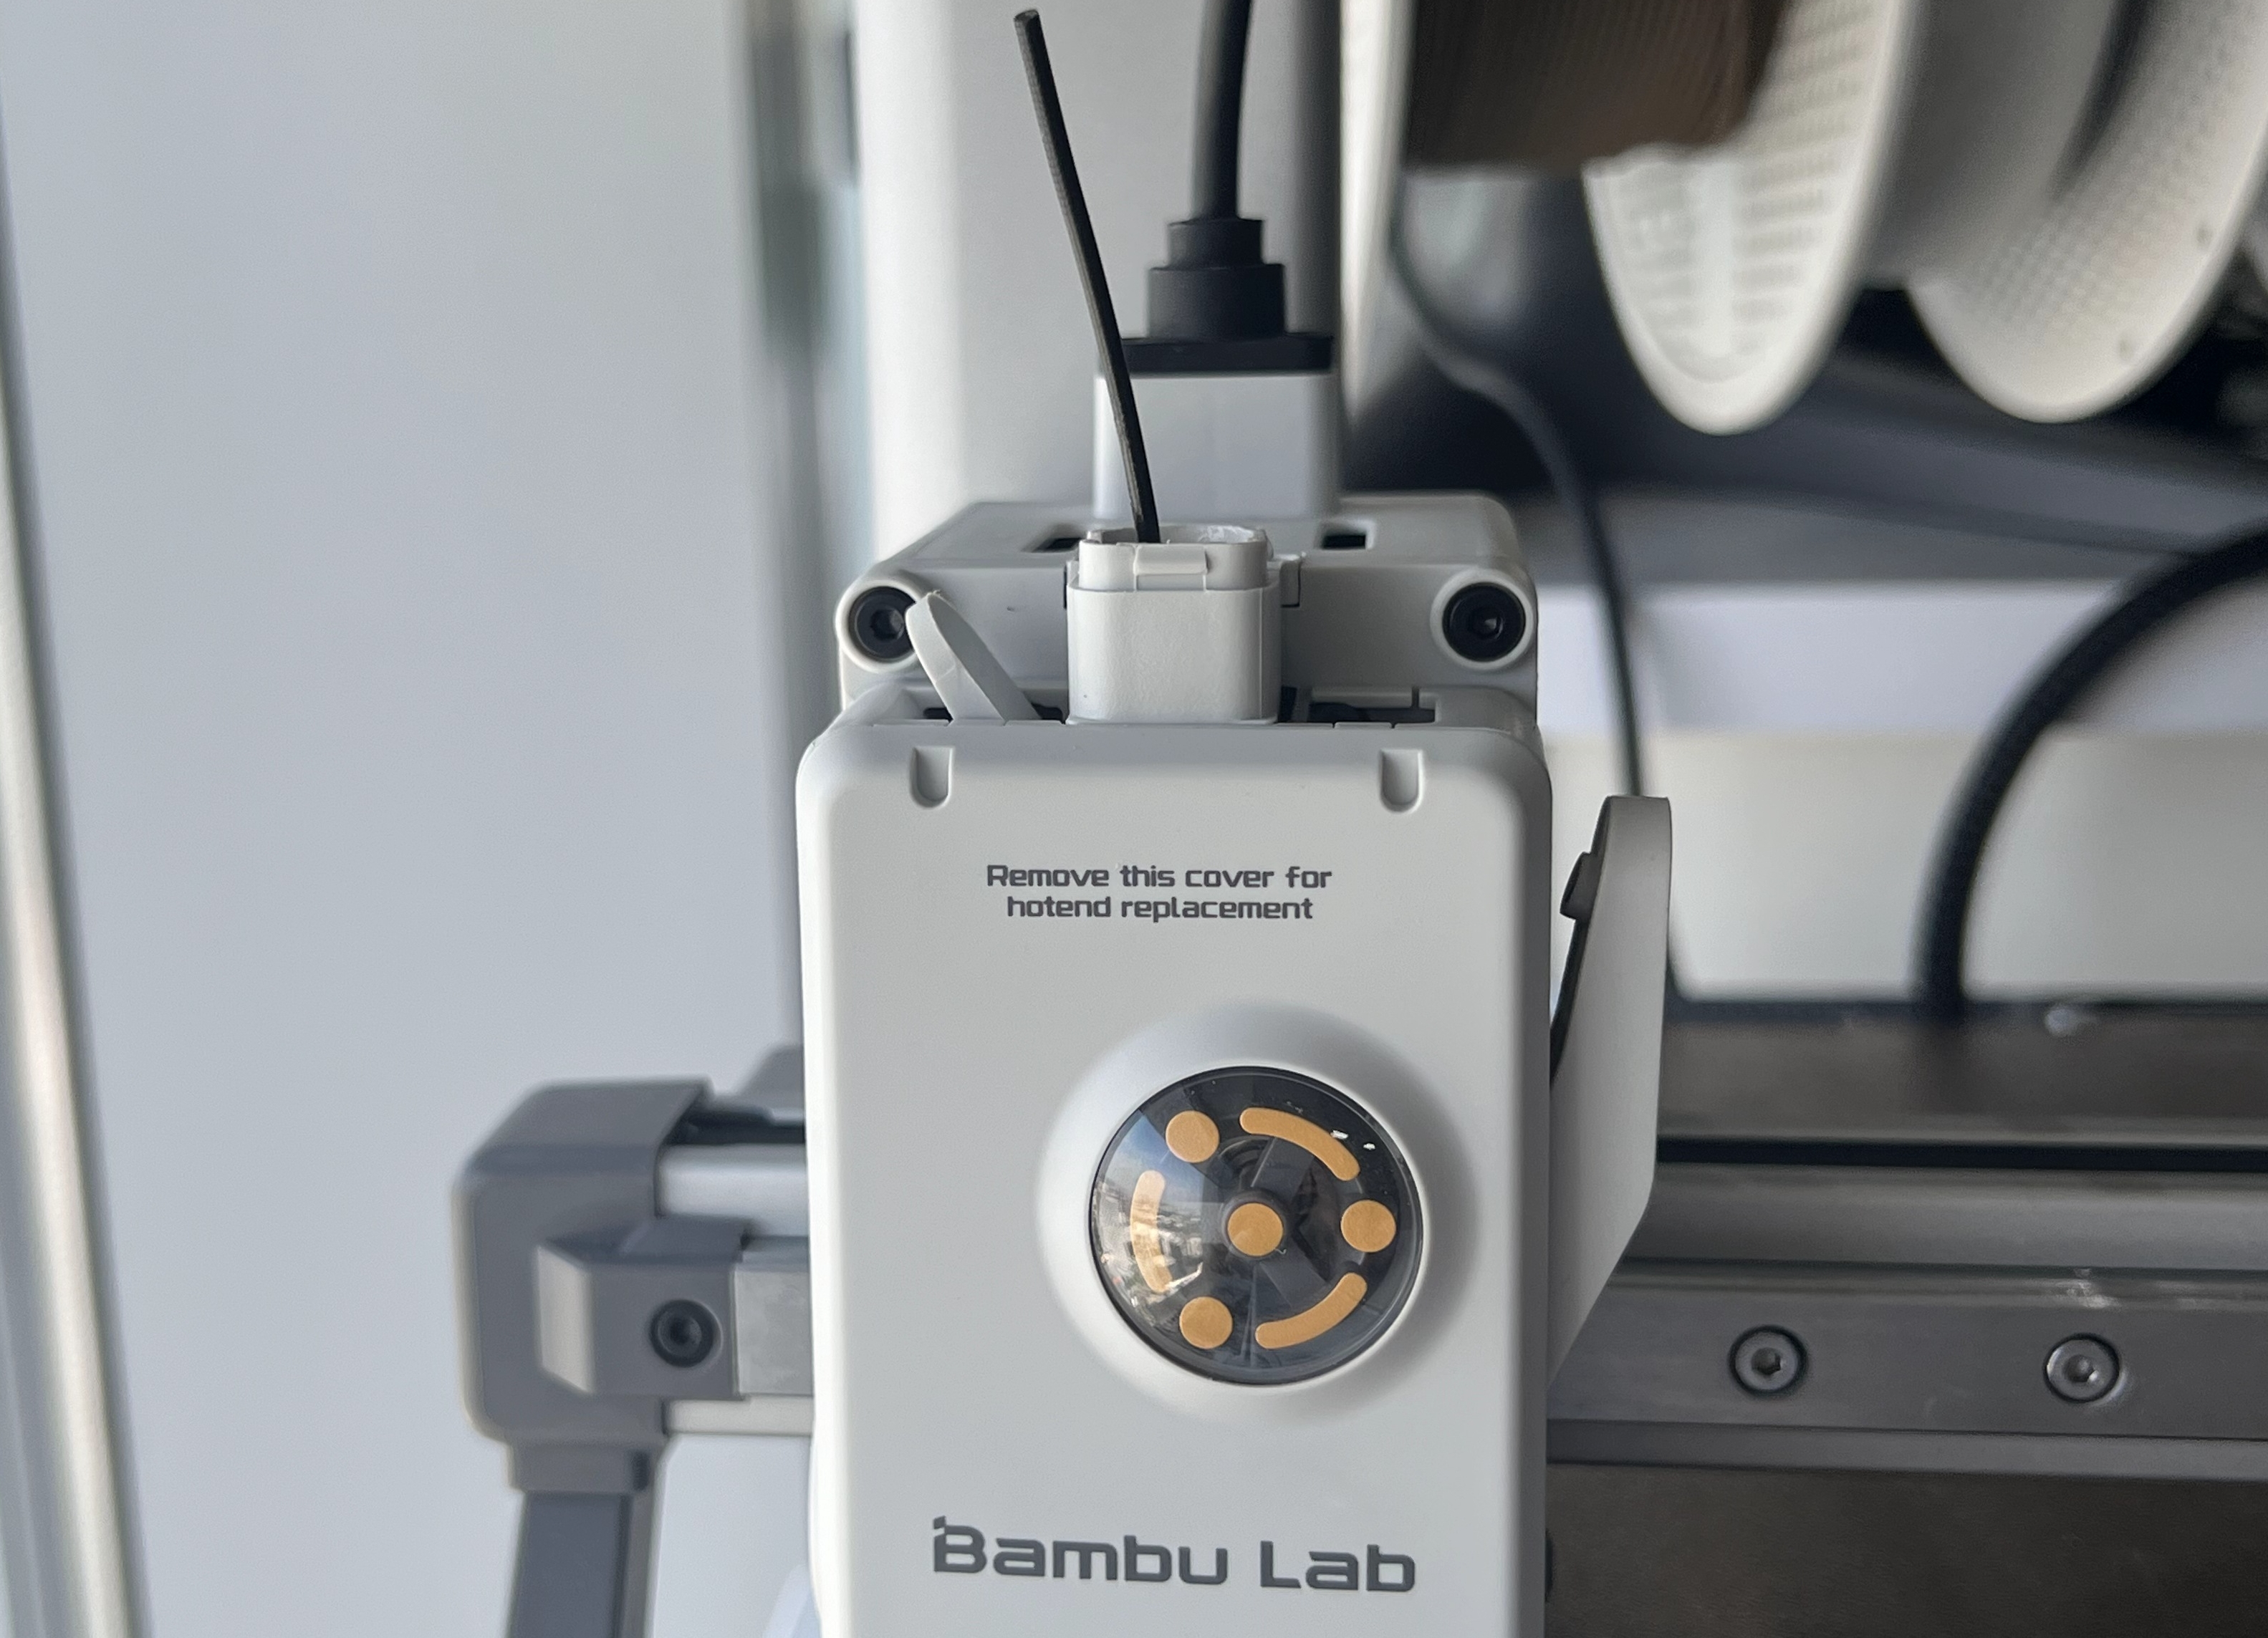
- After inserting a piece of filament, check if a small green dot appears on the extruder icon. When the filament sensor detects the filament, a small green dot will appear on the screen; once it is removed, the green dot will disappear.
 |
 |
¶ Assembly Guide
¶ Step 1. Assemble the filament hub
After cleaning is complete, we need to reassemble the Filament Hub.
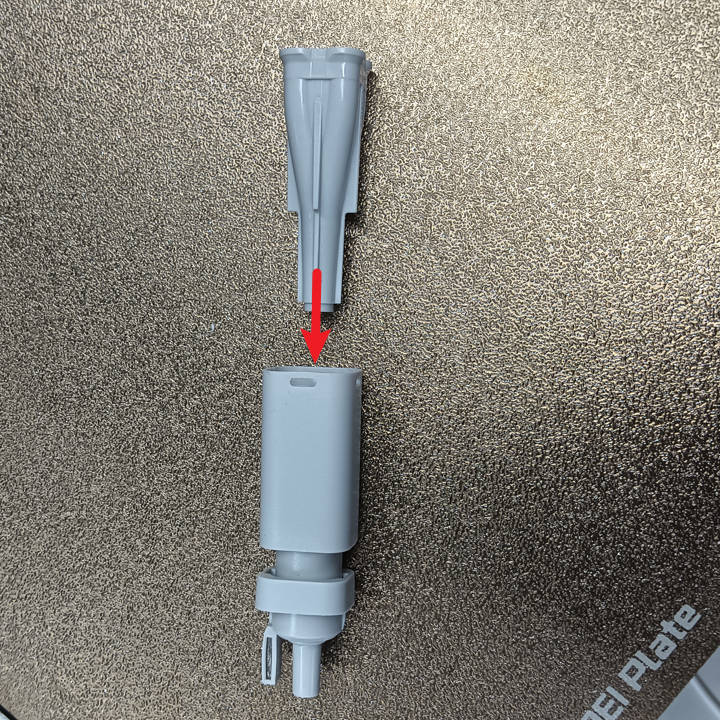
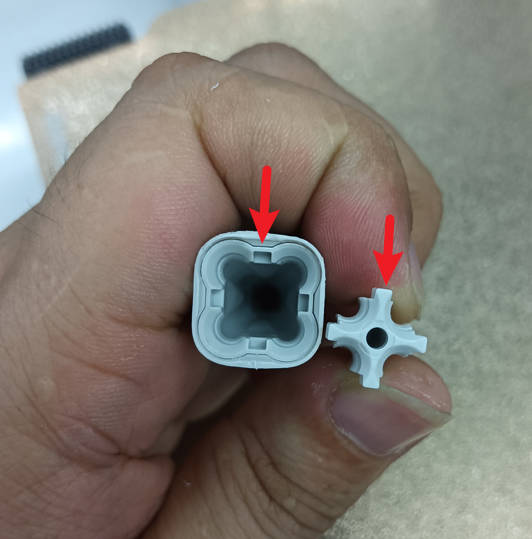
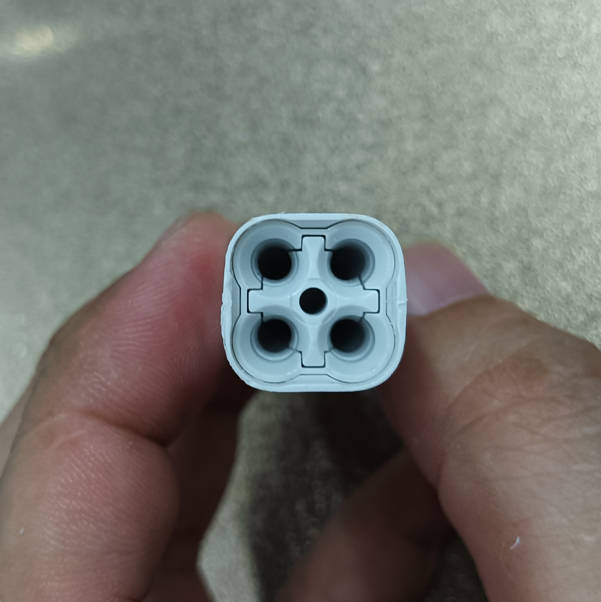
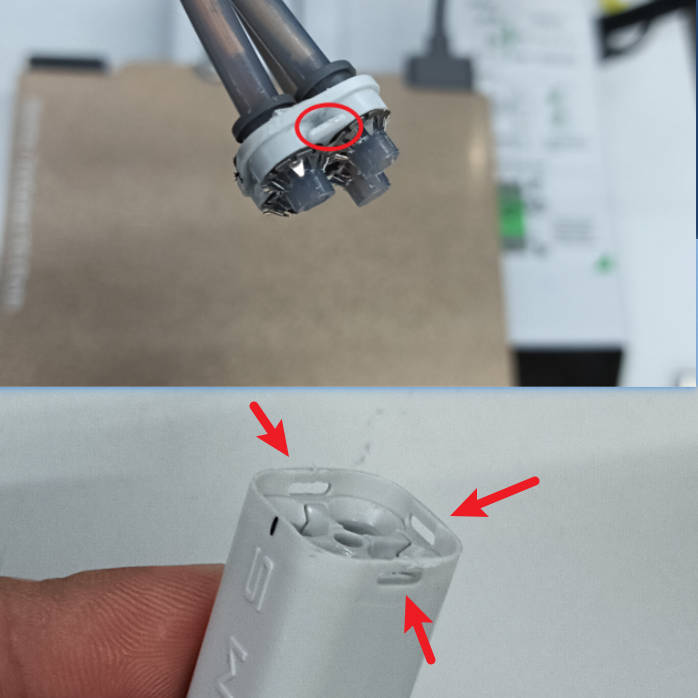
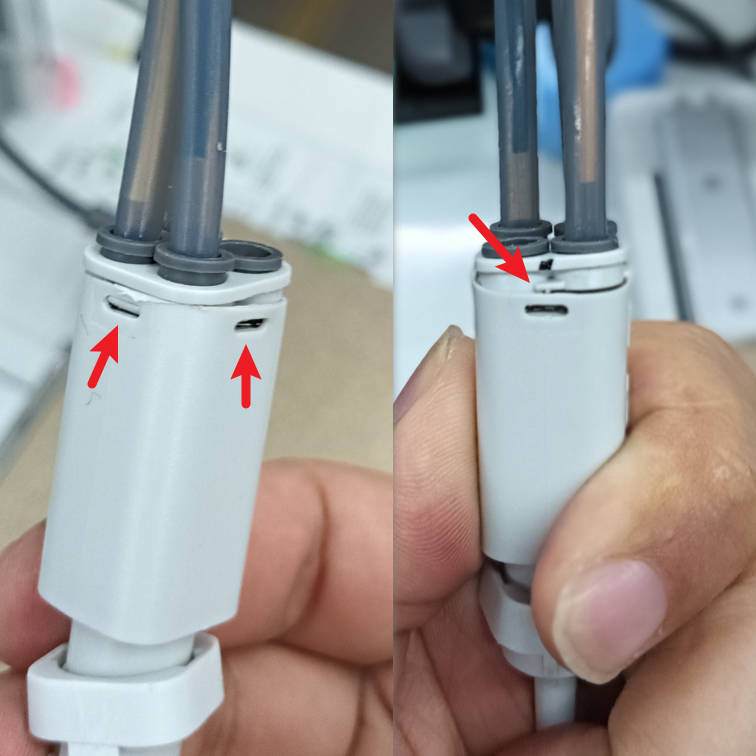
Refer to the pictures below, install the accessories into the Filament Hub one by one, and then align the three longer buckles at the inlet cover with the left side, the right side, and the rear side of the filament hub's body, press and install them in place to lock them.
If the spring piece comes out, please reinstall it according to the position shown in the last picture.
 |
 |
 |
 |
 |
 |
¶ Step 2. Install the filament base
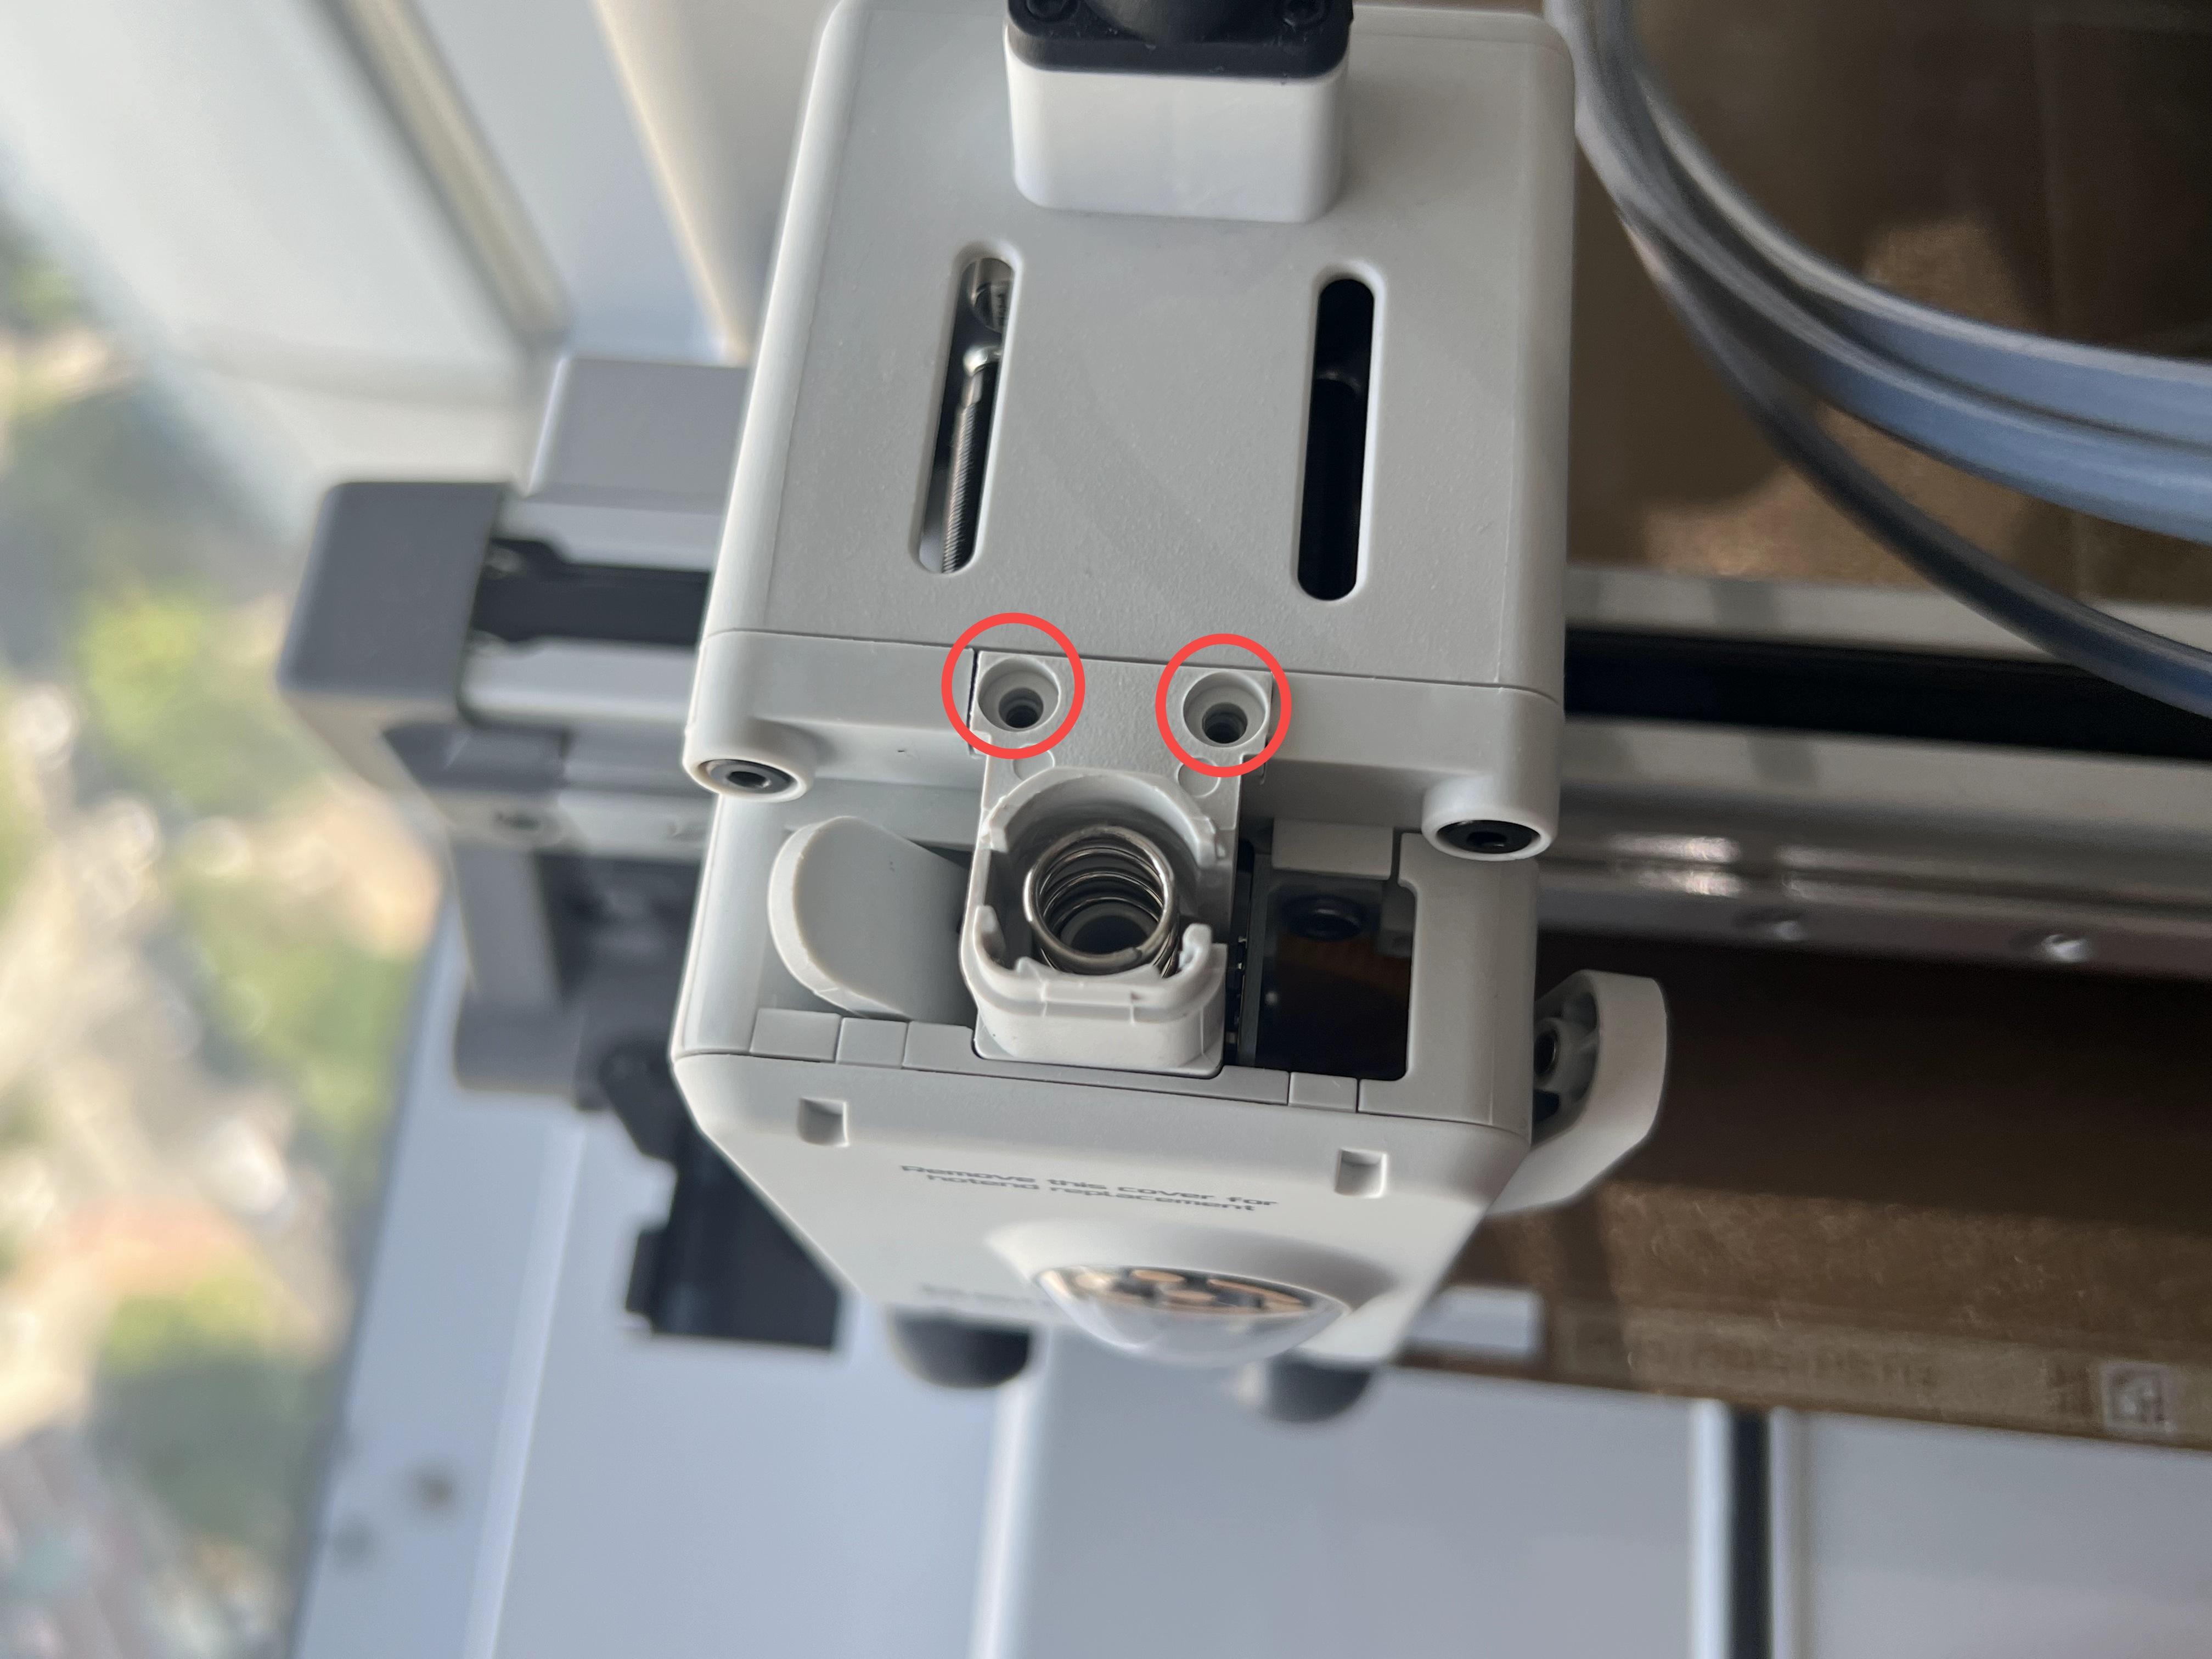
Put the filament base back and install the 2 screws on the top of the base with an H2.0 Allen key.
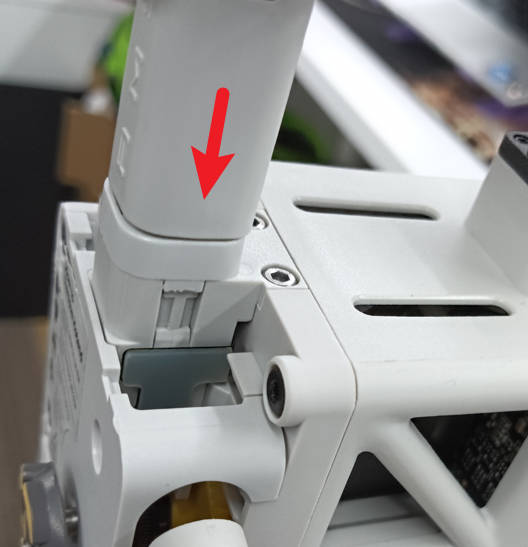
¶ Step 3. Install the filament hub
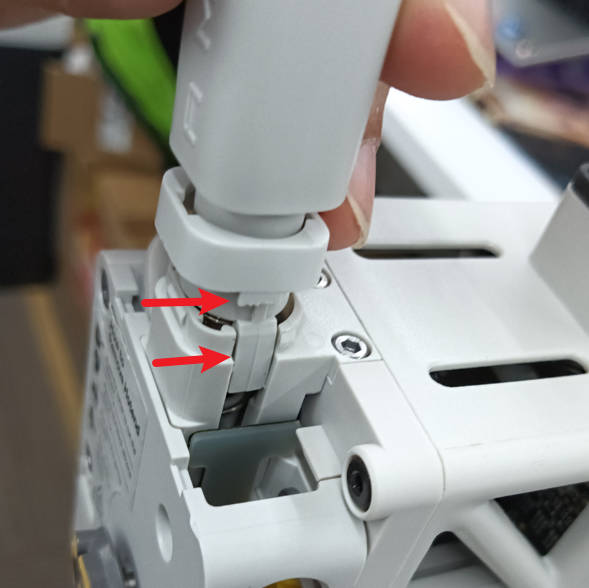
Install the Filament Hub onto the printer. Align the mounting buckles as shown in the figure below, then press down on the bottom bracket body to lock the Filament Hub.
 |
 |
¶ End Notes
We hope that the detailed guide we shared with you was helpful and informative.
We want to ensure that you can perform it safely and effectively. If you have any concerns or questions regarding the process described in this article, we encourage you to reach out to our friendly customer service team before starting the operation. Our team is always ready to help you and answer any questions you may have.
Click here to open a new ticket in our Support Page.
We will do our best to respond promptly and provide you with the assistance you need.