¶ When to use
After using the printer for a long time, filament debris and dust may remain inside the extruder, which can easily cause the extrusion gear to become stuck or even unable to rotate during operation. In order to ensure the normal printing of the printer, the extruder needs to be cleaned of foreign materials on time.
¶ Tools and materials needed
- Tweezers
- Brush
- H1.5 and 2.0 Allen key
- Air blower
¶ General cleaning
¶ Step 1-Remove the hotend assembly
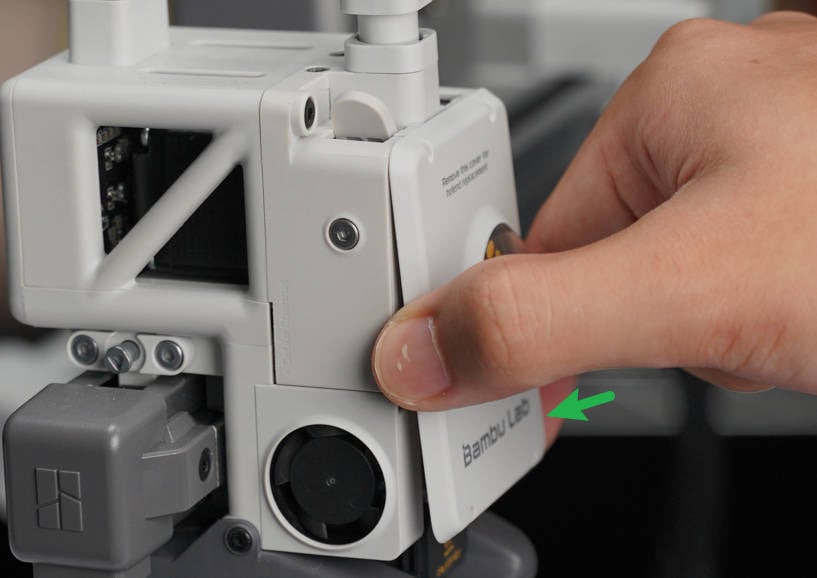
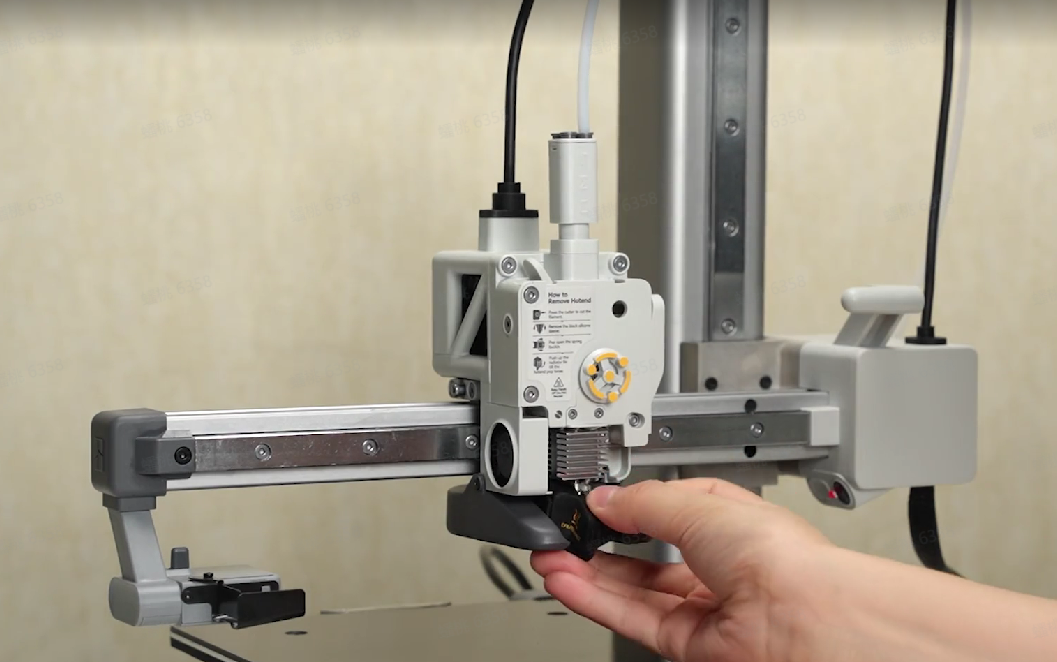
(If the filament is in loading status, please use the filament cutter to cut off it first) Press the Toolhead Cover from both sides to unlock and remove the cover. Pull the protrusion on the side of the Silicone Sock for Hotend with your hands, and remove the Silicone Sock for Hotend .
 |
 |
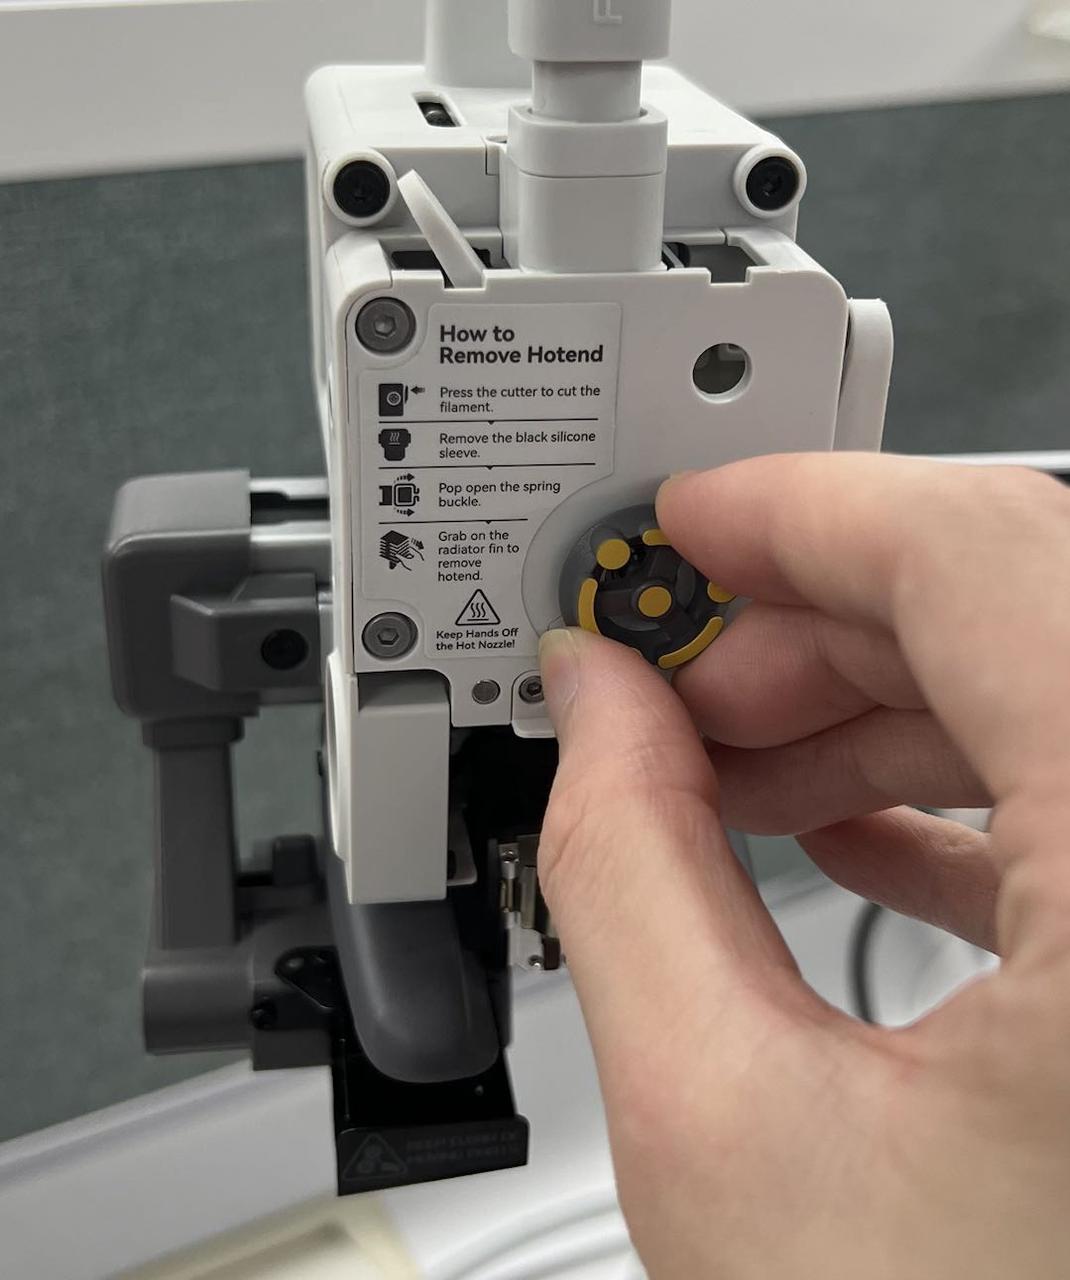
Remove the rotating wheel. Take off the pressure block by using a H1.5 Allen key wrench to unscrew two screws.
 |
 |
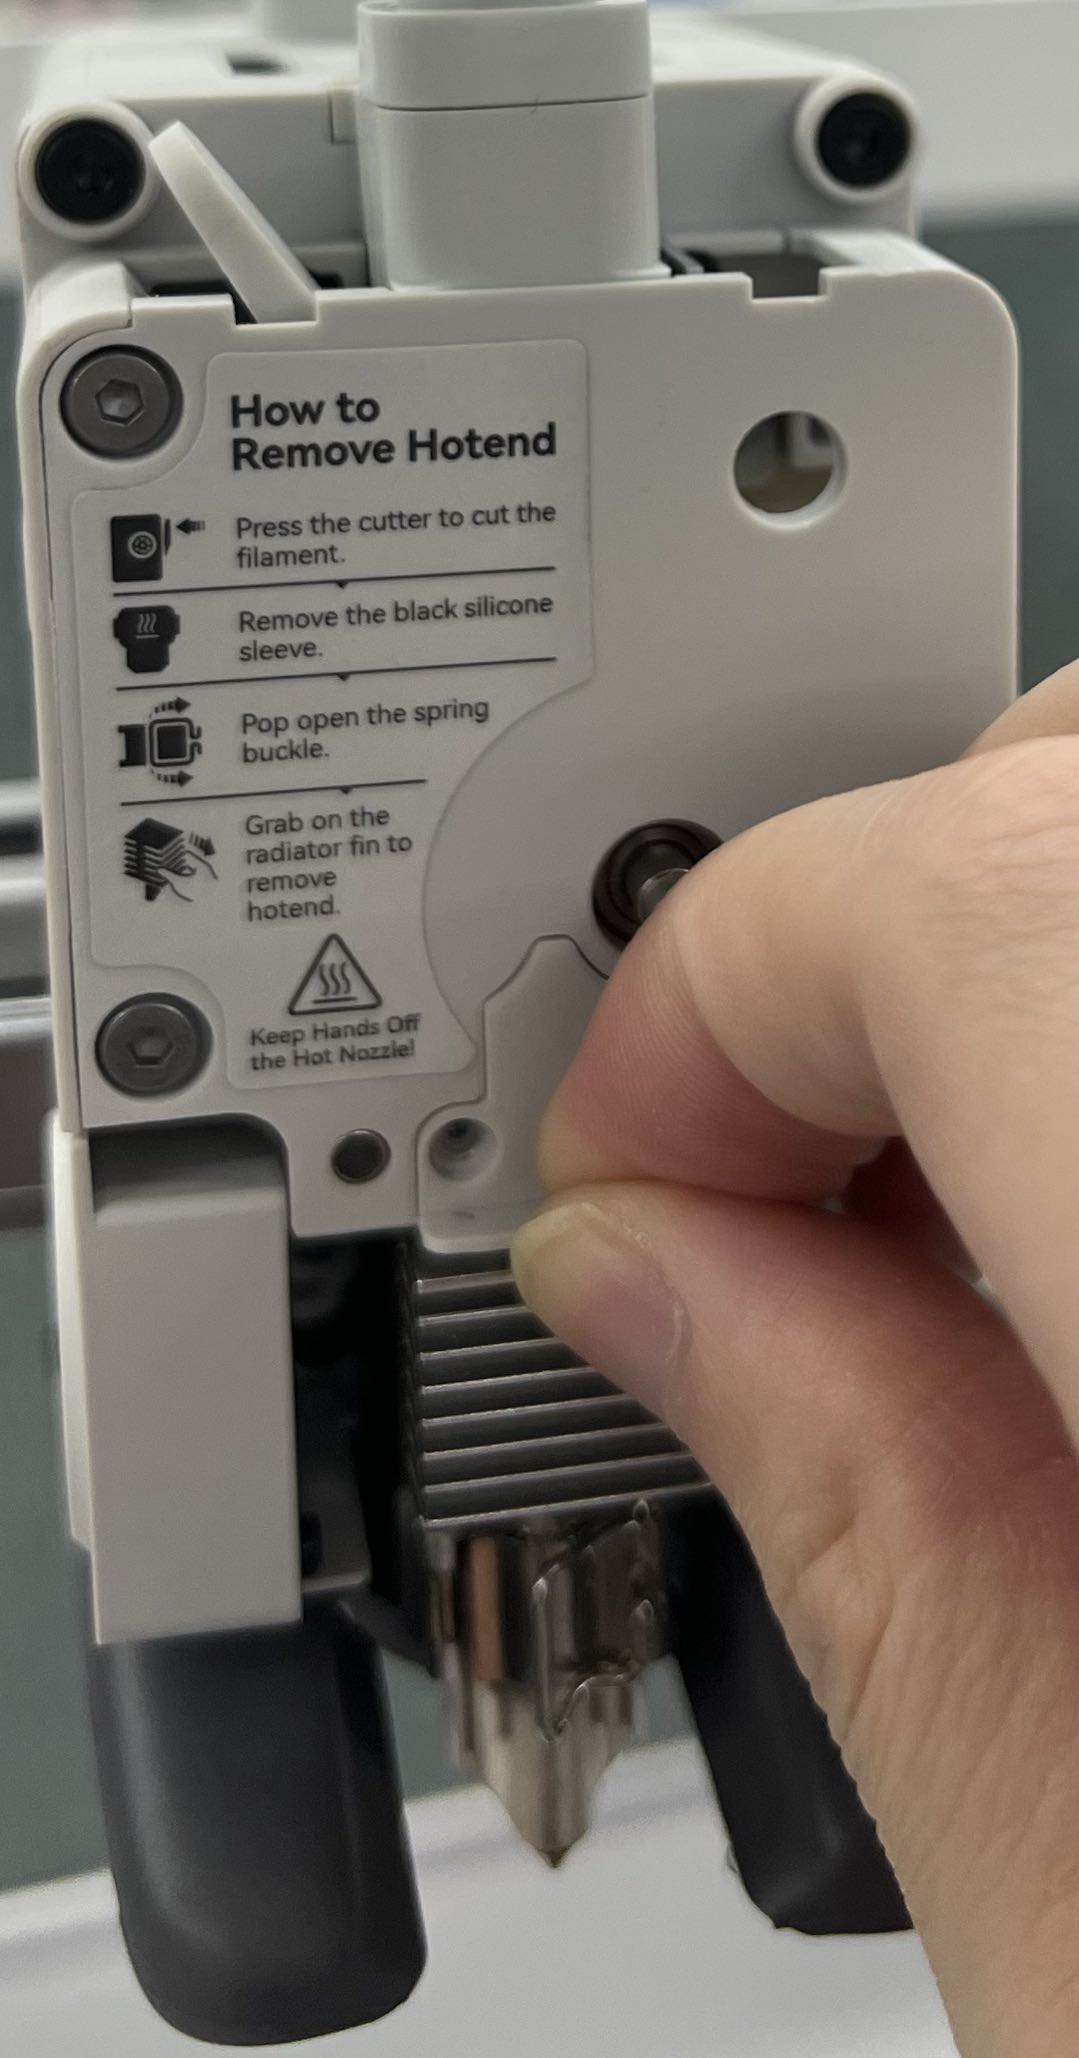 |
Release the hotend latch, then hold the heat sink with your hands and take out the hotend.
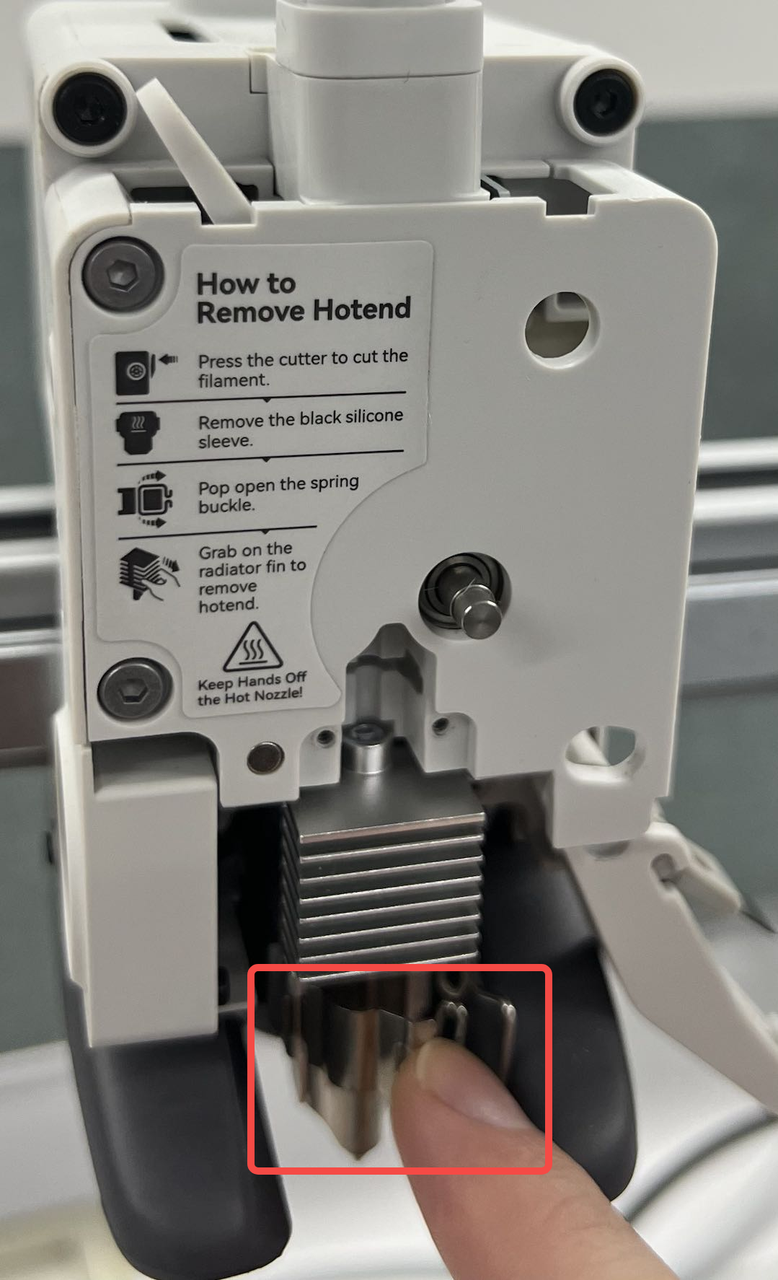 |
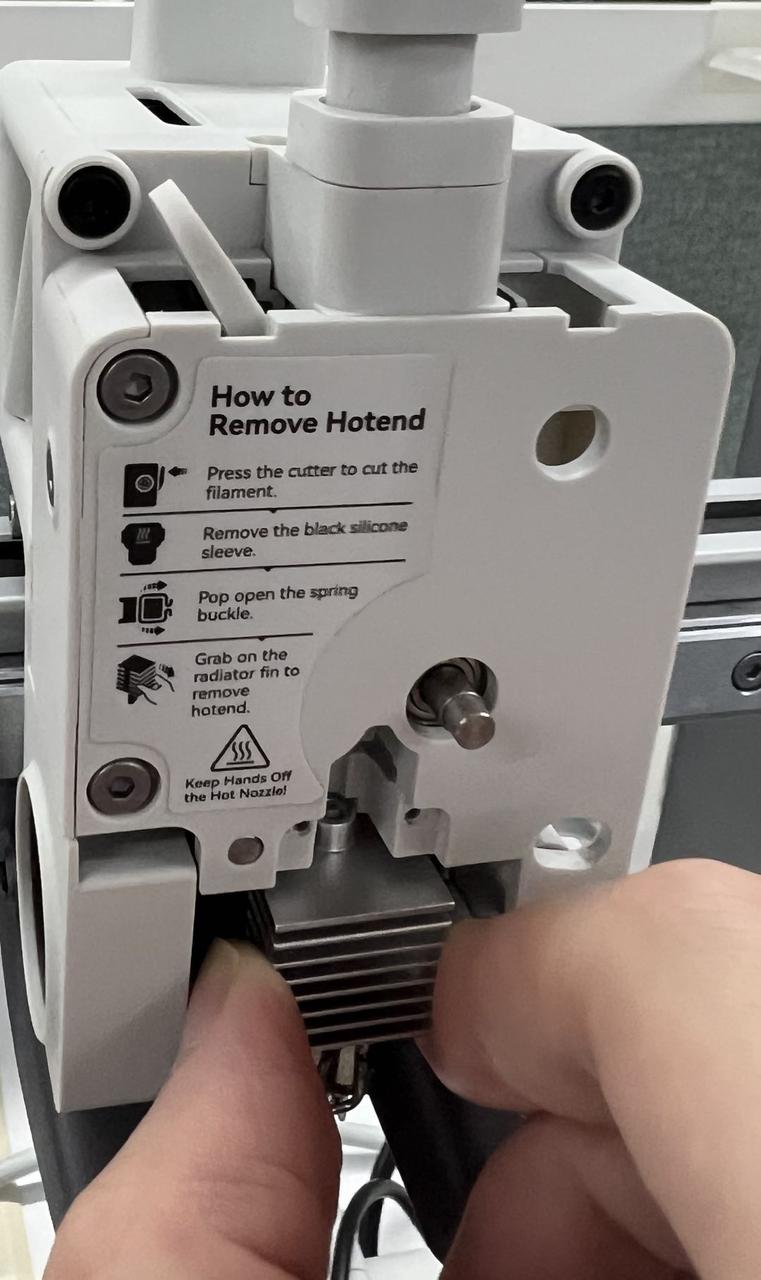 |
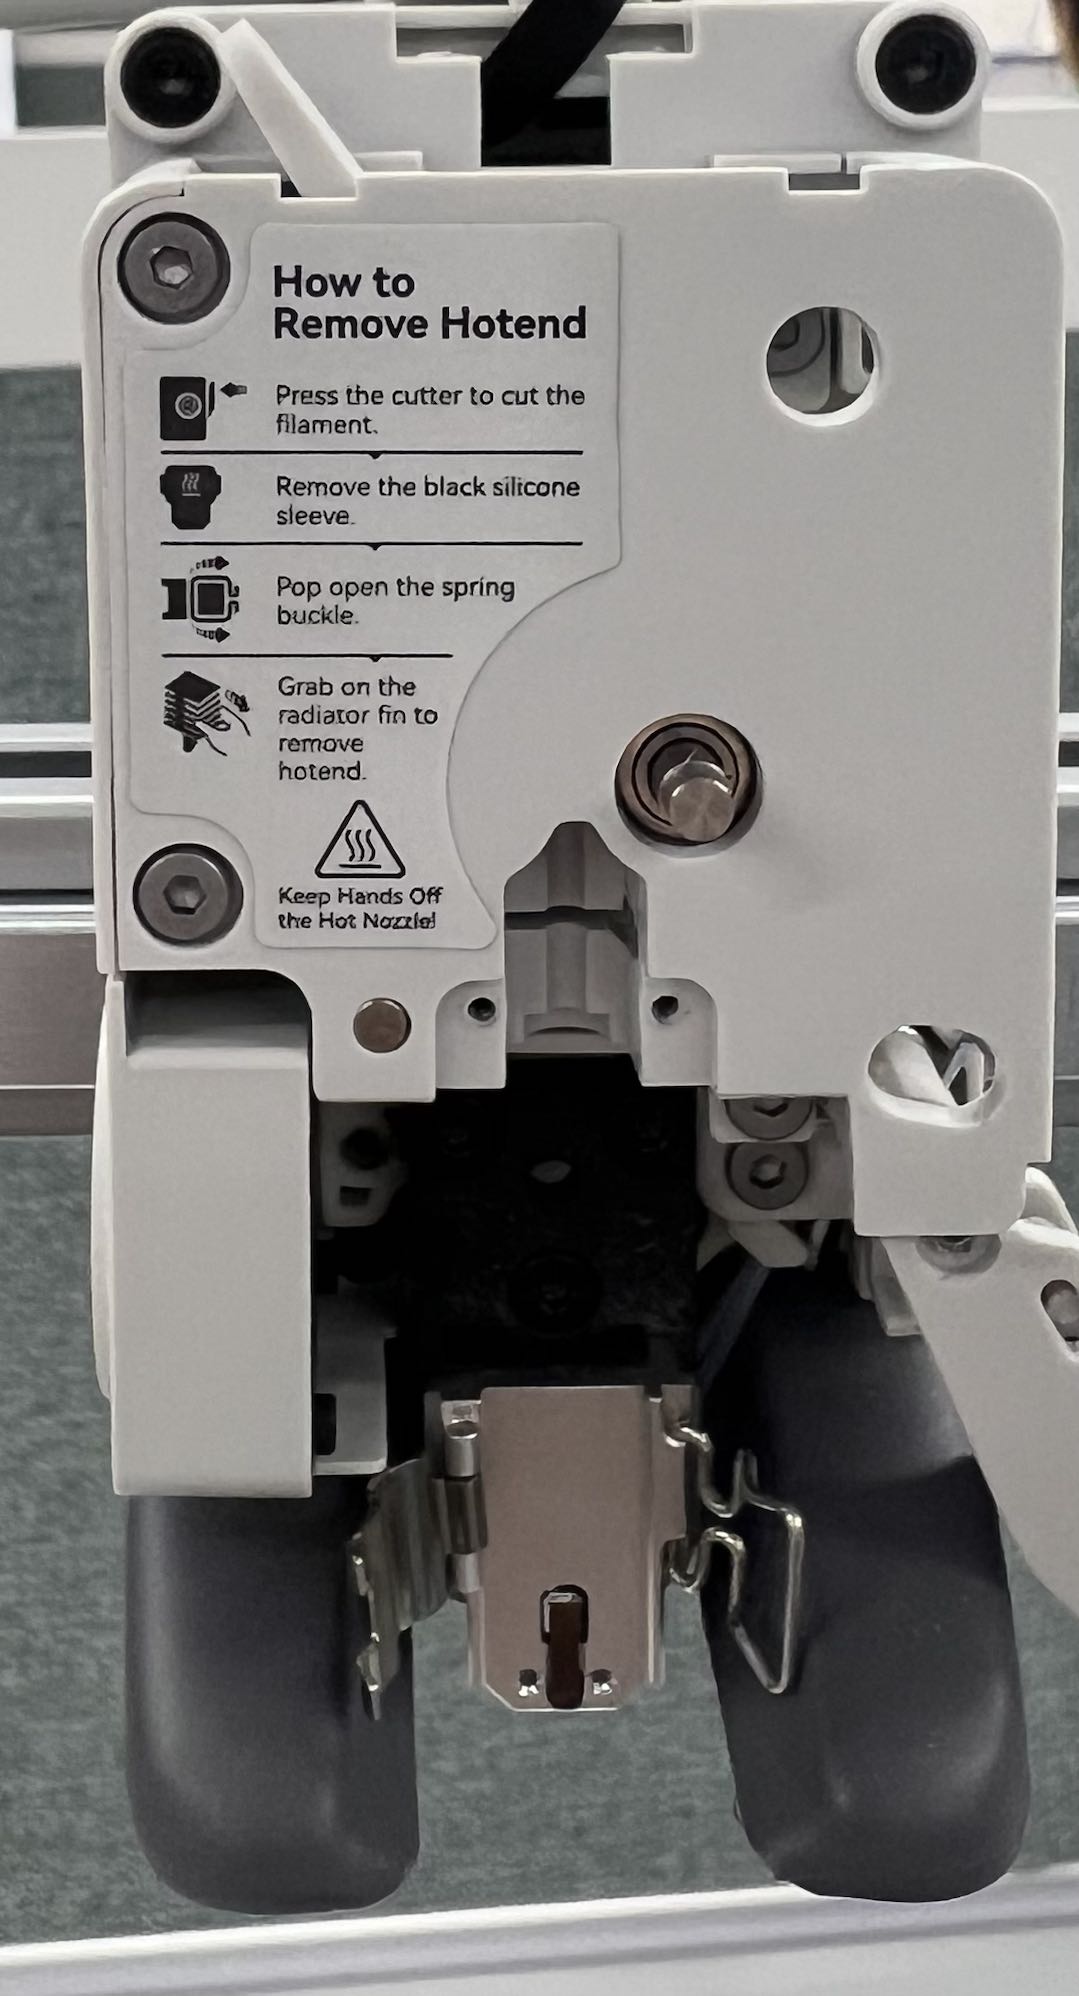 |
¶ Step 2-Loosen the filament cutter
Use a H2.0 Allen key wrench to unscrew one screw, release the filament cutter.
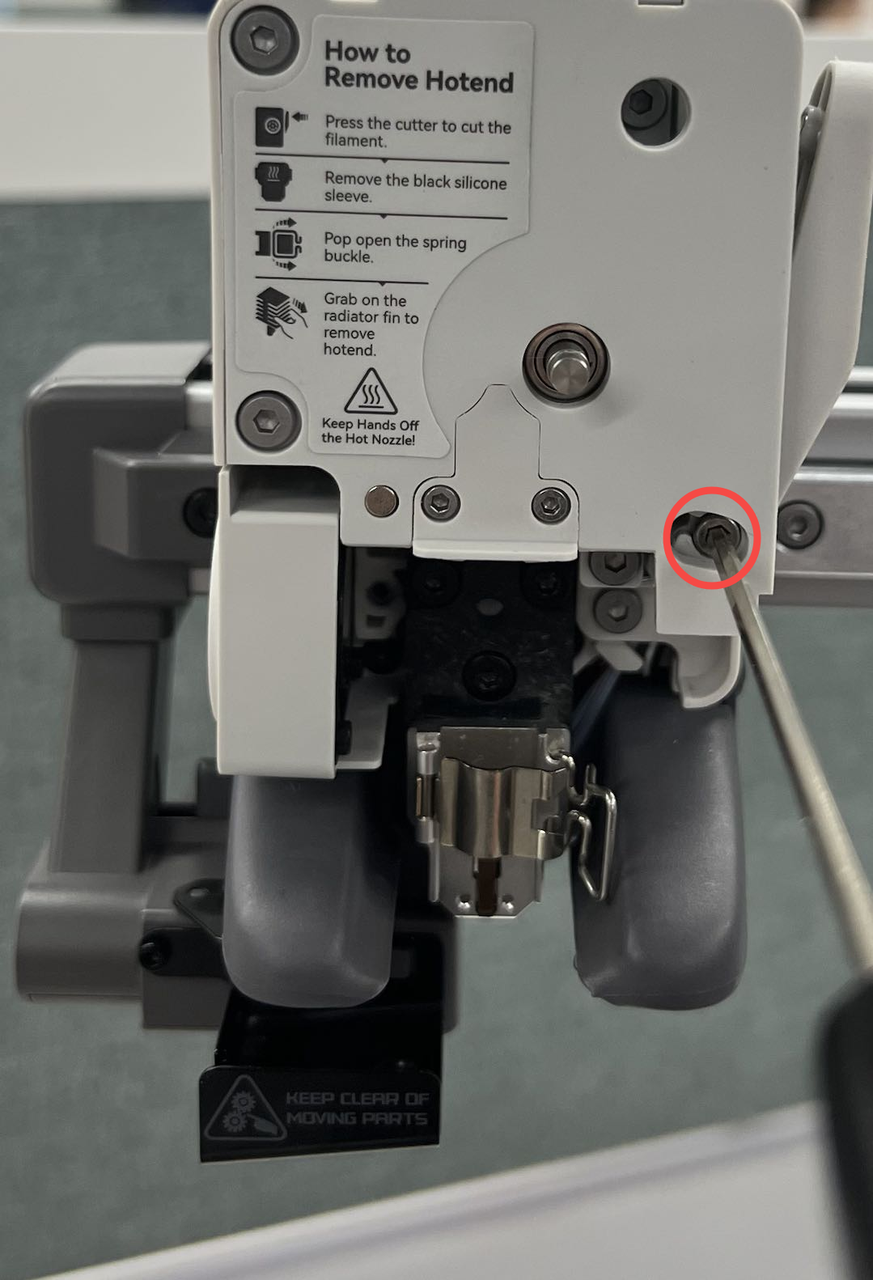 |
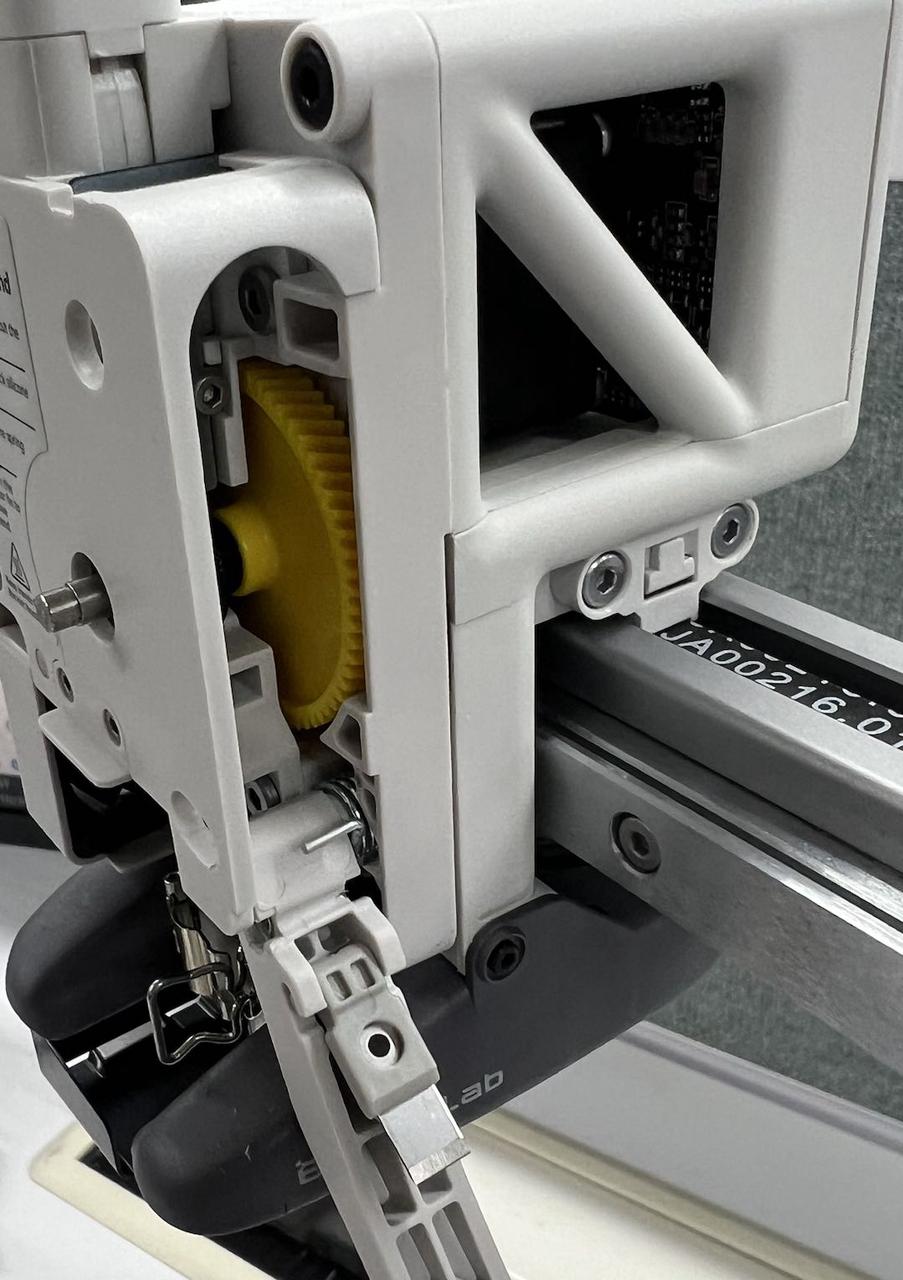 |
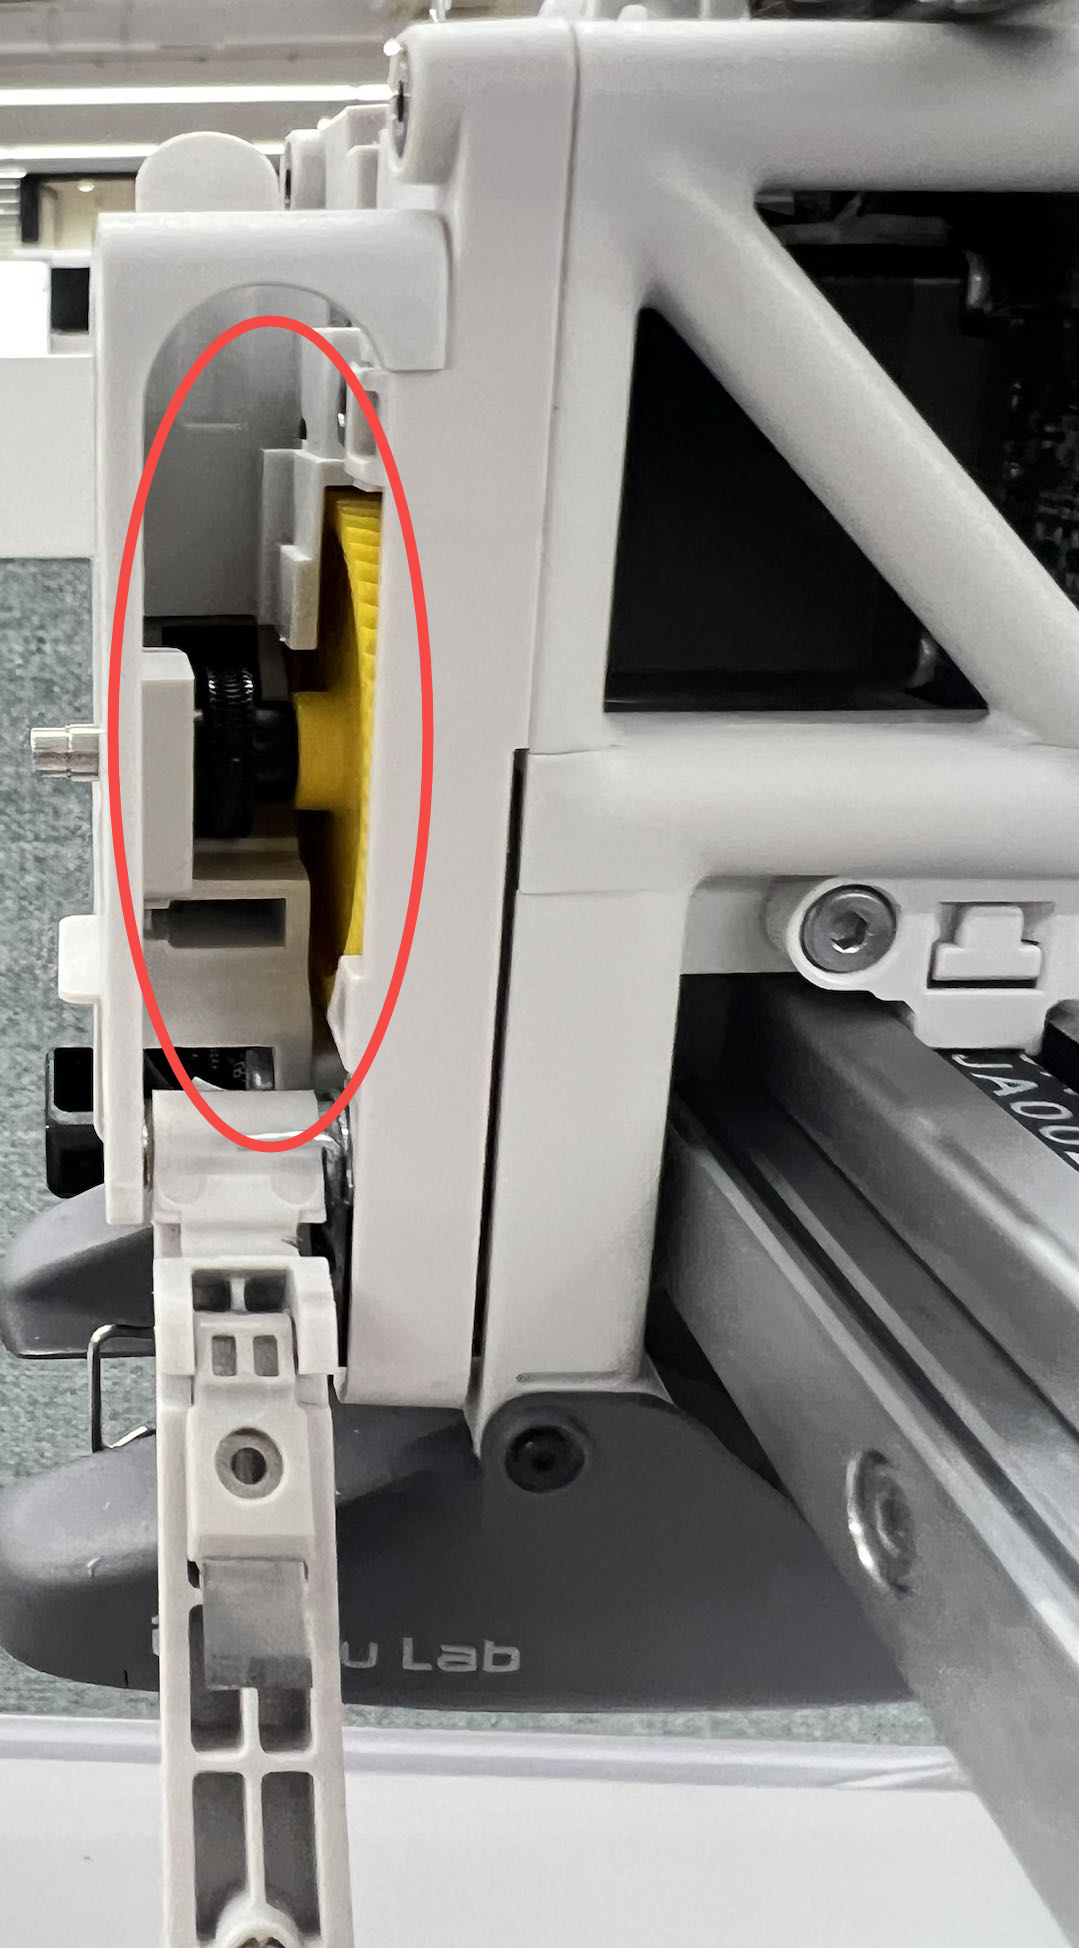
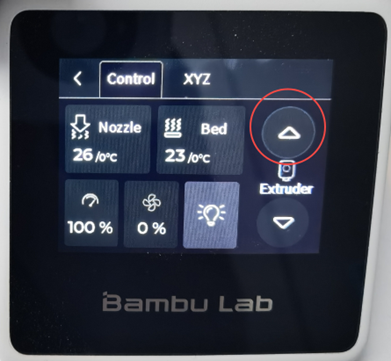
Use tweezers and a blower to clean the internal filament debris and residue from the indicated positions (manually rotate the yellow gear clockwise for cleaning while the power is off, or click the "retract" button on the screen while the power is on to rotate the extruder wheel to the specified angle for cleaning)
|
 |
 |
When cleaning the extruder according to the above steps fails to achieve satisfactory results, you can disassemble the extruder and remove the extrusion wheel assembly for cleaning.
¶ Deep cleaning
¶ Step 3-Remove the filament hub assembly
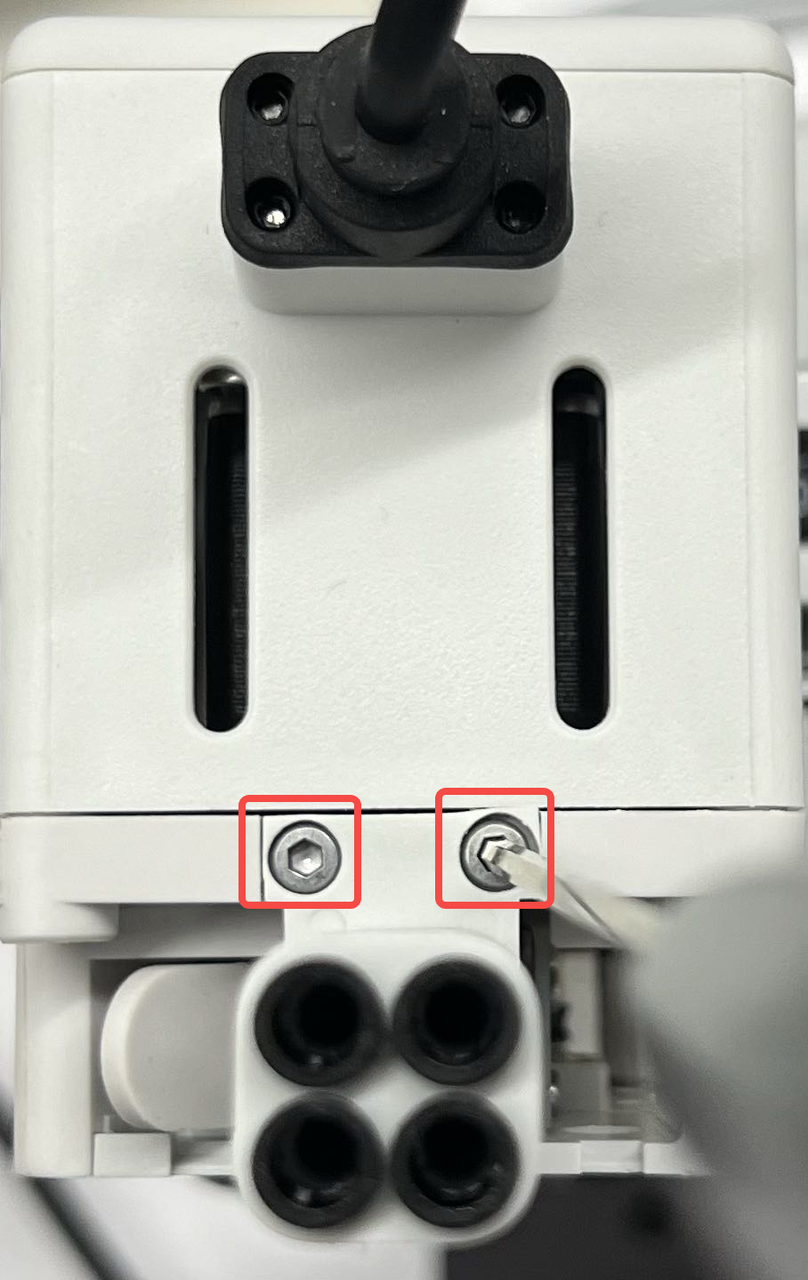
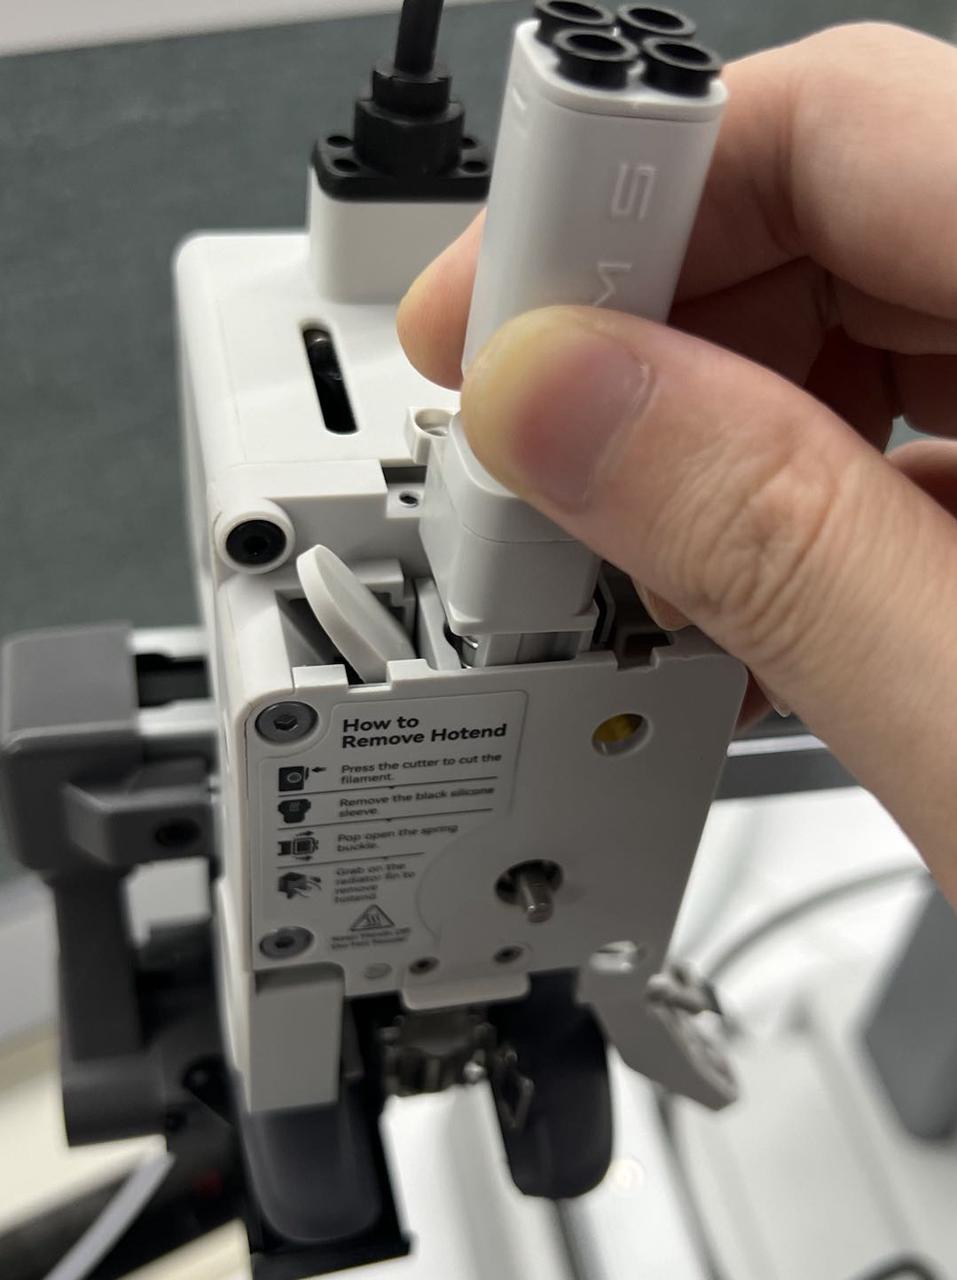
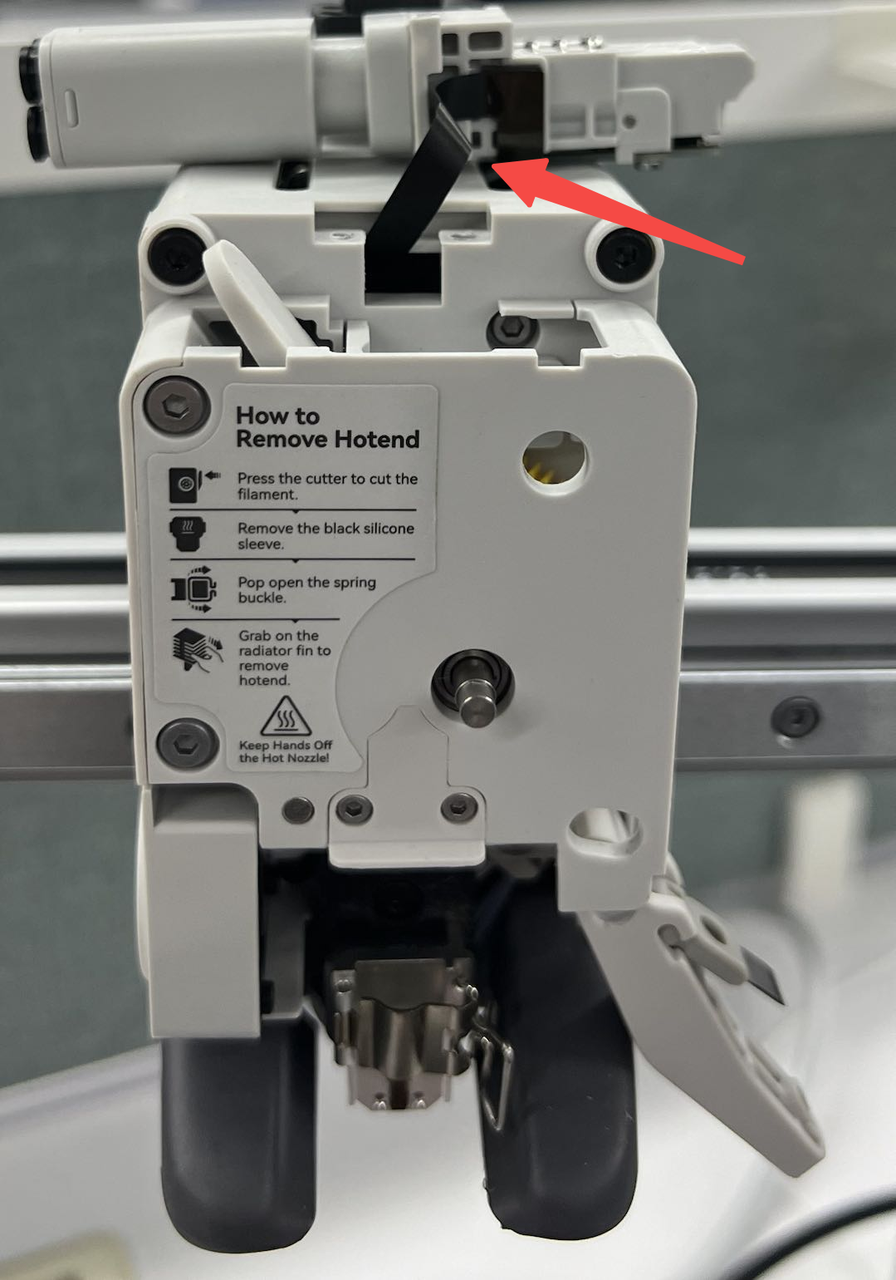
Use an H2.0 Allen key wrench to unscrew two screws and then take out the filament hub. Please be careful not to damage the black FPC cable. After removing the filament hub, you can place it on top of the tool head as shown in the picture.
 |
 |
 |
¶ Step 4-Remove the extruder front cover
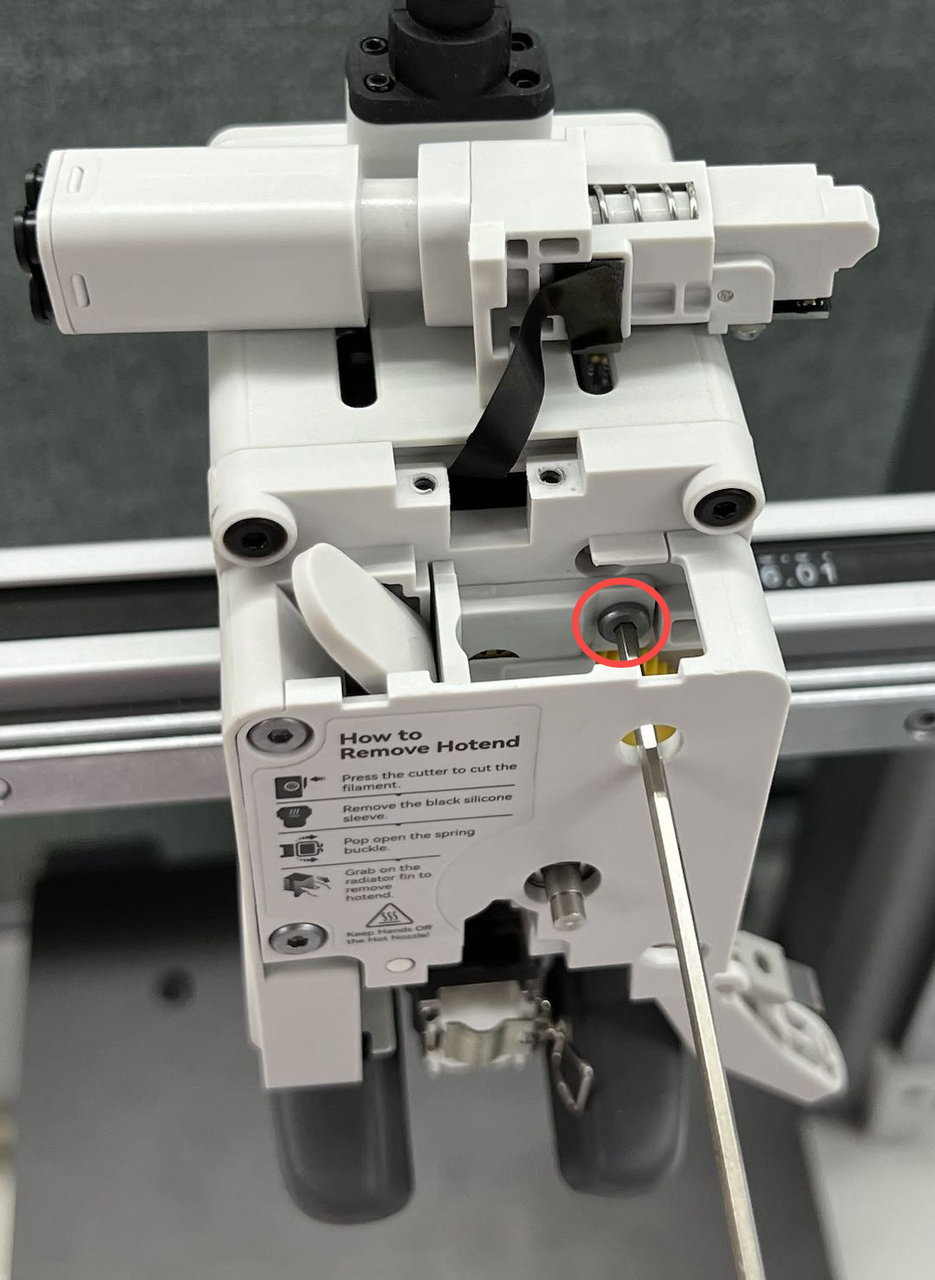
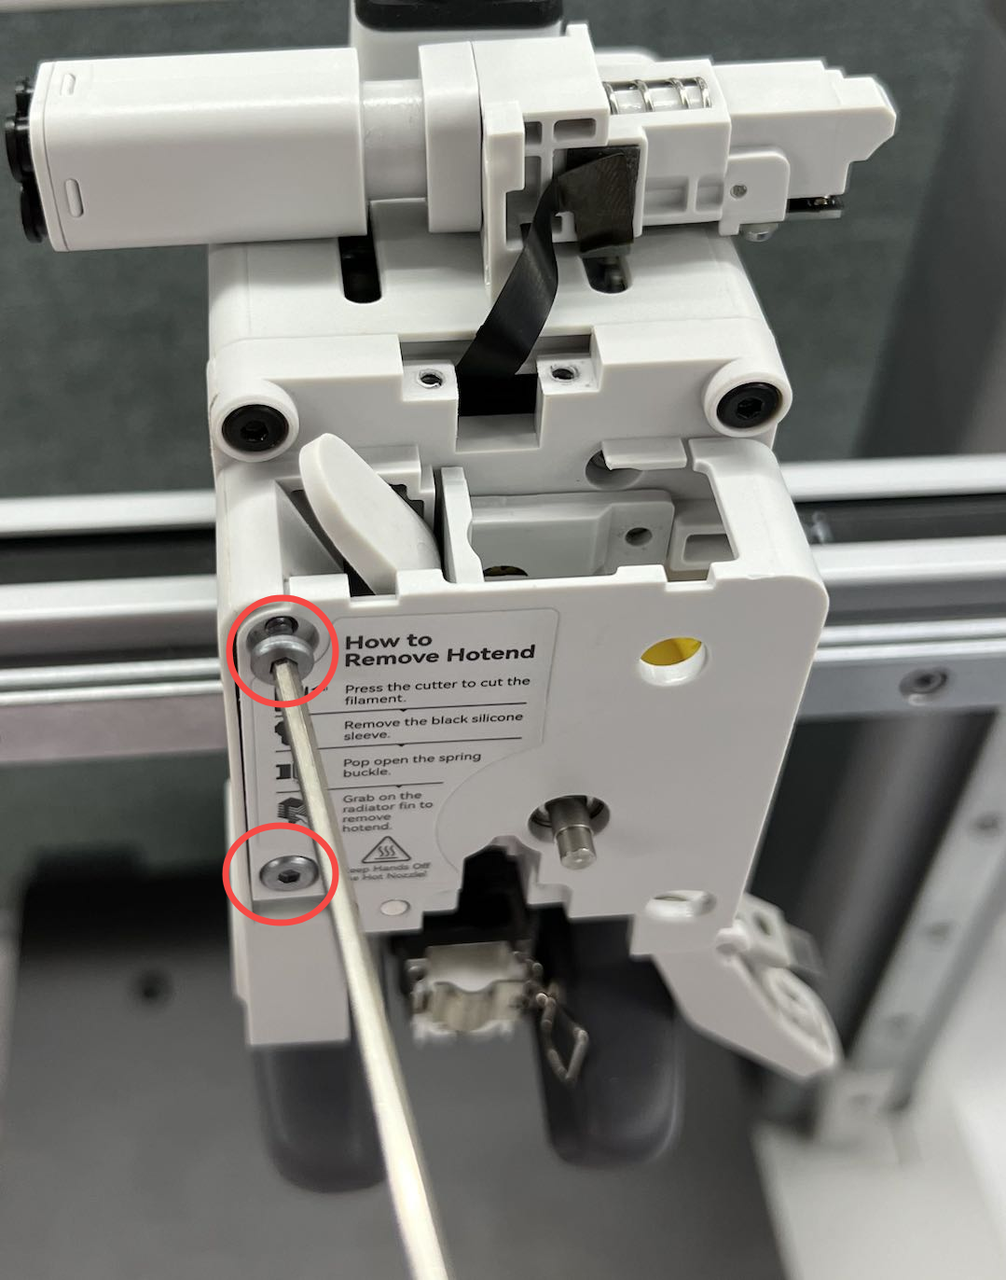
Use a H2.0 Allen key wrench to unscrew the 4 screws on the front cover of the extruder.
 |
 |
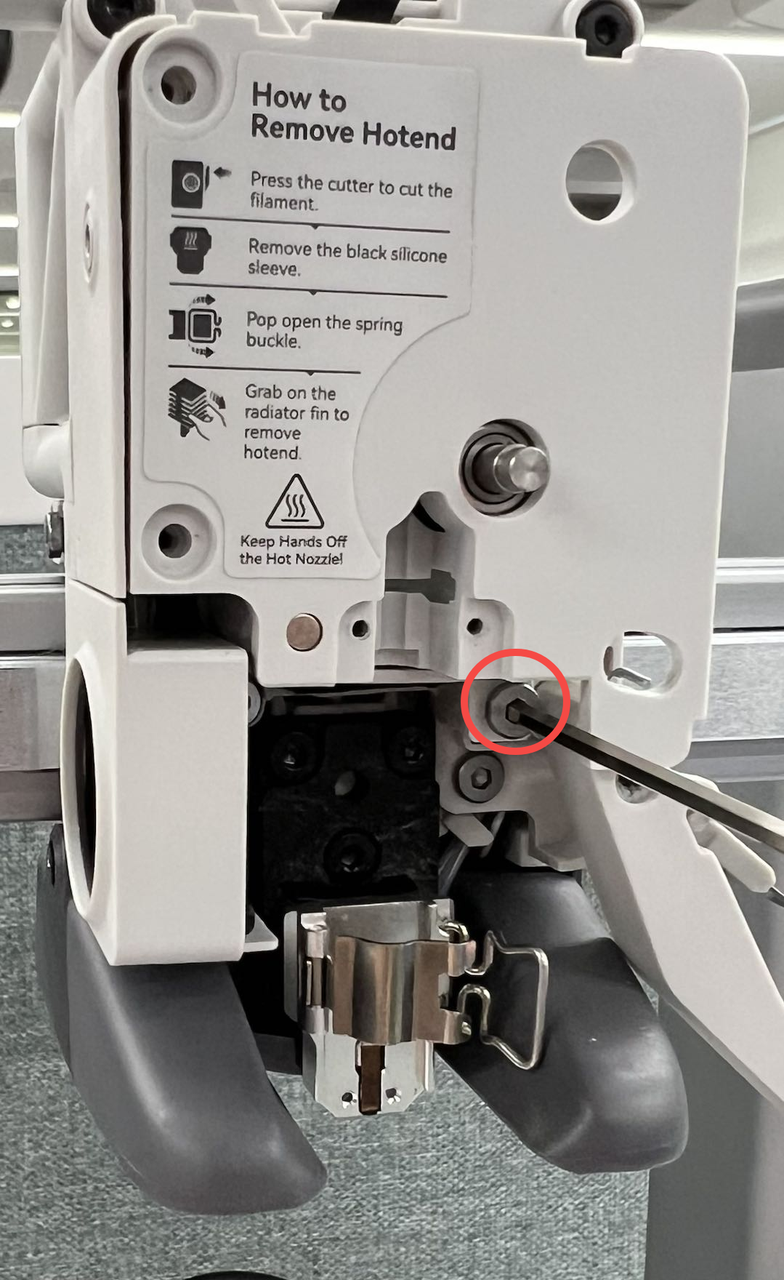 |
When removing the front cover, first loosen the screw on the side (only loosen it slightly). Then, hold the top of the bracket and remove the front cover of the extruder while holding the other side.
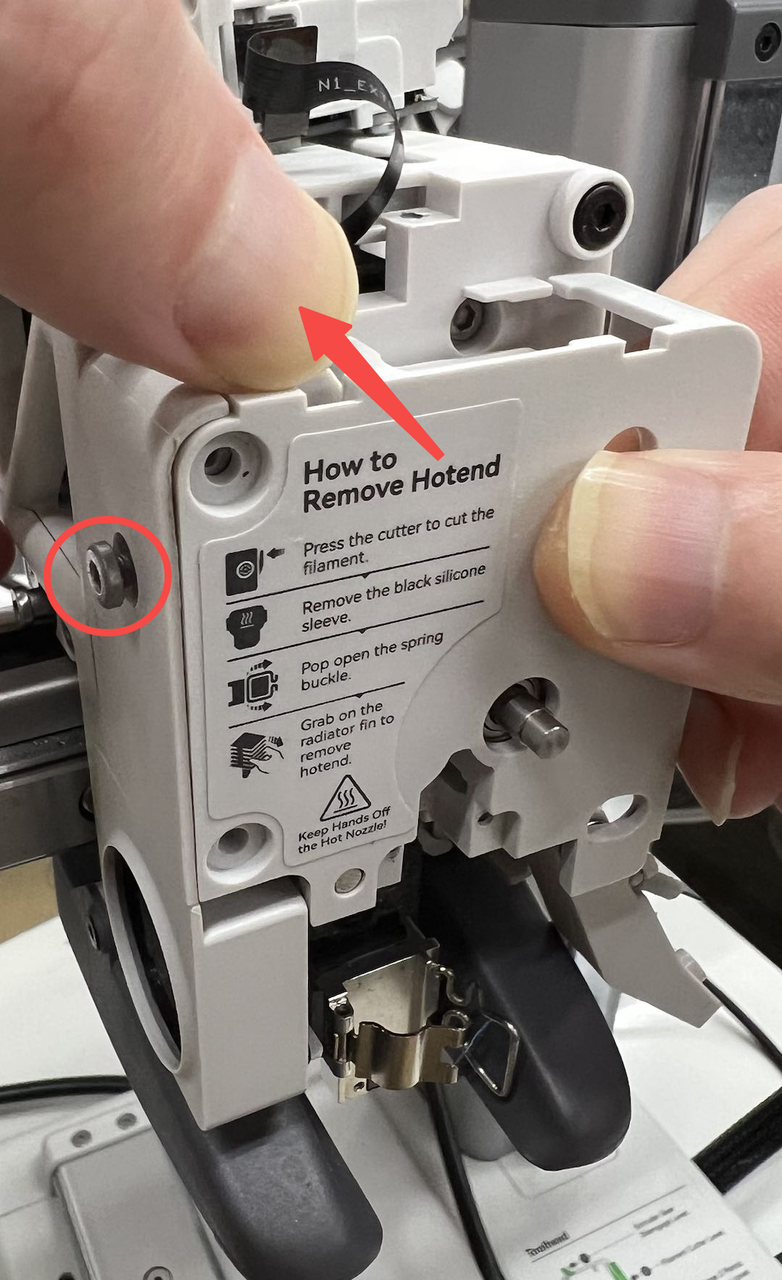 |
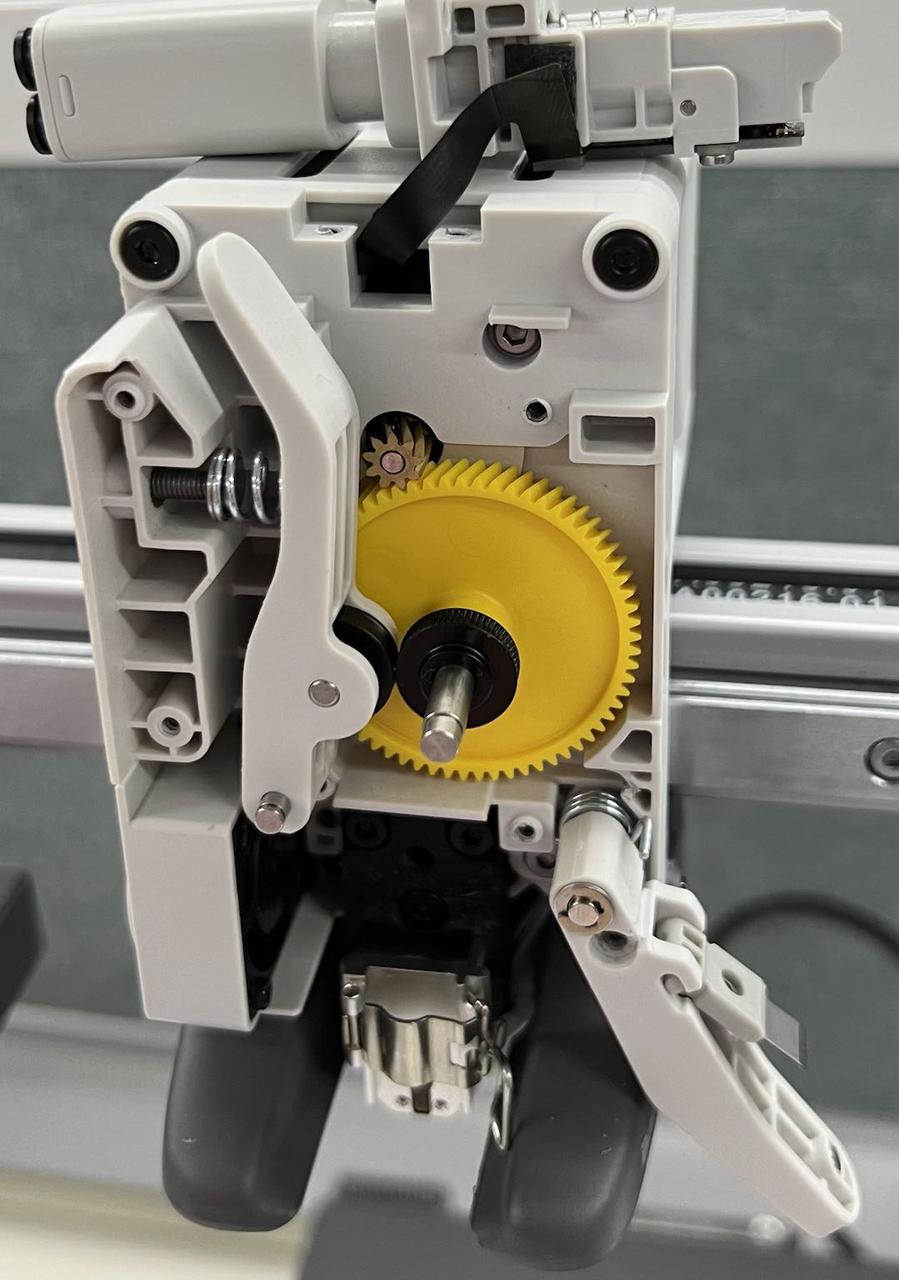 |
¶ Step 5-Remove the driven wheel bracket
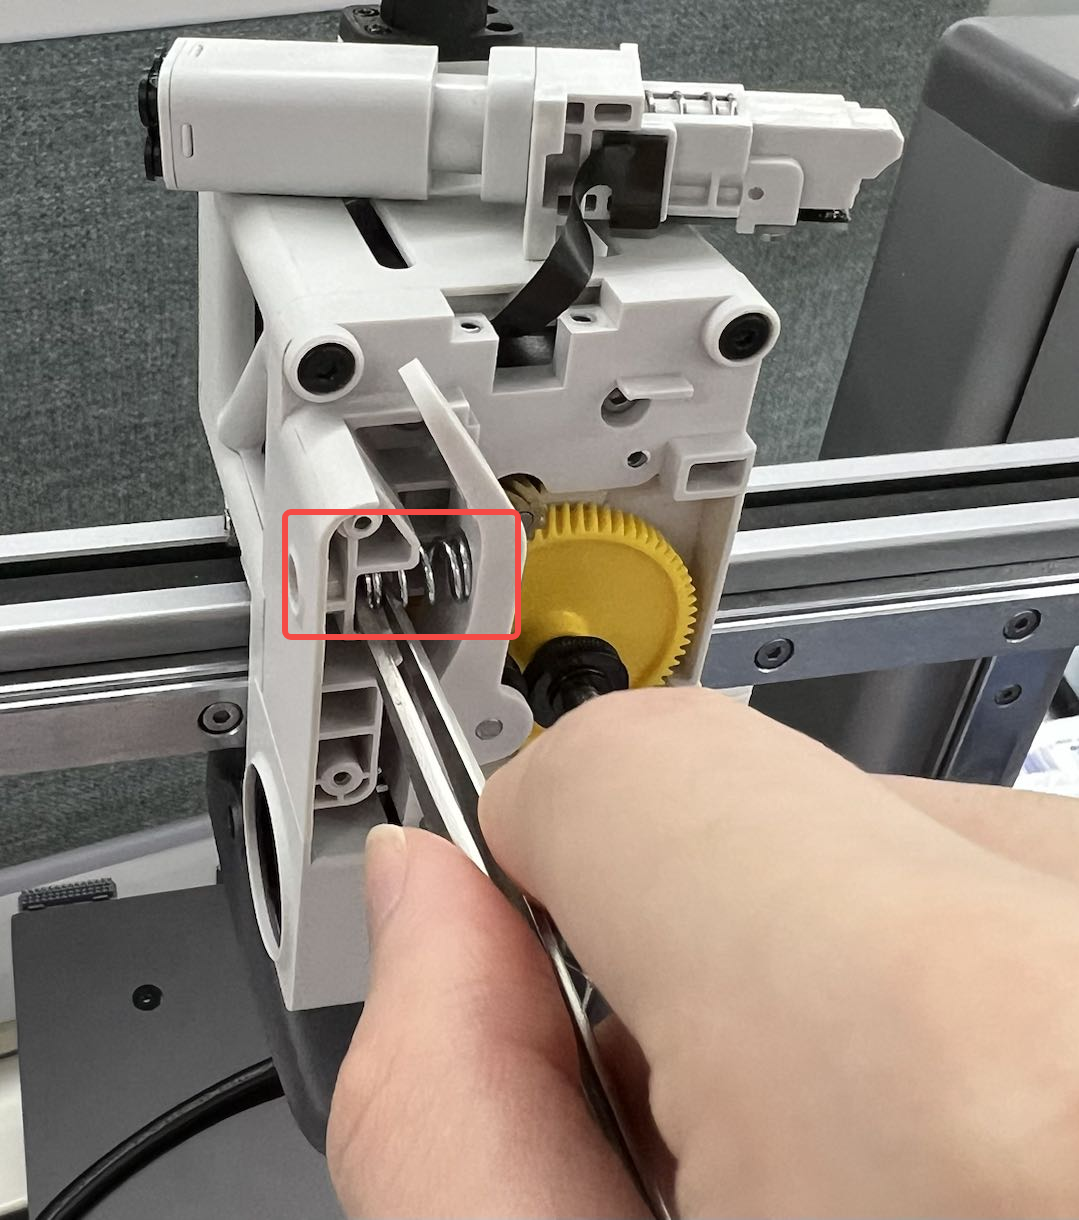
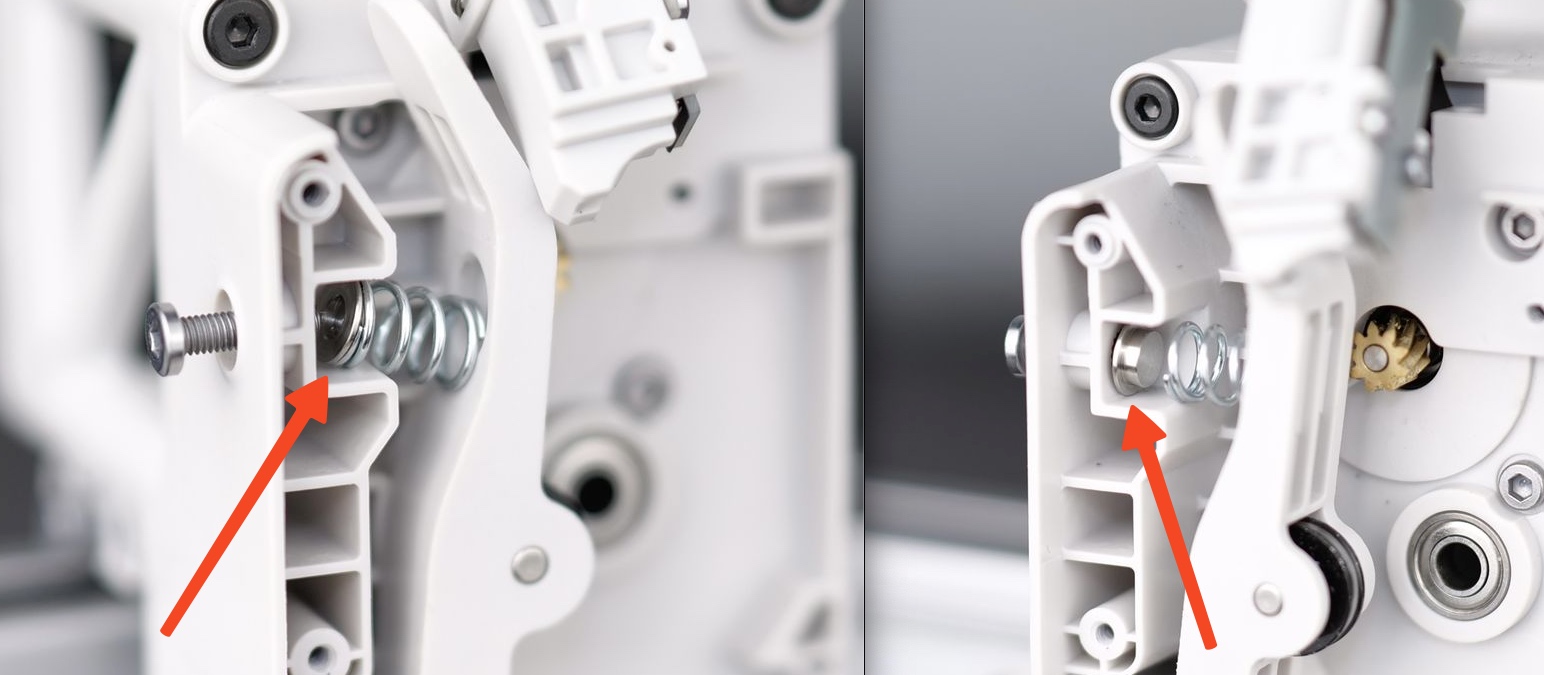
Use a H2.0 hex key wrench to unscrew the screw on the side and carefully take out the bracket. Please be cautious when handling it as the internal spring and end cap can easily fall off. Use tweezers to remove them carefully to prevent loss.
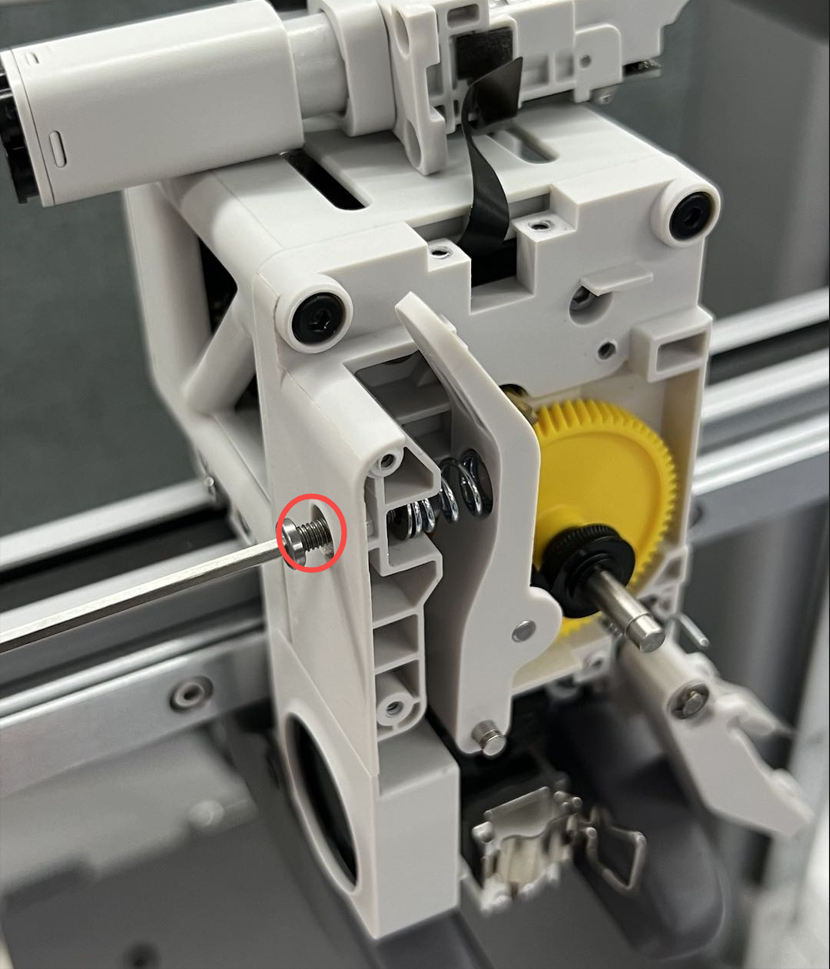 |
 |
Pay close attention not to lose this metallic cap, as it is important
¶ Step 6-Remove the extrusion gear
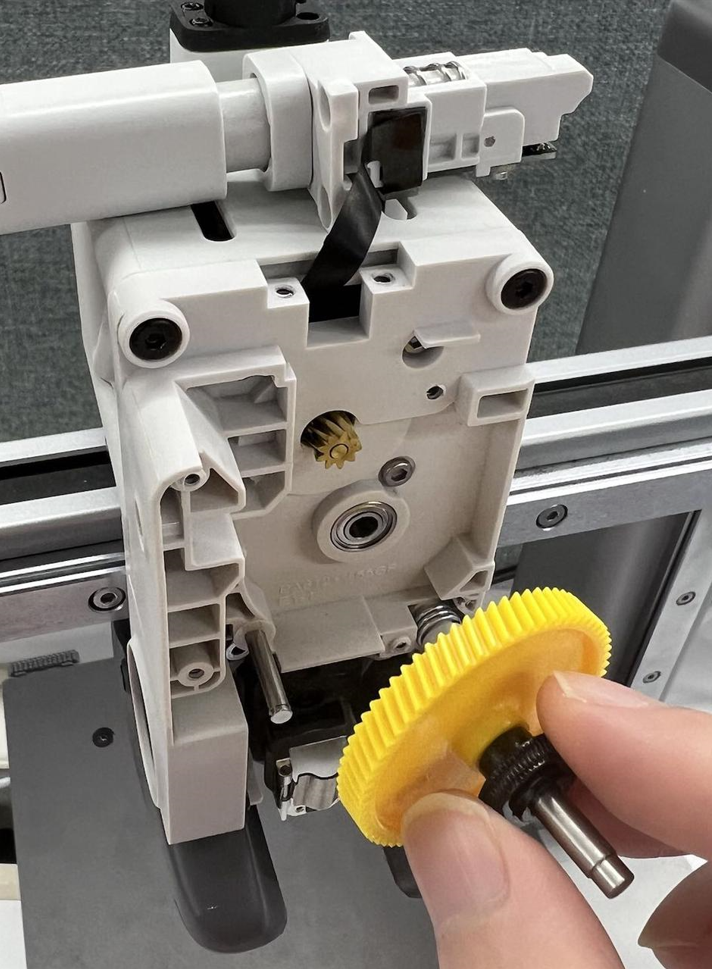
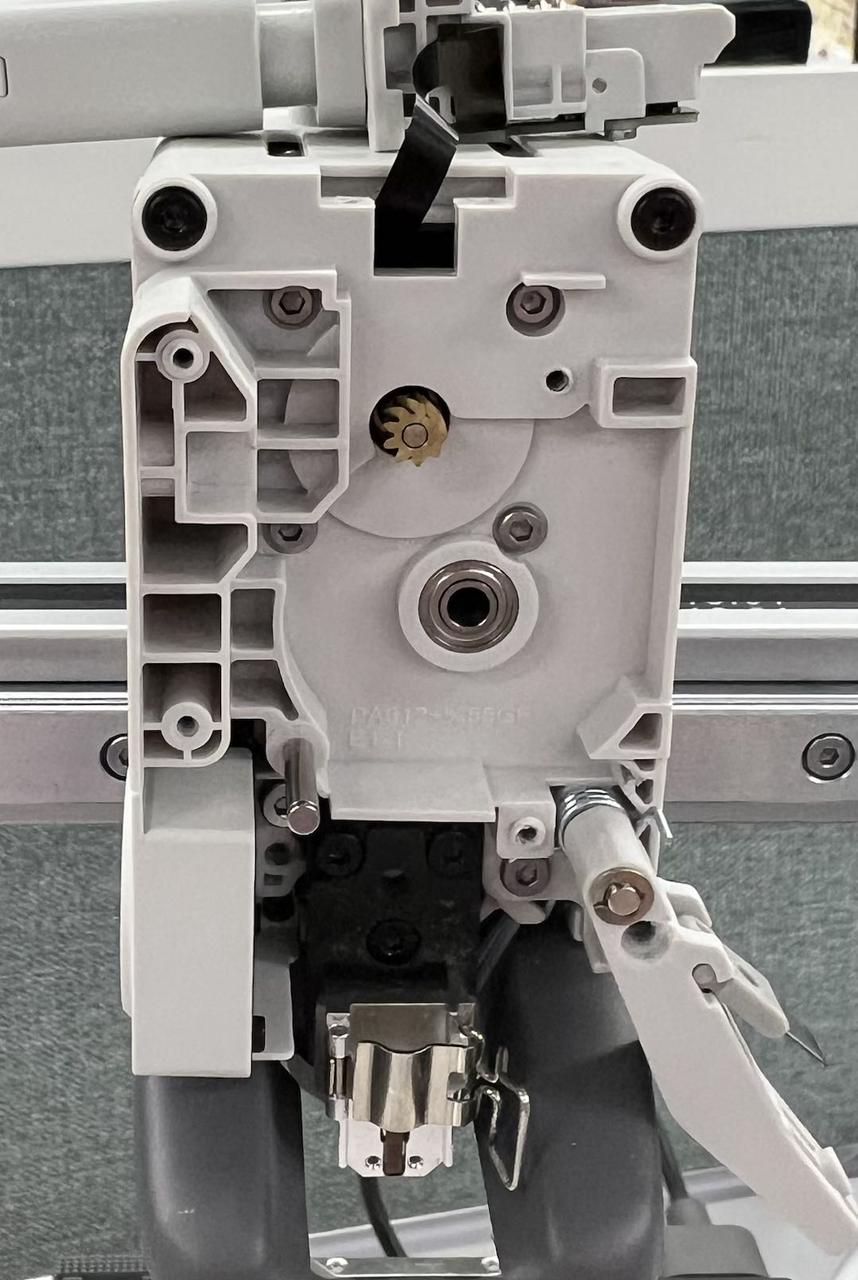
Remove the extruder gear assembly directly and clean the residue of filaments inside the extruder.
 |
 |
¶ Assembly instructions
¶ Step 1-Install the extrusion gear
Install the extrusion gear.
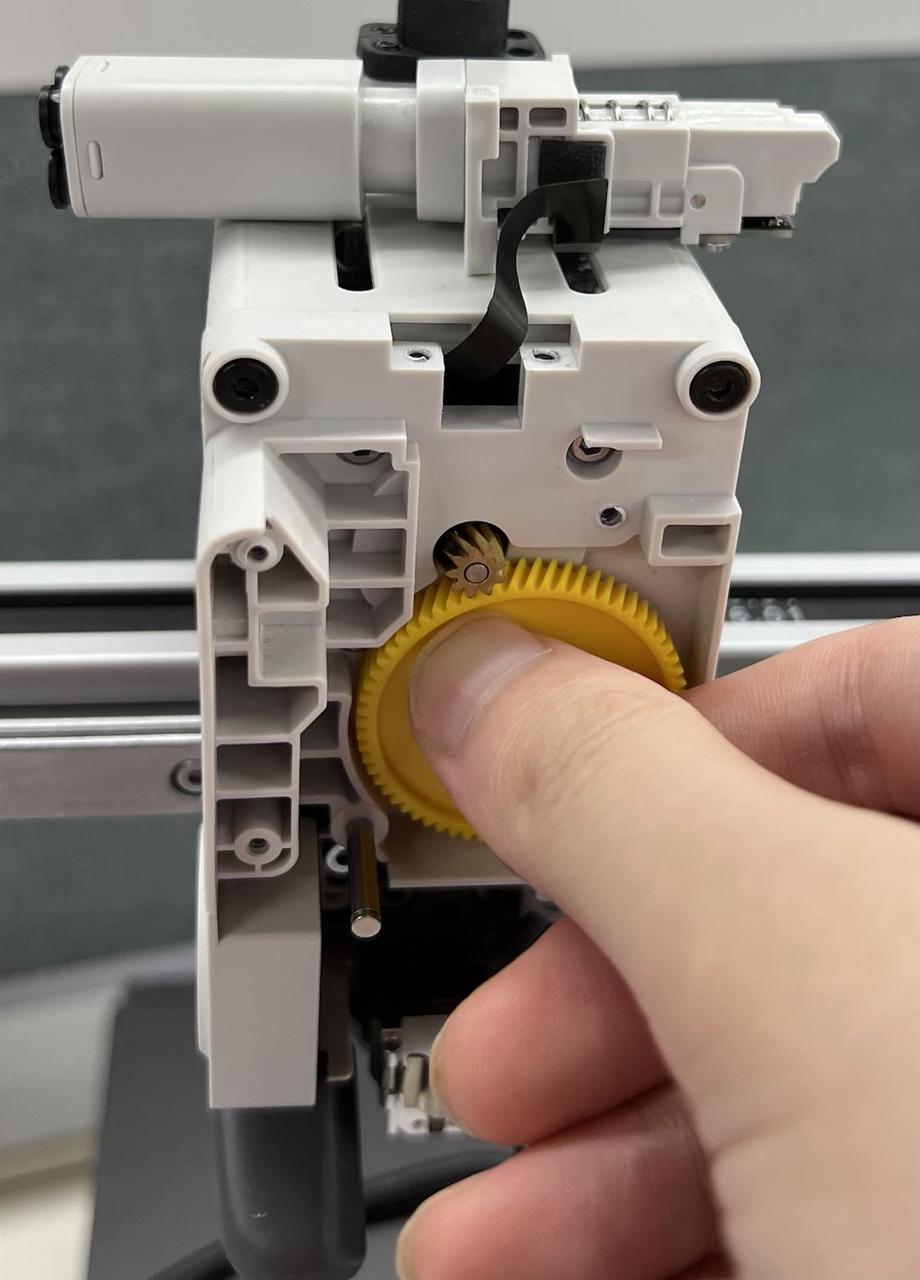
¶ Step 2-Install the driven wheel bracket
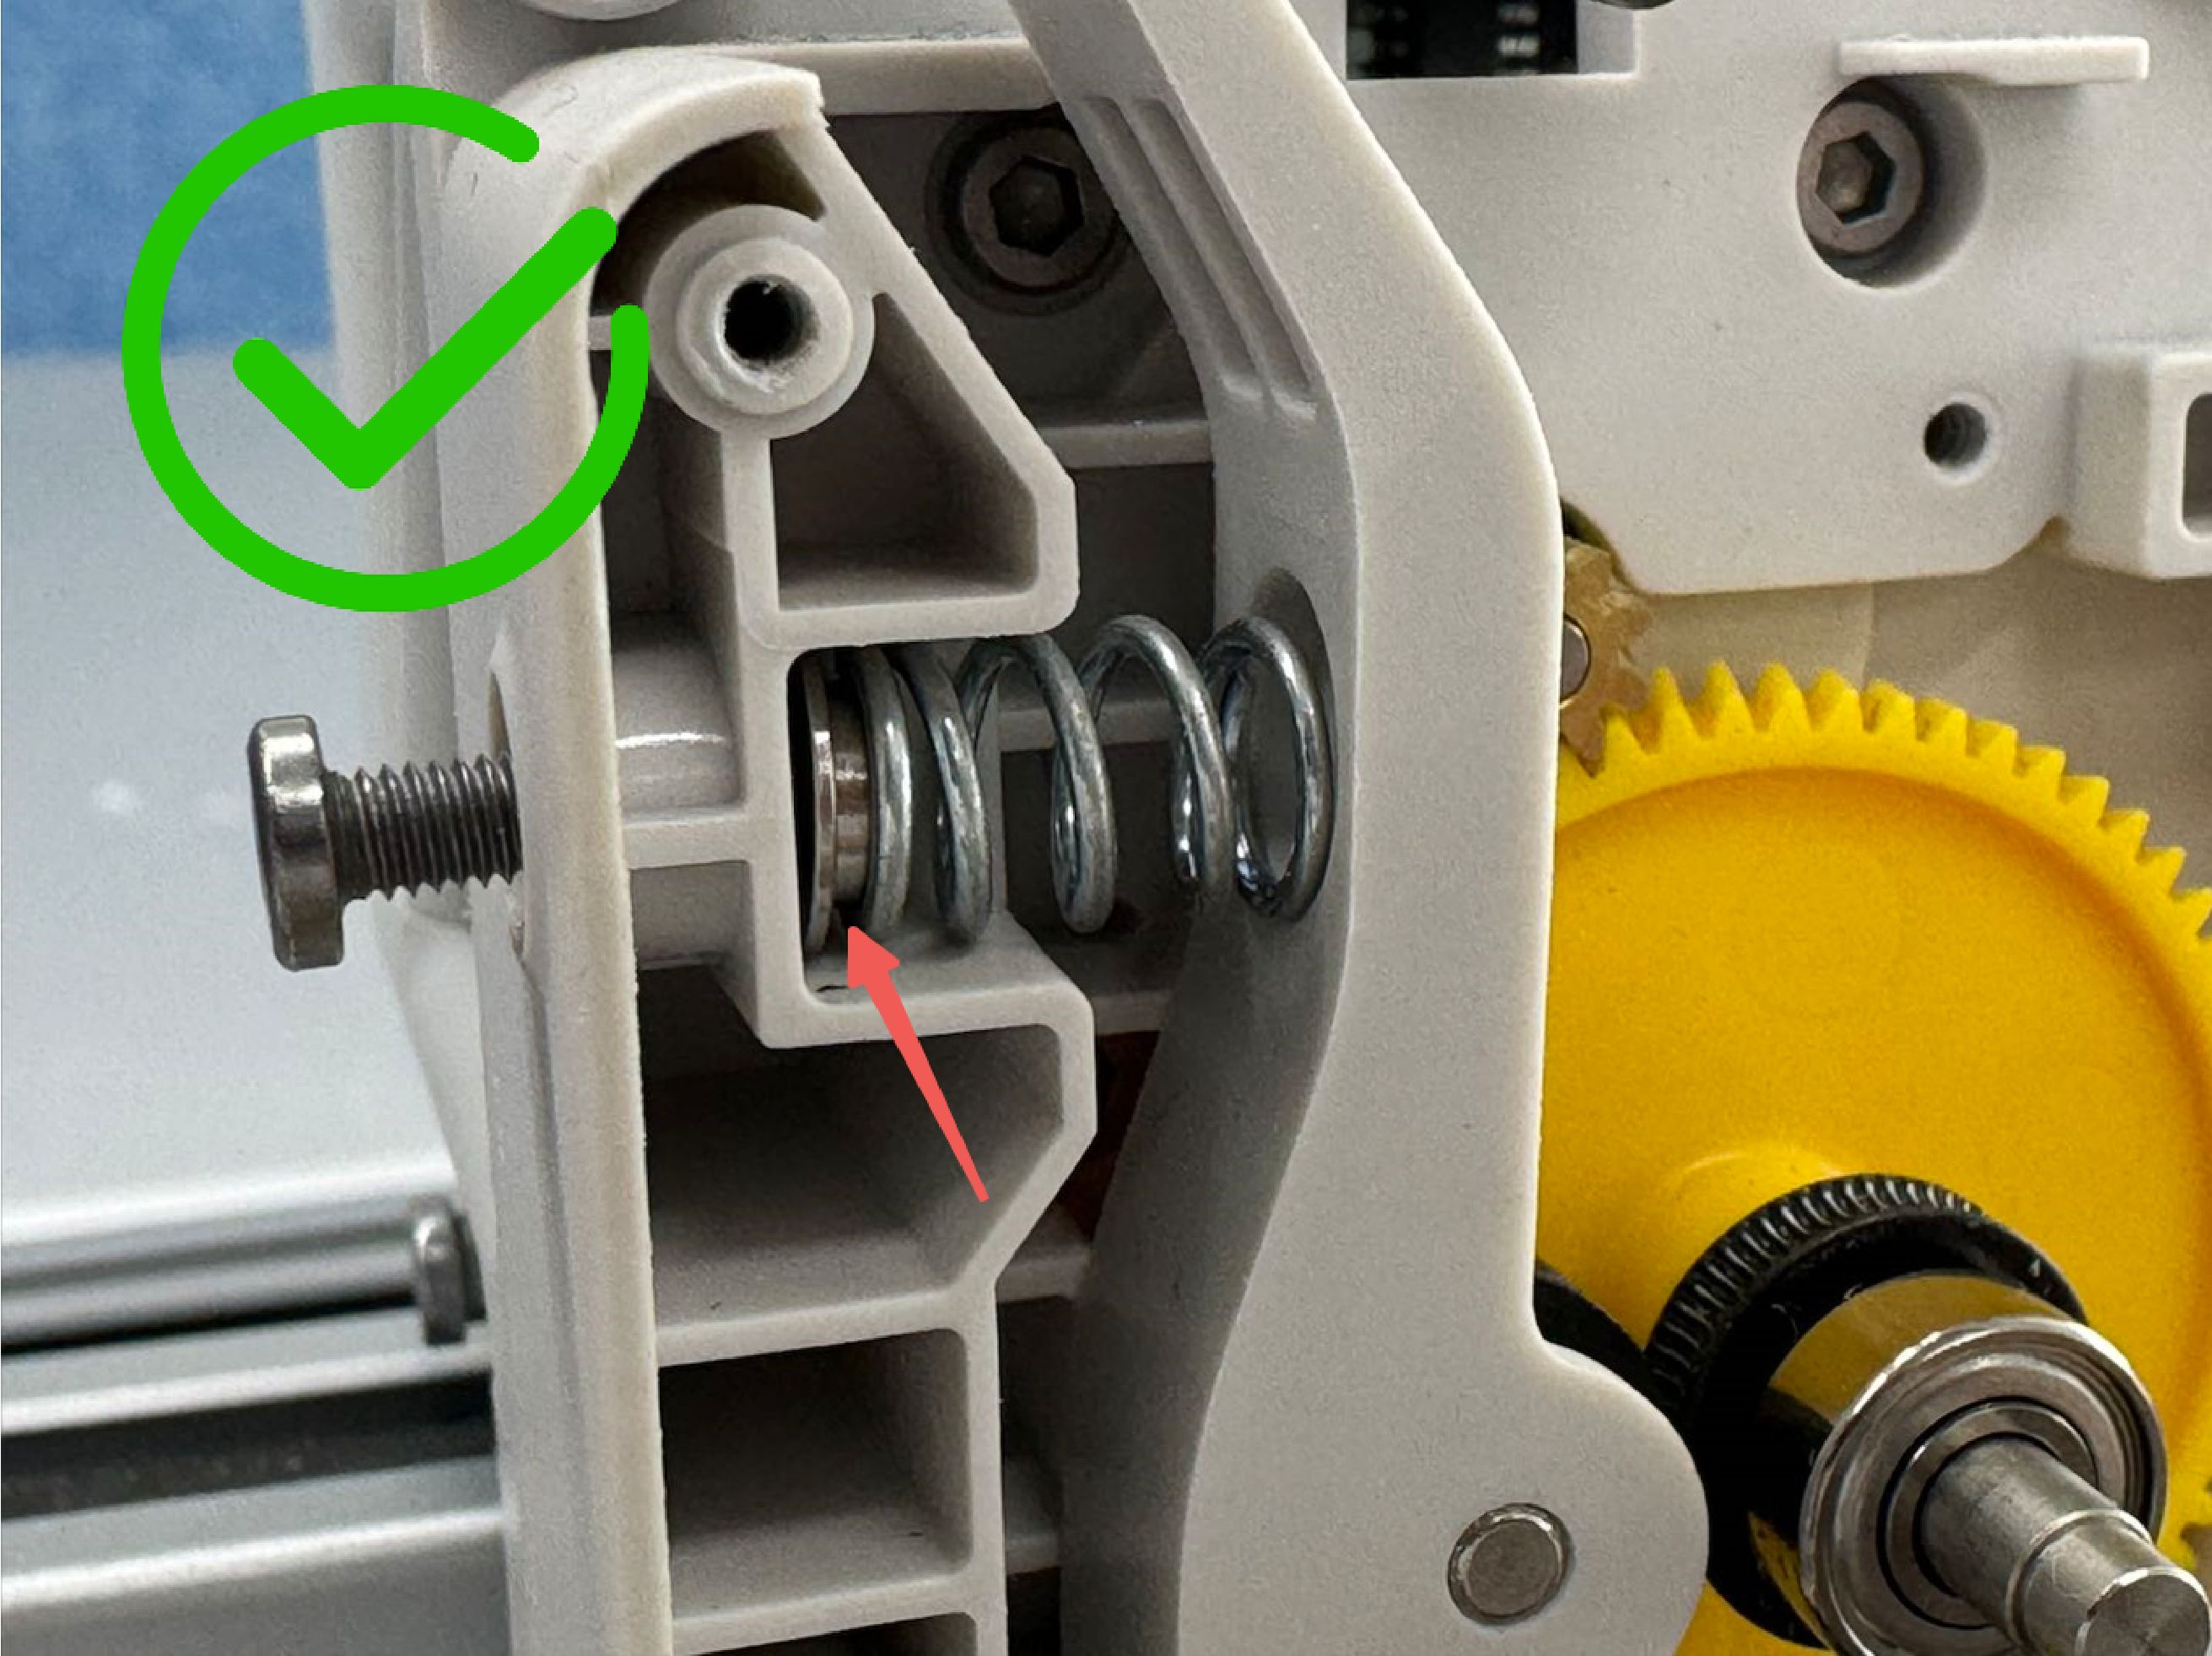
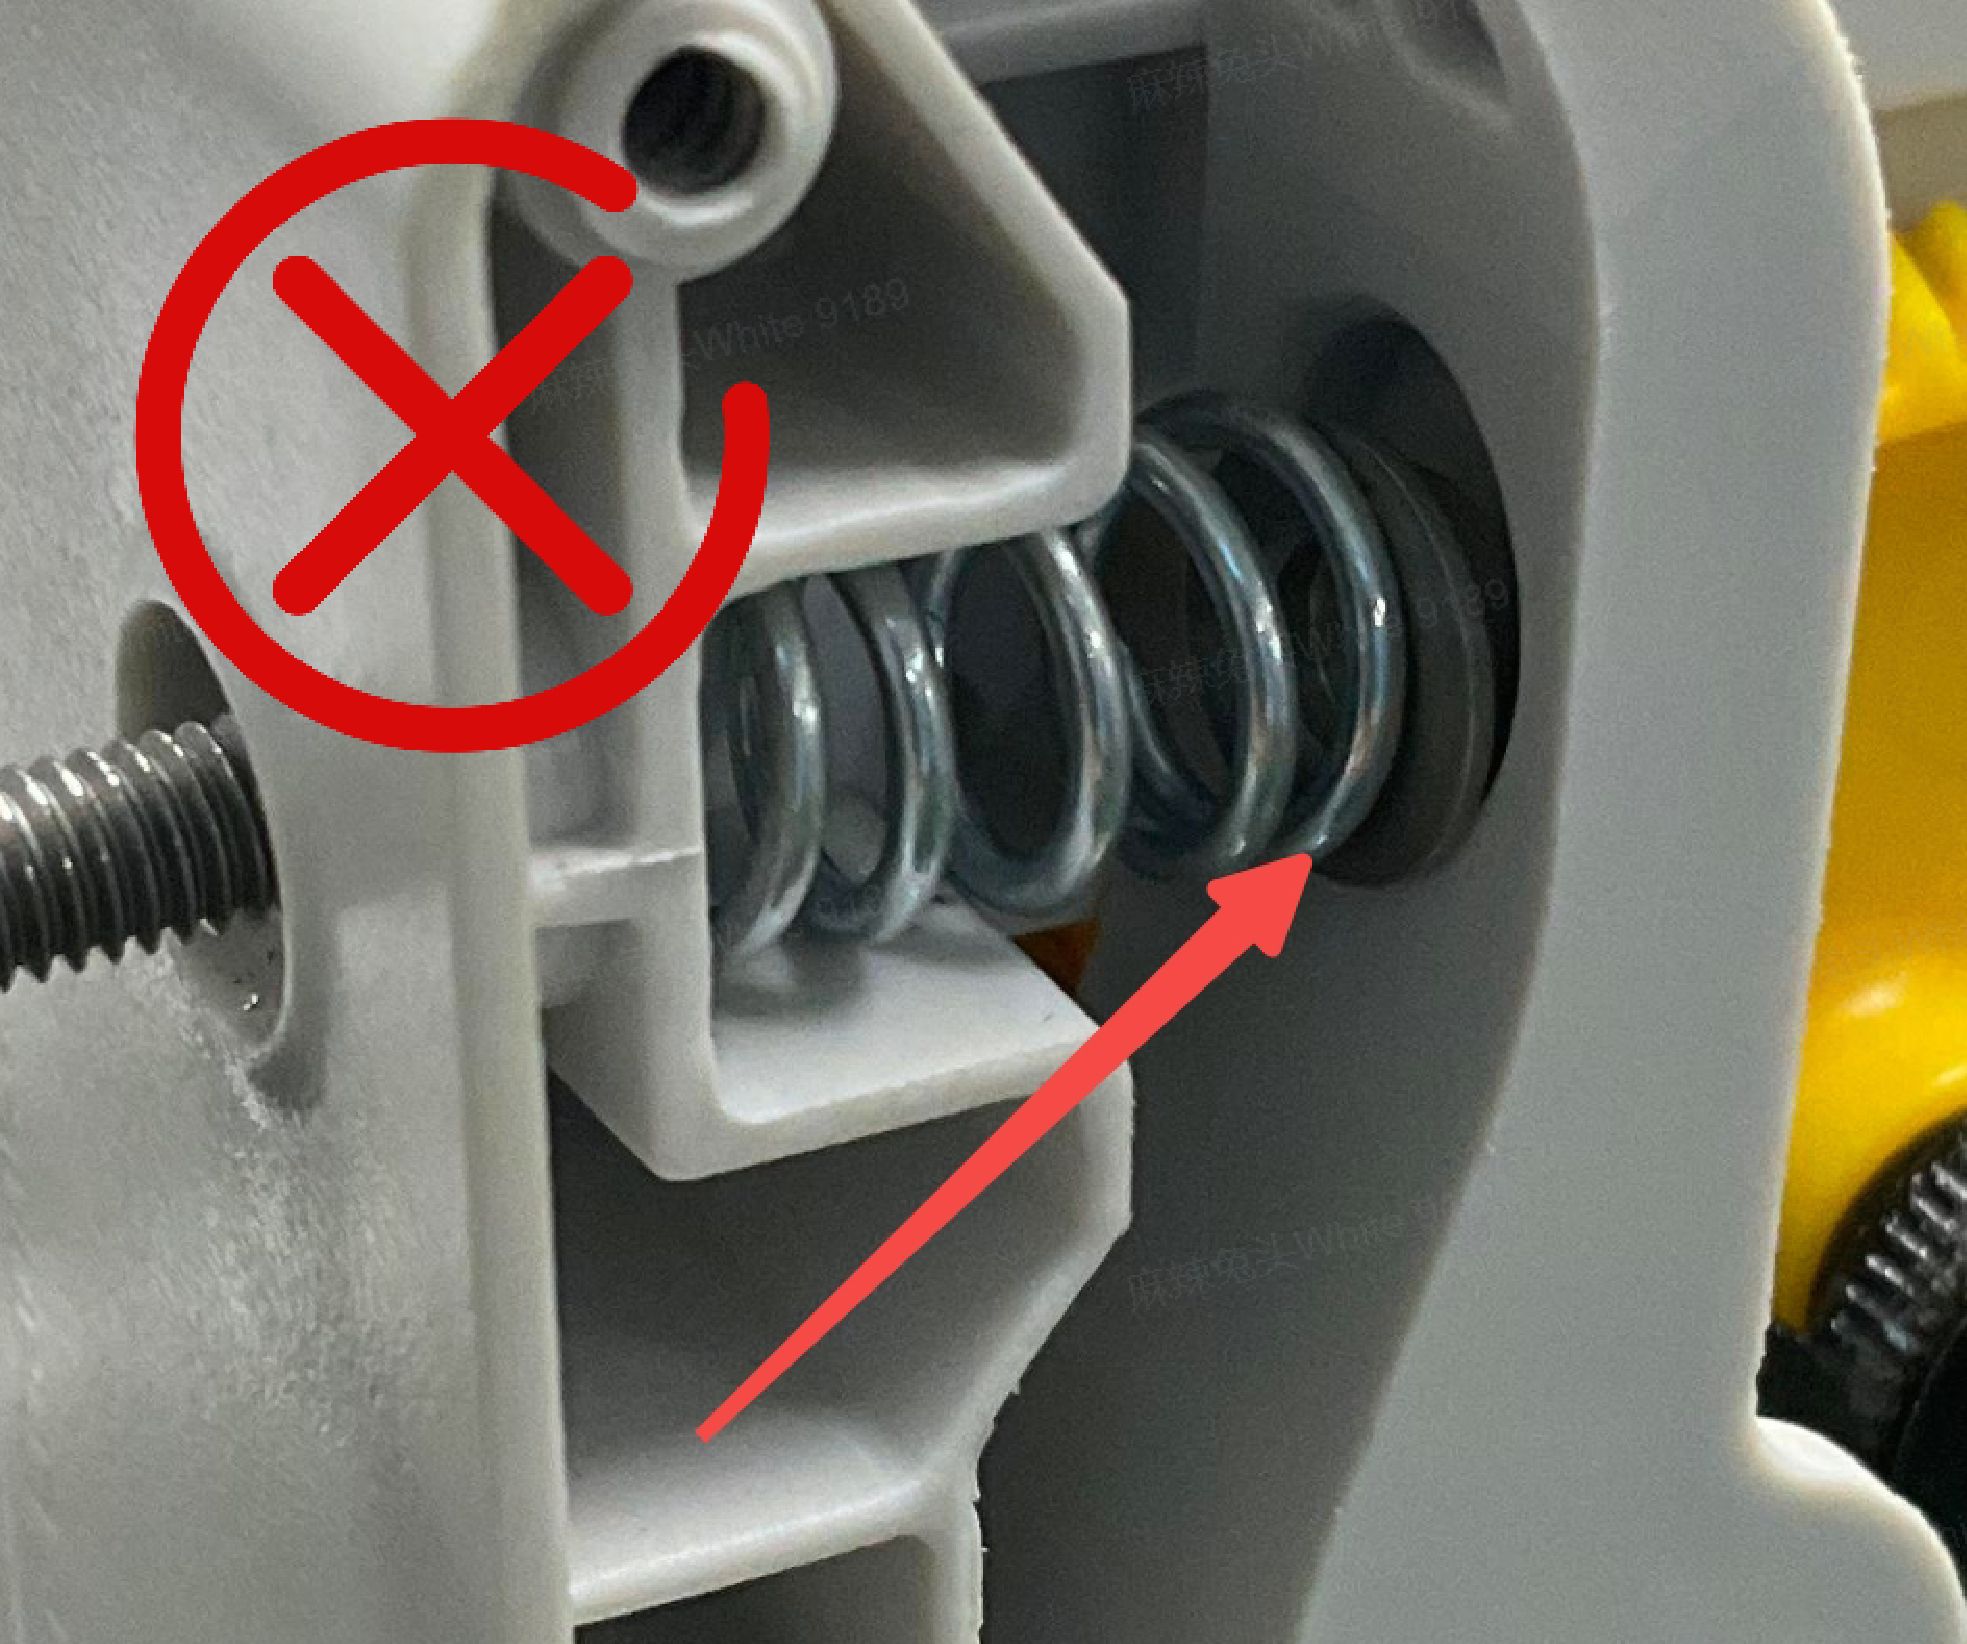
Install the driven wheel bracket to the corresponding shaft. Assemble the spring and end cap together in the correct position and direction (see the images below for the correct and wrong examples), and carefully place them in the corresponding position of the driven wheel bracket using tweezers. Do not tighten the screw on the side for the moment.
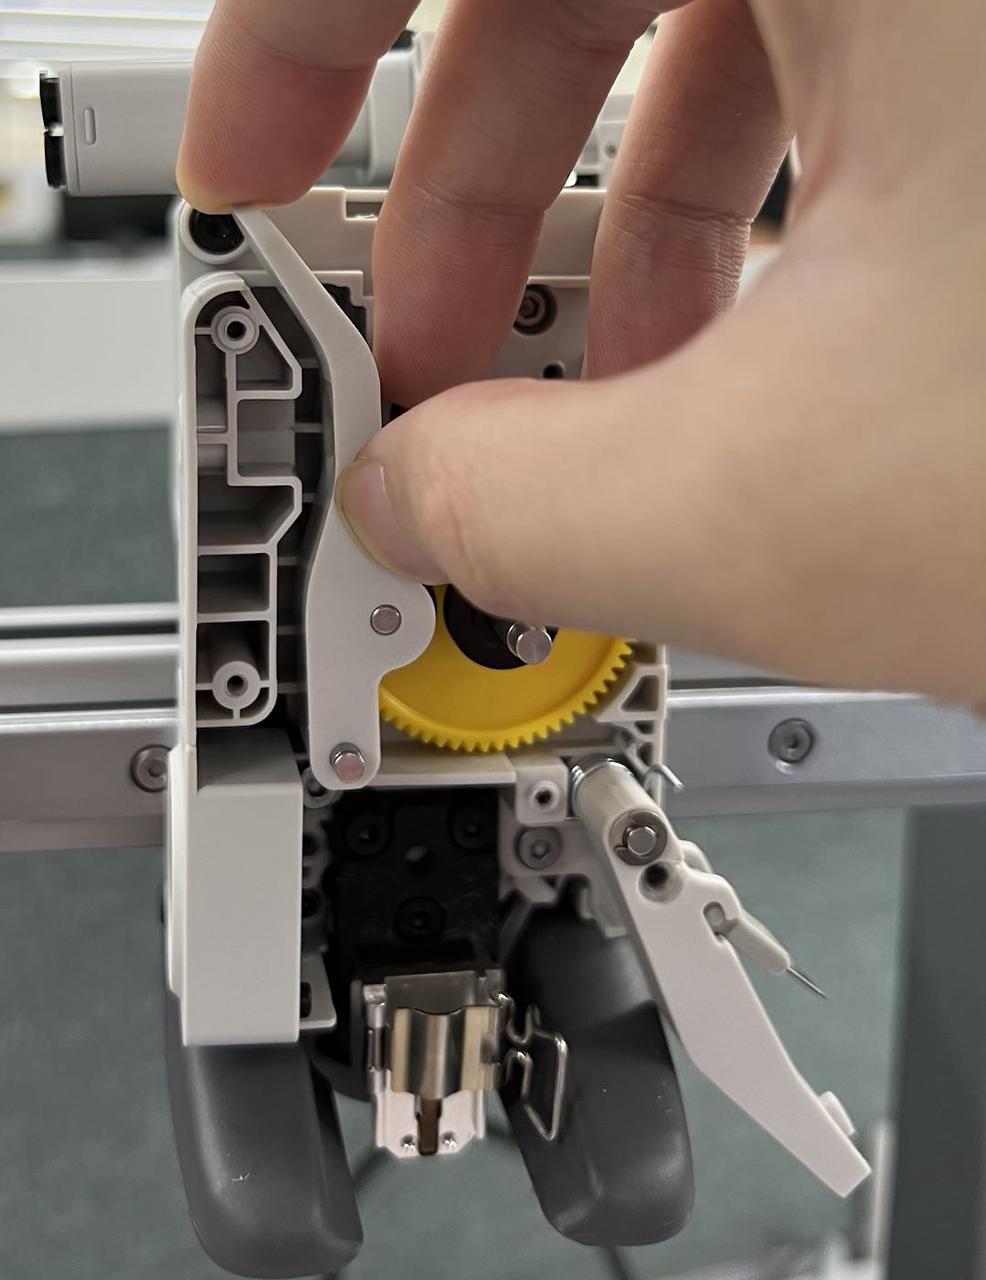 |
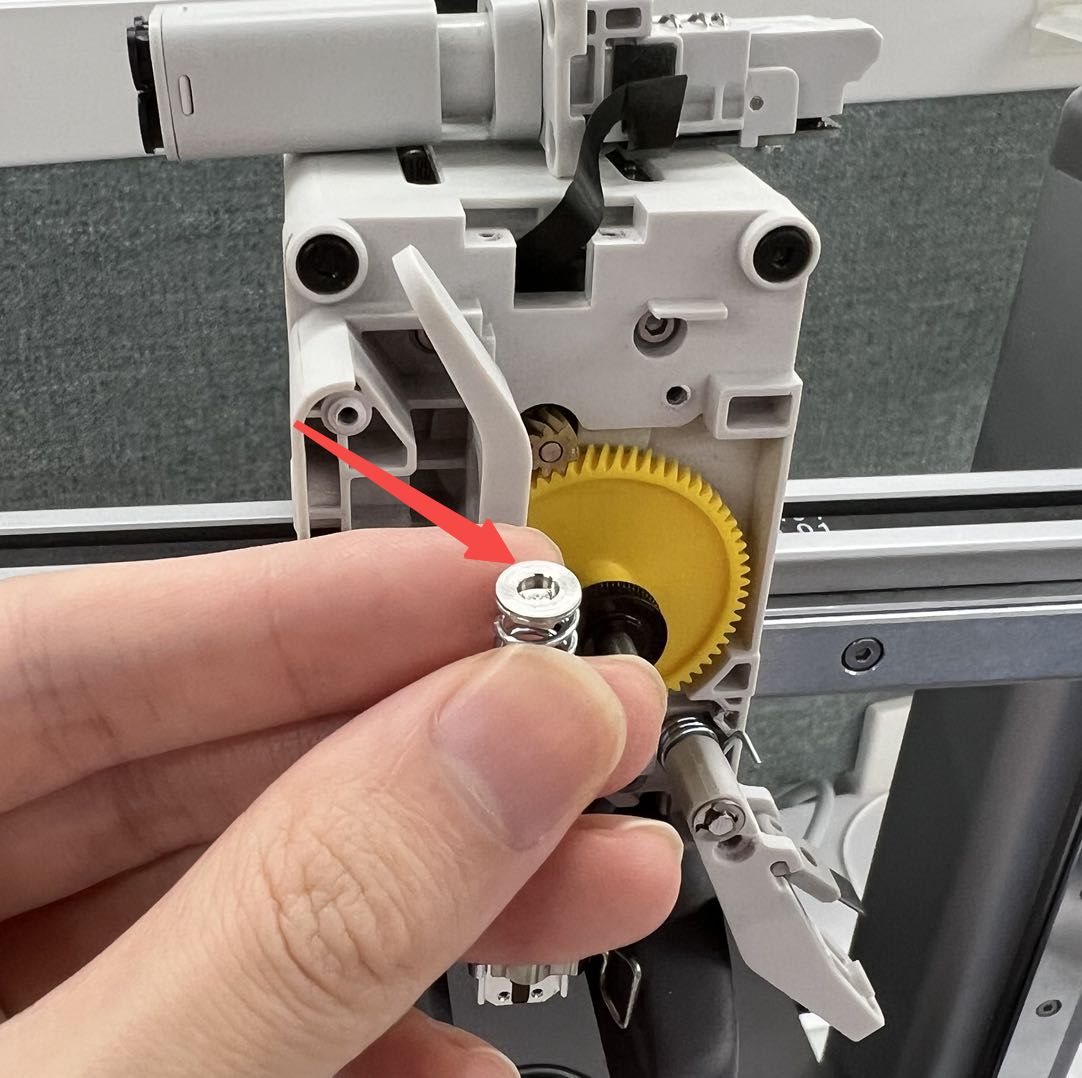 |
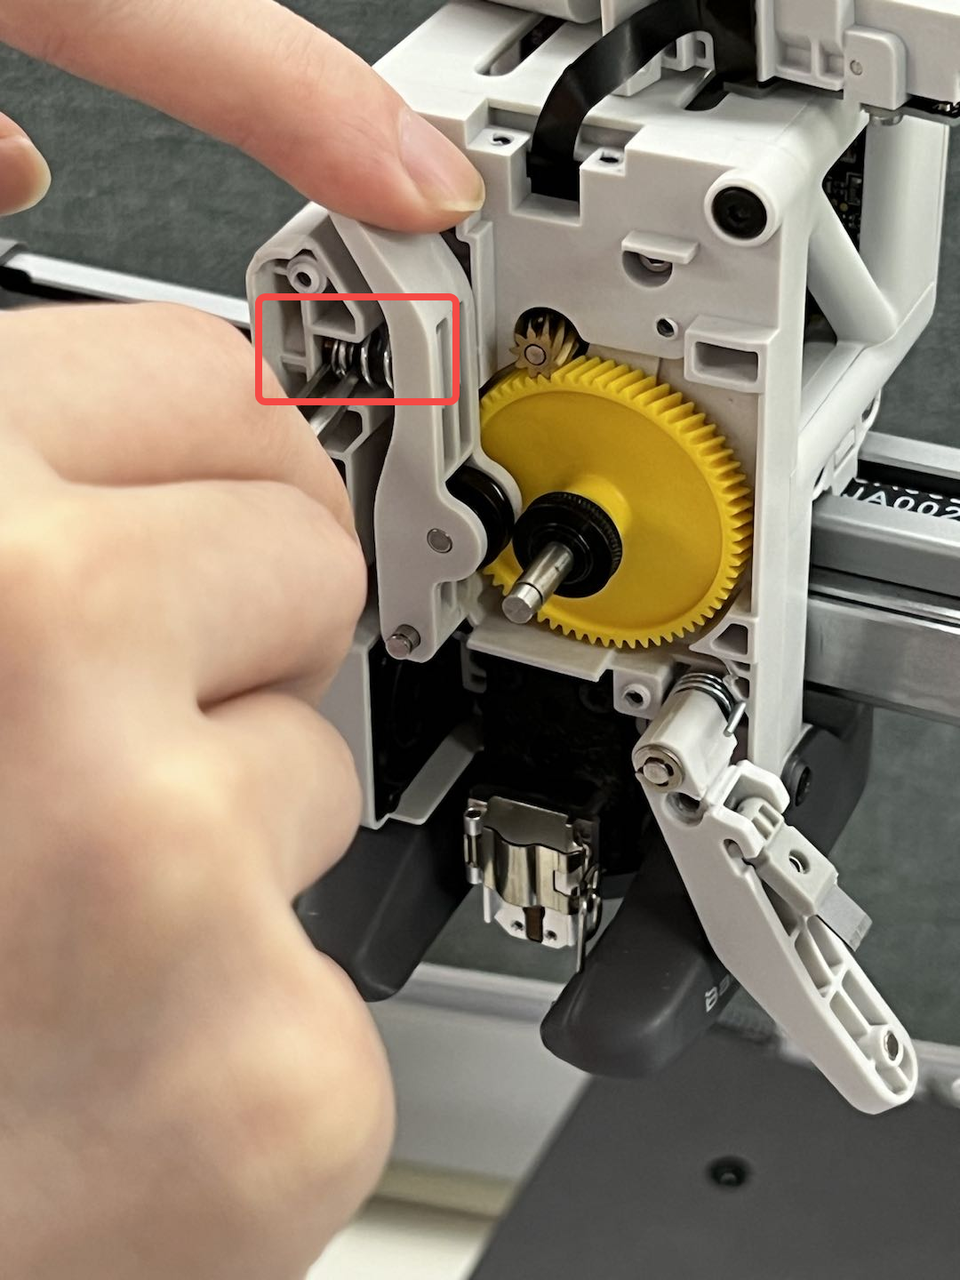 |
Important!
Please make sure to install the spring and end cap correctly. Otherwise, the gear will not be able to grip on the filament, causing print failure.
|
|
¶ Step 3-Install the extruder unit front cover
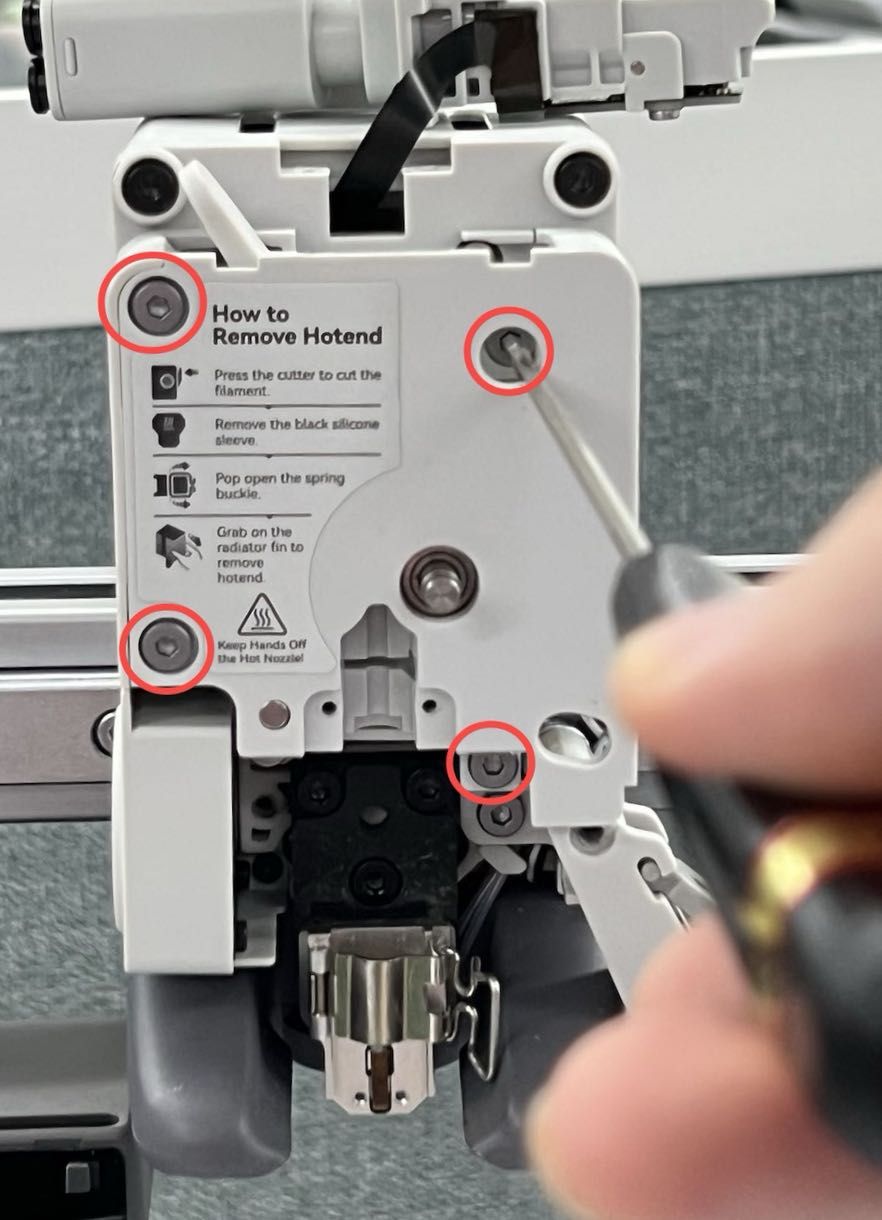
Tighten the 4 screws on the front cover of the extruder.
¶ Step 4-Tighten the screw on the side
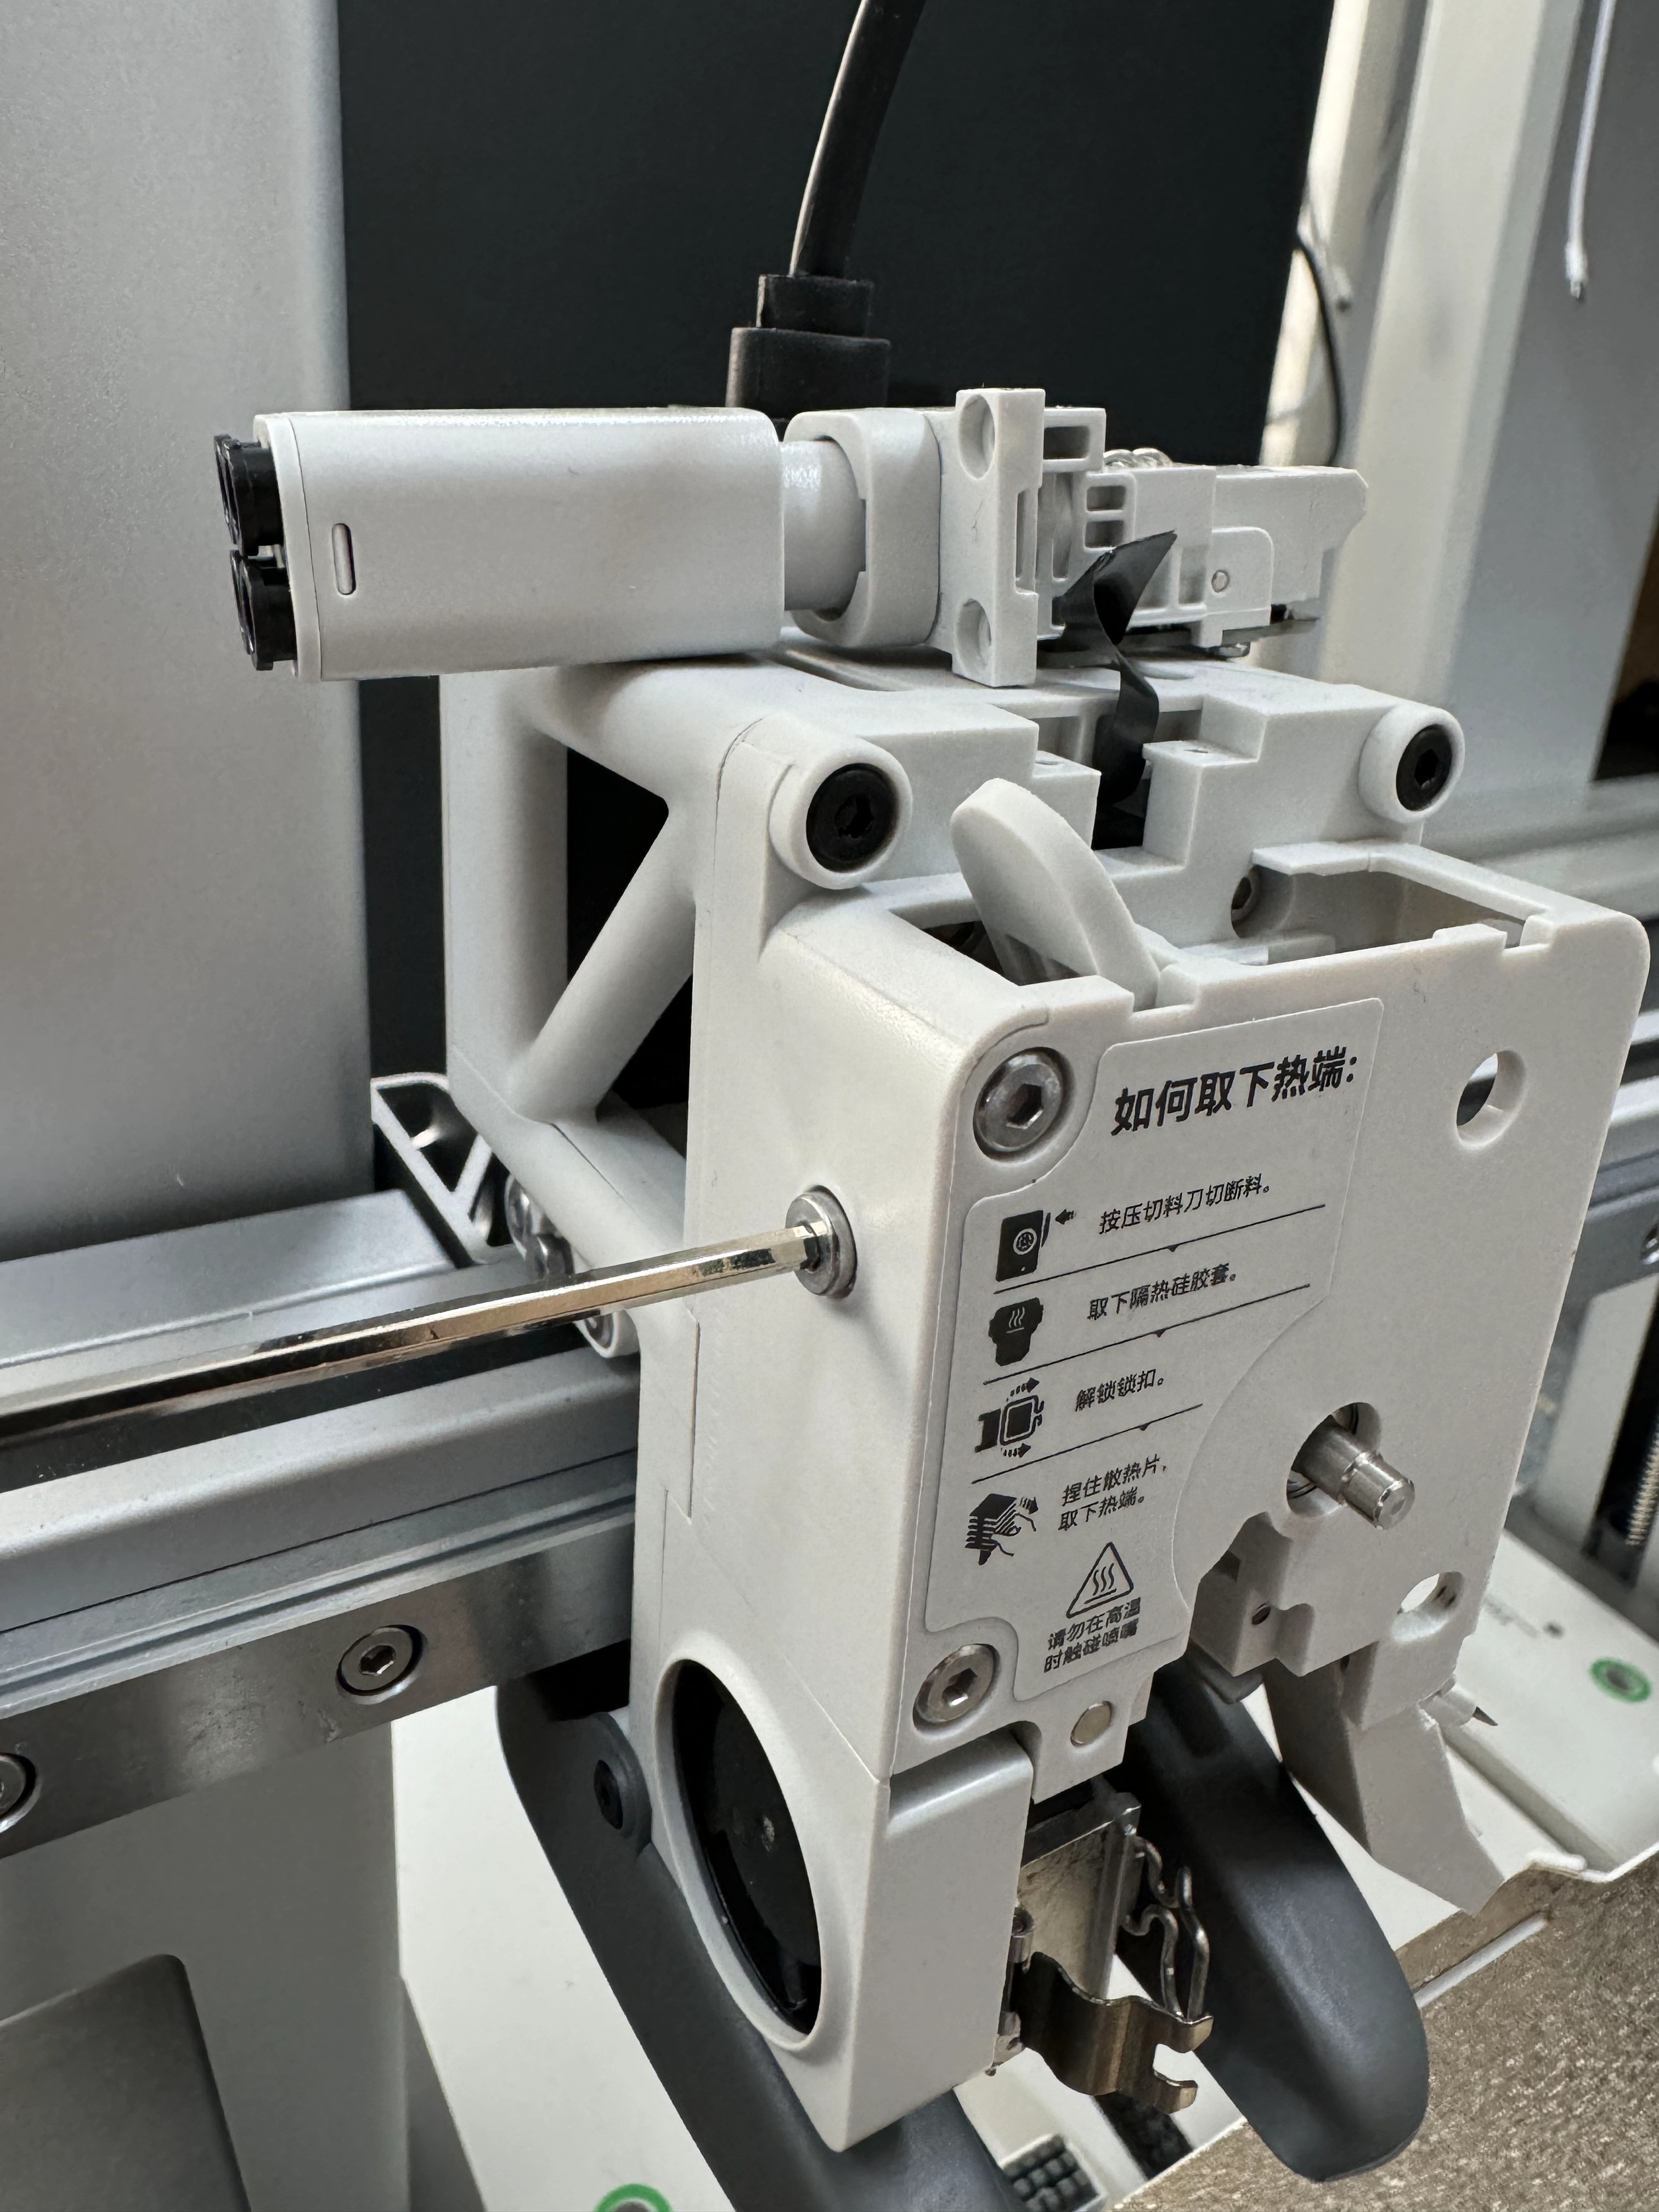
Tighten the screw on the side of the extruder.
¶ Step 5-Install the filament hub assembly
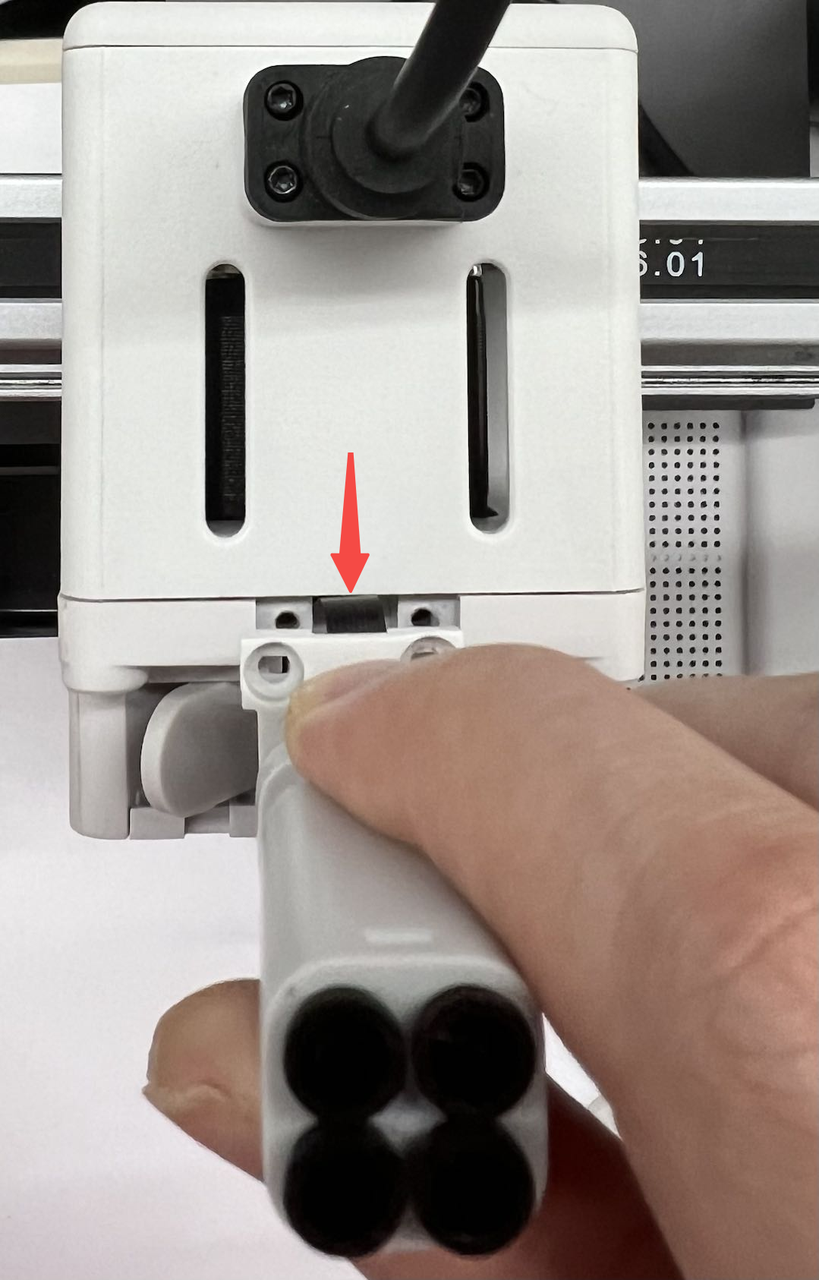
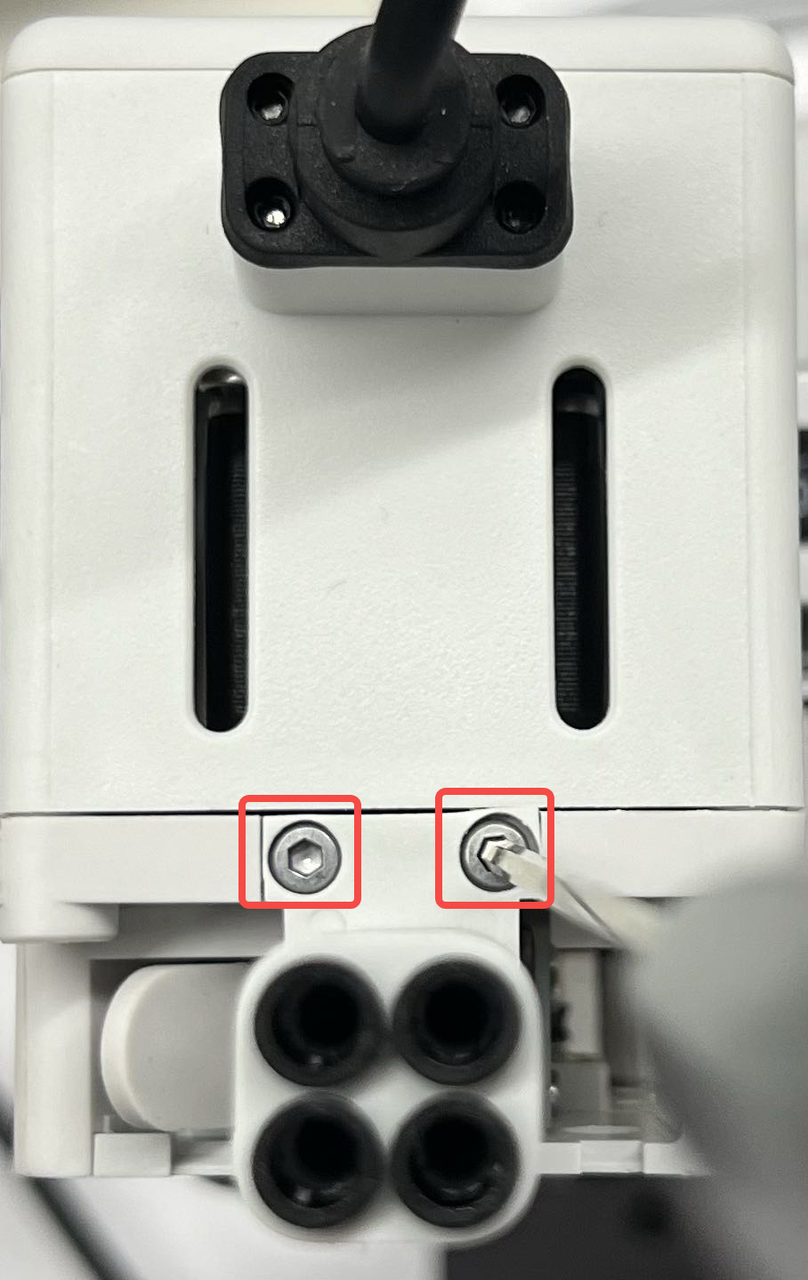
Install the filament hub assembly, make sure that the black FPC cable is not folded and smoothly placed in the vacant position. Then, tighten the 2 screws to secure thefilament hub in place.
 |
 |
¶ Step 6-Install the filament cutter
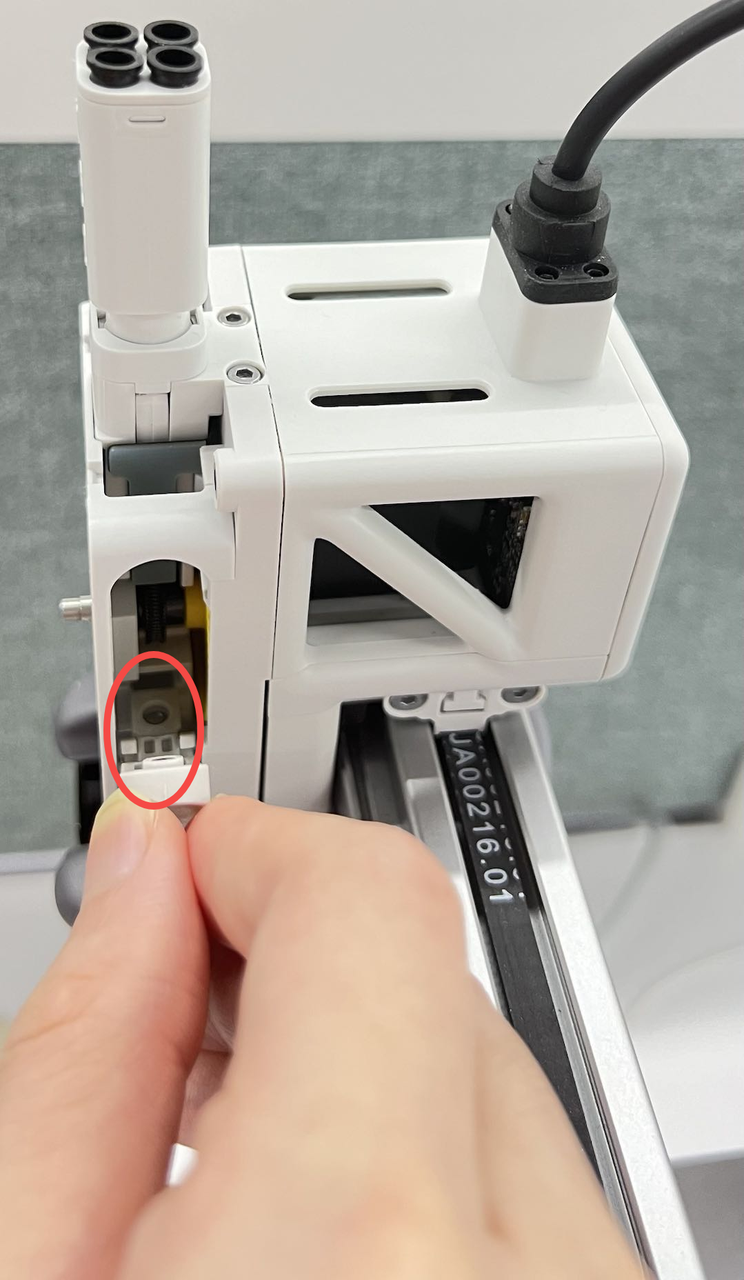
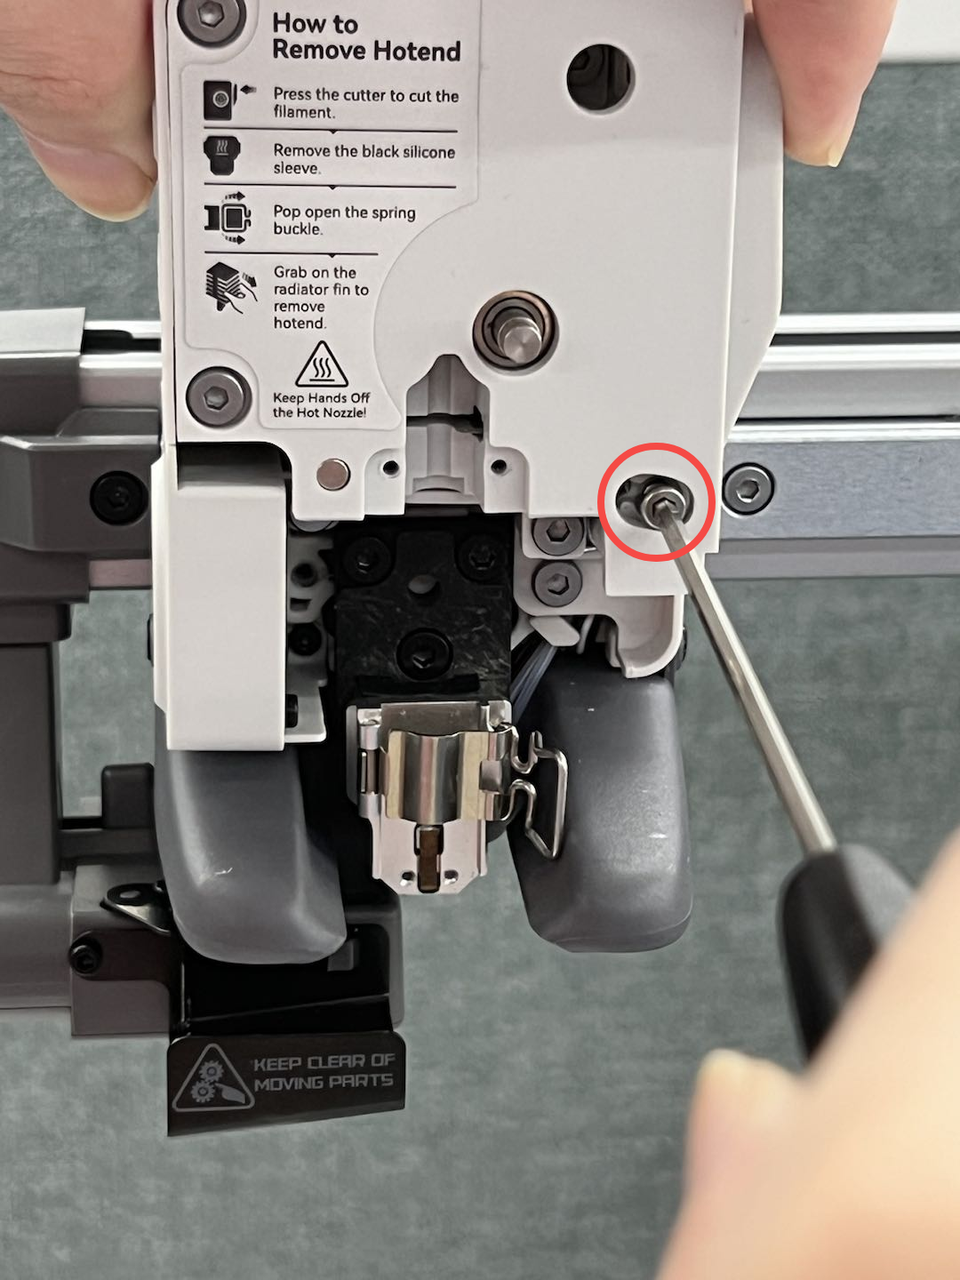
Lift the lever and slide the cutter into place along the blade groove. Secure the cutter lever by tightening 1 screw.
 |
|
¶ Step 7-Install the hotend assembly
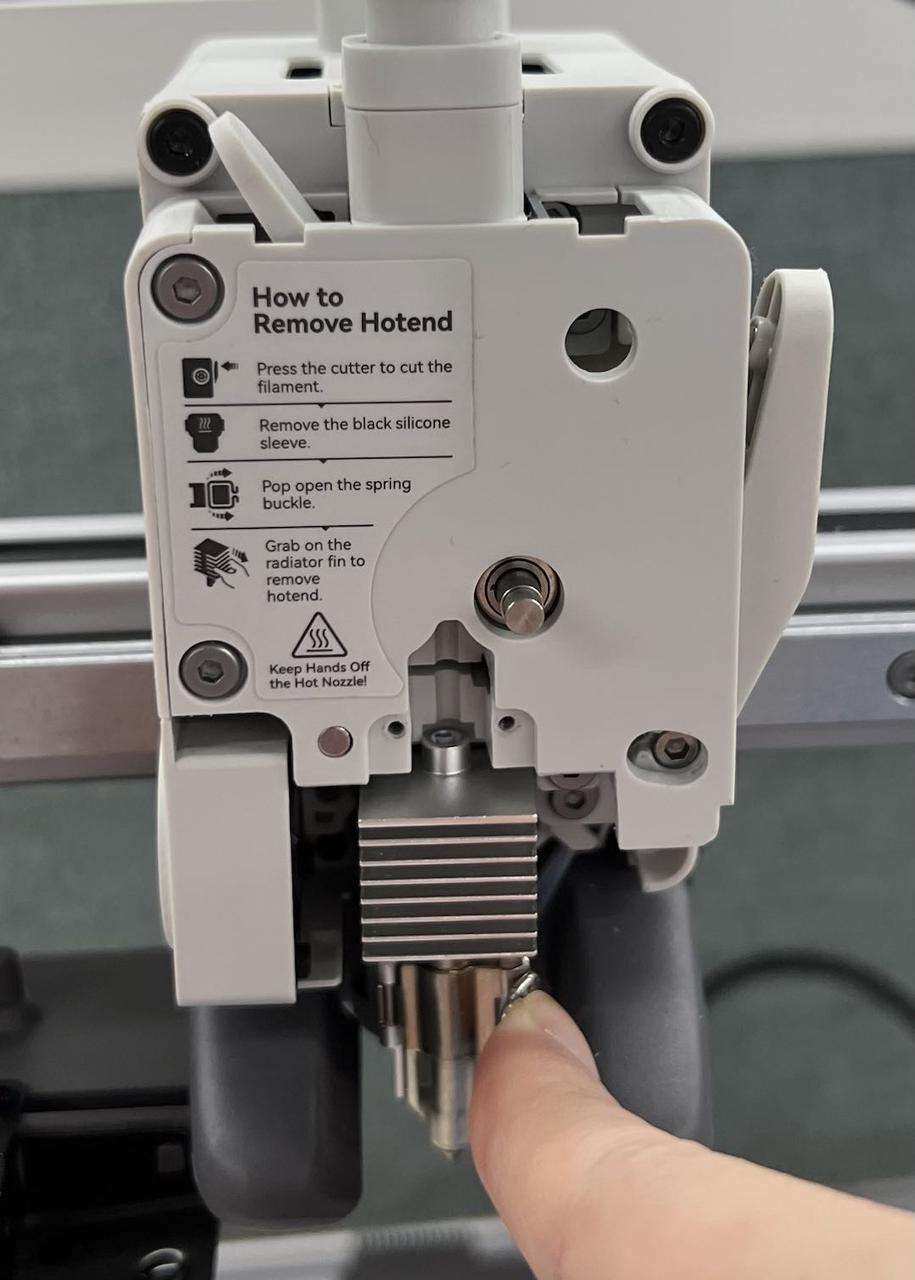
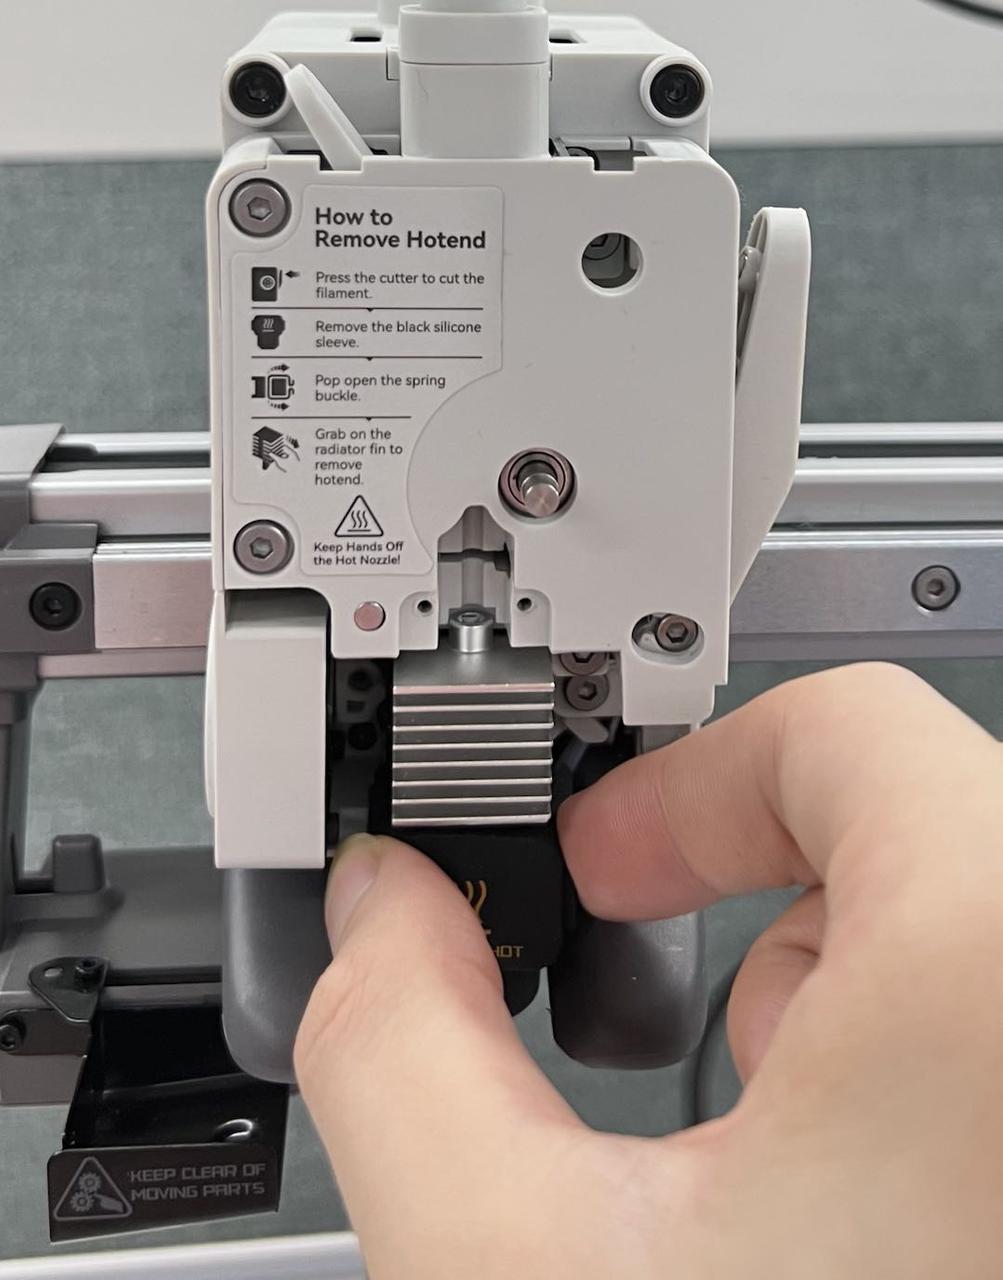
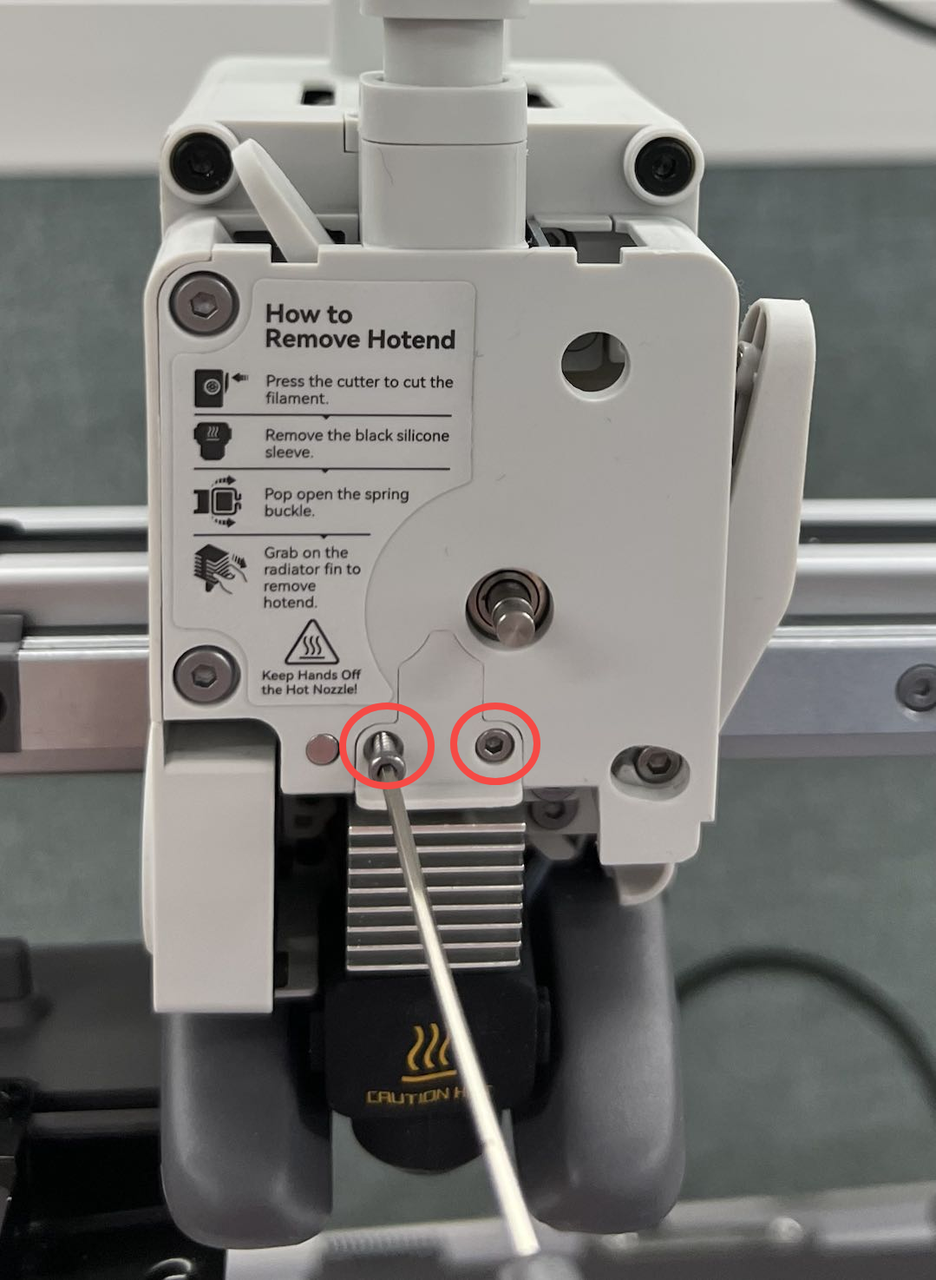
Hold the nozzle heat sink, align the mounting position, mount the nozzle in place, and snap the quick-release device. Put on the Silicone Sock for Hotend and tighten the 2 screws to secure the pressure block in place.
 |
 |
 |
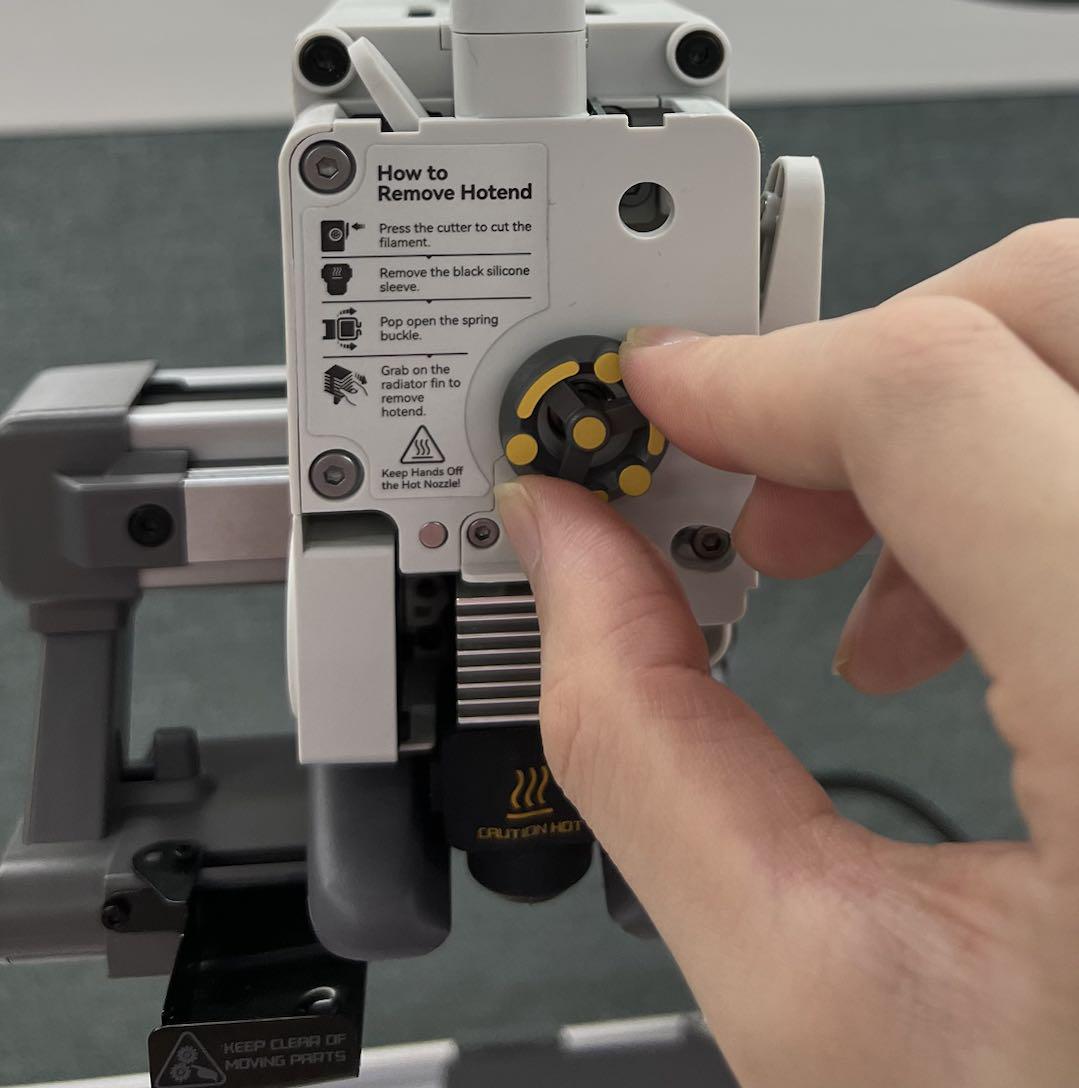
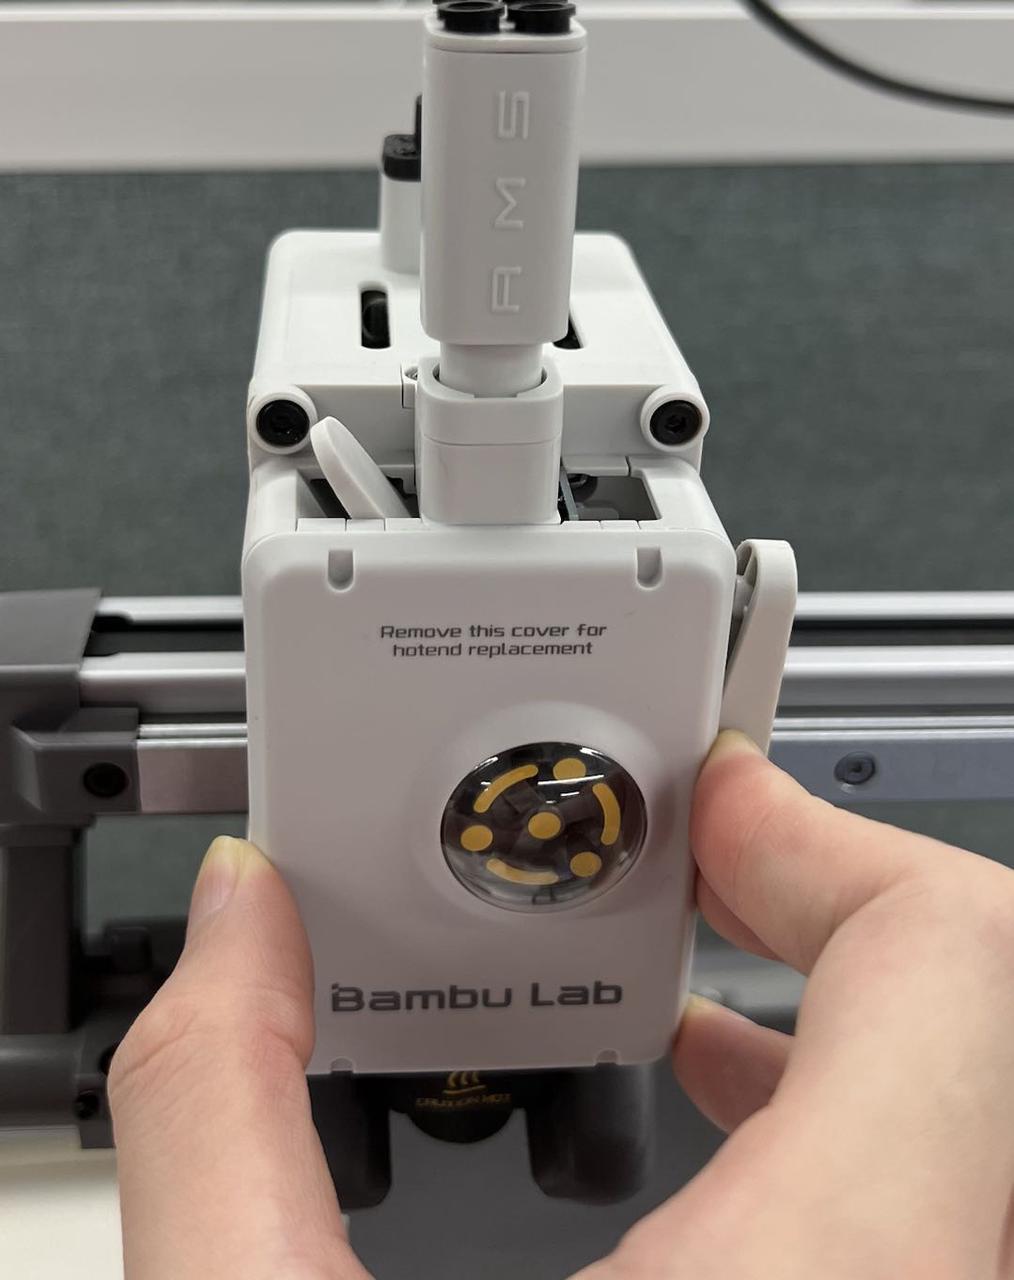
Install the rotating wheel and toolhead front cover.
 |
 |
¶ End Notes
We hope the detailed guide provided has been helpful and informative.
To ensure a safe and effective execution, if you have any concerns or questions about the process described in this article, we recommend submitting a technical ticket regarding your issue.
Please include a picture or video illustrating the problem, as well as any additional information related to your inquiry.