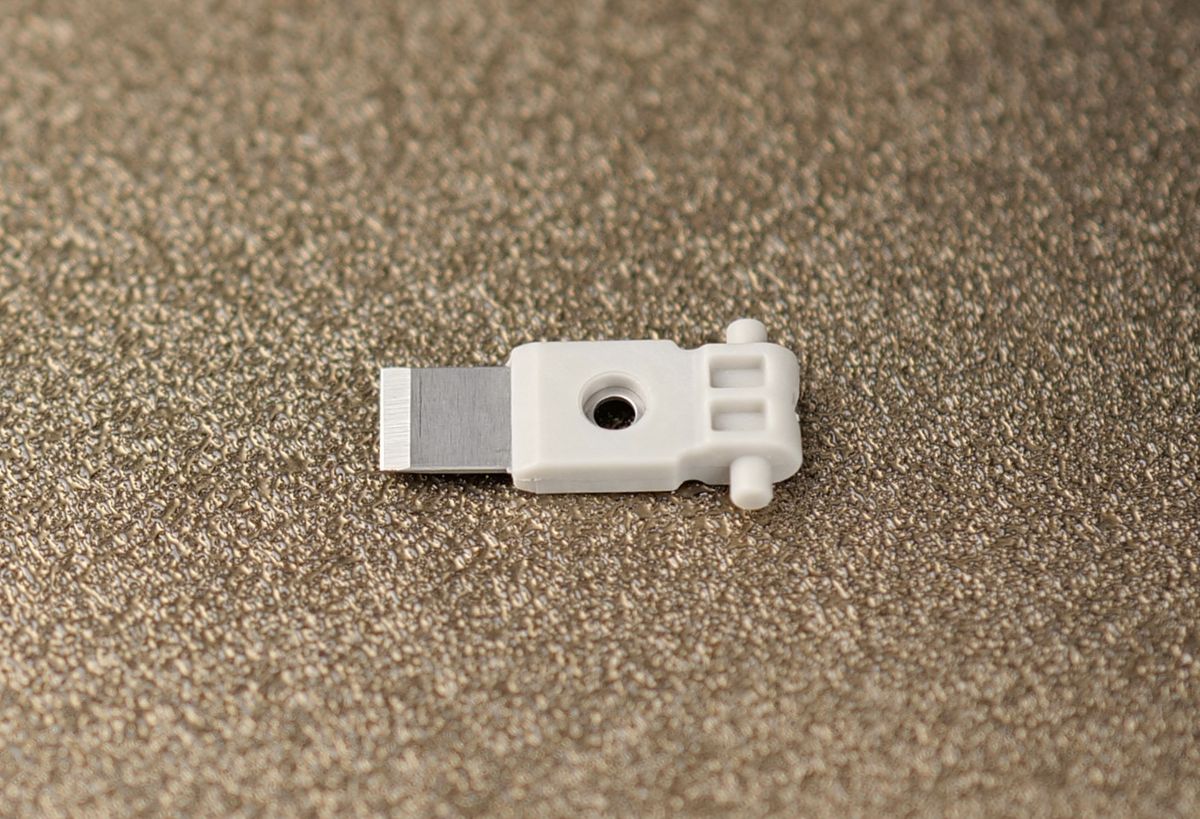
In this guide we will show the process of replacing the filament cutter blade on the A1 mini, and installing a new one.
Please note that this guide also applies to the A1 3D printer.
¶ When to use?
This guide should be used if there are problem with filament cutting, or when the filament cutter blade gets dull. The sharpness of the blade can become worse over time.
We recommend replacing the filament cutter every 10-15 spools of filament used (or quicker) to ensure the cutting performance is unaffected.
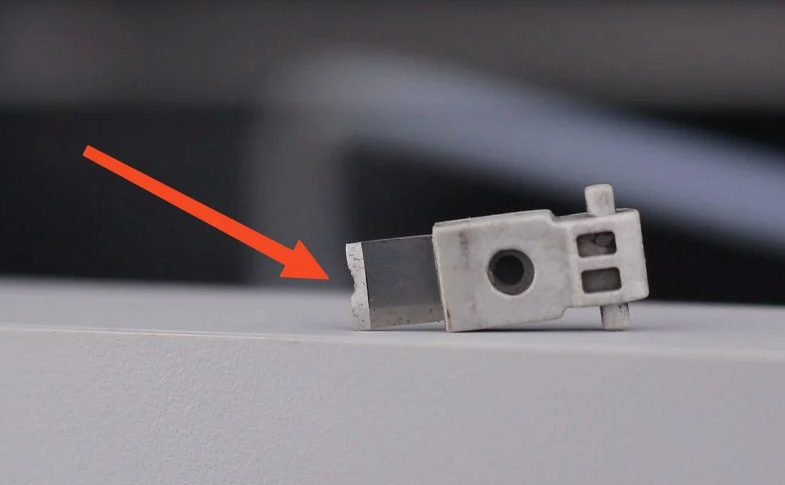
We have found that after about 5.000-7.000 filament cuts, the filament cutter blade can get dull but the blade might not get deformed as shown in the image below.
If you encounter issues with the AMS filament retractions, we recommend replacing the blade for the best results. If the blade is sharp, the filament will be cut cleanly and should not cause problems during operation.
Example of worn / damaged filament cutter blade.
Common issues that are caused by the A1 filament cutter needing to be replaced:
- Layer shifts when the toolhead tries to cut the filament
- The filament cut is not clean, leading to AMS retration issues
- There is damage showing on the filament cutter blade due to wear
- Recommended by Bambu Lab Customer Support
¶ Tools and materials needed
- Bambu Lab Filament Cutter for A1 Series (spares included in the box at purchase)
- H2.0 Allen key
- 5 minutes of your time
¶ Safety Warning
IMPORTANT!
It's crucial to power off the printer before performing any maintenance work on the printer and its electronics, including tool head wires, because leaving the printer on while conducting such tasks can cause a short circuit, which can lead to additional electronic damage and safety hazards.
When you perform maintenance or troubleshooting on the printer, you may be required to disassemble some parts, including the hotend. This process can expose wires and electrical components that could potentially short circuit if they come into contact with each other or with other metal or electronic components while the printer is still on. This can damage the electronics of the printer and cause further damage.
Therefore, it's essential to switch off the printer and disconnect it from the power source before doing any maintenance work. This will prevent any short circuits or damage to the printer's electronics. By doing so, you can avoid potential damage to the printer's electronic components and ensure that the maintenance work is performed safely and effectively.
If you have any concerns or questions about following this guide, open a new ticket in our Support Page and we will do our best to respond promptly and provide you with the assistance you need.
¶ Steps to remove the old Filament Cutter blade
¶ 1. Remove the toolhead front cover
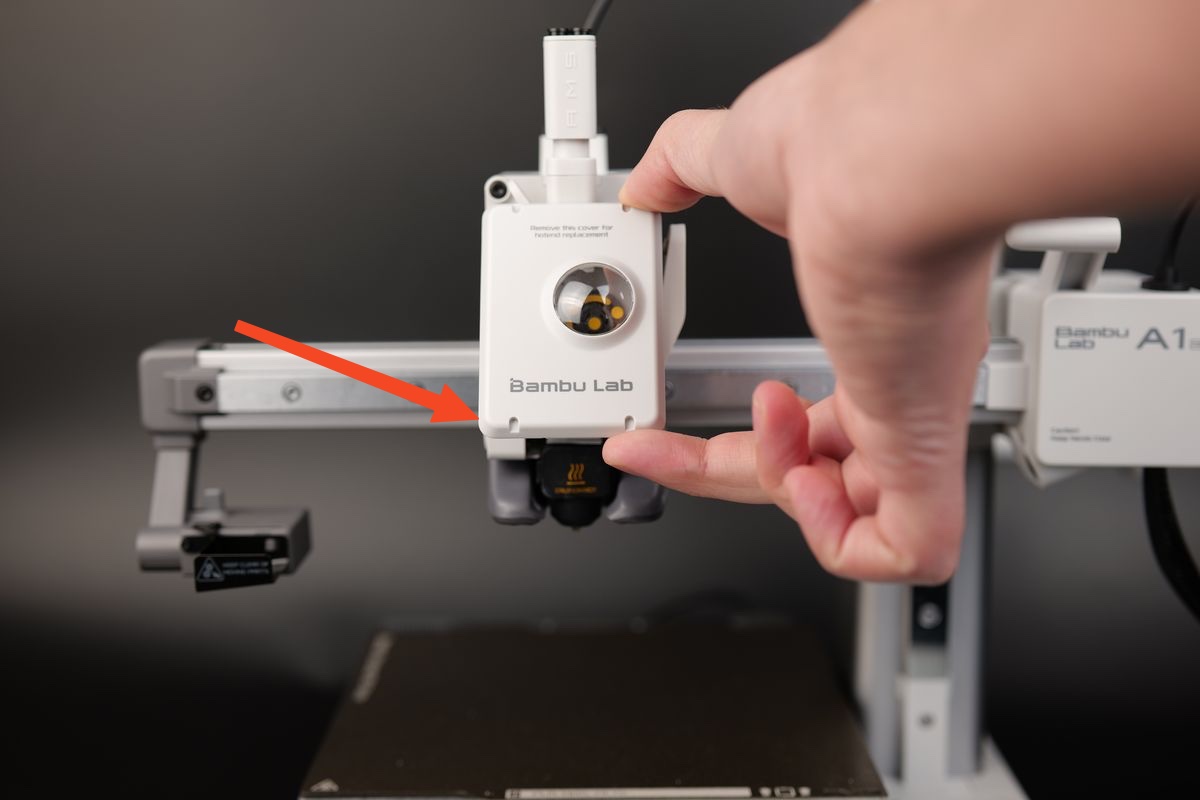
The first step in replacing the filament cutter blade on the A1 is to remove the toolhead front cover. Grab the base of the front cover and gently pull towards you.
The clips holding the cover in place will be released, allowing you to remove the front cover
¶ 2. Release the filament cutter lever
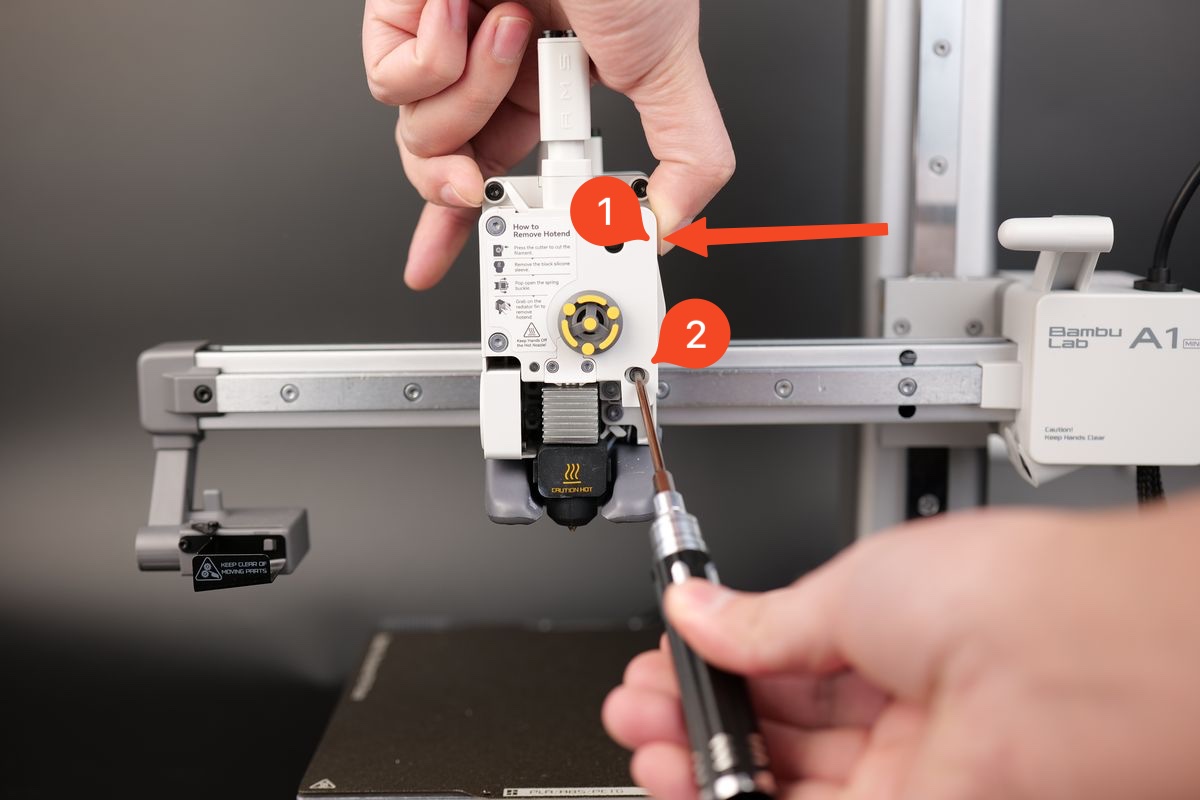
The next step is to release the filament cutter lever. To do it, start by holding the filament cutter pressed to allow for easy removal of the single screw holding it in place.
Keep holding the lever pressed until the screw is completely removed, then gently release the cutter.
¶ 3. Remove the filament cutter blade
The final step is to remove the filament cutter blade from the lever.
Start by gently pushing the blade in the direction indicated in the image below, then remove it upwards.
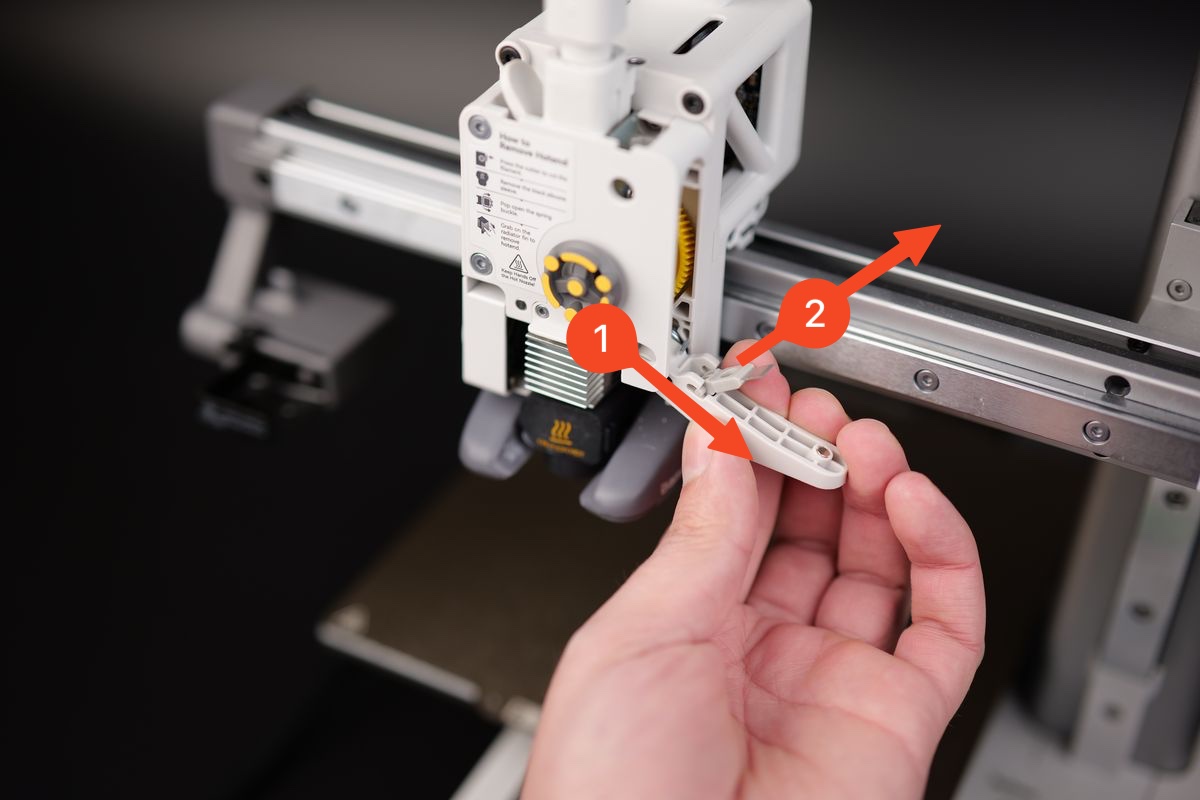
Important! The blade has sharp corners and there is a risk of cutting yourself. Please proceed with caution!
¶ Optional - Clean the extruder gear
We also recommend cleaning the metallic extruder gear, and the yellow gear before proceeding with installing the new filament cutter.
After some time, small filament debris can become stuck on the extruder gears, and cleaning it at this point will ensure smooth operation in the future.
A can of compressed air can be used to blow out any debris that could be present inside the extruder, and around the gears
¶ Steps to install the new Filament Cutter blade
¶ 1. Install the new filament cutter blade
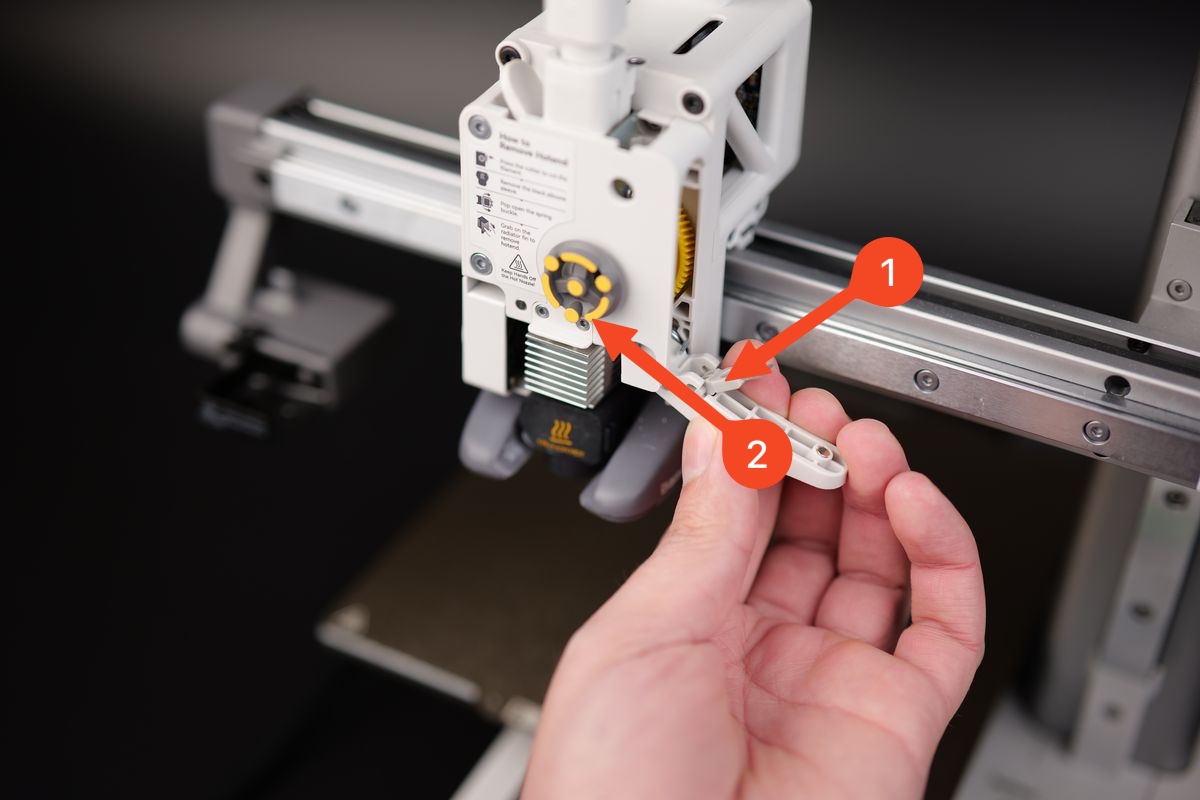
Installing the new filament cutter blade is easy. Simply align the blade with the filament cutter to slot it in place
Then, gently push towards the direction shown in the image below, to click it in place.
¶ 2. Lock the filament cutter lever in place
With the blade installed on the lever, we can lock the filament cutter in place.
First, align the blade with the extruder hole where the blade will slide into.
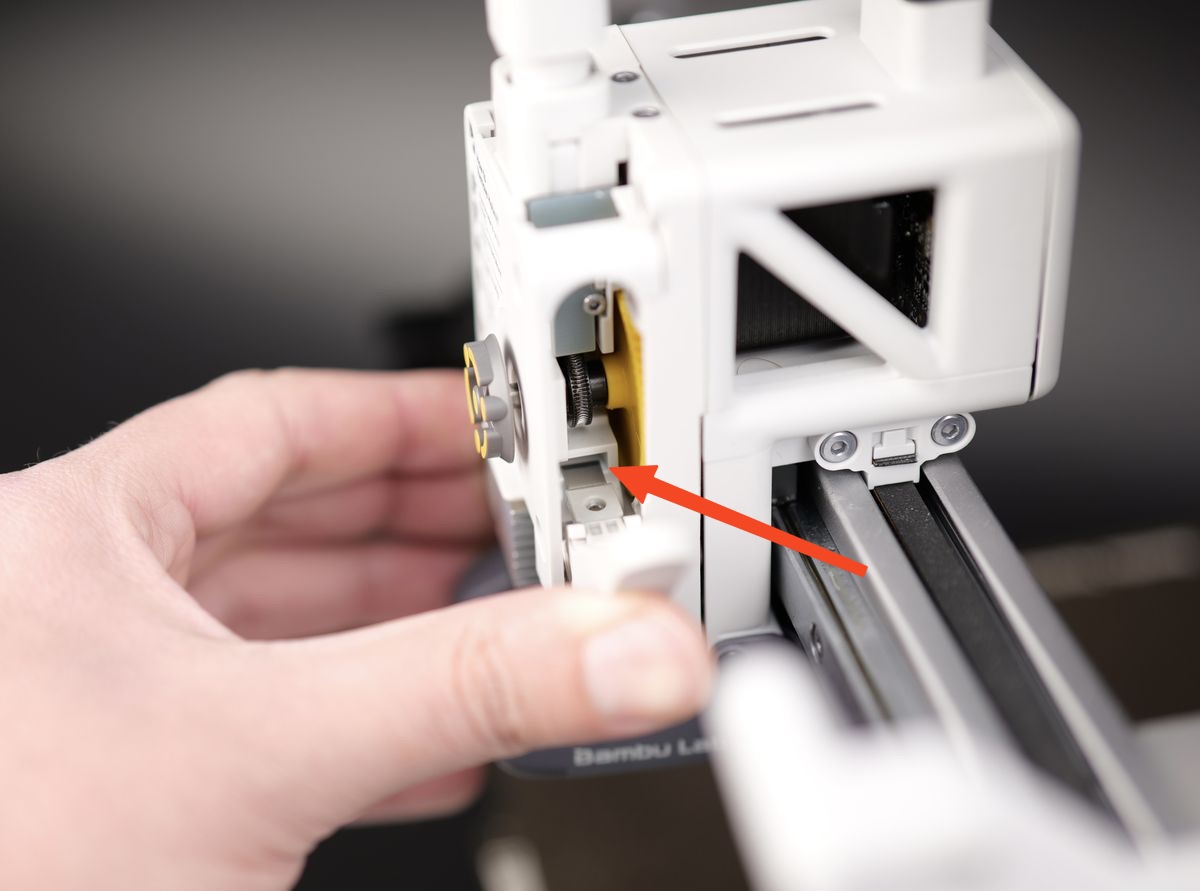
Next, push on the filament cutter lever and hold it in place while you re-install the screw.
Make sure not to overtighten the screw, to avoid damaging the plastic threads

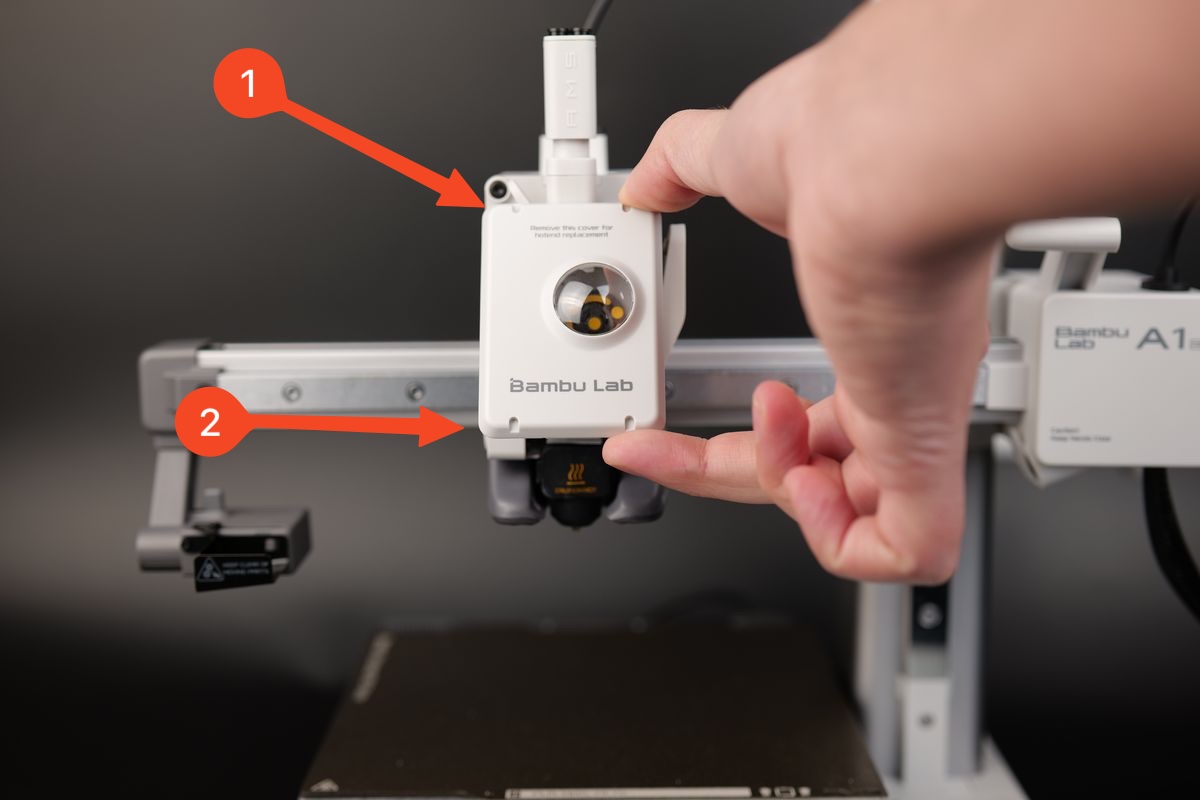
¶ 3. Install the toolhead front cover
The toolhead front cover can now be re-installed. Simply attach it on the top of the toolhead by aligning the clips, then gently push on the bottom side.
You will hear the clips when the installation is complete.
¶ 4. Verify the functionality
To ensure everything works as expected, press the filament cutter lever a few times, and ensure the motion is smooth and the lever returns to the initial position
This will ensure smooth operation during use.
¶ End Notes
We hope the detailed guide provided has been helpful and informative.
To ensure a safe and effective execution, if you have any concerns or questions about the process described in this article, we recommend submitting a technical ticket regarding your issue.
Please include a picture or video illustrating the problem, as well as any additional information related to your inquiry.